Busy Bag Adventures

Make My Pumpkin

In the spirit of Halloween, I wanted to do an art project with my 4-year-old while my 6-year-old was at school.  My middle child loves and cherishes this one-on-one time with Mommy.  Jess’ post on Monday inspired us to make our own Jack-O-Lanterns, but I had a different objective in mind.

I was also inspired by a “find the differences” book I was reading with Leyson that has two near-identical pictures side by side, but with subtle differences.  Each page asks you to “find (x-amount of) differences” which may be as simple as the omission of an object in the picture or a change of color, shape, size or placement of an object.

The objective of our activity was for my son to be able to both point out and fix the differences between my picture and his picture to make them the same, and also to recreate the picture I created… in this case, a pumpkin.

Materials needed:  construction paper, scissors, maybe some glue after the activity 🙂

IMG_20131021_085715_381

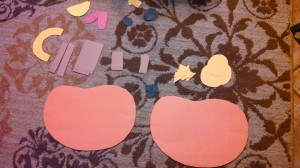
Mommy Prep:  Using orange construction paper, I cut out two large pumpkin shapes, and lots of different sized rectangles*, triangles, circles, squares and other various shapes with brown, yellow and black paper.

*I cut out 4 different types of rectangle stems to bring in some vocabulary to our activity:  short, long, thick, thin
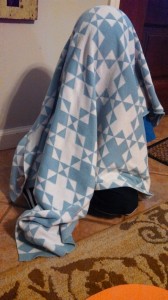
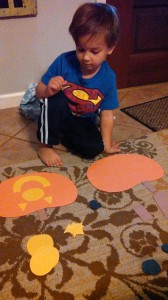
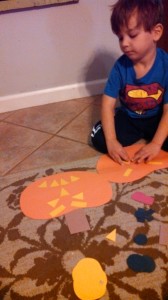
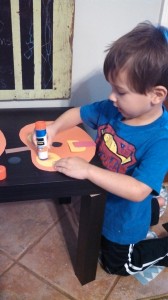
IMG_20131021_085735_081 Leyson first had to close his eyes (or cover his face with a blanket because I learned that I can’t trust him to keep his eyes closed) and count to twenty while I arranged the different shapes to make a face on my pumpkin.  Apparently, counting to twenty now means omitting numbers 14 and 19, so we will be working on that again soon.

I started off with a simple face.  Two circles for eyes, a circle for a nose, a fat, brown rectangle and a U-shape for a smiley mouth.


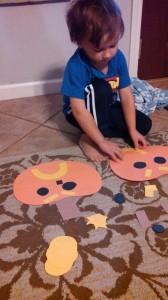
When he got to 20, he pulled the blanket off of his face, he had to use the remaining shapes to make his pumpkin look just like my pumpkin.

IMG_20131021_085825_458

To make the project more challenging in other rounds, I layered some of the shapes such as using smaller circles on top of larger circles for the eyes.

The most difficult part of the activity was when I used only triangles to make a face and he had to figure out which direction the triangles were facing.  It’s harder than it looks!

IMG_20131021_091203_570

We experimented with all the different things we could learn from making pumpkins:

  • Feelings/Emotions: We made happy pumpkins, and sad pumpkins, and angry pumpkins, and scared pumpkins… and talked about why each pumpkin was feeling the way they were feeling.

IMG_20131021_090120_123

  • Counting/More or Less:  Sometimes Mommy’s pumpkin had 4 teeth, sometimes it had more or less.
  • Compare and Contrast:  “What is different about the nose on your pumpkin and the nose on my pumpkin?”  “Do our pumpkins have the same shaped mouth?”
  • Vocabulary:  Colors, shapes, sizes, parts of the face
  • Spacial Awareness:  “Are the eyes close together or far apart?”  “If you put the eyes in the middle of the pumpkin, can we fit a nose and a mouth too?”
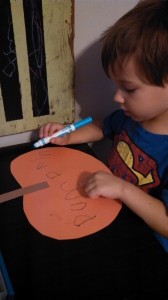
  • Phonemic Awareness & Writing:  We segmented the sounds in pumpkin /p/ /u/ /m/ /p/ /k/ /i/ /n/… which is pretty hard to do when your child pronounces it like “po’kin” but we wrote the real word on the back of our project.

IMG_20131021_093142_009

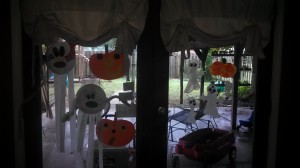
When you are finished the activity, grab some glue so you can add some Halloween decor to your house!

IMG_20131021_092154_790

IMG_20131021_105651_367

Who needs to buy decorations from the store, when with a little glue and tape you can make your house ready for any holiday?!

Easy Busy Bag Ideas from Kidspired Creations!

Hi, Mommy Teachers!  It’s Casey, stopping by from Kidspired Creations!  I am Mommy to James (5) who just started Kindergarten, Leyson (3) and Lena (6 months).  I currently stay at home with the younger two but I taught Pre-K and Kindergarten before my Mommy days.

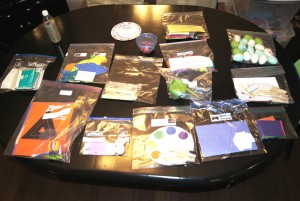
Leyson and I were playing (learning) today and were toying around with different Busy Bag Exchange ideas. We will be participating in a Busy Bag Exchange soon where all the moms participating bring gallon baggies filled with simple, hand-made activities for each of the kids who will be there.  If 15 moms participate, your child has 15 new Busy Bags full of super fun (and educational) activities!

Leyson and I came up with 3 different ideas today and I thought they would all be fun to share with you Mommy Teachers!

PATTERNS:

We used word strips (found at the Dollar Tree for, you guessed it, $1 per package) to glue colored squares in AB, ABB and ABC patterns.  I cut additional colored squares for Leyson to COPY the patterns on the strips by placing each of the colored squares below the square on the strip.  This will get him used to making patterns.  Saying the color out loud reinforces the pattern so he can also HEAR the pattern (helpful for an auditory learner – someone who learns better when hearing information).

After he was able to copy the pattern, I then taught him how to EXTEND the pattern.  At the end of the strip, he must finish the pattern by placing the appropriate colored squares that would come NEXT in the pattern.

The next step is to create his own patterns without looking at the strip.  From there you can create more complex patterns!  The options are endless!  Patterns are difficult to understand, so it might take a little time for your little one to be able to catch on.
WHAT’S IN A NAME?:

Kids are so funny when it comes to learning how to spell their own names.  Most often kids learn how to spell their names before they completely understand the concept that letters make words when put together.  Take my son Leyson, for example; anytime he sees a word that starts with an L, he says it spells Leyson.  He thinks he owns the letter L.  The same goes for the letters E, Y, S, O and N… he owns them all.  You see, for young toddlers, they will not understand that the ORDER of letters actually makes a difference when spelling words.

Even in my kindergarten classroom, students who knew how to spell their names would sometimes slip into the idea of “owning” all the letters in their name and would write their names out of order.  LUIS would spell his name UILS… still thinking that it spelled the same thing.  Even more common would be for kids to write their names backwards (SIUL)… and several, get this, would write their names in mirror image!  I can’t even do that!  All of these are totally normal progressions when your child is learning how to spell his/her name, so here is an easy activity to help:

You need two word cards (or index cards).  Write your child’s name evenly and legibly on each card.  Leave the first card whole, and cut out each individual letter on the second card.  First, have your child put each cut out letter on top of the letters on his/her name card, matching letter for letter.  Then, have your child put his/her name together underneath the name card.  Last, take away the name card and have your child put together the letters to spell his/her name from memory.  Be sure to say the letters out loud in order so your child can hear how to spell his/her name in addition to seeing it.  Jessica had a great post on singing a catchy song to learn how to spell a name.
HAMBURGER PLAY:

This game was Leyson’s idea.  He picked up a circle I cut out and pretended to eat it, saying it was a hamburger bun.  Bam!  Instant Busy Bag idea!

I used construction paper to cut out a top and bottom bun, hamburger, tomato, cheese, ketchup, mustard, pickles, lettuce, and bacon and we made a hamburger!  Not only is this a great pretend-play activity, but it was a great way to encourage language development and sequencing.  I had Leyson explain to me exactly how we should make a hamburger.  I encouraged him to use words such as “first,” “next,” “then,” and “last” in his explanation.  You can also add an extra element by writing numbers on each of the pieces to teach your child number order (1: the bottom bun, 2: the hamburger, 3: cheese, etc.).  For the beginning reader?  Write the words “bun,”  “pickle,” etc. on each of the pieces and then enjoy your nice, tasty treat!

I am still brainstorming different Busy Bag ideas!  If you have a good one, please comment below and share!  Hopefully after the Busy Bag Exchange I will have another post for you, so stay tuned!!!


Casey Dellinger Hilty

“One day, all children in this nation will have the opportunity to attain an excellent education.”
Teach For America
LA Corps 2005

Busy Bag (Take Two)

I really love the Busy Bag exchange!  Getting a bag full of age-appropriate activities is exciting, but, it helps to have some direction.  A bag of activities will only take your little one as far as you LEAD them.  There might be instructions on some of the activities, but I wanted to add my step-by-step teaching tips because otherwise your little one simply has something to occupy their time (which isn’t all bad! I am a mommy too remember?) BUT you also have a great teaching opportunity….to meet your little one in his/her zone of proximal development.  Wait what?  Basically….a chance to tap into their prior understandings, engage with their working memory, and BUILD onto what they already know.

I joked with my girlfriends the other night at dinner about one of the activities in the mix because it seemed almost too open-ended to even figure out what it’s purpose was.  But open-ended materials can leave room for some of the most organic learning experiences, and it has many purposes for more ages than the suggested age.

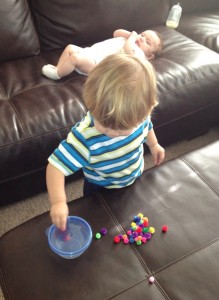
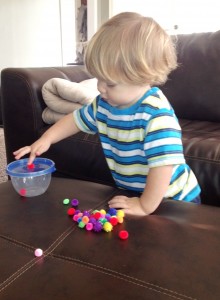
Lets begin with the Pom Pom Activity

1) I started by letting my little one investigate on his own so I could observe what observations he was making and so he could just get his curiousity out before I started something slightly more structured.

2) We talked about the colors (sorting them into groups for a better visual). We talked about how soft they were (texture).  We talked about how they were little (size). We talked about how there were a lot of pom poms and tried to count them (one by one correspondence) as we put them inside the tupperware.

3) We pretended we were little crawfish and used our pinchers to pick up the pom poms.  “Oooh, lets put the red ones in first!” (Pre-writing in mind….proper pencil grip!)

4) We practiced pushing them the pom poms in the hole with just our “pointer finger” and then just our “thumb” and later we were silly trying to push it in with our pinky finger.

5) Finally, we practiced taking turns and Sean Patrick had a blast racing me to push my pom pom in on my turn.

If you have older ones….accommodate and adapt the activity to fit what your little one is working on….estimation, graphing, or adding. You probably have the materials just lying around your house so it is too easy not to get it together.

So, my encouragement is not to take activities at face value EVEN IF the picture of the activity SEEMS self-explanitory.

The Mommy Teacher’s First Busy Bag Exchange (Take One)

After being introduced to Second Story Window’s Busy Bag Exchange concept, there is so much to share that I am going to try my best to compartmentalize my efforts.  So, here is “take one” of the busy bag adventure.

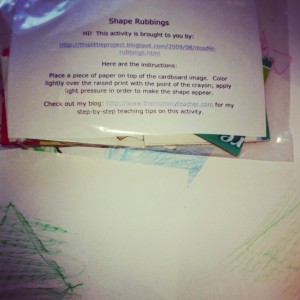
Seventeen mommy teachers (myself included) signed up to participate in a toddler busy bag exchange with several activity ideas linked in a google doc.  I chose one of them called “Doodle Rubbings” from the blog This Little Project with an emphasis on Shapes.

Though I read a low-rating review from a blogger who has a toddler  blog (a blog that I like a lot though), I chose the activity intentionally because it is a GREAT activity to teach and to experiment with fine motor and sensory development.  This activity is not going to reap the same outcome as it would for a five year old, however, it is still a busy bag that I want at my toddler’s fingertips.  AND it can be adapted for preschool, pre-k, and even kindergarten use!

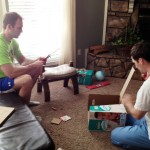
In order to make the materials, my awesome husband and brother-in-law helped me cut up pampers boxes using a razor and scissors (and by helped me I mean that they did this part for me :).  Then I drew shapes onto the cardboard squares and traced over the self-made stencil with hot glue.  This was NOT difficult at all….but, it was time-consuming because I was making SO many of them for the exchange.

But I don’t want to neglect the how-to!  A lot of sites give you “instructions” for activity ideas but this can incidentally shotgun mommies into lessons without much guidance.  So, Here is one means of carrying out this activity with a little more umph! (varying depending on the prior understandings of each child):

1) Start with one shape, unless your little one already knows all their shapes….in that case, review the shapes.

2) Talk about the shape (round, lines, what it looks like, where we see the faces of shapes like a square on a box, etc)

3) Place a piece of paper over a flat surface and color, explaining that because we are coloring on a flat surface the picture comes out a lot like I imagined it would in my mind.

4) Place the shape under the paper (emphasize over, under, and on top), and as you are making strokes back and forth with your crayon talk about the amount of pressure you are placing on the crayon (“I’m not pushing hard with my crayon, I am coloring soft”).

The triangle on the left was what appeared when I held my little one's hand to color.

5) Take your little one’s hand and demonstrate using the same shape but a new piece of paper.

6) Have your little one try it by himself/herself.

 7) Talk about why it might have come out different than the first two or why the shape appears because the image underneath is raised.

 And a few more thoughts:

 This activity allows little ones to explorewith sensory development: texture, touch, etc. and use the little muscles in their hands to develop fine motor skills as well as the scientific observation of cause and effect due to changing the materials to produce a different outcome.

For children who need more of a challenge: This activity can be used to make tangrams (pictures made out of combining shapes).  Tangrams are great for developing spatial skills!

Related Posts Plugin for WordPress, Blogger...