Age-Appropriate

Backwards Writing

IMG_20130710_085857_062

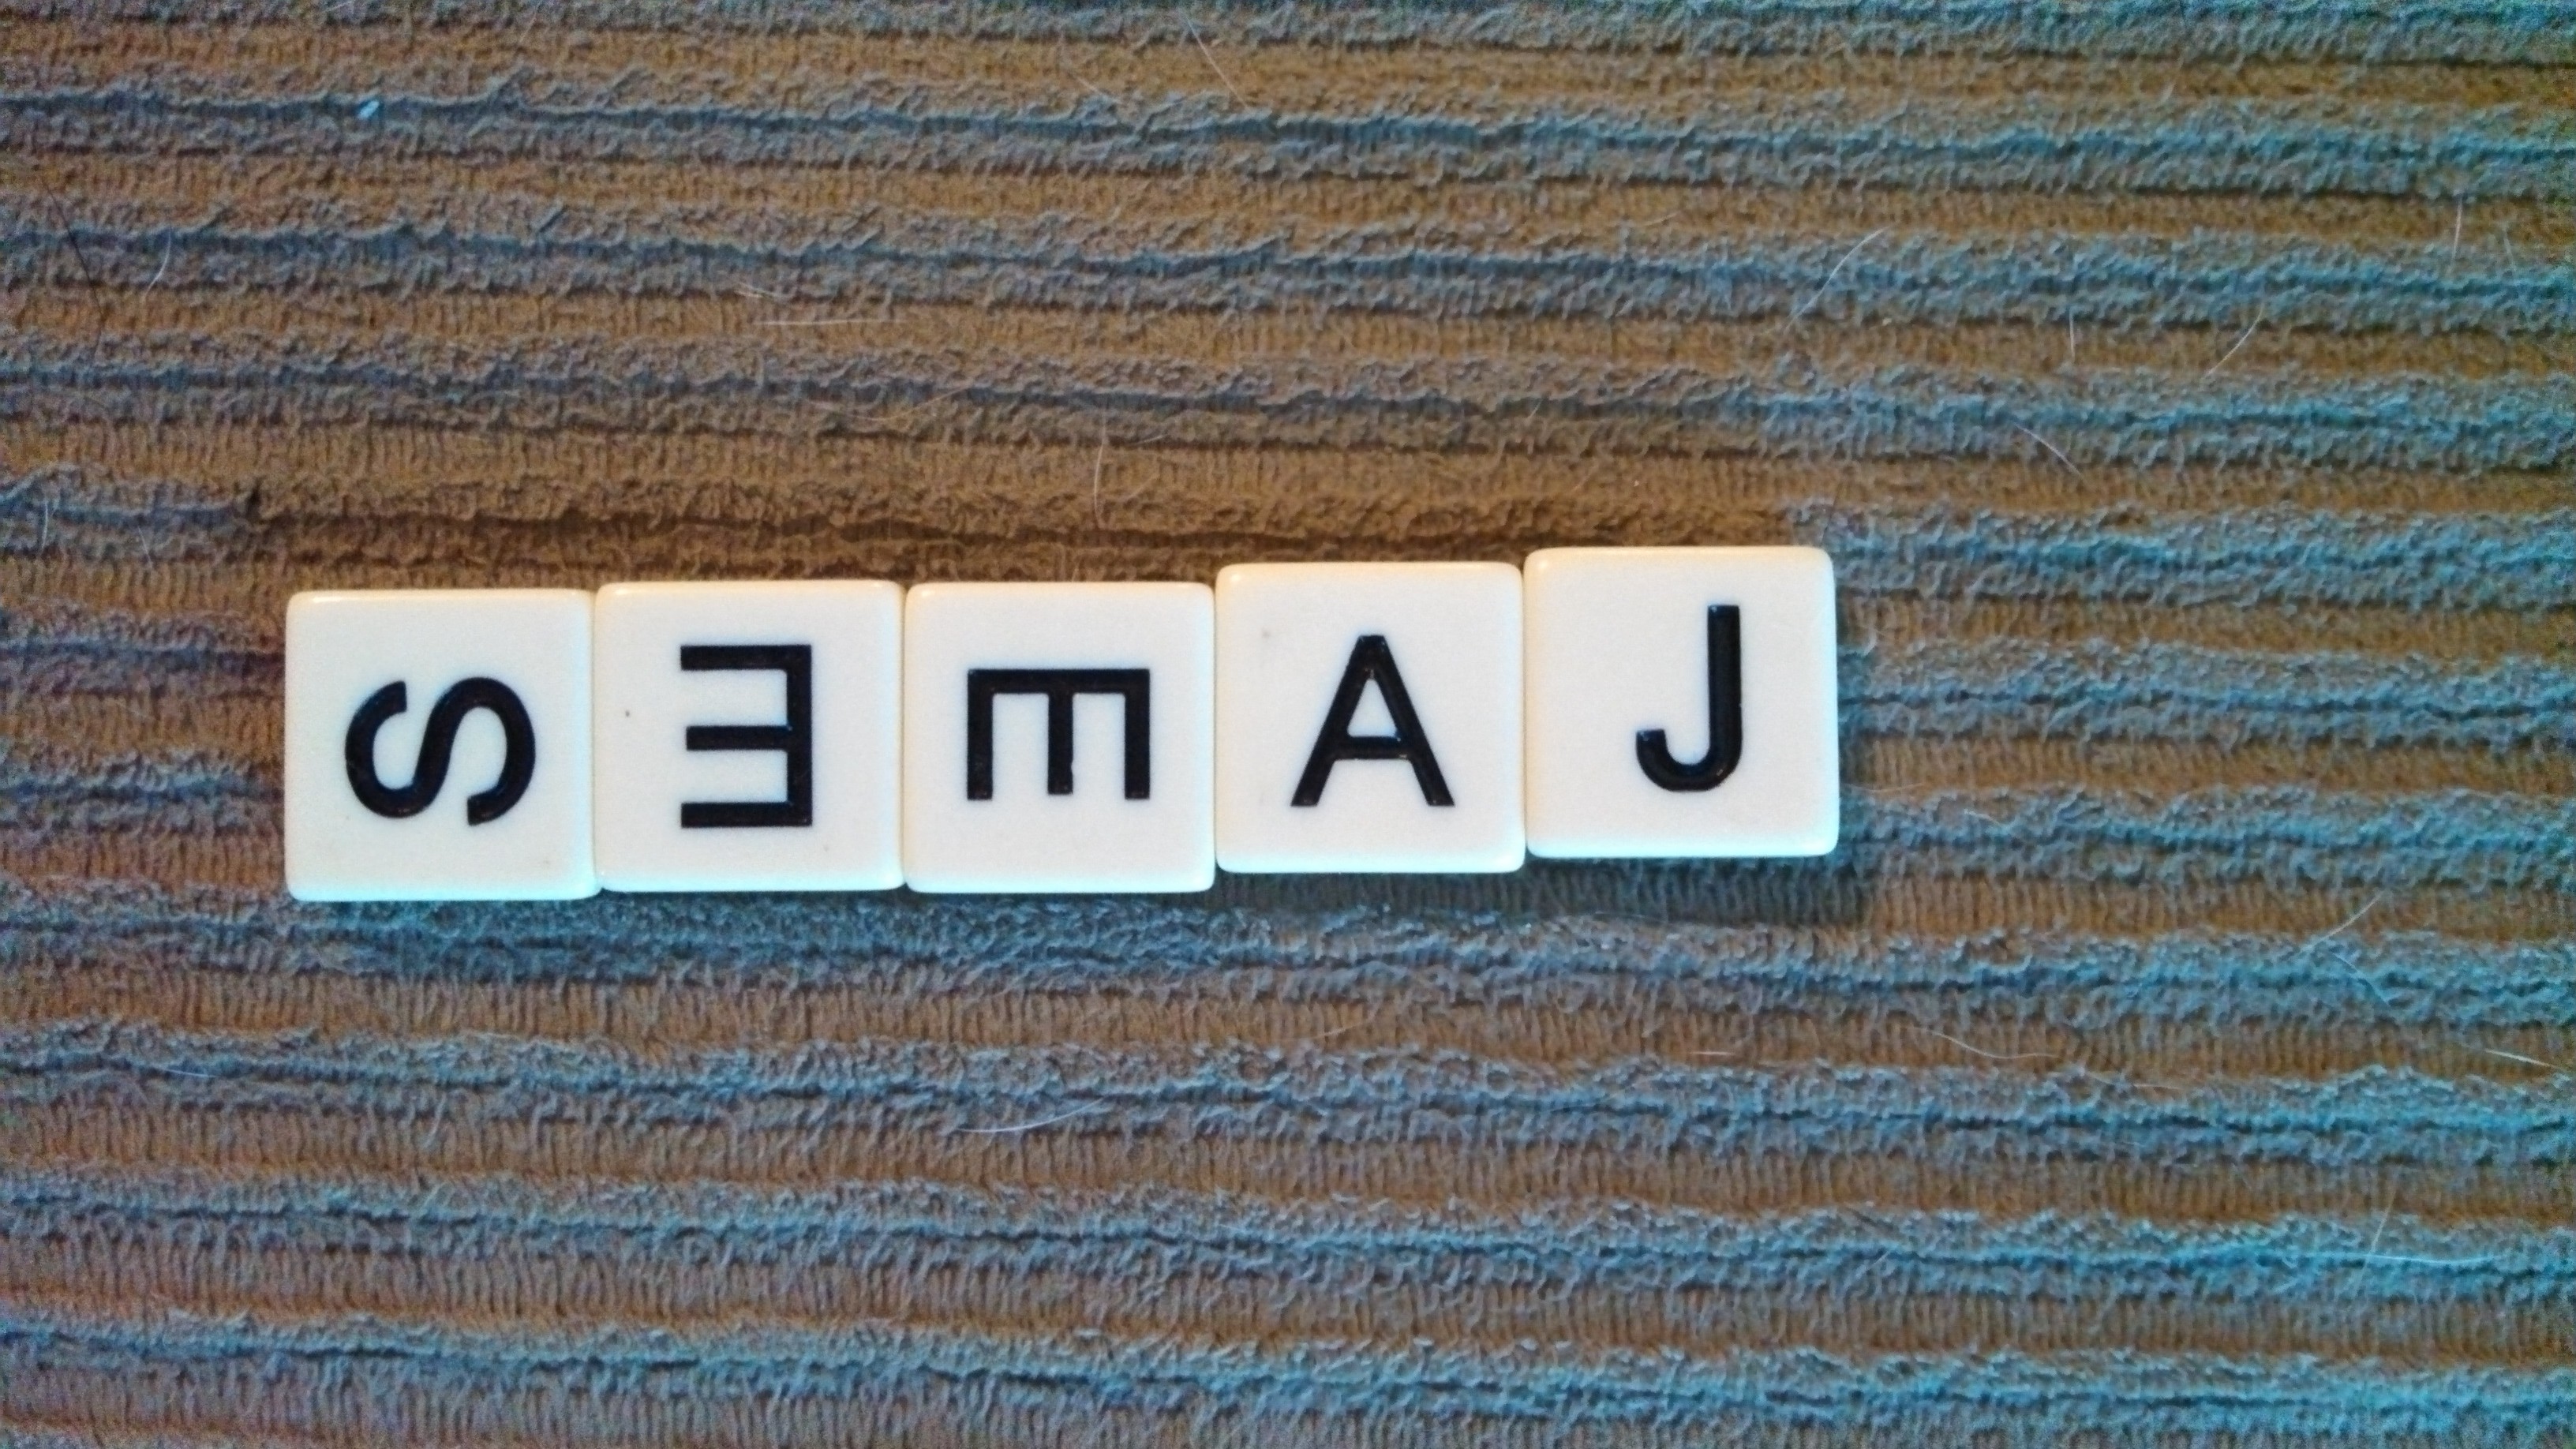
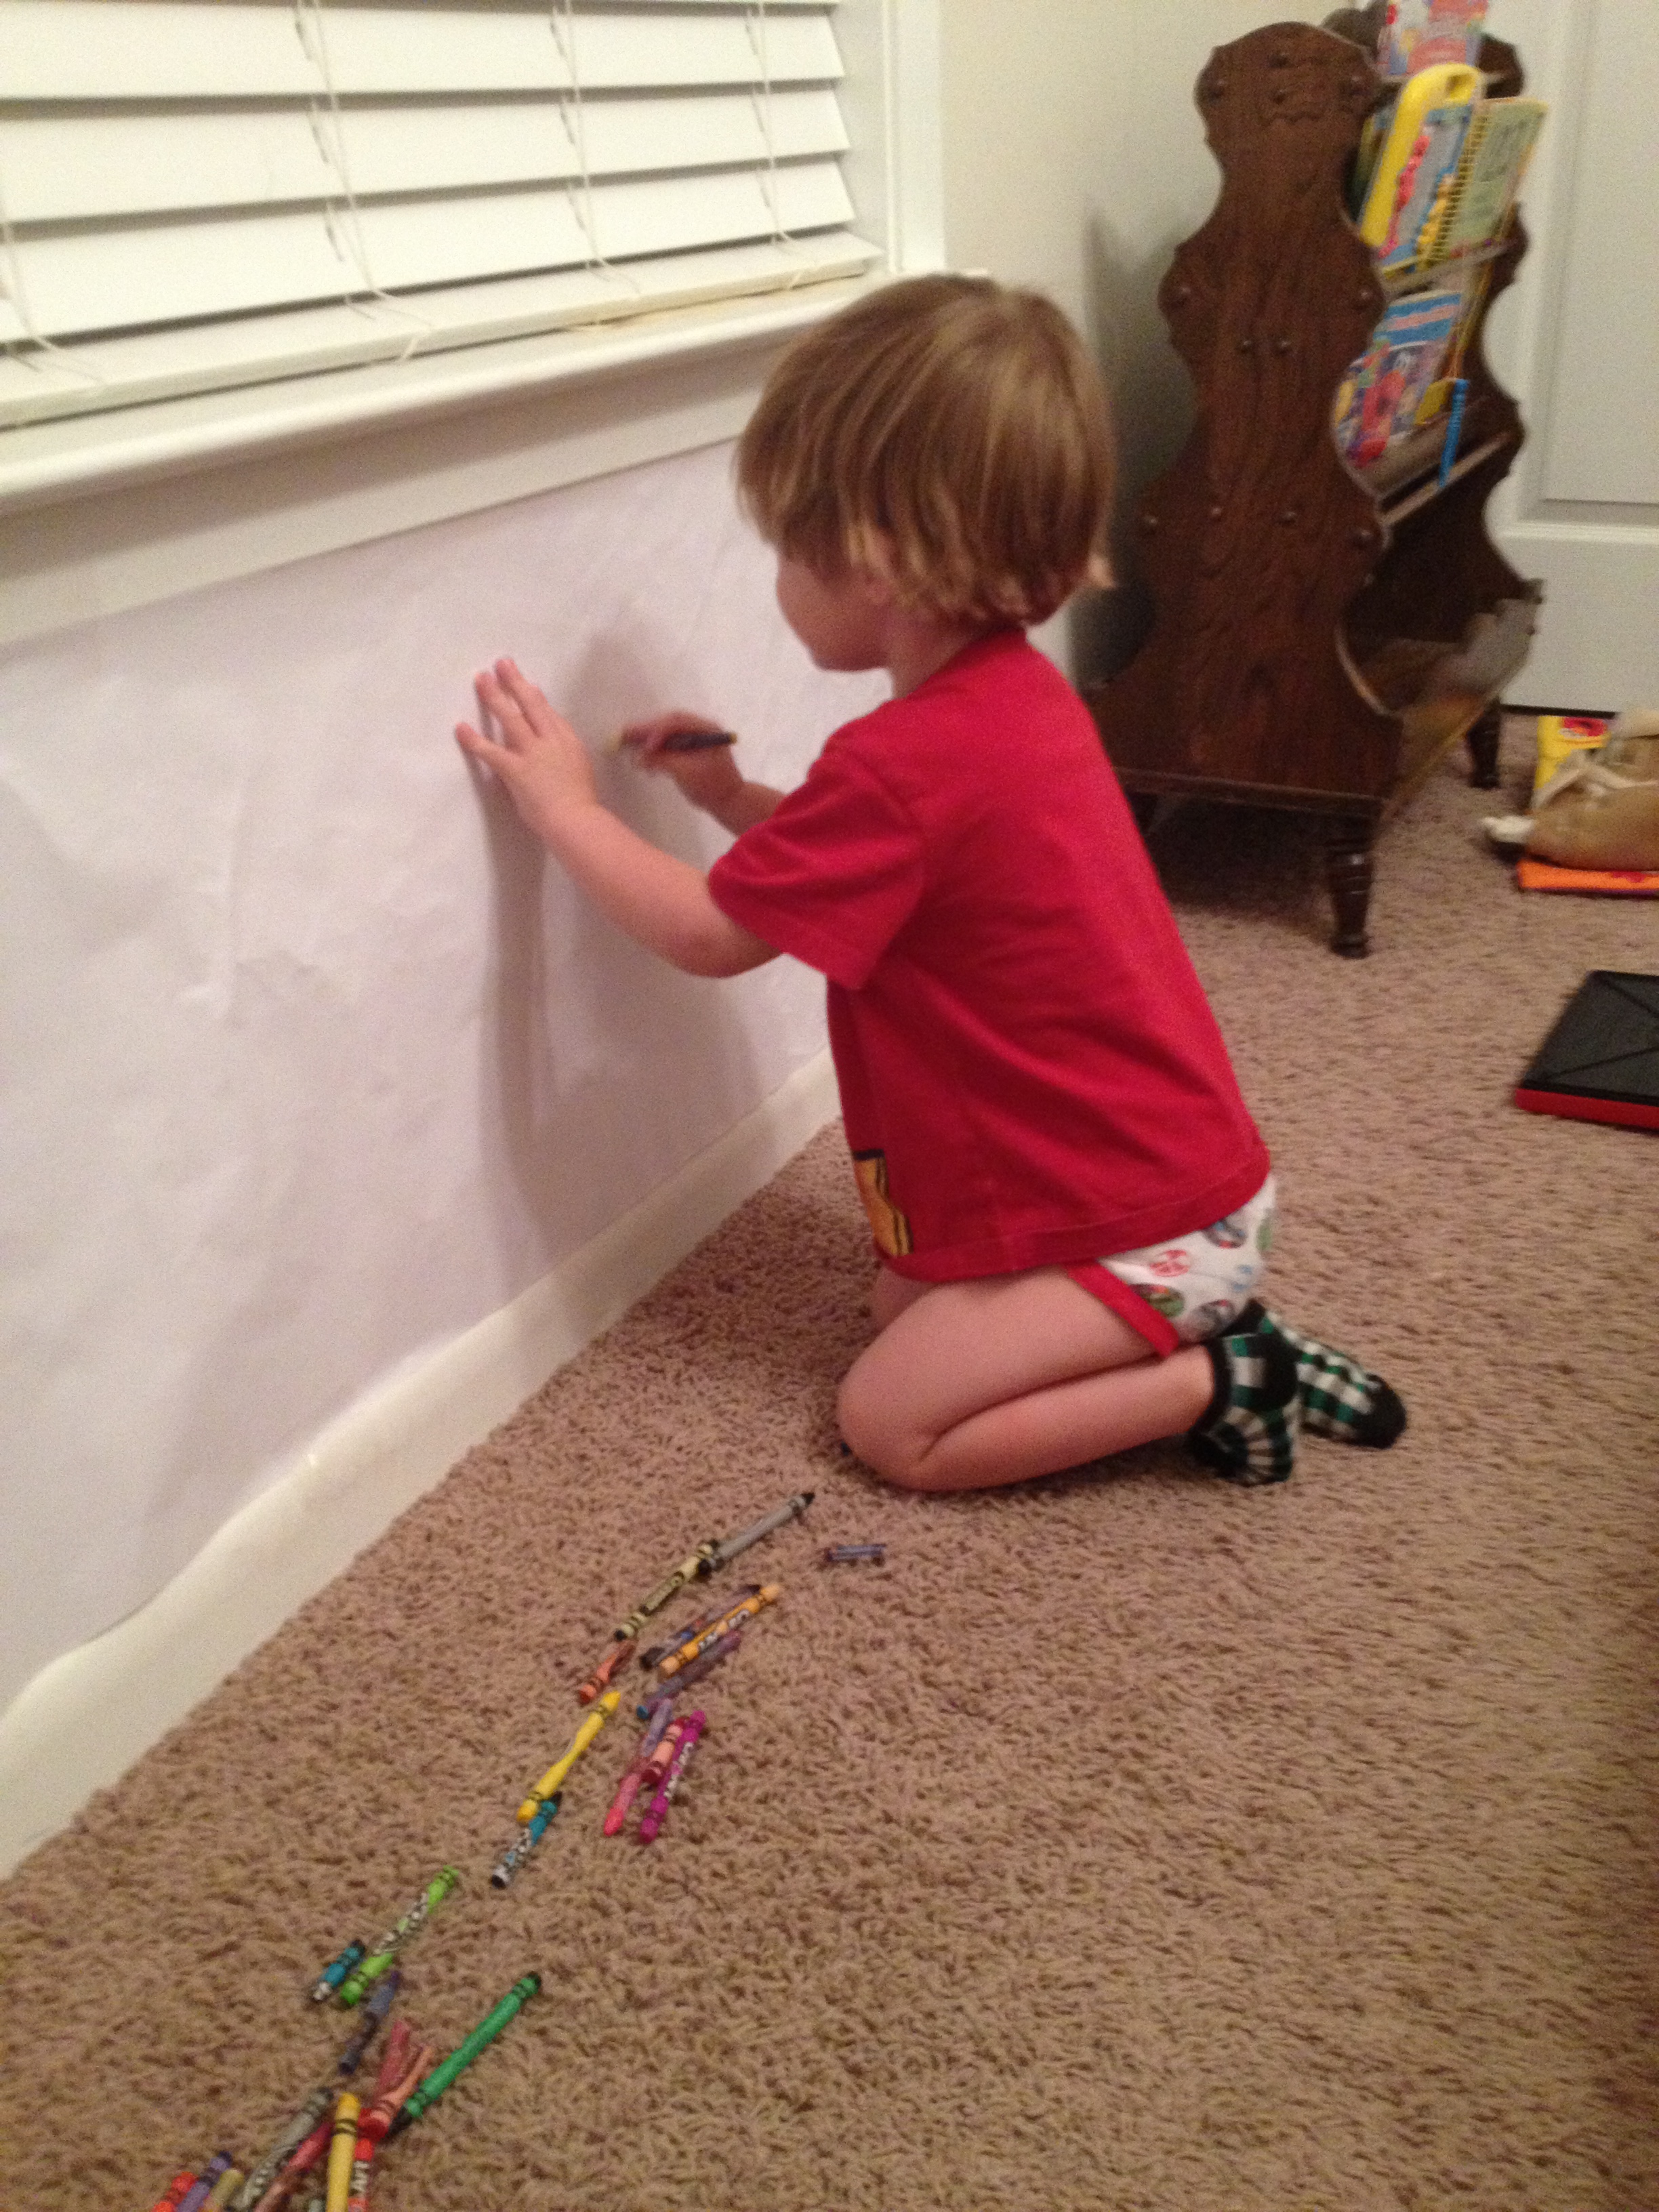
“Look, Mom!  I spelled ‘James!'”

I have had many parents come to me worried that their preschool or kindergarten aged child may be dyslexic* after he or she continues to spell and write words/letters backwards, upside down, in mirror image, or mix up letters within a word.

Let me say now that this writing behavior is totally normal at this stage in your child’s pre-writing and pre-reading development and in most cases* is not indicative of a learning disability.

Let’s think about this…

We, the smarter-than-the-average-preschooler mommy teachers, see a triangle.  3 sides + 3 points = triangle no matter how you look at it.

IMG_20130710_111514_981-1

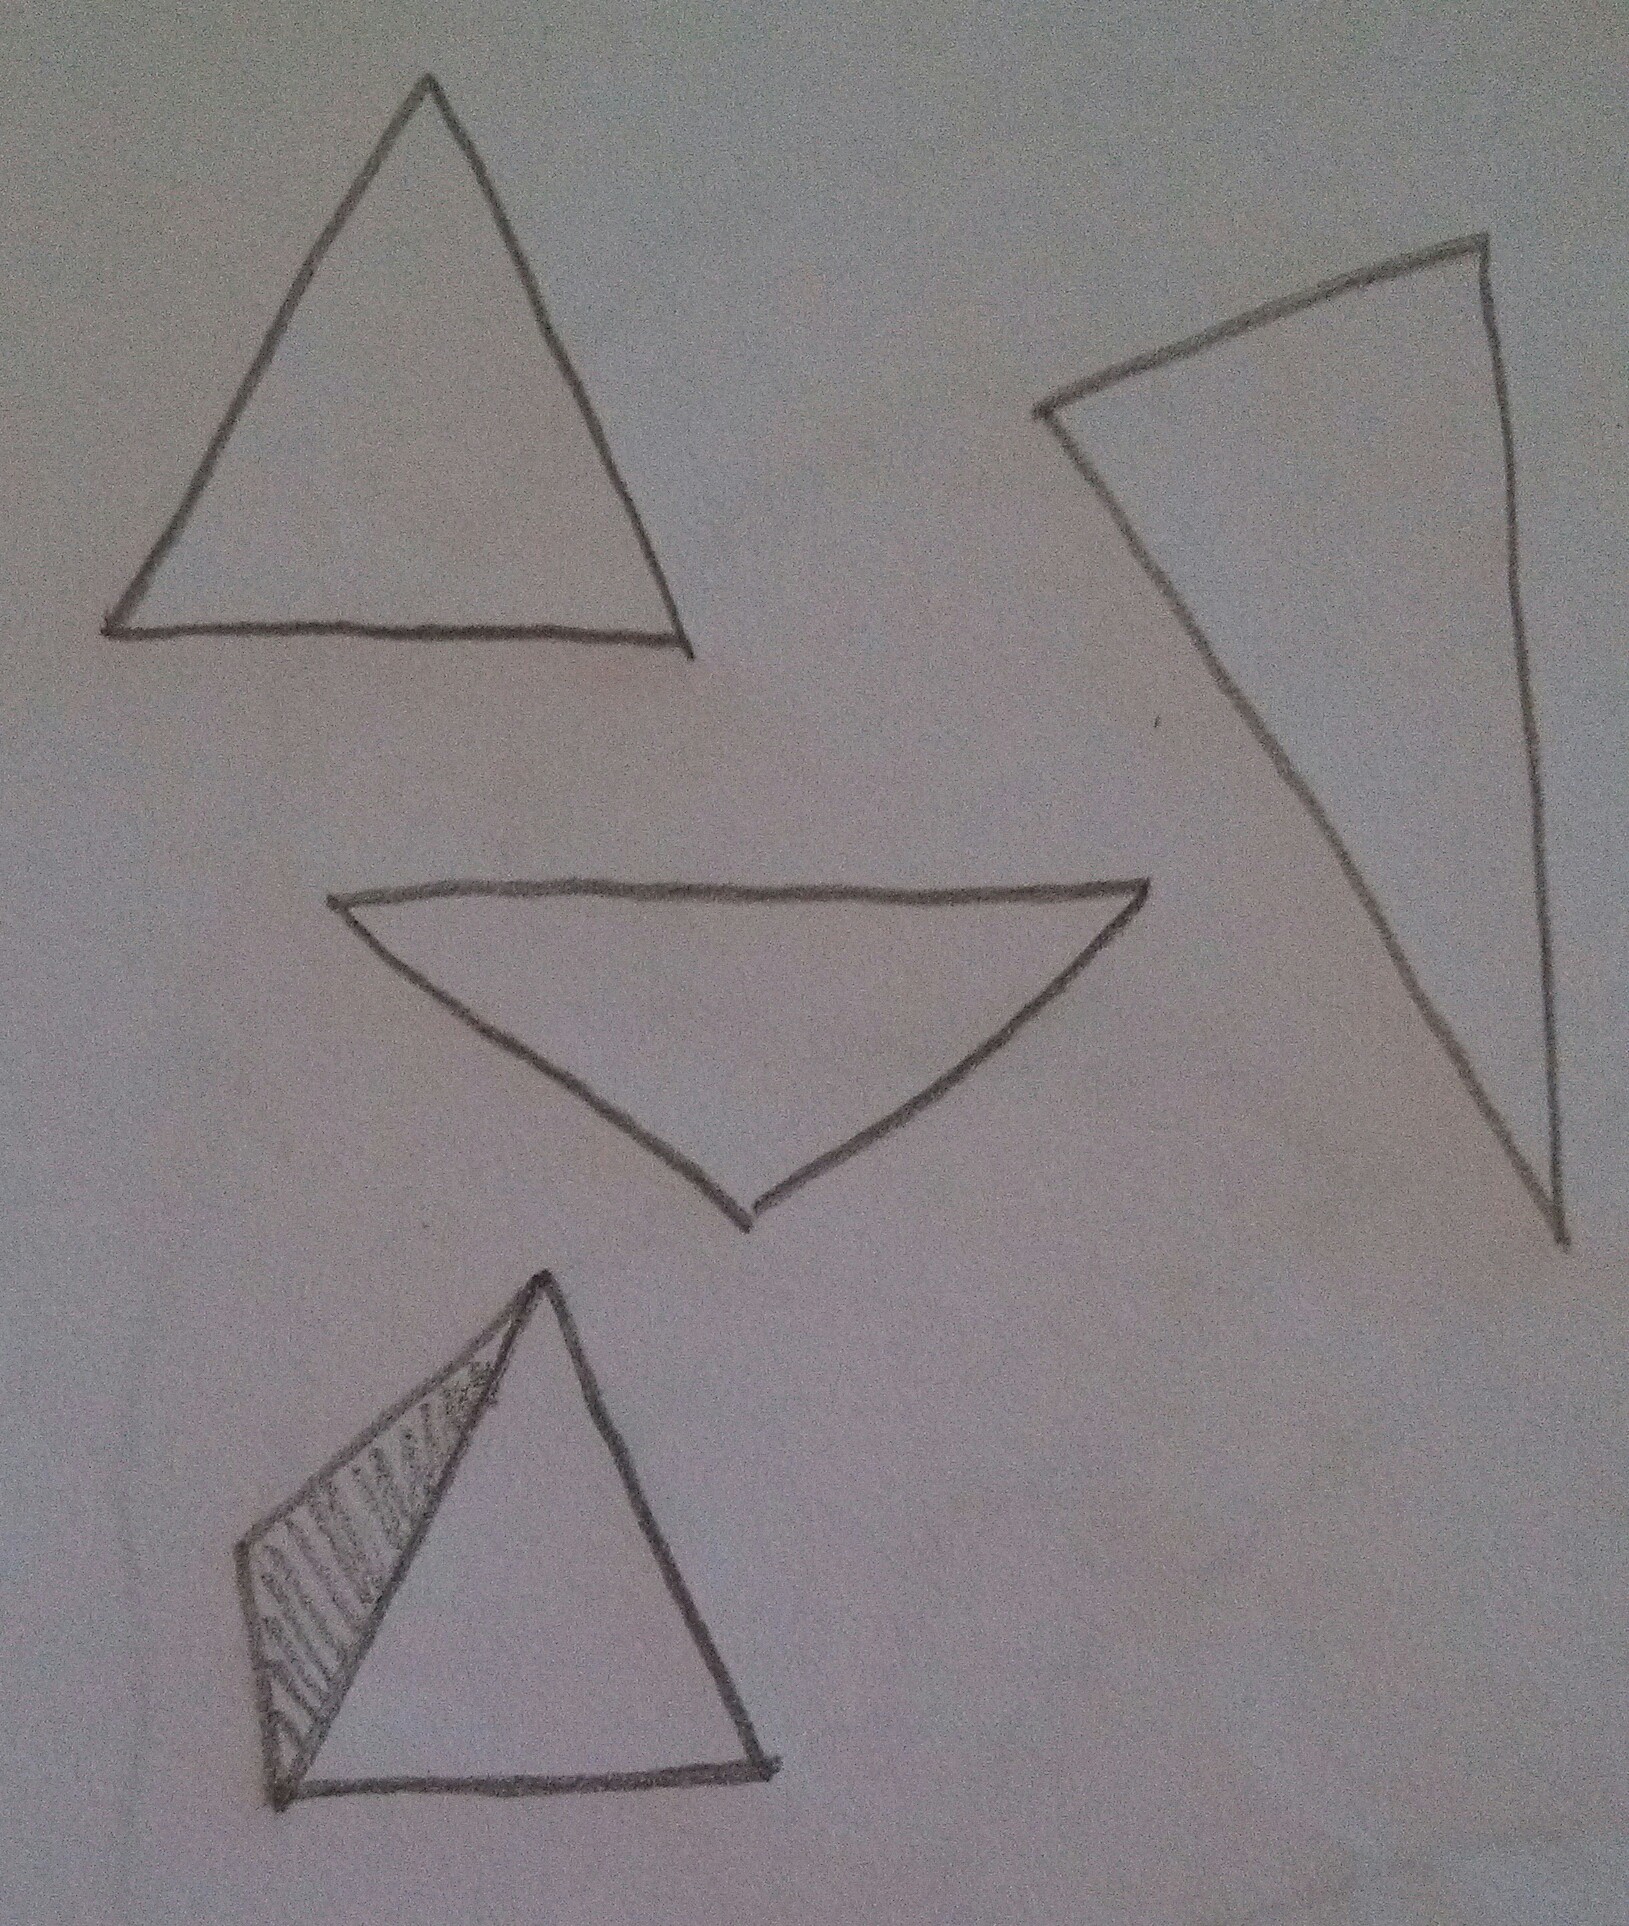
(Technically that last one is a pyramid says my 5year old, but you get my point.)

What, then, is the letter A?

IMG_20130710_111521_654-1

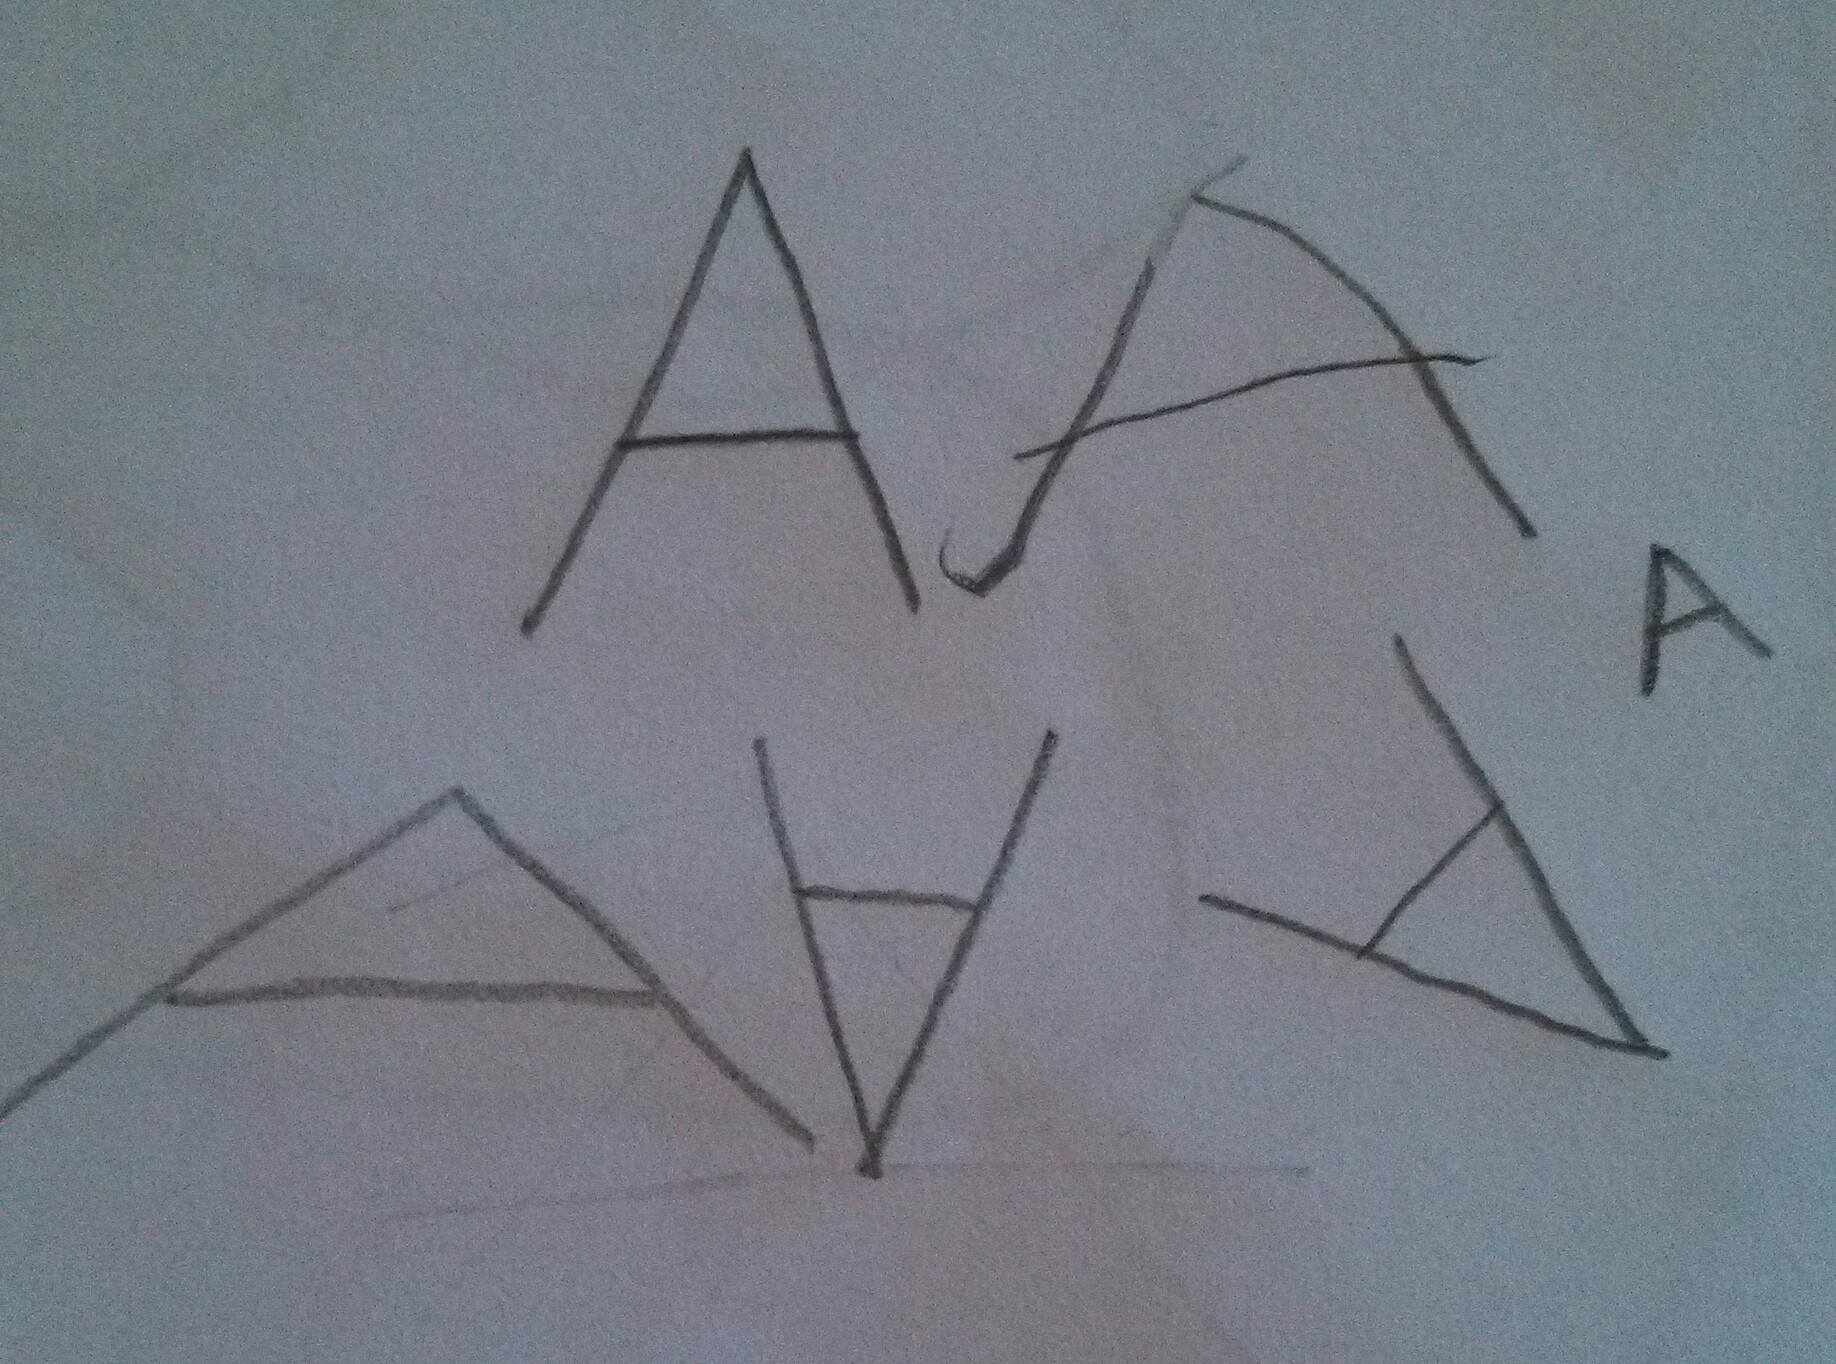
It is but a mere visual representation of a sound in a word… a symbol… or simply, a shape, not unlike our friend, the triangle.  We recognize this shape no matter the direction, font, size or color.  Our brains are hardwired to group these similar shapes together so we can recognize them even though they may look slightly different than the  Times New Roman  capital letter A.

Our kids are naturally doing the same exact thing which is why they can still find the letter A in a pile of letters, even though some of the As are upside down.

IMG_20130710_111554_714

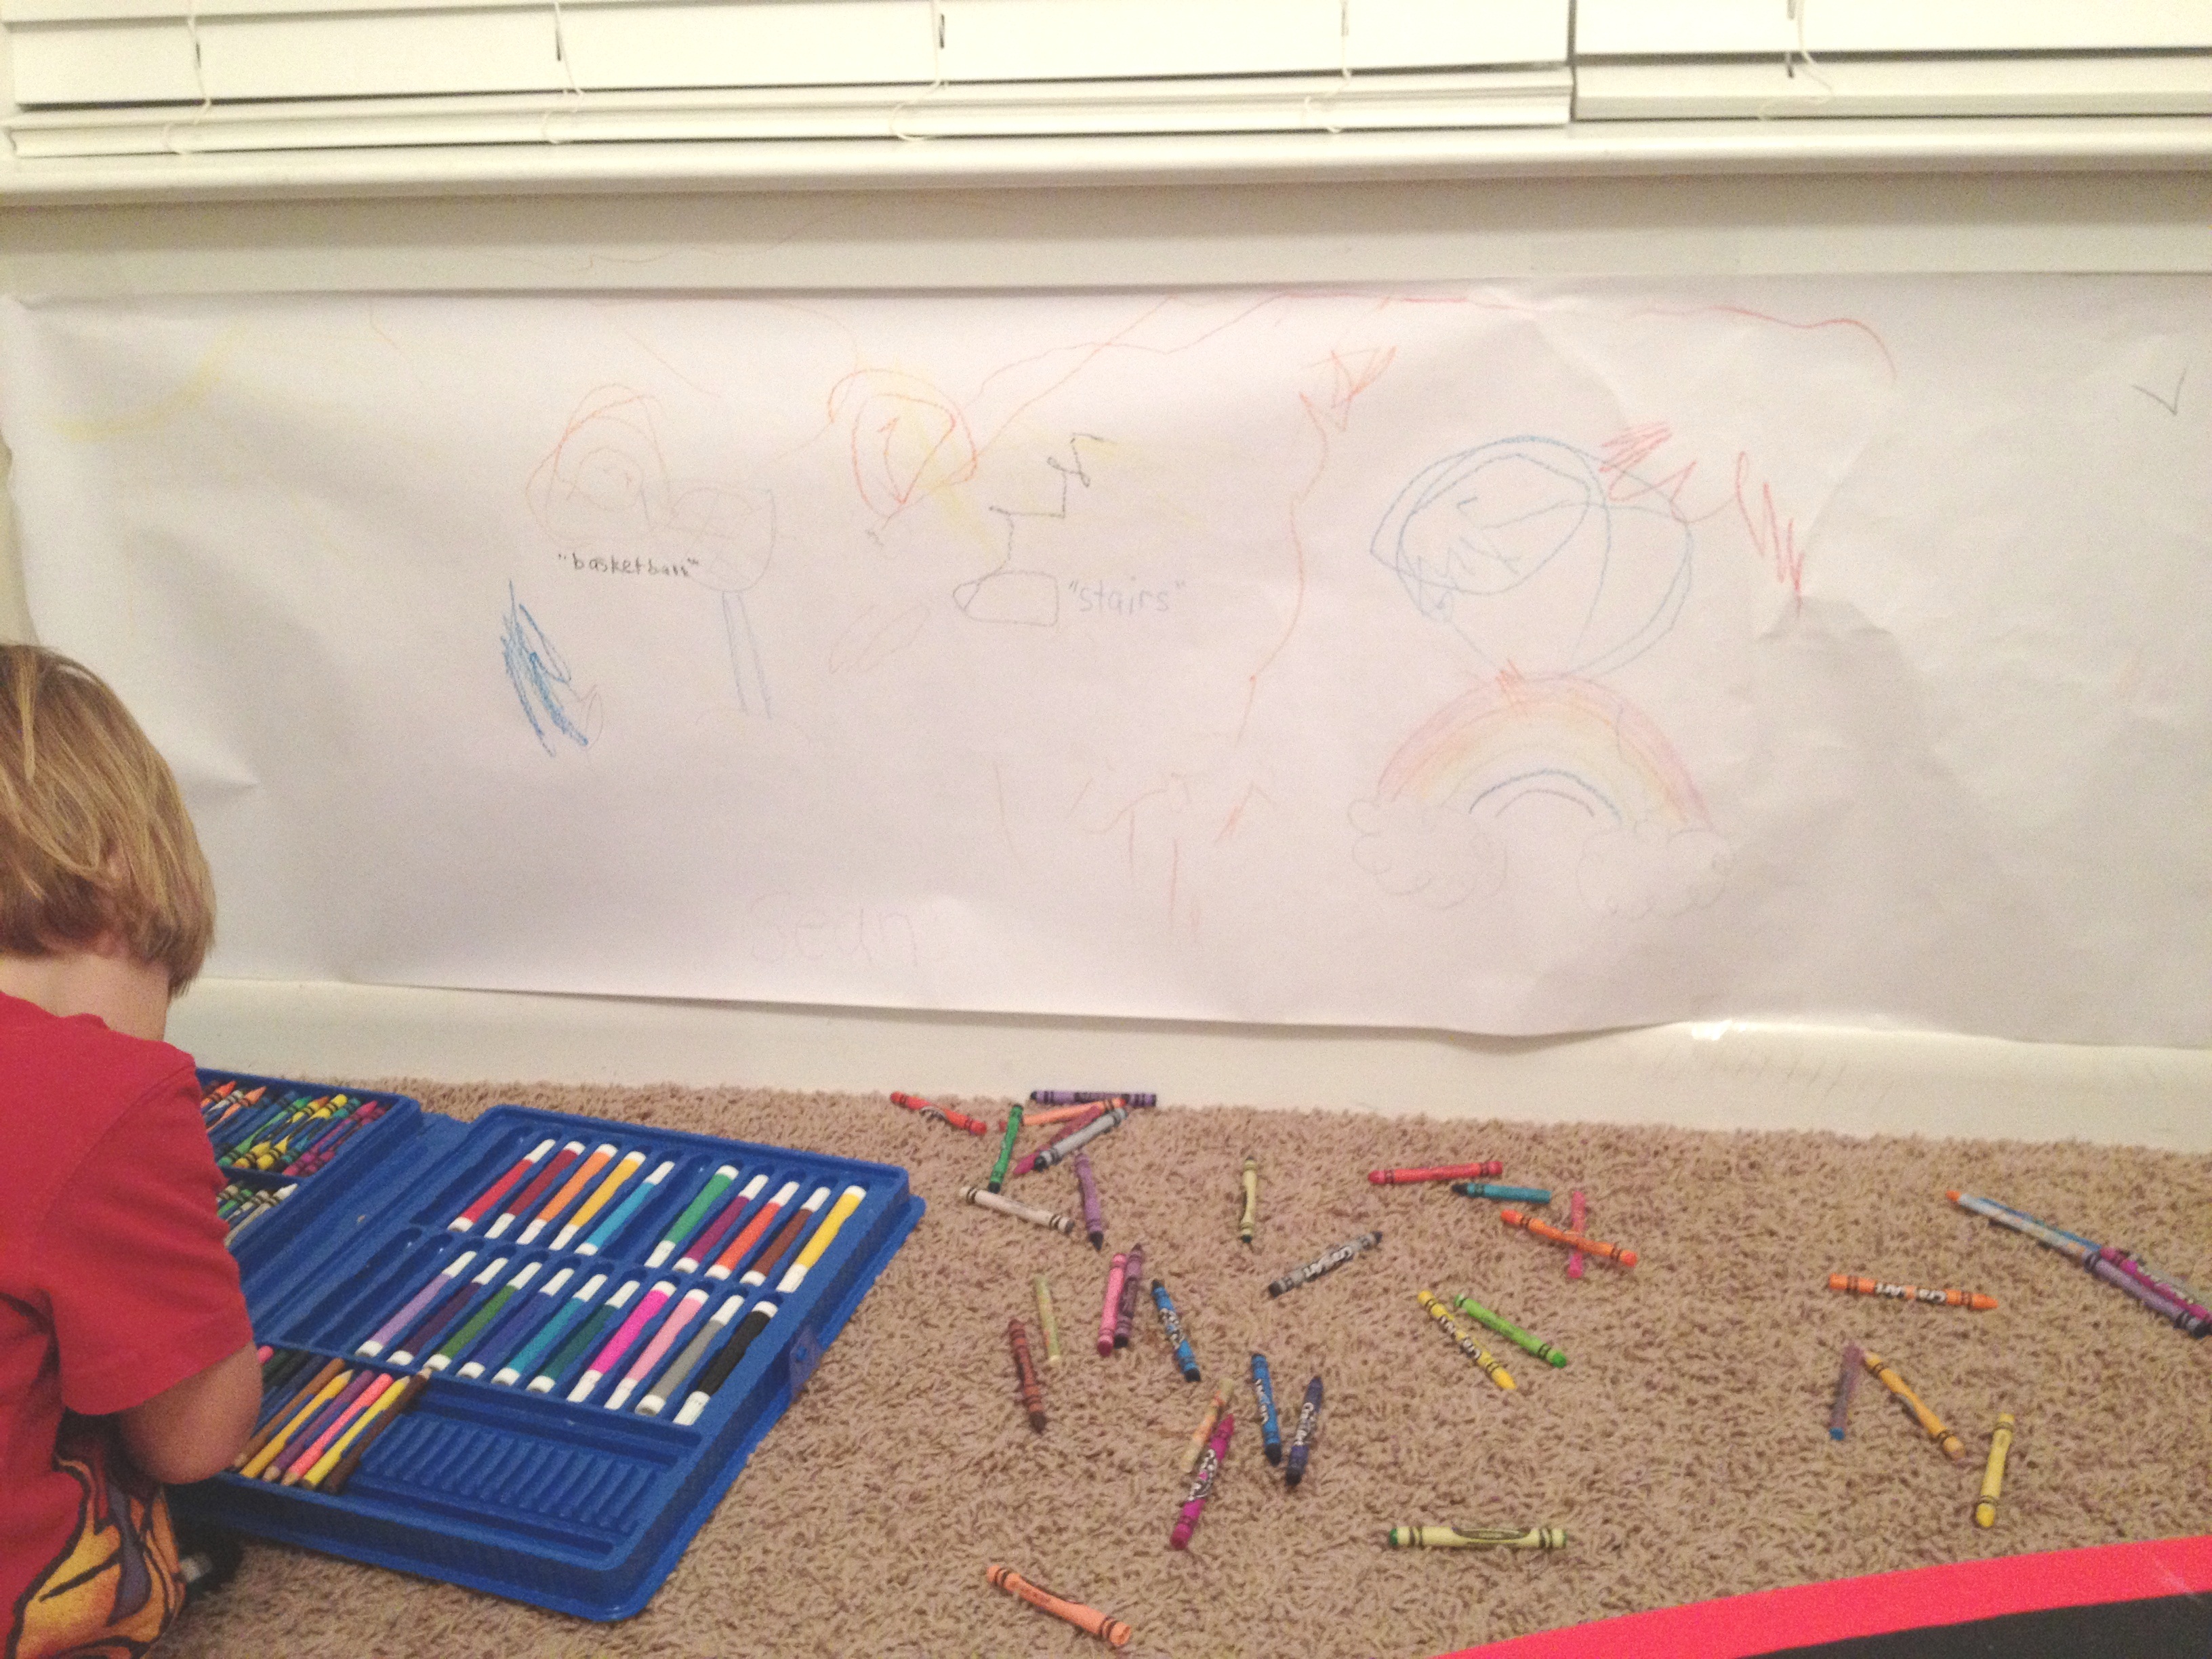
To help teach correct directionality (the direction in which we read and write in English), use your index finger to guide reading: top-bottom, left-right.  This is a learned skill and will become ingrained through repetition and practice.  In Leyson’s case, if he knew that he should have spelled the letters out from left to right, the word would have actually spelled JAMES instead of SEMAJ – but with a sideways S and an E for an M… babysteps.

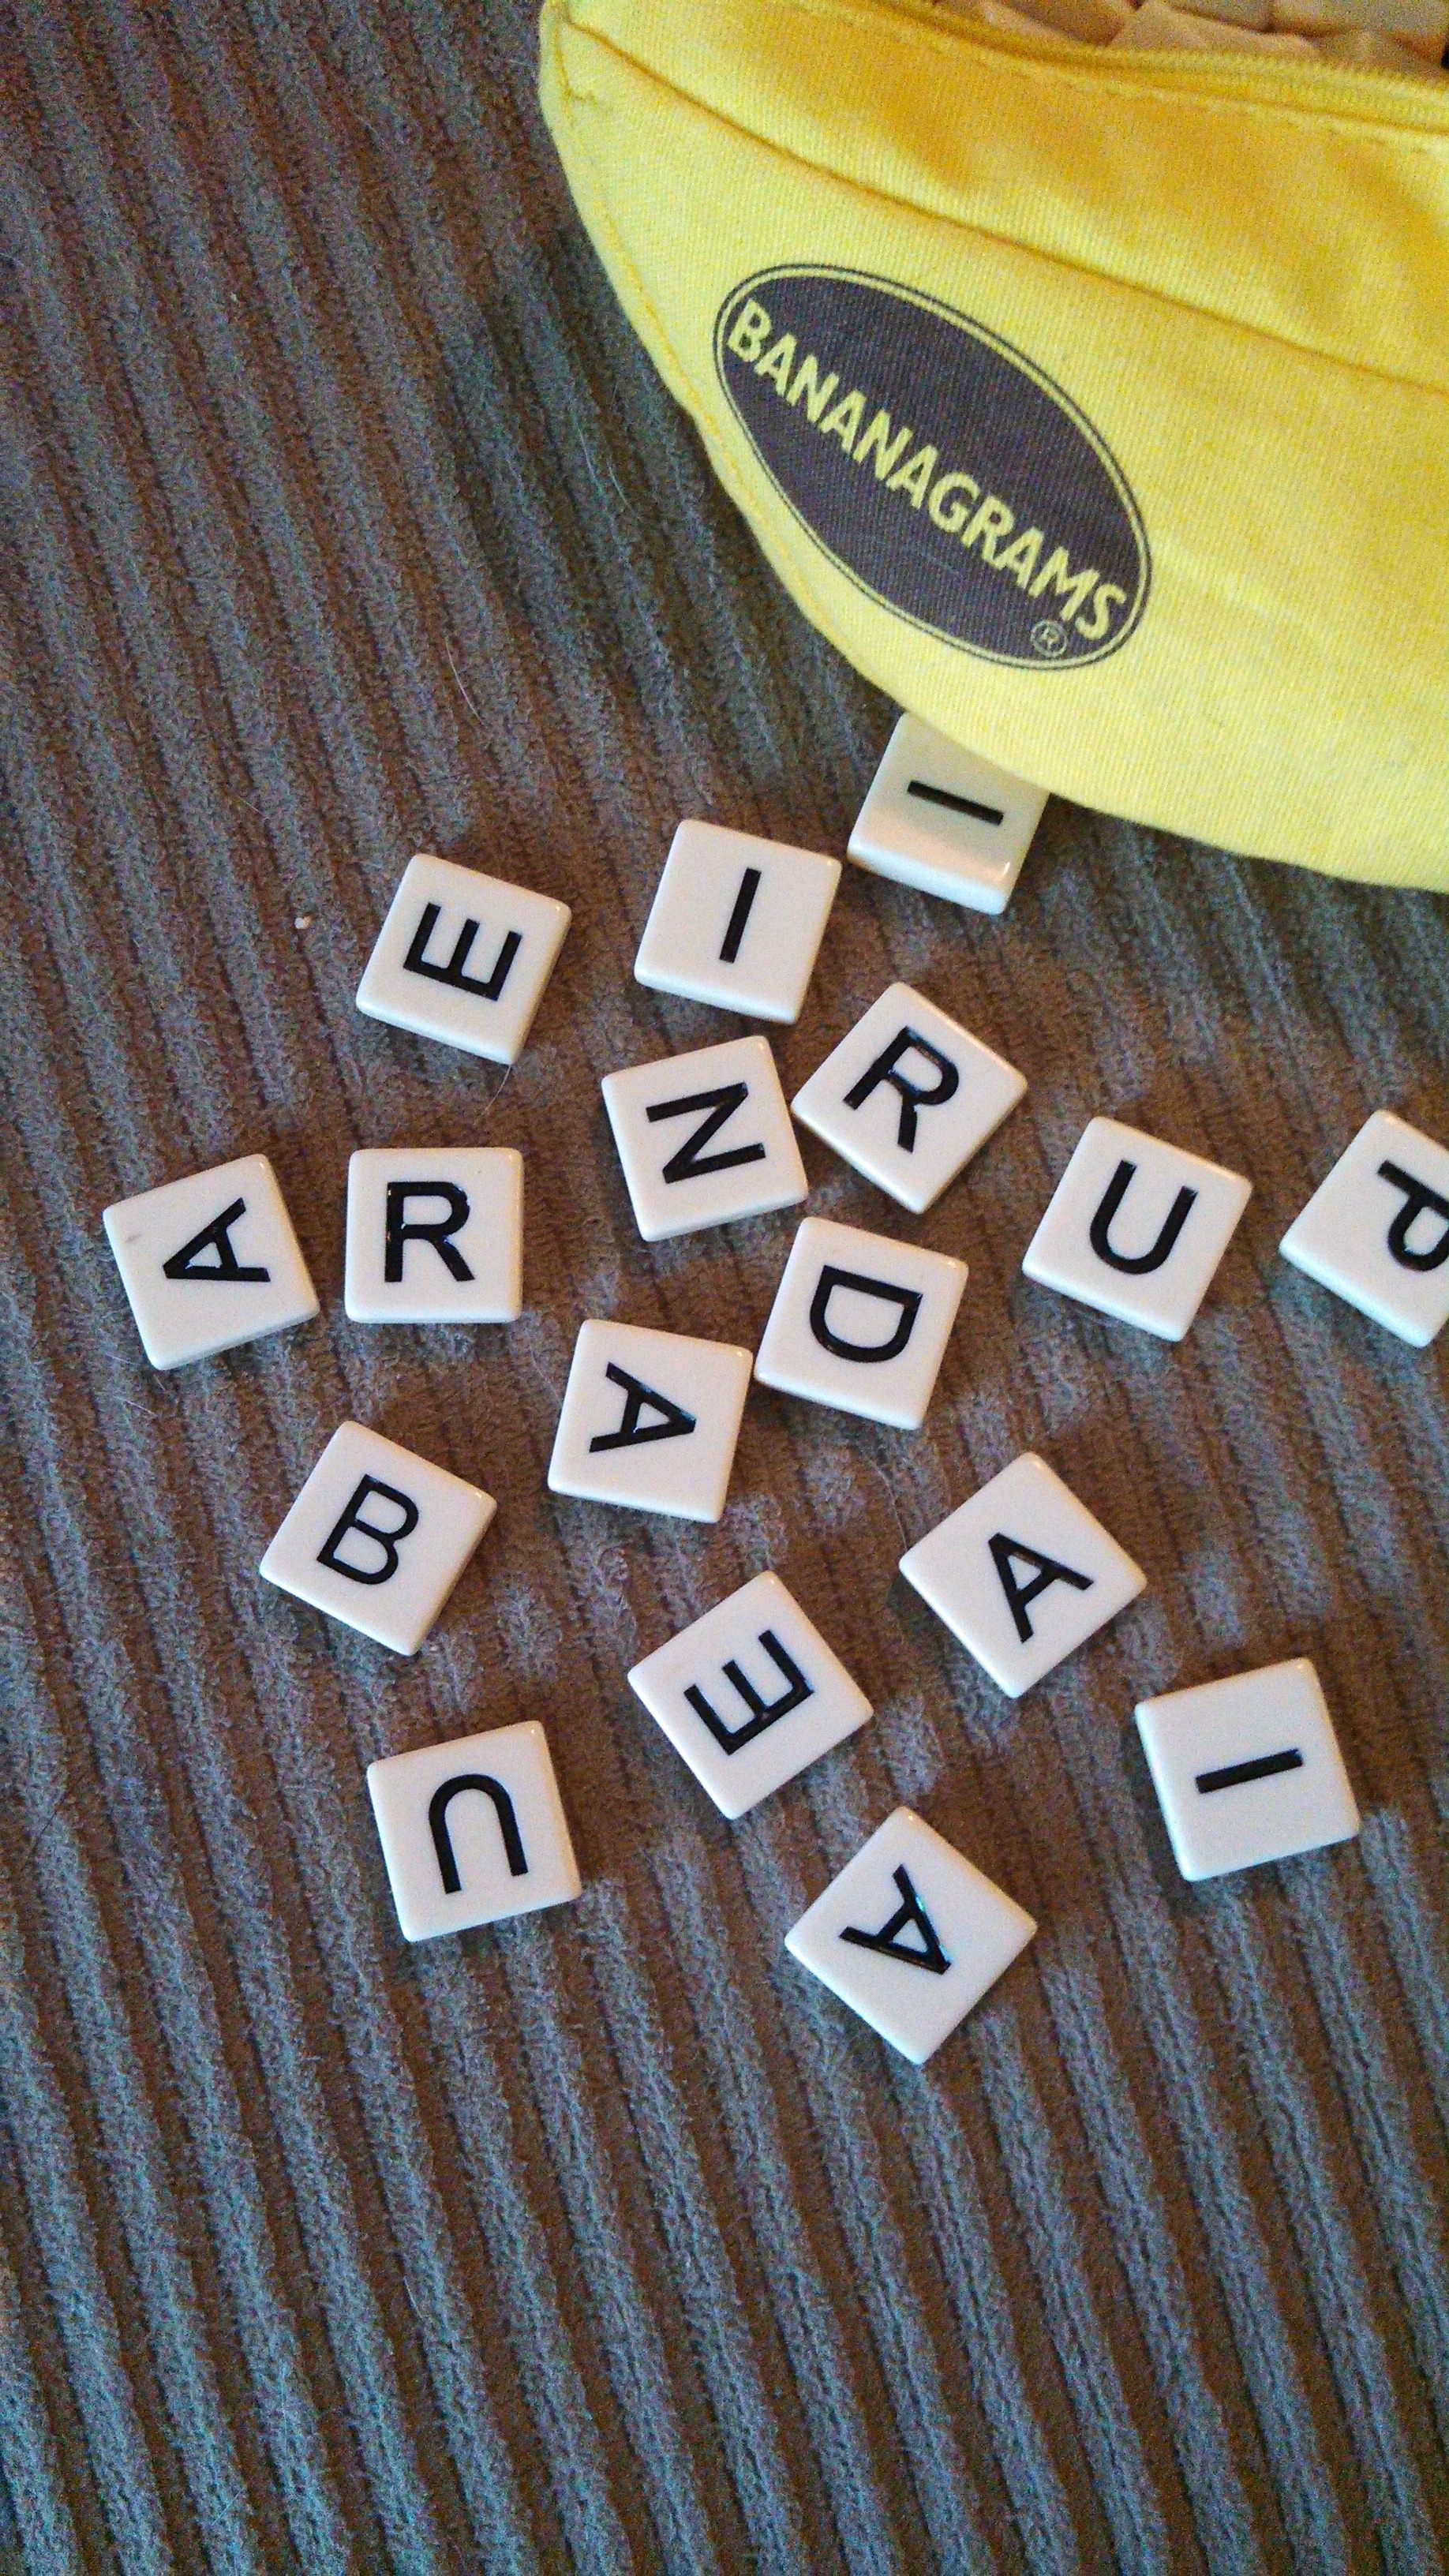
When Leyson spelled James’ name backwards, I then modeled how to spell his own name as he said the letters out loud to me.  Leaving those letters in place, I then pulled a second set of letters for his name and asked him to put them in order directly under the one I had done.

“Which letter comes first?  Which comes second?”  Etc.

IMG_20130710_090415_301

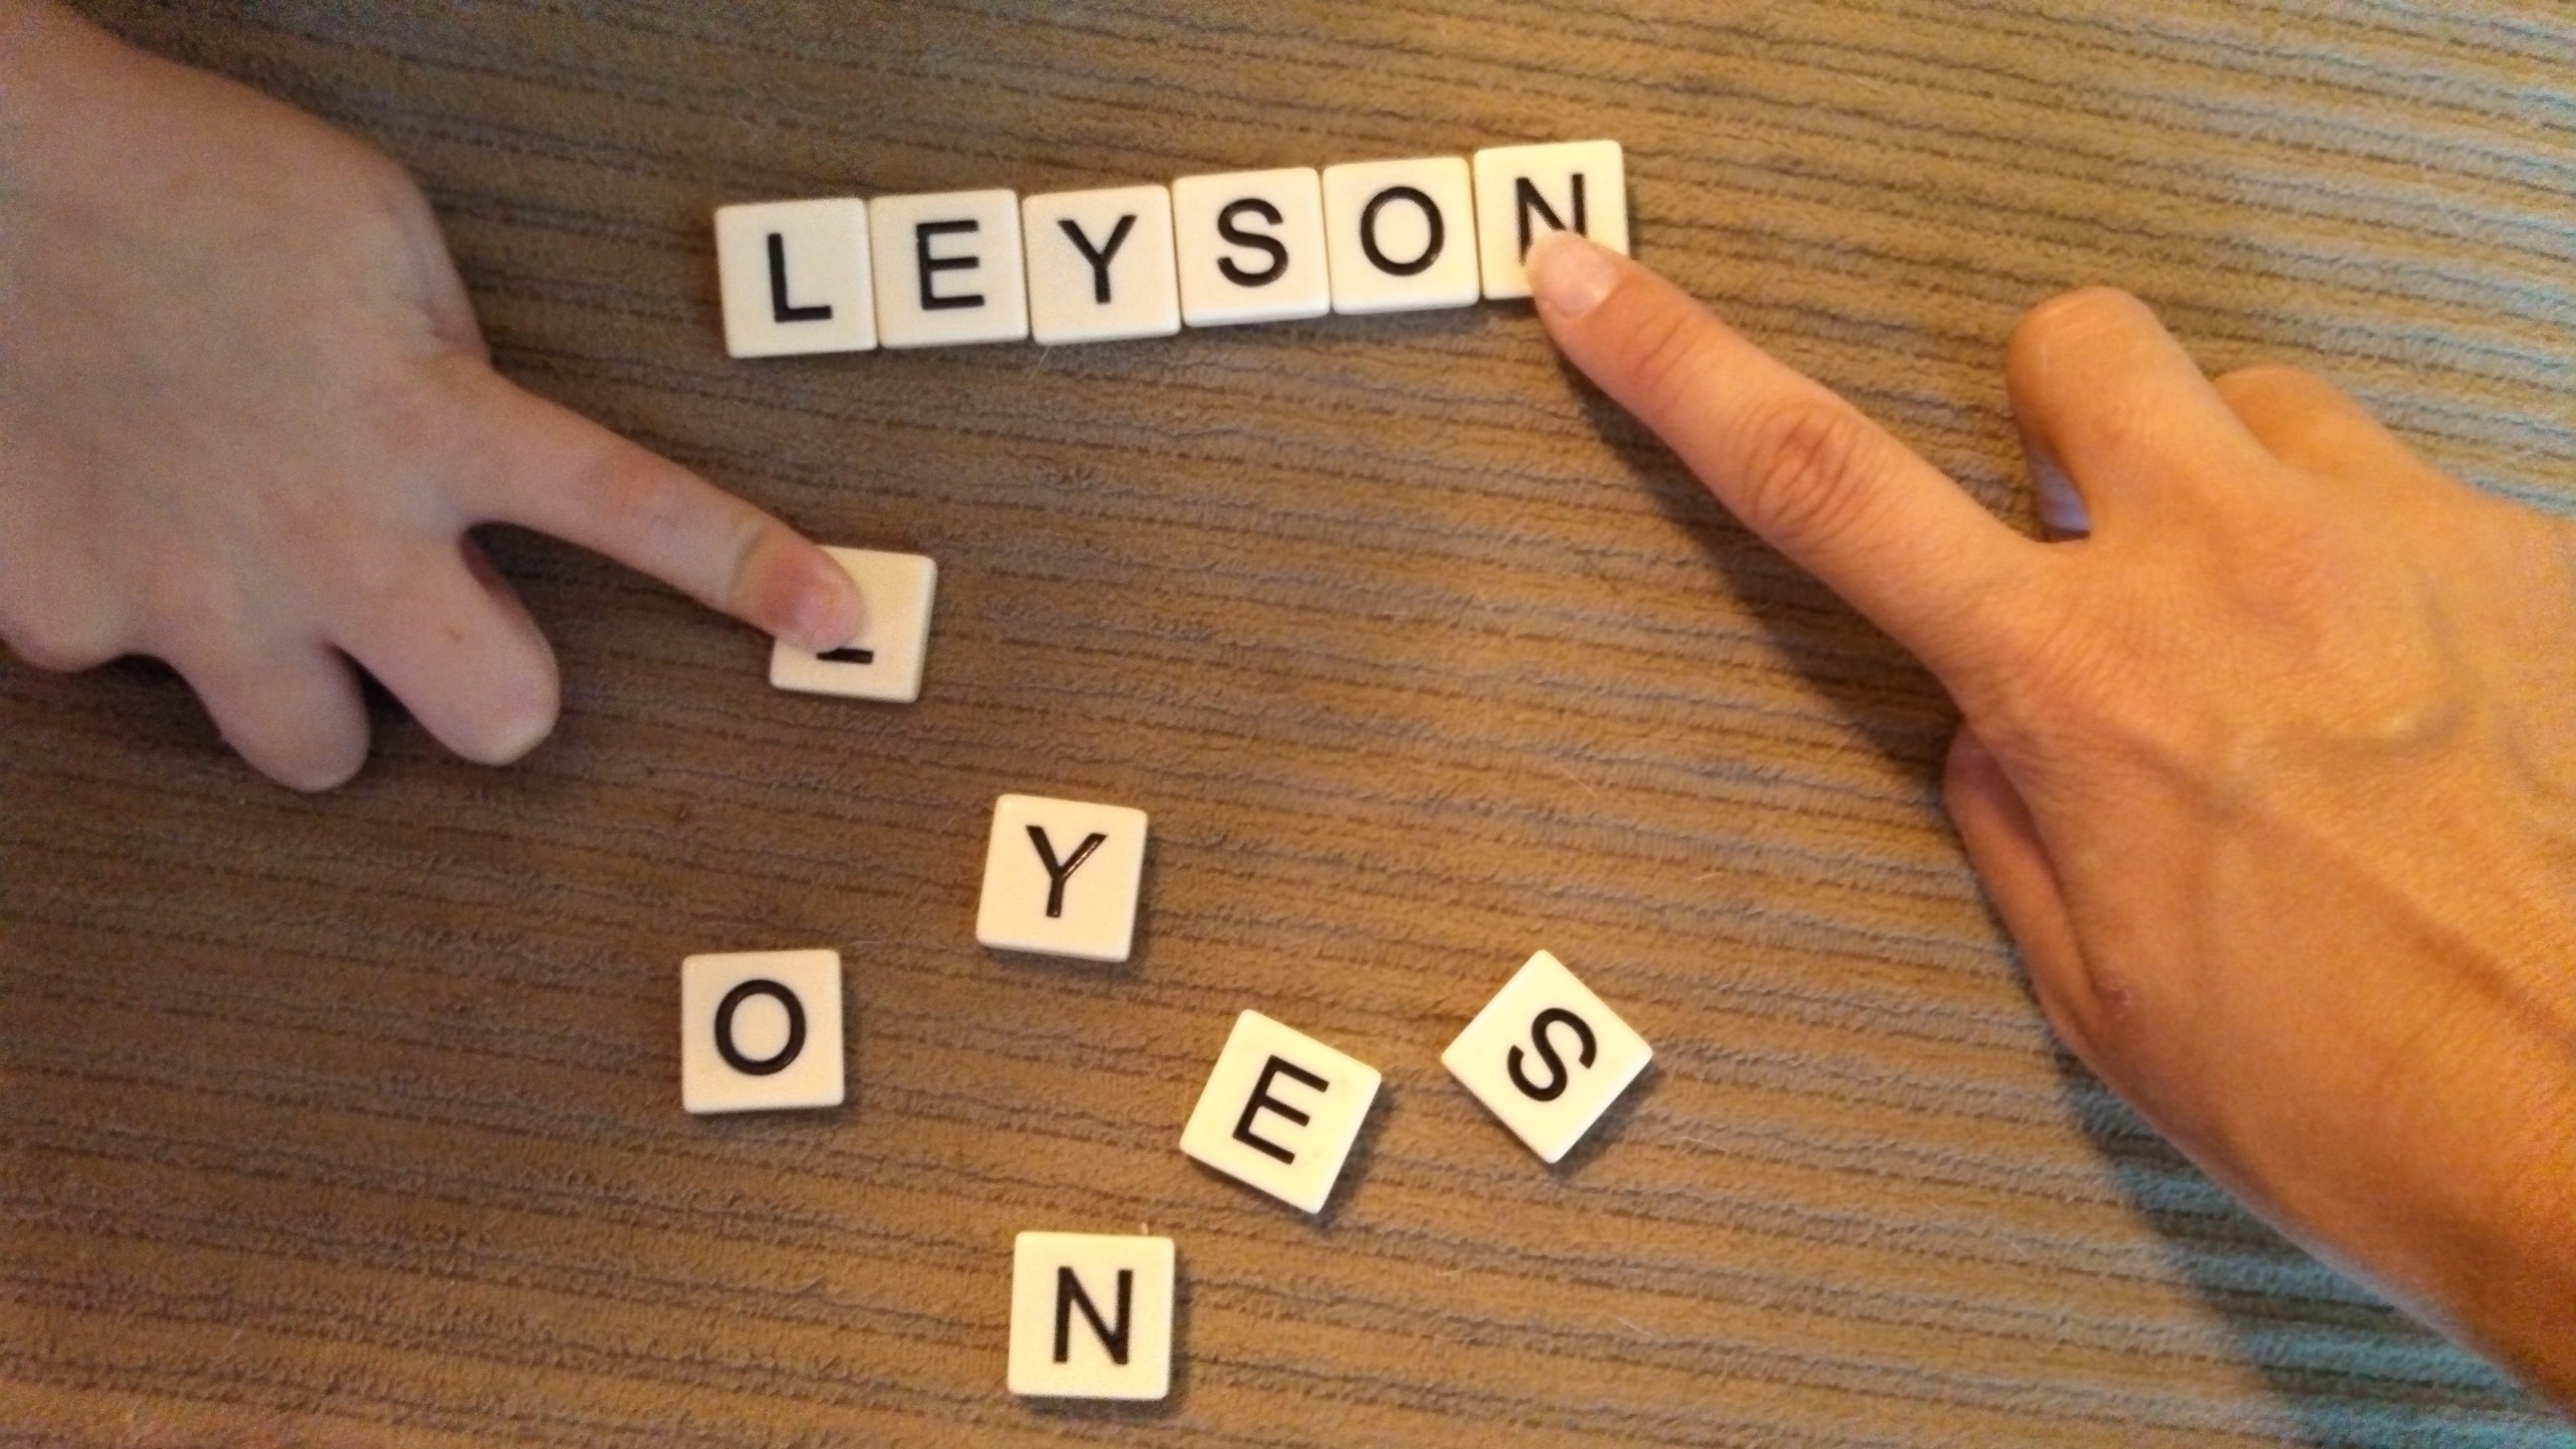
To fix his sideways S, I lined up a few of the same letter and laid them out right side, upside down and sideways and we chose the correct letter.  This taught him that it DOES matter which way a letter is written… BAM!  Epiphany.

Back to his spelling of James’ name:

Me:  “Now, if we spelled the name LEYSON with the L over here on the left, what is different about how you spelled JAMES?”

IMG_20130710_085857_062

Leyson:  “I used an upside down E as an M!”

Epiphany x2.

*  Dyslexia is a Developmental Reading Disorder (DRD) which is one of the most common learning disabilities.  A small percentage of those with this type of DRD actually see and write letters backwards or upside down.  Most often dyslexia is diagnosed within the critical beginning reader years (kindergarten – 2nd grade) if  a child of normal intelligence still has difficulties with visual and/or auditory reading comprehension, spelling and phonological awareness.

If after age appropriate and developmentally appropriate reading and writing strategies have been correctly taught to your school-aged child and you find he or she is still struggling with reading, begin to log your perception of your child’s reading abilities and share it with your child’s teacher or doctor so they can determine if your child may need further evaluation.

Summer Break Curriculum: Ocean Life

1st month of summer Summer break is about halfway over here in Louisiana!  If you are just now joining our summer quest to never hear the phrase, “I’m bored,” please go back and read Part 1 and Part 2 of our summer learning curriculum and activity schedule.  On the right hand column, you will see all of the summer schedule posts neatly organized for you to have quick access!

WEEK 5:  OCEAN LIFE

So I apologize for the delay in the post about Ocean Life. I’d love to give you my reasons (my computer crashed so I’m having to sneak around to borrow one and we went on a vacation) but no one wants to hear those!

The kids had a great time learning about Ocean Life despite the fact that they never really showed too much interest in Finding Nemo – I’ve tried… what’s not to like about it?  But as you all know, kids tend to have their own opinions about things no matter how much we try to mold their little minds ;-).

A IMG_20130625_134513_067 nywho, our favorite activity from the week was our Ocean Life PUPPET THEATER!  This activity was super cheap and was instant entertainment for DAYS!  It is also a great way to encourage storytelling which increases skills in reading comprehension, writing and illustrating stories (this skill starts as early as kindergarten) and oral communication.

Materials:

Painters Tape, poster board, scissors, long skewers/craft sticks, 1 blue and 1 yellow plastic table cloth, black sharpie marker

To make the puppets, I used a foam board.  YOU, however, should NOT use a foam board.   IMG_20130625_113305_927 That sucker was a pain to cut out all of the fishy shapes with all of the twists and turns.  I ended up breaking most of the fish when cutting them out and had to play “doctor” to fix them all back together (great tie-in to our Community lesson).  Just use 1 white poster board and it will save you time, energy, and unnecessary frustration.

IMG_20130625_115012_914 I drew the fish onto my board using a black sharpie.  The kids painted the fish and then went down for their naps (good timing on my part so they didn’t have to wait for the paint to dry).  I cut the fish out and taped the long skewers to the back of the fish.  (I ran out of skewers and used Popsicle sticks for the starfish, crab and crawfish* since they don’t swim too far from the bottom of the ocean anyway).

*I understand that crawfish are not normally found in the ocean, but as they have been raised in South Louisiana, my kids insisted we have a crawfish in our puppet show.

IMG_20130625_193238_817 After nap time, the kids could not WAIT to put on the puppet show!  My daughter’s room was the PERFECT theater because 1. she had the audience (stuffed animals galore) and what show would be complete without an audience? and 2. her closet made the perfect stage for the show!

We took the blue table cloth and hung it with tape from the clothes rod, and the 2nd table cloth (we used blue and taped yellow tissue paper to make “sand” but just using a yellow table cloth would be so much easier) was taped across the doorway of the closet at door knob level. This gave the kids enough space to crouch under and behind the yellow (sand) curtain and in front of the blue (ocean) curtain.

James had the idea to make a sign with the title and performers names and hung it on the closet doors for all of the audience (stuffed animals) to see.  He also had the idea to use one of our lamps as the spotlight and designated his Mimi to be the lighting technician.

There are several different ways you can perform plays with your kids!

1.  REENACTMENT:  You can take a story that your kids know really well (a great one for this theme would be The Rainbow Fish or even Finding Nemo) and  your kids can reenact the story.  To simplify this, you can make sequencing cards for your kids to act out:

1.  Nemo and his dad lived in an anemone.

2.  Nemo swims out to sea and is captured by the scuba diver.

3.  Nemo’s dad and Dori search for Nemo and meet a lot of friends on the way.

4.  Nemo makes his great escape.

5.  Nemo and his dad are reunited.

2.  MAD LIB:  You write a short story out and leave blanks for the kids to fill in.

Once upon a time there was a fish named name.  He was color and color.  His best friends was name the ocean animal.  Together they liked to activity.

3.  NARRATE:  You can narrate the story and the kids can move and talk for the puppets.

4.  STORY WRITING:  This is great for older kids!  Your kids write the story and include a beginning, middle and end!

5.  TAKE TURNS WRITING THE STORY:  Each person adds a new adventure to the story!   Things can get a little crazy here!

Person 1:  “Once upon a time there was a fish named Bob.”

Person 2:  “Bob loved to swim to the middle of the ocean.”

Person 3:  “He made lots of friends along the way.”

Person 1:  “His best friend was a starfish named All Star.”

Person 2:  “All Star loved to play basketball in the water.”

As for my kids?  They preferred to #6, JUST PLAY!   Sit back and see what your kids come up with!  This is my favorite and each of my kids had such different ideas for the puppets that they each took turns playing puppeteer and audience member.  They loved watching what the other came up with and would build off of each other’s stories!  I love how these little minds work!

James’ story was great (says the biased mommy)!  It was about a little fish who met a shark who wanted to eat him.  All of his fishy friends decided to go talk to the shark to stop him from eating their friend.  They offered him a peach instead.  The shark enjoyed the peach so much that he never ate a fish again and the little fish and the shark became best friends.  The play was called “The Fish, the Shark and the Peach” (fitting).

Leyson’s story took place in the river (Mr. 3-year-old wanted to create his own setting) and his fish spent the whole time swimming up and down the river.  And then the rest of the time his play sounded very similar to big brother’s play.

CRAFT TIME FAIL:

IMG_20130707_180536_492 Another activity we did was a near-complete failure.  I say near-complete because the kids could care less that it didn’t work as it was intended.

My kids and I ATTEMPTED to make sensory-bag fish bowls.  We cut out a hole in a paper plate and glued it to another paper plate – then decorated the plates, of course.  We filled plastic zip-lock baggies with blue hand soap (gel probably would have worked better) and put small plastic fish inside.  Then we placed the bags inside of the paper plate hole and made “fish bowls,” but yeah, they didn’t work.  The kids DID enjoy squishing the fish around in the sensory bags!  But then they started leaking because Mommy bought the cheap bags.  ::womp womp::

Here is the craft that gave me the idea to make a sensory bag, but I should have just stuck to these directions instead:

“Read it again, Mom” has so many great book ideas, songs and crafts for this theme!

Some Of My Favorite YouTube Playlists

Whether, like me, you are somewhat homebound with a newborn, or you have other reasons that you need to get your kids moving (rain, heat, an injury, etc.). I wanted to share some great movement videos for young children.  My kids spend at least half an hour enjoying some of the videos I have shared below.

We only have one TV in our house, but it happens to be one that has “Apps” like Netflix, YouTube, Pandora, etc.  This makes our den my all-purpose room for sure.

My favorite playlists for MOVEMENT are:

PattyShukla’s action and movement songs

Have Fun Teaching’s fitness songs

and for

Sing -Along :

Super Simple Song’s “Easy-to-teach, Easy-to-learn Songs for Young Learners”

Harry Kindergarten’s class songs

If you subscribe to any of these channels you will discover LOTS of great educational songs too.  Have Fun Teaching has some really fun songs that makes associations with the letter formation of the letters, the sounds, and words that start with that sound.  And of course Sesame Street is so great too!

PLEASE share your favorites in a comment so I can add some new playlists 🙂

My kindergarteners loved these videos so don’t rule them out until you put them on for your kids.  They are great to coincide with learning about the body to reinforce body parts and the importance of exercise.

Here is a little clip of my little ones and a friend enjoying “Jump” by Patty Shukla.  Yes, we let them jump on the couches for this one…. I know some moms are going crazy, but ya know…. To each his own 🙂

Graffiti

A precious First Grade Teacher that was a co-worker of mine used to have bulletin board paper taped to her desk and it was a writing center that she called her “Graffiti Space” for her student’s personal artistic signatures.

The idea stuck with me….especially as a mommy of a little one who thinks that every wall should be his personal masterpiece.   I have really drilled it in Sean Patrick’s head that we only write on paper because of all the times I have found his hidden messages on the walls, his body, my couch, the tables, etc.

Tonight, I encouraged him to do just that… to write on paper, but on a LARGE area that I designated as his Graffiti Space for the night.

IMG_6265

It was as simple as this…

IMG_6252

He helped me tape the paper to the windowsill and the baseboards…. this was a great spot for him because it is in his playroom and mr. clean magic erasers agree with my windowsills and baseboards 🙂

I laid out crayons, markers, and colored pencils and let him pick and choose whatever writing tools he wanted to explore with.

We had so much fun!  He would scribble different images and tell me what it was afterwards.

We made rainbows, a special message for daddy, the sun, people, and a lot of other free-writing squiggles just to talk about different ways to form lines (up, down, back and forth, around and around, side to side, etc).   IMG_6264 This kind of activity makes writing fun for Sean Patrick, and that is honestly my main learning goal for him.   I just want him to know how fun writing can be!

Gotta love his fashion sense… IMG_6254

We left if up on the wall so that he could continue to “fill the space” and add any new ideas when he was ready.


Food Fun

Hi!  I’m Casey from Kidspired Creations!  I have been a guest blogger a few times on The Mommy Teacher am very excited to now be co-blogging with Jessica!  I am a former Pre-Kindergarten and Kindergarten teacher and am currently a stay-at-home Mom of 3 little ones ages 5, 3 and 10 months.

I have to admit that despite my best attempts, not all of my Mommy Teacher moments get the best reception from my kids.  I think if I say, “Let’s make a pattern!” one more time, my 3-year-old might throw a toddler tornado-sized tantrum.

IMG_6932[1] Yes, my kids can get burnt out on lessons from this Mommy Teacher; however, I know how to win them over every time:  food, particularly pizza.

I recently saw a recipe on Pinterest that involved cutting zucchini in half long ways, carving out the insides and filling them with various deliciousness.  I decided that these “zucchini boats” would make great pizza crusts!   This idea perked interest with my kids so quickly that I couldn’t prep fast enough.

Zucchini Boat Pizzas

-Ingredients:  zucchini, pepperoni, mozzarella, pizza sauce

-Pre-heat oven to 350 degrees.  Cut zucchini long ways and spoon out a trench on the inside.  Spread a few spoonfuls of pizza sauce inside.  Fill with mozzarella cheese.  Top with pepperonis.  Place on the oven for 15-20 minutes or until zucchini is tender.

Easy peasy… and so delicious that even my super-picky 3-year-old was digging into the “green crust.”

Here are the different skills we covered while making our pizzas:

Math IMG_6931[1]

– Sequencing: “What is the first step to making our pizza?  What comes next?”

– Measuring:  “How long is our zucchini?  Let’s measure in pepperonis.”

– Adding:  “Our pizza needs 3 pepperonis.  There are 2 pepperonis on the pizza now.  How many more do we need to add to make 3?”

-Counting:  “How many pepperonis are on your pizza?”  How many pepperonis are there all together?”

-Multiplying:  (for the school-aged child)  “If we have 3 pepperonis on 10 pizzas, how many pepperonis are there all together?”

-Time:  “Our pizzas need to cook for 20 minutes.  Let’s set the timer.”

Motor Skill Development IMG_6928[1]

-Pouring and spreading the sauce with a spoon

-Sprinkling the cheese using our fingers

-Using the pincer grasp to separate the pepperonis

Language Skills

-Sequencing Vocabulary:  first, second, next, then, last, before, after etc.

Health and Nutrition:  Learning about making healthy choices by substituting with fresh vegetables and what food groups are being included in dinner

Following Directions and Recipes:  Following step-by-step or a series of directions is different than following one direction at a time.  “So, I put the pepperonis on first right???  No?  Well, what do the directions tell me to do?”  You can take this a step further than I did by drawing or writing out the recipe for your child to have a visual to follow.

Social Behaviors:  being a happy helper in the house!  It is important for kids to take ownership over household tasks and doing it with a happy heart!

* * * IMG_6933[1]

My kids do not like to try new things, but since they made the dish themselves they were eager to dig right in!  More surprisingly was my 3-year-old who didn’t shed any tears before his taste test!  That’s quite an accomplishment at our dinner table!  Everyone was happy… even the baby who got pureed zucchini that was scooped out of the middle of our boats.  Bonus!


Related Posts Plugin for WordPress, Blogger...

1 2 3 4 5 7