I am so excited to introduce you to my dear friend, Miriam Douglas, Christ-follower, wife, mother, architect, artist, author and entrepreneur! Miriam is a momma of two little ones and has a heart to minister to young children. This fall she is partnering with Melissa D’Aunoy of The Kitchen Table to offer small-session workshops for school-aged children designed to help them learn how to love God, themselves, and others in a healthy and balanced way. For more information about these workshops email her at miriam@miriamdouglas.com. Miriam and her company EQ Studio are based out of Youngsville, Louisiana.
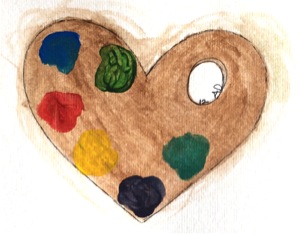
I asked my gifted little friend, Alayna, 12, to sit and do a watercolor portrait of what she thinks God sees when He looks at her Heart. Below is the picture she drew.
I think it’s such a beautiful and accurate perception! We are all living in different environments, born into different centuries, moving through crowds of different personalities. Starting out, we each have a palette much like the one she drew. On it are our emotions, our passions, our spirit, our talents…
We ARE coloring the world around us with the pursuits of our heart, and everyone is holding a brush. As you choose to engage in relationship with others, think about the colors YOU are using. Are you painting with dark blue, out of the pain of your circumstances, or with bright and joyful strokes out of a thankful, Spirit-filled heart?
The Bible tells us that God pours love into our hearts through the Holy Spirit (Romans 5:5), and the colors HE provides are Love, Joy, Peace, Patience, Kindness, Goodness, Faithfulness, Gentleness, and Self-Control (Galatians 5:22-23)….what beautiful, bright colors they are!
Jesus puts Good Things onto our palette, we have only to ask Him for it (John 15:16).
Teach Your Children:
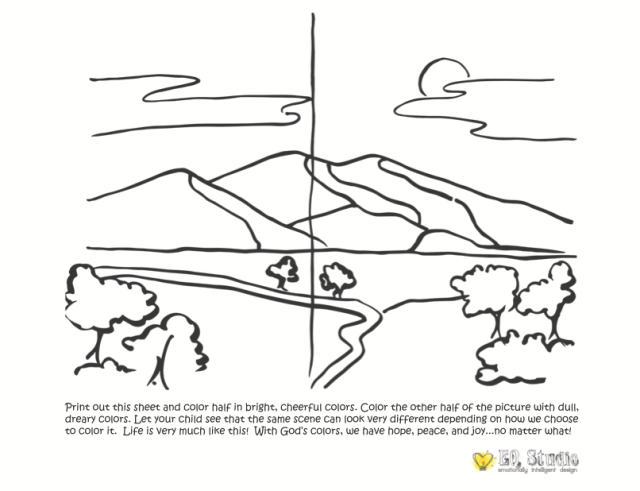
We don’t always get to choose our coloring book, but we DO get to choose what to do with it. Talk to your children today about the good things God puts into their heart. Give them a handful of pretty colors. Print out or copy two pages. Have them color one with those bright, happy colors and then have them color the other with drab, monotone crayons. Let them see the SAME image colored two different ways…Let them see the difference between a gloomy scene and a bright one! (Philippians 4:8)
Hi, Mommy Teachers! It’s Casey, stopping by from Kidspired Creations! I am Mommy to James (5) who just started Kindergarten, Leyson (3) and Lena (6 months). I currently stay at home with the younger two but I taught Pre-K and Kindergarten before my Mommy days.
Leyson and I were playing (learning) today and were toying around with different Busy Bag Exchange ideas. We will be participating in a Busy Bag Exchange soon where all the moms participating bring gallon baggies filled with simple, hand-made activities for each of the kids who will be there. If 15 moms participate, your child has 15 new Busy Bags full of super fun (and educational) activities!
Leyson and I came up with 3 different ideas today and I thought they would all be fun to share with you Mommy Teachers!
PATTERNS:
We used word strips (found at the Dollar Tree for, you guessed it, $1 per package) to glue colored squares in AB, ABB and ABC patterns. I cut additional colored squares for Leyson to COPY the patterns on the strips by placing each of the colored squares below the square on the strip. This will get him used to making patterns. Saying the color out loud reinforces the pattern so he can also HEAR the pattern (helpful for an auditory learner – someone who learns better when hearing information).
After he was able to copy the pattern, I then taught him how to EXTEND the pattern. At the end of the strip, he must finish the pattern by placing the appropriate colored squares that would come NEXT in the pattern.
The next step is to create his own patterns without looking at the strip. From there you can create more complex patterns! The options are endless! Patterns are difficult to understand, so it might take a little time for your little one to be able to catch on.
WHAT’S IN A NAME?:
Kids are so funny when it comes to learning how to spell their own names. Most often kids learn how to spell their names before they completely understand the concept that letters make words when put together. Take my son Leyson, for example; anytime he sees a word that starts with an L, he says it spells Leyson. He thinks he owns the letter L. The same goes for the letters E, Y, S, O and N… he owns them all. You see, for young toddlers, they will not understand that the ORDER of letters actually makes a difference when spelling words.
Even in my kindergarten classroom, students who knew how to spell their names would sometimes slip into the idea of “owning” all the letters in their name and would write their names out of order. LUIS would spell his name UILS… still thinking that it spelled the same thing. Even more common would be for kids to write their names backwards (SIUL)… and several, get this, would write their names in mirror image! I can’t even do that! All of these are totally normal progressions when your child is learning how to spell his/her name, so here is an easy activity to help:
You need two word cards (or index cards). Write your child’s name evenly and legibly on each card. Leave the first card whole, and cut out each individual letter on the second card. First, have your child put each cut out letter on top of the letters on his/her name card, matching letter for letter. Then, have your child put his/her name together underneath the name card. Last, take away the name card and have your child put together the letters to spell his/her name from memory. Be sure to say the letters out loud in order so your child can hear how to spell his/her name in addition to seeing it. Jessica had a great post on singing a catchy song to learn how to spell a name.
HAMBURGER PLAY:
This game was Leyson’s idea. He picked up a circle I cut out and pretended to eat it, saying it was a hamburger bun. Bam! Instant Busy Bag idea!
I used construction paper to cut out a top and bottom bun, hamburger, tomato, cheese, ketchup, mustard, pickles, lettuce, and bacon and we made a hamburger! Not only is this a great pretend-play activity, but it was a great way to encourage language development and sequencing. I had Leyson explain to me exactly how we should make a hamburger. I encouraged him to use words such as “first,” “next,” “then,” and “last” in his explanation. You can also add an extra element by writing numbers on each of the pieces to teach your child number order (1: the bottom bun, 2: the hamburger, 3: cheese, etc.). For the beginning reader? Write the words “bun,” “pickle,” etc. on each of the pieces and then enjoy your nice, tasty treat!
I am still brainstorming different Busy Bag ideas! If you have a good one, please comment below and share! Hopefully after the Busy Bag Exchange I will have another post for you, so stay tuned!!!
—
Casey Dellinger Hilty
“One day, all children in this nation will have the opportunity to attain an excellent education.”
Teach For America
LA Corps 2005
Great learning opportunities do not have to be completely planned out nor do they necessarily have to require much time at all. They do not have to come at a certain time of the day and do not always have to be over-the-moon exciting. Great learning opportunities DO need to have a goal in mind and this one, in particular, needs to be routine.
I give you the every-time-we-leave-the-house-4-second-learning-opportunity…
My kindergartner came home with his first day of homework. He had to trace the word RED three times, color the picture red, and do a word search where he had to find the word 4 times. After, I asked him how to spell RED without looking at his paper… r-e-d. Perfect.
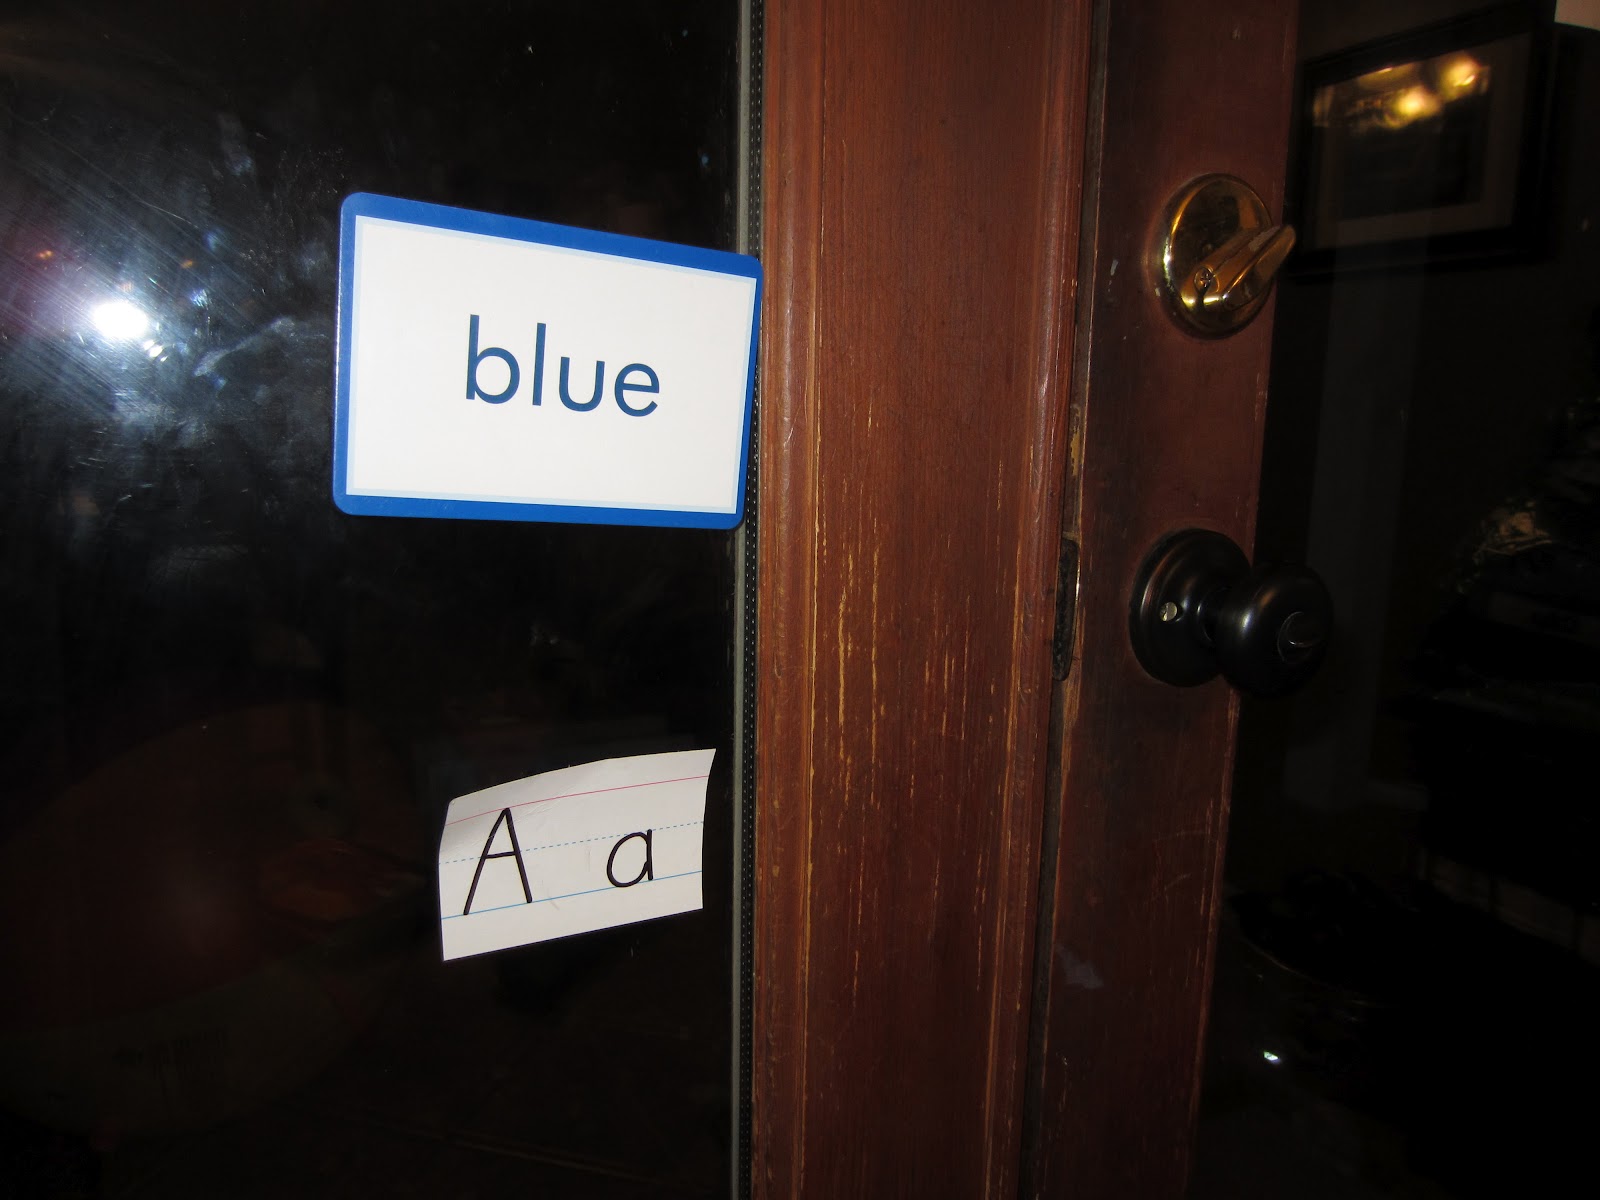
The next day he came home with his homework for the color BLUE. After completing the same tasks as he did with the color red, I asked him to spell BLUE, but he couldn’t remember.
Then I remembered a teaching trick I used to get something to stick in my Pre-K and Kindergartners’ heads: repetition. How can I guarantee that I remember to enforce this repetition? Through practiced routine. And what better routine is there in a classroom than how to enter and exit the classroom? It is, in fact, the most rehearsed and the most repetitive… going in and out and in and out all day long.
I always had a sight word of the week (Kinder) or letter/number of the week (Pre-K) posted on the door frame and any time a student entered or exited the classroom they first had to hit the door frame and say (and spell) the word/letter.
For your beginning reader…
“B-l-u-e! Blue Blue Blue!”
or for your 1-3 year old…
“Big A, little a, /a/ /a/ /a/!”
You can even have just a colored piece of paper and use this repetition to teach colors. Or math facts…
“2 x 3 = 6!”
Or Bible verses! Or pictures of animals for toddlers! The learning opportunities are endless! Keep your one word/letter/color/number on the door for the entire week and any time you and your child leave, make sure to hit it on the way out! Be careful, though, it’s super easy to just remember the SOUND of this repetitive activity without looking at the actual word/letter, so make sure your child is also LOOKING at the card on the door frame to also remember its visual representation as well.
What other things can you teach using this 4 second activity?
Hi! It’s Casey, stopping by from Kidspired Creations once again! My husband and I have recently discovered the game Bananagrams and it has instantly become a family favorite! Even my boys (5 and 2) love to play as well… they just play with a different set of rules… Mommy Teacher rules!
If you are not familiar with Bananagrams, it’s a banana-shaped bag filled with Scrabble tiles and, like Scrabble, there are tons of the most frequently used letters in the alphabet (i.e. vowels) and several of the less frequent ones. This makes building words easier than when you just buy a single pack of 26 letters from the kid’s section at a store because you are able to make words that have double letters, or several words that use the same letters at once. As you can probably imagine, there are endless ways you can use these tiles to work on basic reading and spelling skills.
One of the building blocks to learning to read is being able to break words into syllables. As expert readers, we do this au.to.ma.tic.al.ly when we come to a long word, but we are able to do this because we were taught this skill. I notice myself doing this when I am typing out a long word in an e-mail quite fre.quent.ly.
Refresher course: what is a syllable? A syllable is recognized by the presence of a VOWEL SOUND in a word. For instance, the word “baby” has two syllables (ba.by) because of the presence of the long “A” and long “E” sound in the word. Be careful, some vowel sounds are hard to hear, like the “schwa” sound in the word “table”/ˈtābəl/. <-That upside down e is called a “schwa.” It sounds like “uh” and YES it’s a vowel sound. But, I digress…
My oldest son, James, has already mastered sounding out/reading simple CVC (consonant/vowel/consonant) words like “cat,” and bigger compound words like “bedroom” (Jess teaches about compound words here), so now I am moving on to larger polysyllabic words (words with more than one syllable). These words will be easier for him to read if he separates them into different syllables and reads them individually, but first, I need to teach him how to count syllables.
Clapping out syllables is a great way for kids to be able to HEAR the number of syllables in a word: BED (clap) ROOM (clap). I suggest starting off with simple compound words (cupcake, doghouse, rainbow) because they are made up of two monosyllabic (containing 1 syllable) words, thus it is easier to hear the separate syllables.
Another great way to count syllables is to use objects such as pennies to represent each different syllable. This helps kids to be able to SEE the number of syllables in a word: cup.cake = 2 pennies. Point to each penny as you say each syllable separately.
James found objects around the house
that only have 1 syllable:
car, ball, shoe (though it’s really a slipper),
cap, rock, dice, car (again)
You can also teach your child to FEEL syllables by having him place his hand under his chin as he says the word slowly. With each syllable that he says out loud, his chin will make his hand move down. The only problem with this is that some sounds (like the schwa) do not make your chin move, so when I say “table” while teaching this technique it sounds more like “tay-ball”… I over-exaggerate each word and make funny faces when I say it.
When your child has begun to understand the concept of syllables, you can start visually breaking down words into syllables by using the Bananagrams tiles. Start with words that have short vowel sounds like “exact” (ex.act) or words that are monosyllabic that become polysyllabic when you make it past tense such as “started” (start.ed).
Just for fun, I broke down the word “hippopotamus” because our dog’s name is Hippo. Notice how James sounded it out “hippo.pot.[long A].mus” and I did not correct him. Once he put the word together he automatically fixed the “long A” to the schwa sound. Give your kids a chance; they might surprise you with the things they can figure out without Mommy’s help!
Thanks, Jess, for letting me hop onto your blog! Please visit my Kidspired Creations blog for affordable, customizable and kidspirational art! I also frequently post DIY projects and party ideas! Also, please stop by my personal blog about My Kidspiration and all the hilariousness that comes with raising two boys and a baby girl!
I was following “Mekmommy” on Instagram and saw this fun, illustrated picture:
The Mommy Teacher that I am had to know the play-by-play and story behind this authentic, on-the-spot mini lesson. Krista (this particular mommy teacher) is a mommy of three and the blogger behind “The Mommy Calling.”
So, here is the story shared by Krista that I hope inspires you the way that it inspired me:
“It all started b/c Maddox ran inside freaking out because our yard was full of spider webs. Of course, living in the country cobwebs will always be there, so I had to figure out a way to help him understand. It actually turned into a lesson about counting, adding, habitats, the food chain, a ton of things!
I tore some paper off of the butcher roll and drew a spider. As I drew it, we talked about how it has 2 parts to its body, the head and the body, setting up for a later conversation about the difference between insects and arachnids. Then we counted out the 8 legs as I drew them and talked about how there are 4 on each side and how 4+4=8.
I used a different color crayon to draw the “silk”. I drew some in the spider’s belly, and drew a line coming from the spider and as I drew a random “web” pattern I explained that as the spider moves with the silk behind him it makes the web. After I drew the web I talked about the uses of the web. I broke it down by first drawing the spider in the web telling Maddox that the spider lives in his web. Then I drew an egg sac and explained that this is where the spider lays its eggs and they hatch. I drew a bug flying on the outside of the web and a dotted line leading to the web explaining that as the bug is flying it gets caught in the web because it is so sticky. I explained that the sticky web is how the spiders catch their food to eat. I drew an arrow from the spider to the bug and explained how the spider will then eat the bug. I then asked him if he remembered what the web was for and we broke it down into living, laying eggs, and eating.
Maddox then got his own crayon to copy what I drew and he explained it back to me while I reinforced that there were 2 body parts and counting and adding of the legs (making sure he drew 4 on each side rather than just drawing out 8 random legs so he could visually see the 4+4=8). We didn’t go into the details of the web again, but again we discussed the live, lay eggs, eat. All-in-all it was about 15 minutes and he was so proud that he spent the next 15 minutes talking about it over and over and hung his picture up and called his daddy to tell him about it. In 30 minutes he learned so much about so many things. And it wasn’t anything that was hard to explain or too over his head. It was such a great reminder of how many important things they can learn without a classroom and without making it a boring ‘lesson.'”