Vocabulary

How Does Your Garden Grow? 5 Garden Activities

banner

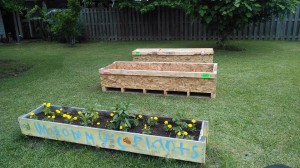
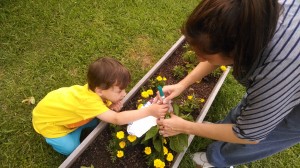
Last Mother’s Day, my kids gave me a great planter for us to start a home garden!
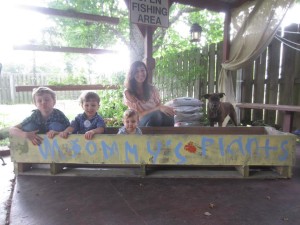
970018_10102217913375845_1261013702_n My husband works at a factory and they frequently get shipments of equipment that come in these long crates that are perfect for starting a garden (especially because they are free).  Keep your eyes peeled for wooden crates and pallets and you can get free planters as well!

This year we have a few more!

10251951_10103298616323475_9182112865024686846_n

Now, this is a little intimidating for me because I do NOT have a green thumb… but my husband is a little bit better at watering…and my kids are REALLY good at watering… a little too good as they sometimes over water.

So many early childhood teachers will grow plants in the classroom for kids to learn the parts of the plant, how to care for a plant, and what plants need to grow: soil, water, sun.  Here are a few activities for you to do at home to teach your kids about growing plants if you have or plan on starting your own garden at home.

1.  Journal:  Have your kids document plant growth.

  • Pre-schoolers – model drawing sketches of what your plants look like each week and then give them a crayon for them to do the same (may not look like much, but they will at least think they are drawing a plant).  Introduce vocabulary such as plant, green, grow, sun, soil
  • Pre-K – have them add words to their drawings (even if their words are just a mix up of letters – write what they are trying to spell underneath).  Vocabulary:  the name of the plants, ex: bell peppers, parts of the plant
  • Kinder – write a sentence or two describing the plant.  Vocabulary and discussion:  the name of the plants, ex: bell peppers, parts of the plant, why plants are important
  • 1st grade and above – a paragraph (minimum) documenting any changes they may see, how long they watered, what time of the day they watered, etc.  Vocabulary and Discussion:  the name of the plants, ex: bell peppers, parts of the plant, describe why plants are important, how they reproduce, nutrition and the benefits of eating home grown foods

2.  Predict:  Have your kids predict what is going to happen throughout the summer with their plants, use your journal from above to help document, then calculate results by a certain date at the end of the summer.

  • Calendar Math:  Using a summer calendar, mark the day you plant your plants.  Have your kids each choose a different date in which they predict they can start picking their ripe produce.
  • Measuring:  Using a ruler, guess the size of the produce and how tall the plants will become by the end of the summer.  Have them draw this out on poster paper to compare at the end of the summer.
  • Counting:  Predict the amount of produce each type of plant will produce.
  • Science – Weather:  predict the number of rainy days versus sunny days
  • Comparison:  predict what type of plant will produce the biggest/smallest, most/least amount, greenest, etc. produce

3.  Experiment:  Get several seedlings that are the same type and are all similar in size.  Experiment with different amounts of sunlight or soil type or watering schedule (choose one) to see what is the optimal amount for that particular plant.  Plant several seedlings in each of the different conditions to get the best average outcome.  And, go back to the first activity:  journal 🙂

4.  Create a Cookbook:  As your plants are growing, decide as a family what you are going to use your plants for and create a family cookbook together!  Take pictures of your growing plants to include in the “ingredients” section of each recipe.

BONUS:  Include a raw versus cooked taste test of each fruit/vegetable to include that 5th sense that we often don’t get to use in a classroom.

5.  Dissect the Plants:

  • Science:  learn about the different plant parts including the parts you don’t see… inside the stem, the roots, inside the fruit and flowers.  When you are finished, use the roots, stem, leaves, flowers to make art on a poster board.
  • Math:  Compare/Contrast the different types of plants:  length, leaf shape, fruit, root length and thickness and number of roots
  • Art:  Create leaf prints by placing a piece of paper on top of the leaves and using the edge of a crayon to etch the shape of the leaf.  Draw the type of produce next to each leaf.

BONUS:  One of my friends started a private Facebook group for some of her friends who wanted to start a home garden.  On it we are sharing pictures and knowledge with each other and when the produce is ripe, we will be having garden picking parties!  It is nice to see what everyone else is growing (and these ladies know way more than I do about gardening so it’s helpful too)!  I encourage you to start a similar group for your friends with green (or slightly unripened) thumbs.

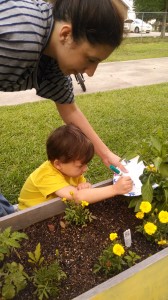
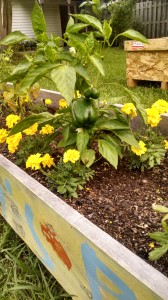
It is so wonderful seeing how excited my kids are to watch our plants grow!  Right now, we just have bell peppers and cherry tomatoes, but we hope to fill our other planters soon!

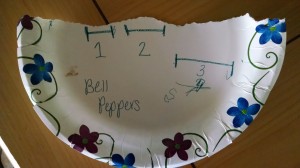
Leyson and I tore a paper plate in half to draw our measurements of the peppers (paper plates are sturdier than sheets of paper thus easier to measure the peppers on).  We used a marker to draw a line on each side of the paper and later use a ruler to measure from line to line.  We numbered our peppers 1, 2 and 3.  Measure them week by week so you can see how much they grow in one week.

IMG_20140512_113850497

IMG_20140510_191016269 IMG_20140510_190829946

IMG_20140510_191123344_HDR

How does your garden grow???  How have you involved your children in your garden?

Food Fun

Hi!  I’m Casey from Kidspired Creations!  I have been a guest blogger a few times on The Mommy Teacher am very excited to now be co-blogging with Jessica!  I am a former Pre-Kindergarten and Kindergarten teacher and am currently a stay-at-home Mom of 3 little ones ages 5, 3 and 10 months.

I have to admit that despite my best attempts, not all of my Mommy Teacher moments get the best reception from my kids.  I think if I say, “Let’s make a pattern!” one more time, my 3-year-old might throw a toddler tornado-sized tantrum.

IMG_6932[1] Yes, my kids can get burnt out on lessons from this Mommy Teacher; however, I know how to win them over every time:  food, particularly pizza.

I recently saw a recipe on Pinterest that involved cutting zucchini in half long ways, carving out the insides and filling them with various deliciousness.  I decided that these “zucchini boats” would make great pizza crusts!   This idea perked interest with my kids so quickly that I couldn’t prep fast enough.

Zucchini Boat Pizzas

-Ingredients:  zucchini, pepperoni, mozzarella, pizza sauce

-Pre-heat oven to 350 degrees.  Cut zucchini long ways and spoon out a trench on the inside.  Spread a few spoonfuls of pizza sauce inside.  Fill with mozzarella cheese.  Top with pepperonis.  Place on the oven for 15-20 minutes or until zucchini is tender.

Easy peasy… and so delicious that even my super-picky 3-year-old was digging into the “green crust.”

Here are the different skills we covered while making our pizzas:

Math IMG_6931[1]

– Sequencing: “What is the first step to making our pizza?  What comes next?”

– Measuring:  “How long is our zucchini?  Let’s measure in pepperonis.”

– Adding:  “Our pizza needs 3 pepperonis.  There are 2 pepperonis on the pizza now.  How many more do we need to add to make 3?”

-Counting:  “How many pepperonis are on your pizza?”  How many pepperonis are there all together?”

-Multiplying:  (for the school-aged child)  “If we have 3 pepperonis on 10 pizzas, how many pepperonis are there all together?”

-Time:  “Our pizzas need to cook for 20 minutes.  Let’s set the timer.”

Motor Skill Development IMG_6928[1]

-Pouring and spreading the sauce with a spoon

-Sprinkling the cheese using our fingers

-Using the pincer grasp to separate the pepperonis

Language Skills

-Sequencing Vocabulary:  first, second, next, then, last, before, after etc.

Health and Nutrition:  Learning about making healthy choices by substituting with fresh vegetables and what food groups are being included in dinner

Following Directions and Recipes:  Following step-by-step or a series of directions is different than following one direction at a time.  “So, I put the pepperonis on first right???  No?  Well, what do the directions tell me to do?”  You can take this a step further than I did by drawing or writing out the recipe for your child to have a visual to follow.

Social Behaviors:  being a happy helper in the house!  It is important for kids to take ownership over household tasks and doing it with a happy heart!

* * * IMG_6933[1]

My kids do not like to try new things, but since they made the dish themselves they were eager to dig right in!  More surprisingly was my 3-year-old who didn’t shed any tears before his taste test!  That’s quite an accomplishment at our dinner table!  Everyone was happy… even the baby who got pureed zucchini that was scooped out of the middle of our boats.  Bonus!


Using Words To Describe Directionality

A lot of parents assume their super verbal and proficient little ones have a wider speaking vocabulary than listening vocabulary.  It is not that your little one doesn’t “know” the words they are looking for, but there are certain language concepts that are not yet part of their speaking vocabulary.

For instance, if I asked your little one to look “under” the table to find my pencil, he or she probably wouldn’t hesitate.  Your little one probably knows the word “under” in context enough to search in the direction that I am referring to.  Or, if I am “under” a table and I asked your little one where I was he or she might state, “Under the table” using the position word “under.”  But, in the context that I had a doll “under” something and asked your little one to describe where the doll is in their words.  He/she may or may not use words to describe directionality like (under, next to, through, between, back, on top, over, above, etc.)

So, to work on developing this skill through a natural progression from head knowledge to incorporating these words into their oral voacbulary and using them abstractly, I am going to give you a series of position word activities using pictures of Casey’s little ones because she is such an awesome mommy teacher – check out her kidspiration blog 🙂

1) Playing Copy Cat Games:  Casey loves to play these games with her little “Leyson man.”  This is very similar to “simon says” – ask your little one to copy you as you place your hands “Over” your head, “between” your knees, “beside” your cheeks, etc.


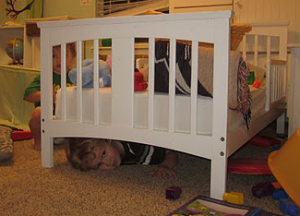
Casey's little one, James, hiding under the bed!

2) Hide and Seek: Hide a toy and give directions using position words for your little one to find it, “The block is between the couch pillows.”

3) Act it out with your whole body:  “Can you hide under the bed?  Can you climb on top of the stool?  Can you jump over the pillow?”  This part of the activity helps little ones meet the needs of learning through movement!Casey’s little one, Leyson, practicing position words with his farm animals!

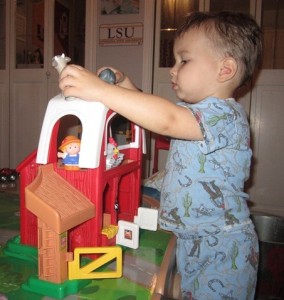
Casey's little one, Leyson, practicing position words with his farm animals!

 4) Act it out with toys:  “Can your cow jump over the farmhouse? Can your pig squeeze through the doorway?”  This helps the little ones needs to learn in a hands-on way!

5) Use words to give directions: Place something (like a doll’s purse) between two chairs, then dialogue with your little one “Pretend that I cant find the Barbie’s favorite purse, but you know where it is!  Without showing me, can you use your words to tell me where it is?”

Pledge Your Allegiance With Your Kids

September 11th is a day that I want to recognize and commemorate by sharing the ways that I have always taught kids about our allegiance to our nation:

Even though I quoted the Pledge of Allegiance EVERY day in grade school verbatim, I still didn’t have a clue what the meaning of it was until about the 4th grade because of the higher order vocab like “allegiance, republic, indivisible, etc.”  You can start introducing a wider vocabulary to kids at a younger age as long as you connect the meaning to those words in multiple ways.  For the pledge (teaching about our allegiance to America), you can do this using:

Activities and Lessons

Books

Pictures

Sign language

Videos

and by using the words in context more often.

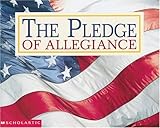
The Pledge of Allegiance

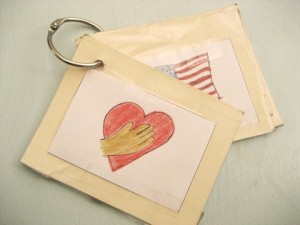
Hubbard’s Cupboard has my favorite pictures for kids that are simple and that you can even incorporate into a book printable.  The printables I use most are the “day 2” printables and hey, they are FREE 🙂

You can also put these pictures on cards, whole punch the corner of the cards, and put them on a binder ring to flip each card as you say the pledge.

Can I get a “God Bless America!!!” ???


Uses for a Picture Dictionary

Lately I have been staring at my little one’s picture dictionary and deciding that I am not going to let it collect dust when there ARE plenty of uses for them….no matter your child’s age!

In case you don’t believe me, I was sitting in the back seat with my 15 month old the other day and the only book I had in the back to get him out of his cranky mood was a picture dictionary that I bought at a garage sale.  SO, I decided, let’s practice his oral vocabulary and build on it a little. * I know I know….only a mommy teacher would think this way.  I picked it up, opened to a page with a few familiar images (ball, balloon, banana, etc.) and I started pointing and naming the images he knew with clear enunciation of each word – giving him enough time to repeat me.

He is really articulate for 15 months and has a great memory; so, I thought, hmm…I wonder how long I can make this last if I make a game out of it.
Starting with the pictures he knew, I asked him “Where is the ball?”  I watched his eyes search the page, and then, a light bulb went off!  He pointed to the ball and said “baaaaaaaaawwwwww” in the long, dragged out way he always says ball.  I was so proud, as every biased mother would be! We did this same routine for several other pictures that he knew, for about 10 minutes, and every time we repeated this process on a new page I would introduce one unfamiliar picture.

For those of you cheering “more more!” here are some more ideas:

1)   Have your little one use it as a research tool when they want to find out how to spell something “let’s find the picture under the letter that it starts with and see how it is spelled in a book!”

2)  Play “I spy” a picture that is made up of the sounds /b//e//d/ or /b/ /ed/

Or I spy a picture that has that word “at” in it’s name “bat!”

3)  Get ideas for a letter study….help your little one make a “B” (or any letter) poster and get ideas of what you might draw on the B poster from the picture dictionary.

4)  With your little one’s eyes closed, open the book and randomly place their finger on a picture, see if your little one can sound it out without looking at the word and then check the word beside the picture to see how many sounds “matched.”

Related Posts Plugin for WordPress, Blogger...

1 2