This weekend we went to a birthday party for a big boy 4 year old! Now, since I have 5 and 3 year old boys, I am all too familiar with the likes and interests for little boys this age. It can be pretty frustrating, actually. You buy a gift that is say, $20, and they are more interested in playing with the plastic parts, twist ties and cardboard packaging that it came in.
Two Christmases ago, we hit the idea jackpot for least expensive Santa gift ever… a spy kit! I bought cheap canvas backpacks from Hobby Lobby for $10 a piece and ironed on letters that spelled Agent J and Agent L. Then I filled them with all sorts of random junk from the Dollar Store! $30 per child… not bad at all! So before I went to the store, I was searching the house, trying to decide what my boys’ FAVORITE toys are, and what did I see littered all over my messy house? The contents of their spy kits! I think a Mini-Spy Kit is PERFECT for Austin, the birthday boy!
And BONUS: the idea of a spy kit encourages imaginative or pretend play which is really important for your child’s Physical, Linguistic, Emotional, Academic and Social Education (PLEASE) and development. Here is a great article on the importance of Imaginative Play in Early Childhood.
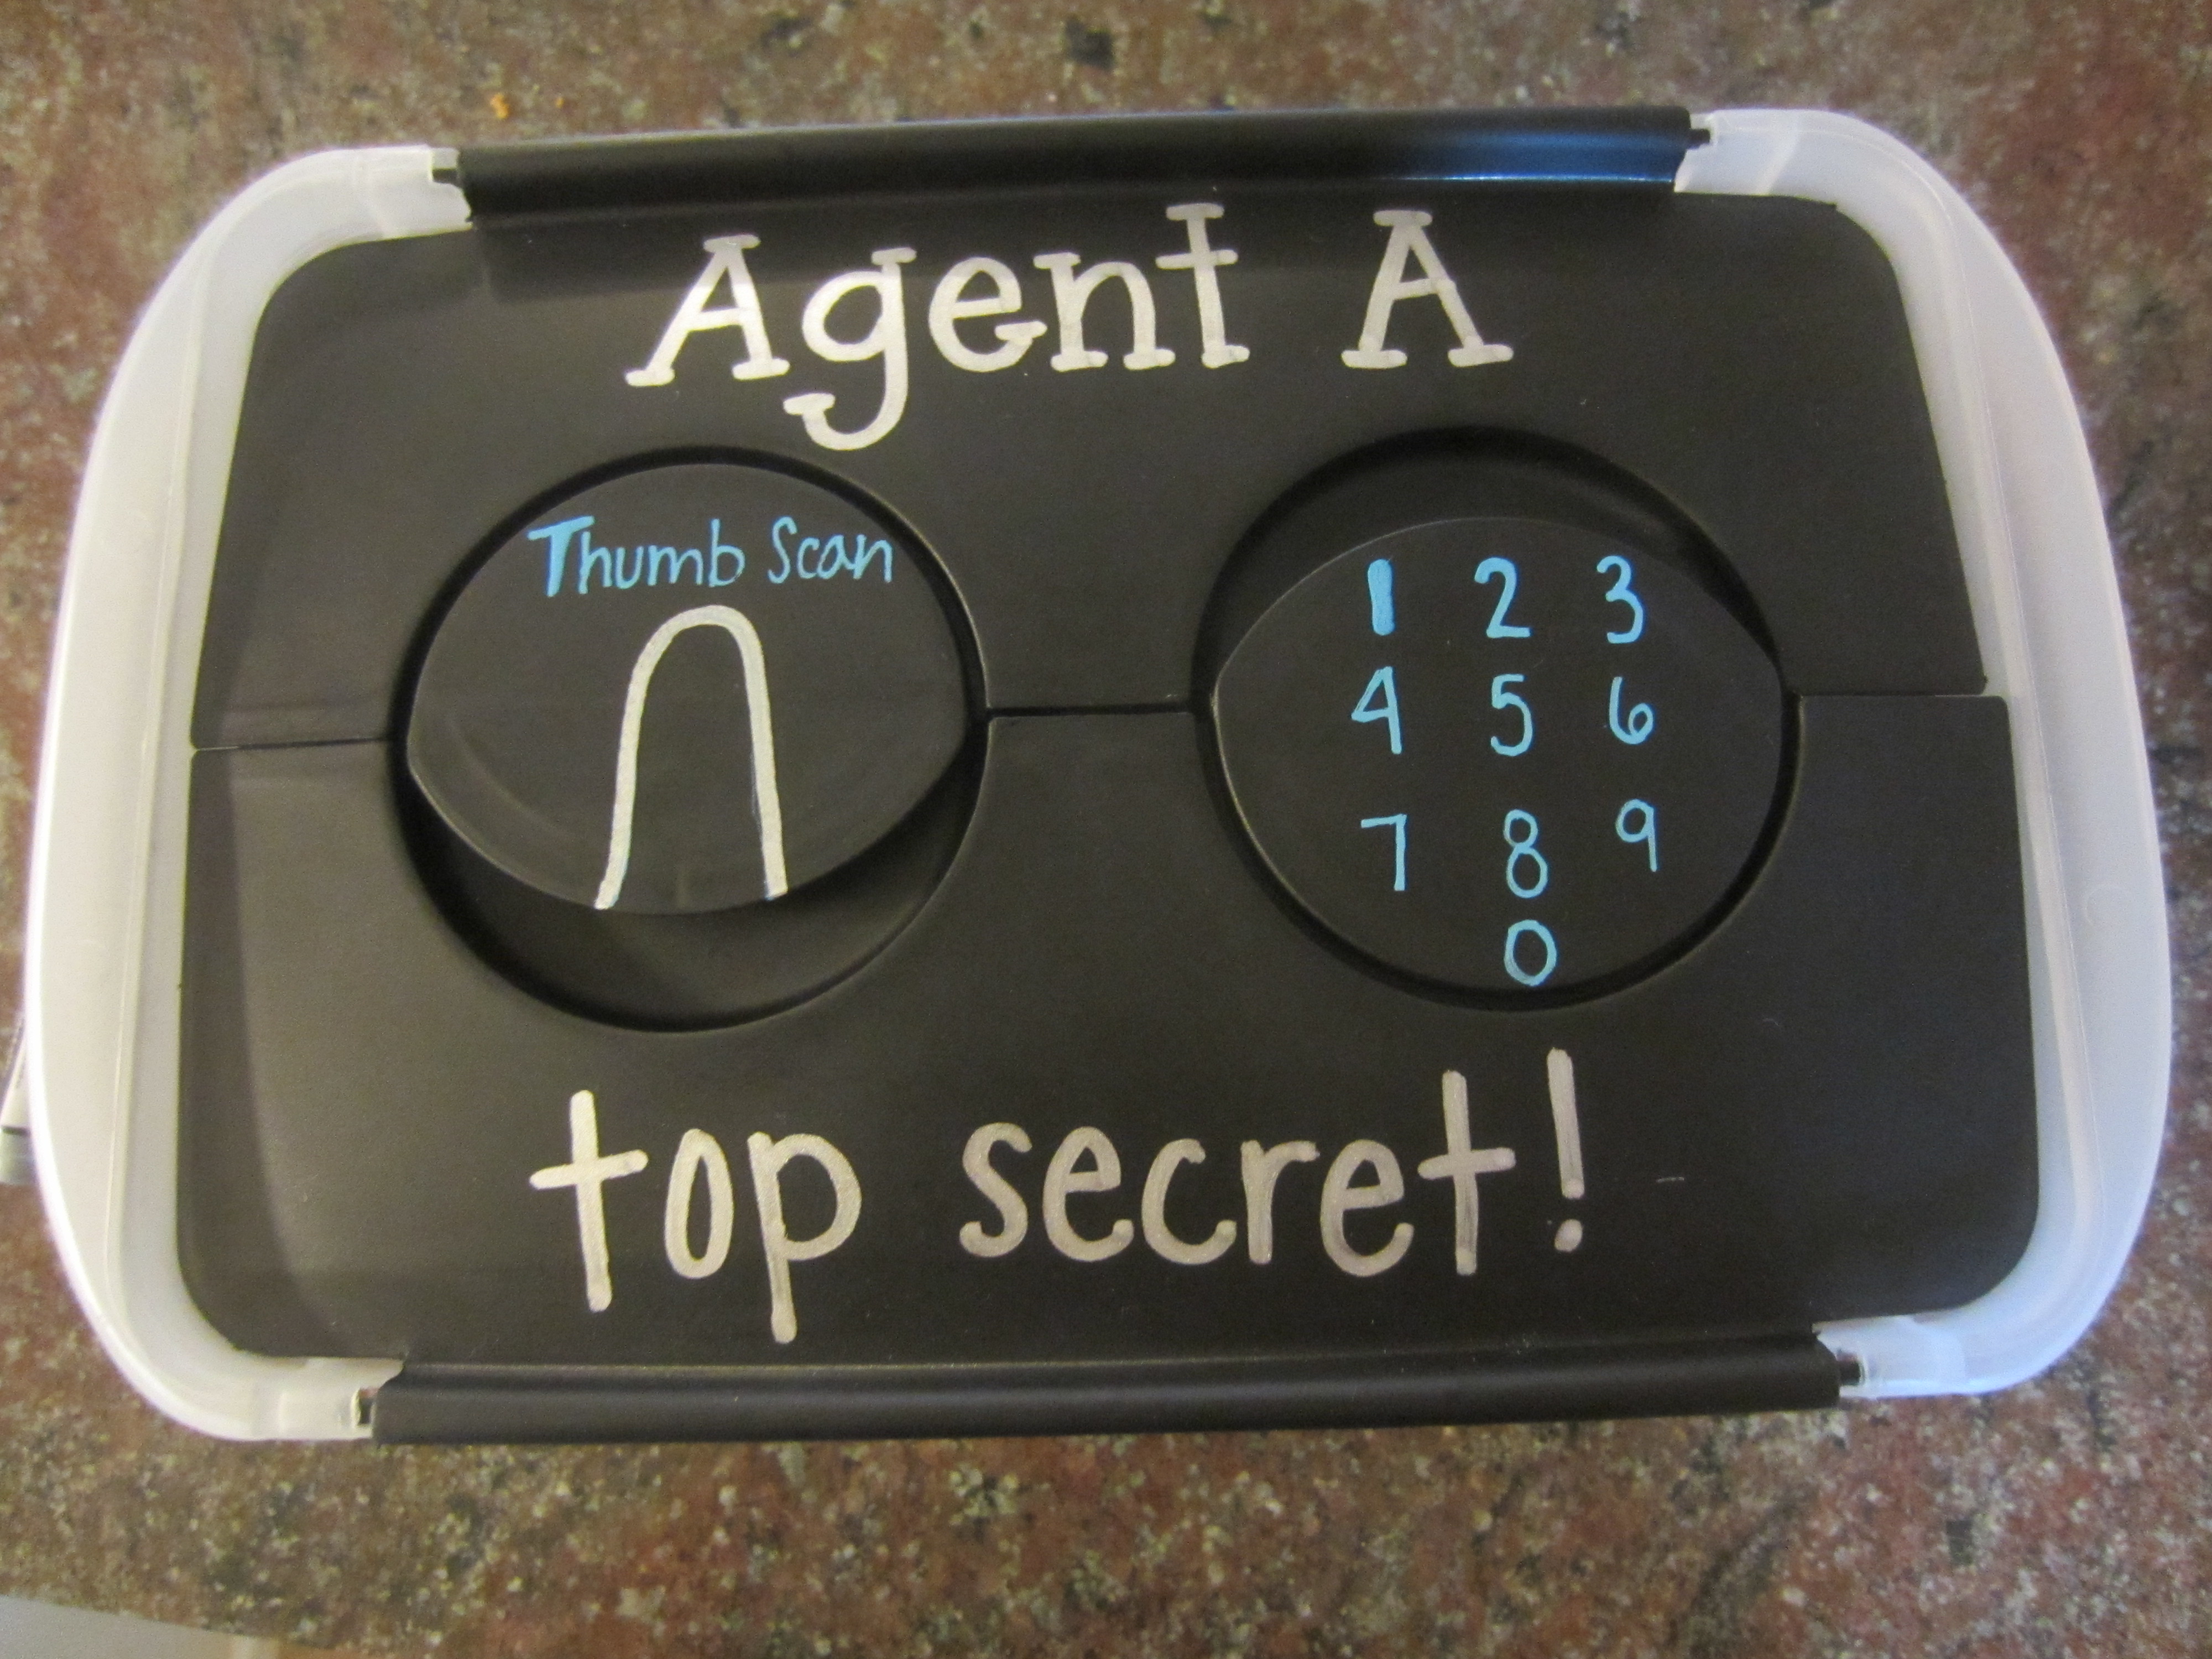
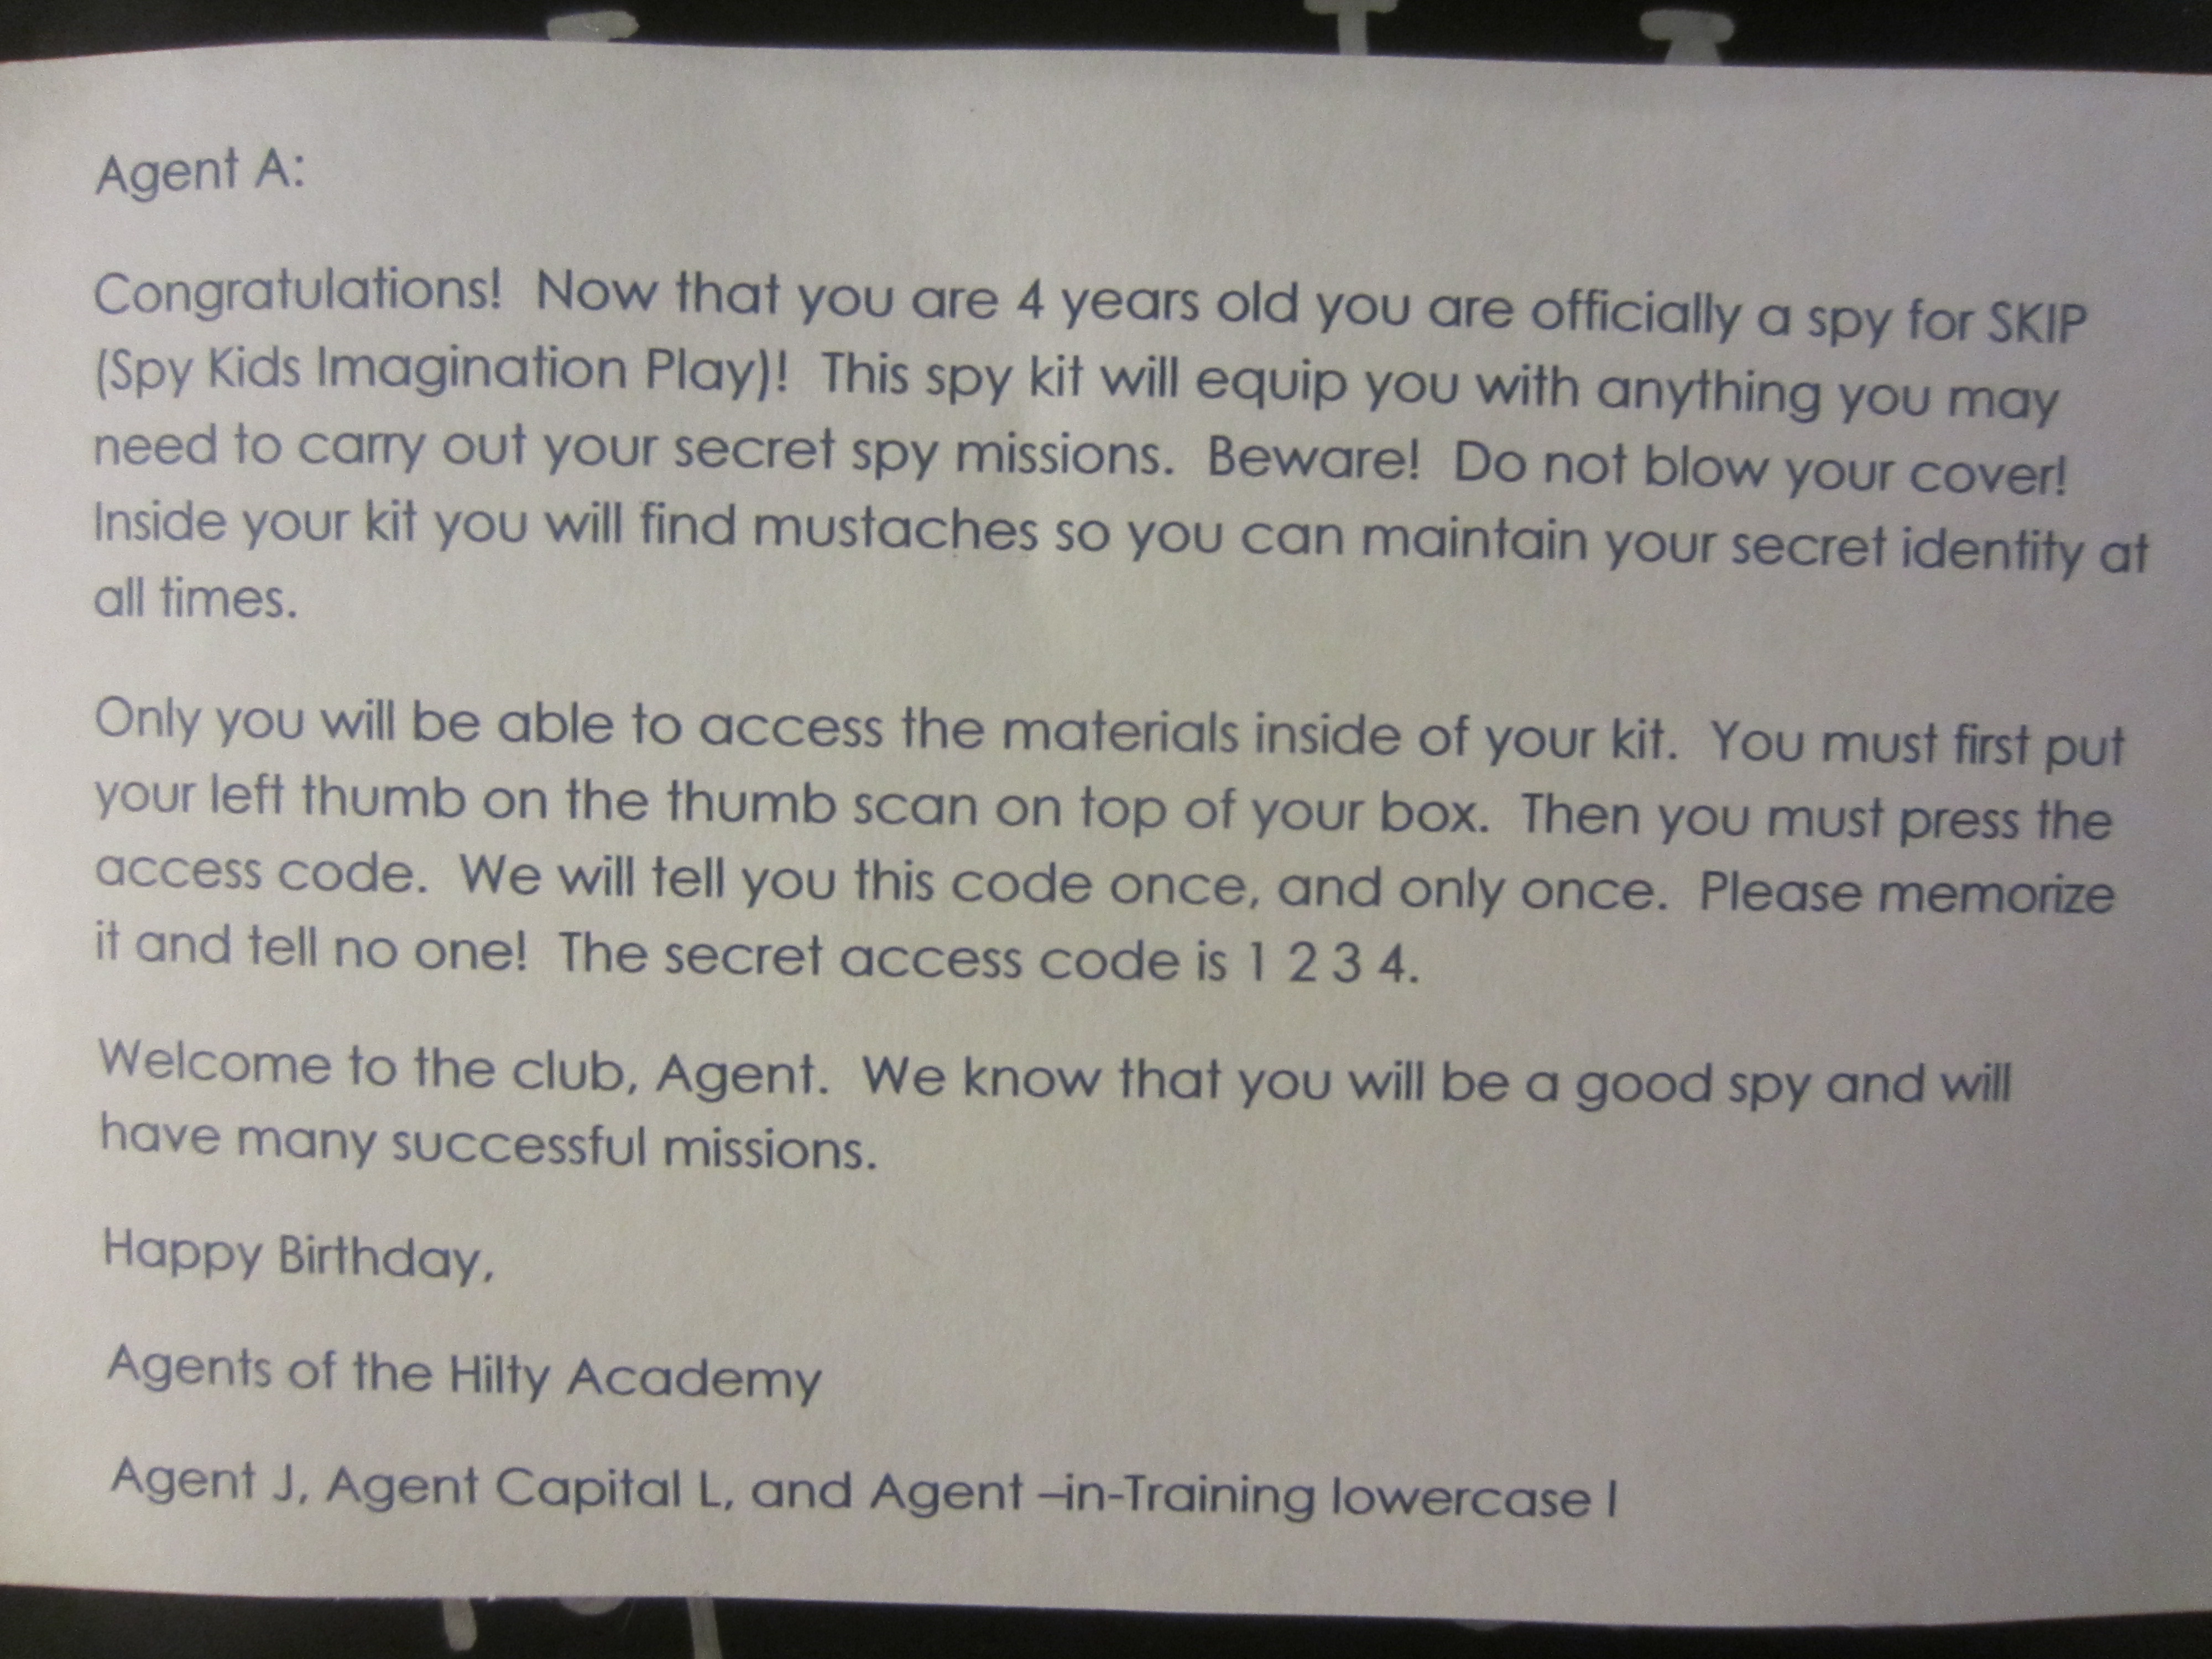
Agent A is now an official member of SKIP (Spy Kit Imaginative Play)!
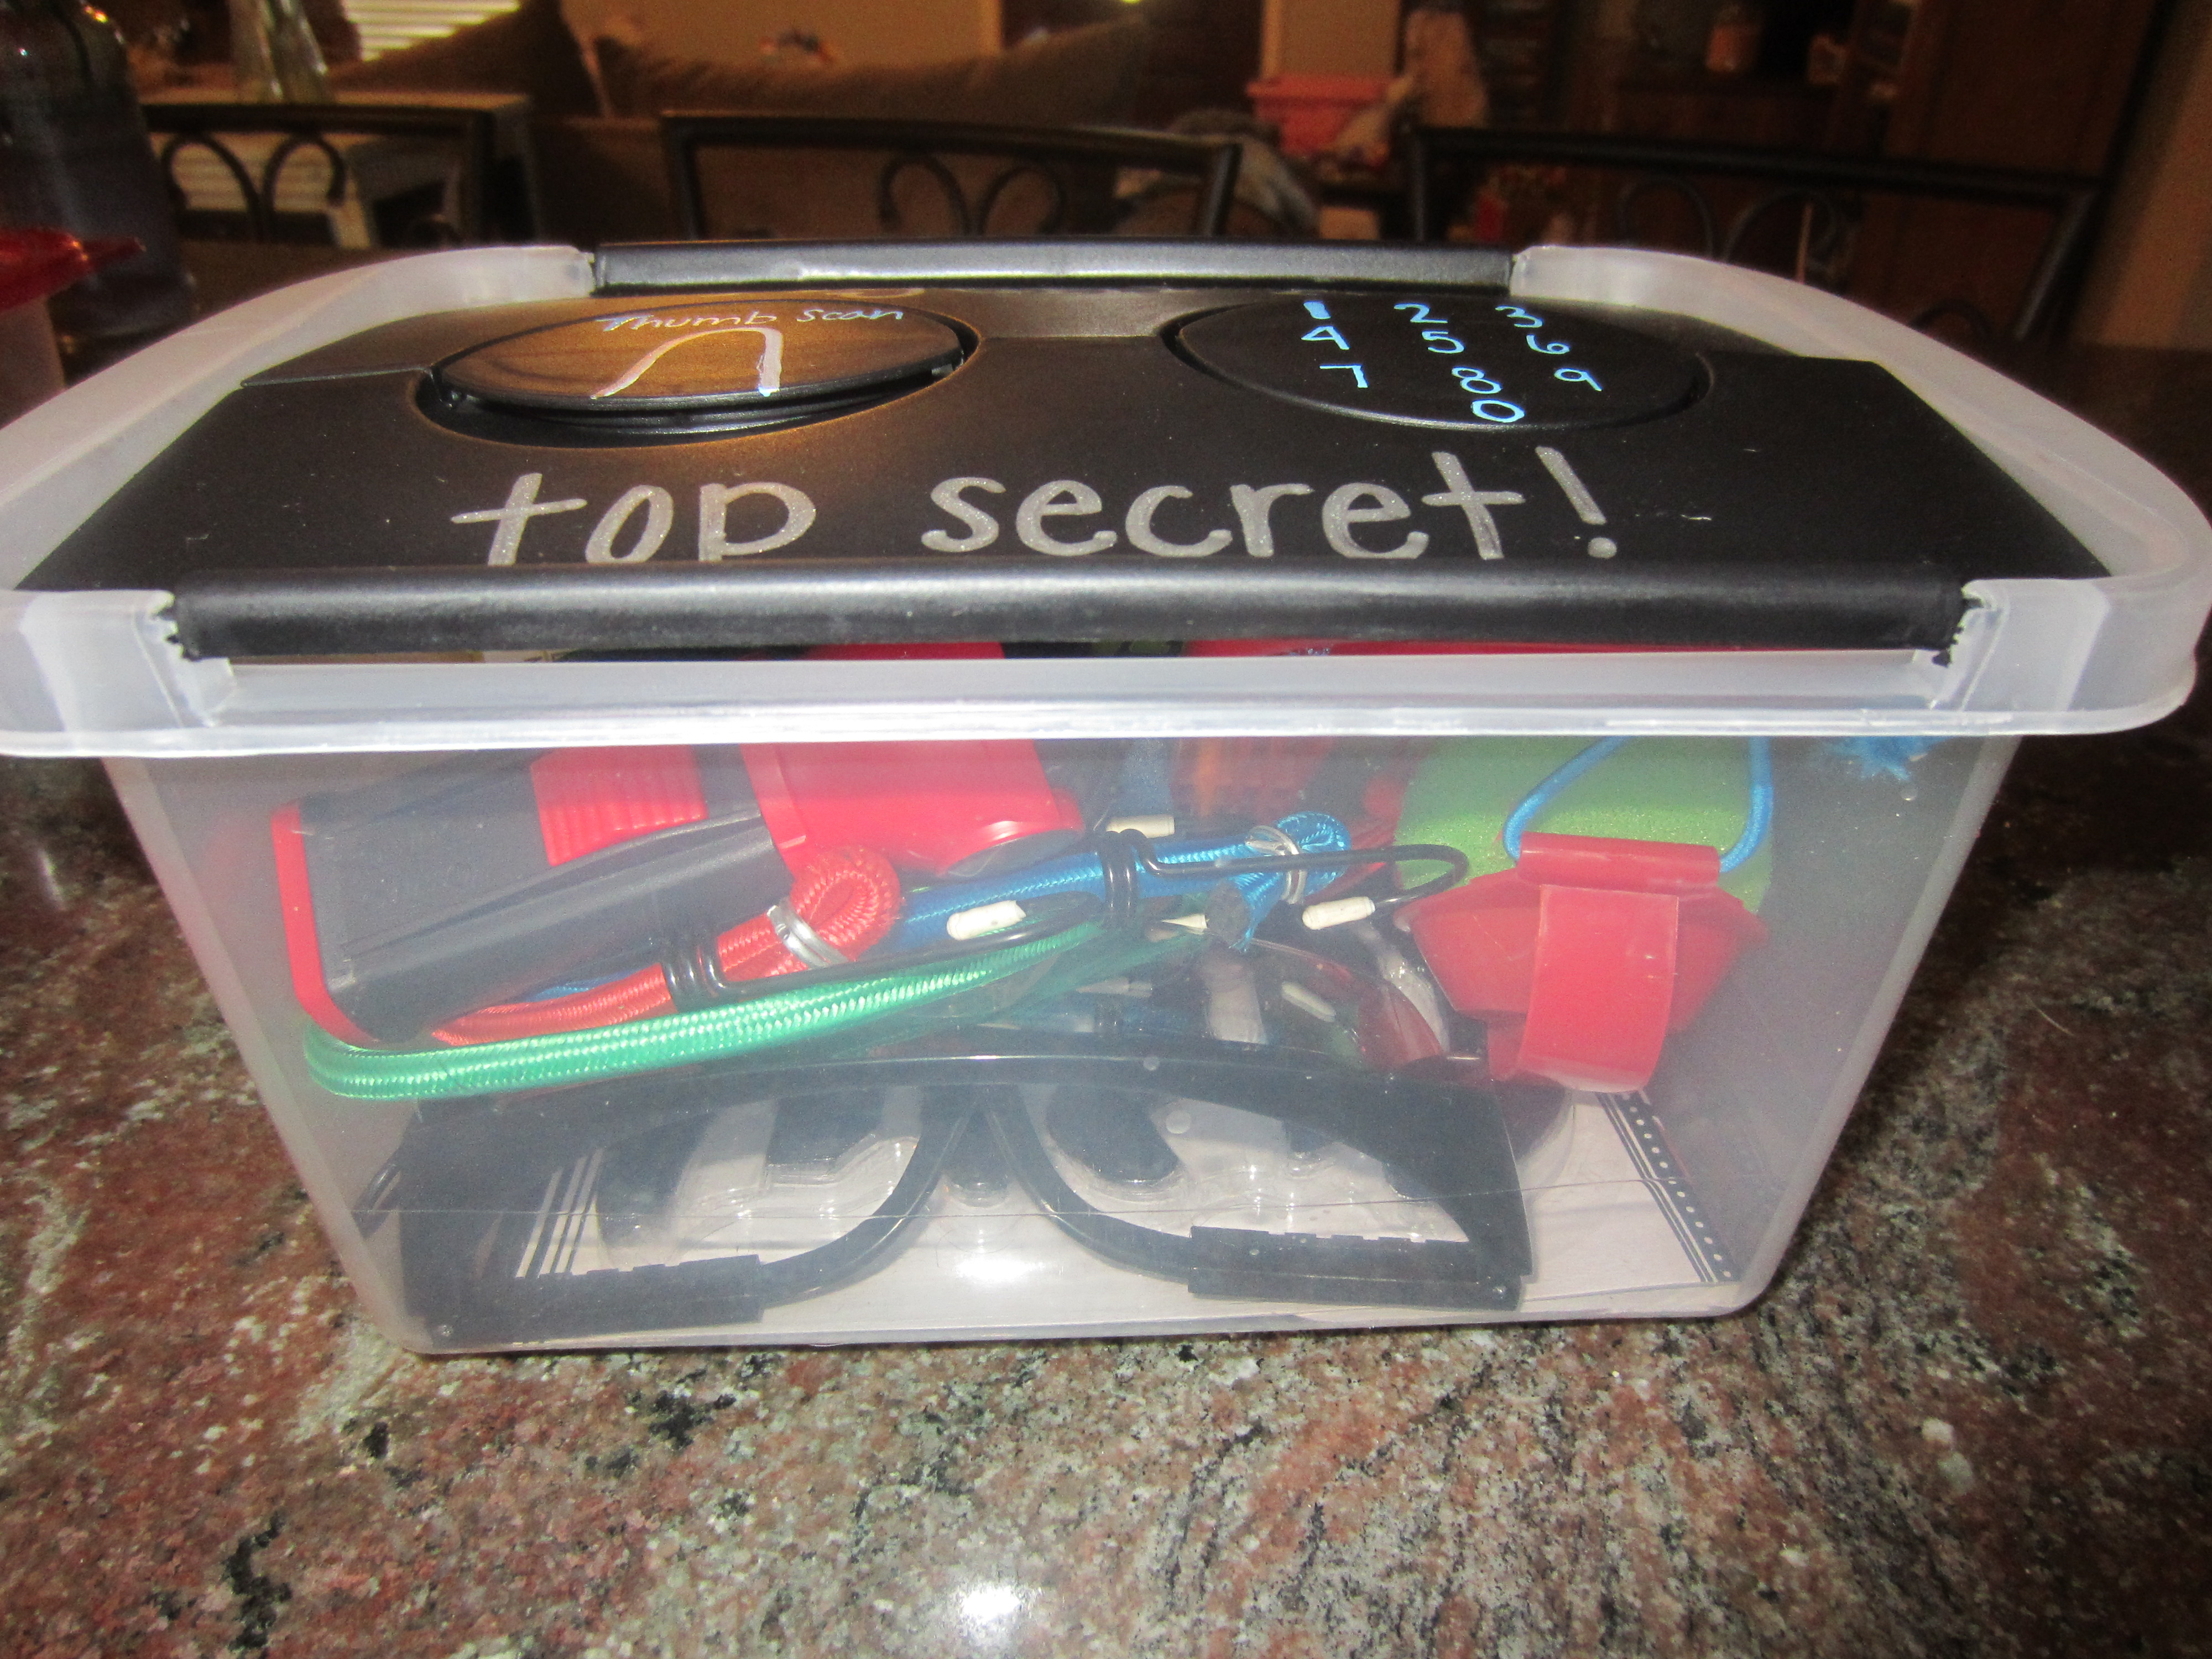
All secret agents need to have sole access to their kits via a thumb scan and number code.
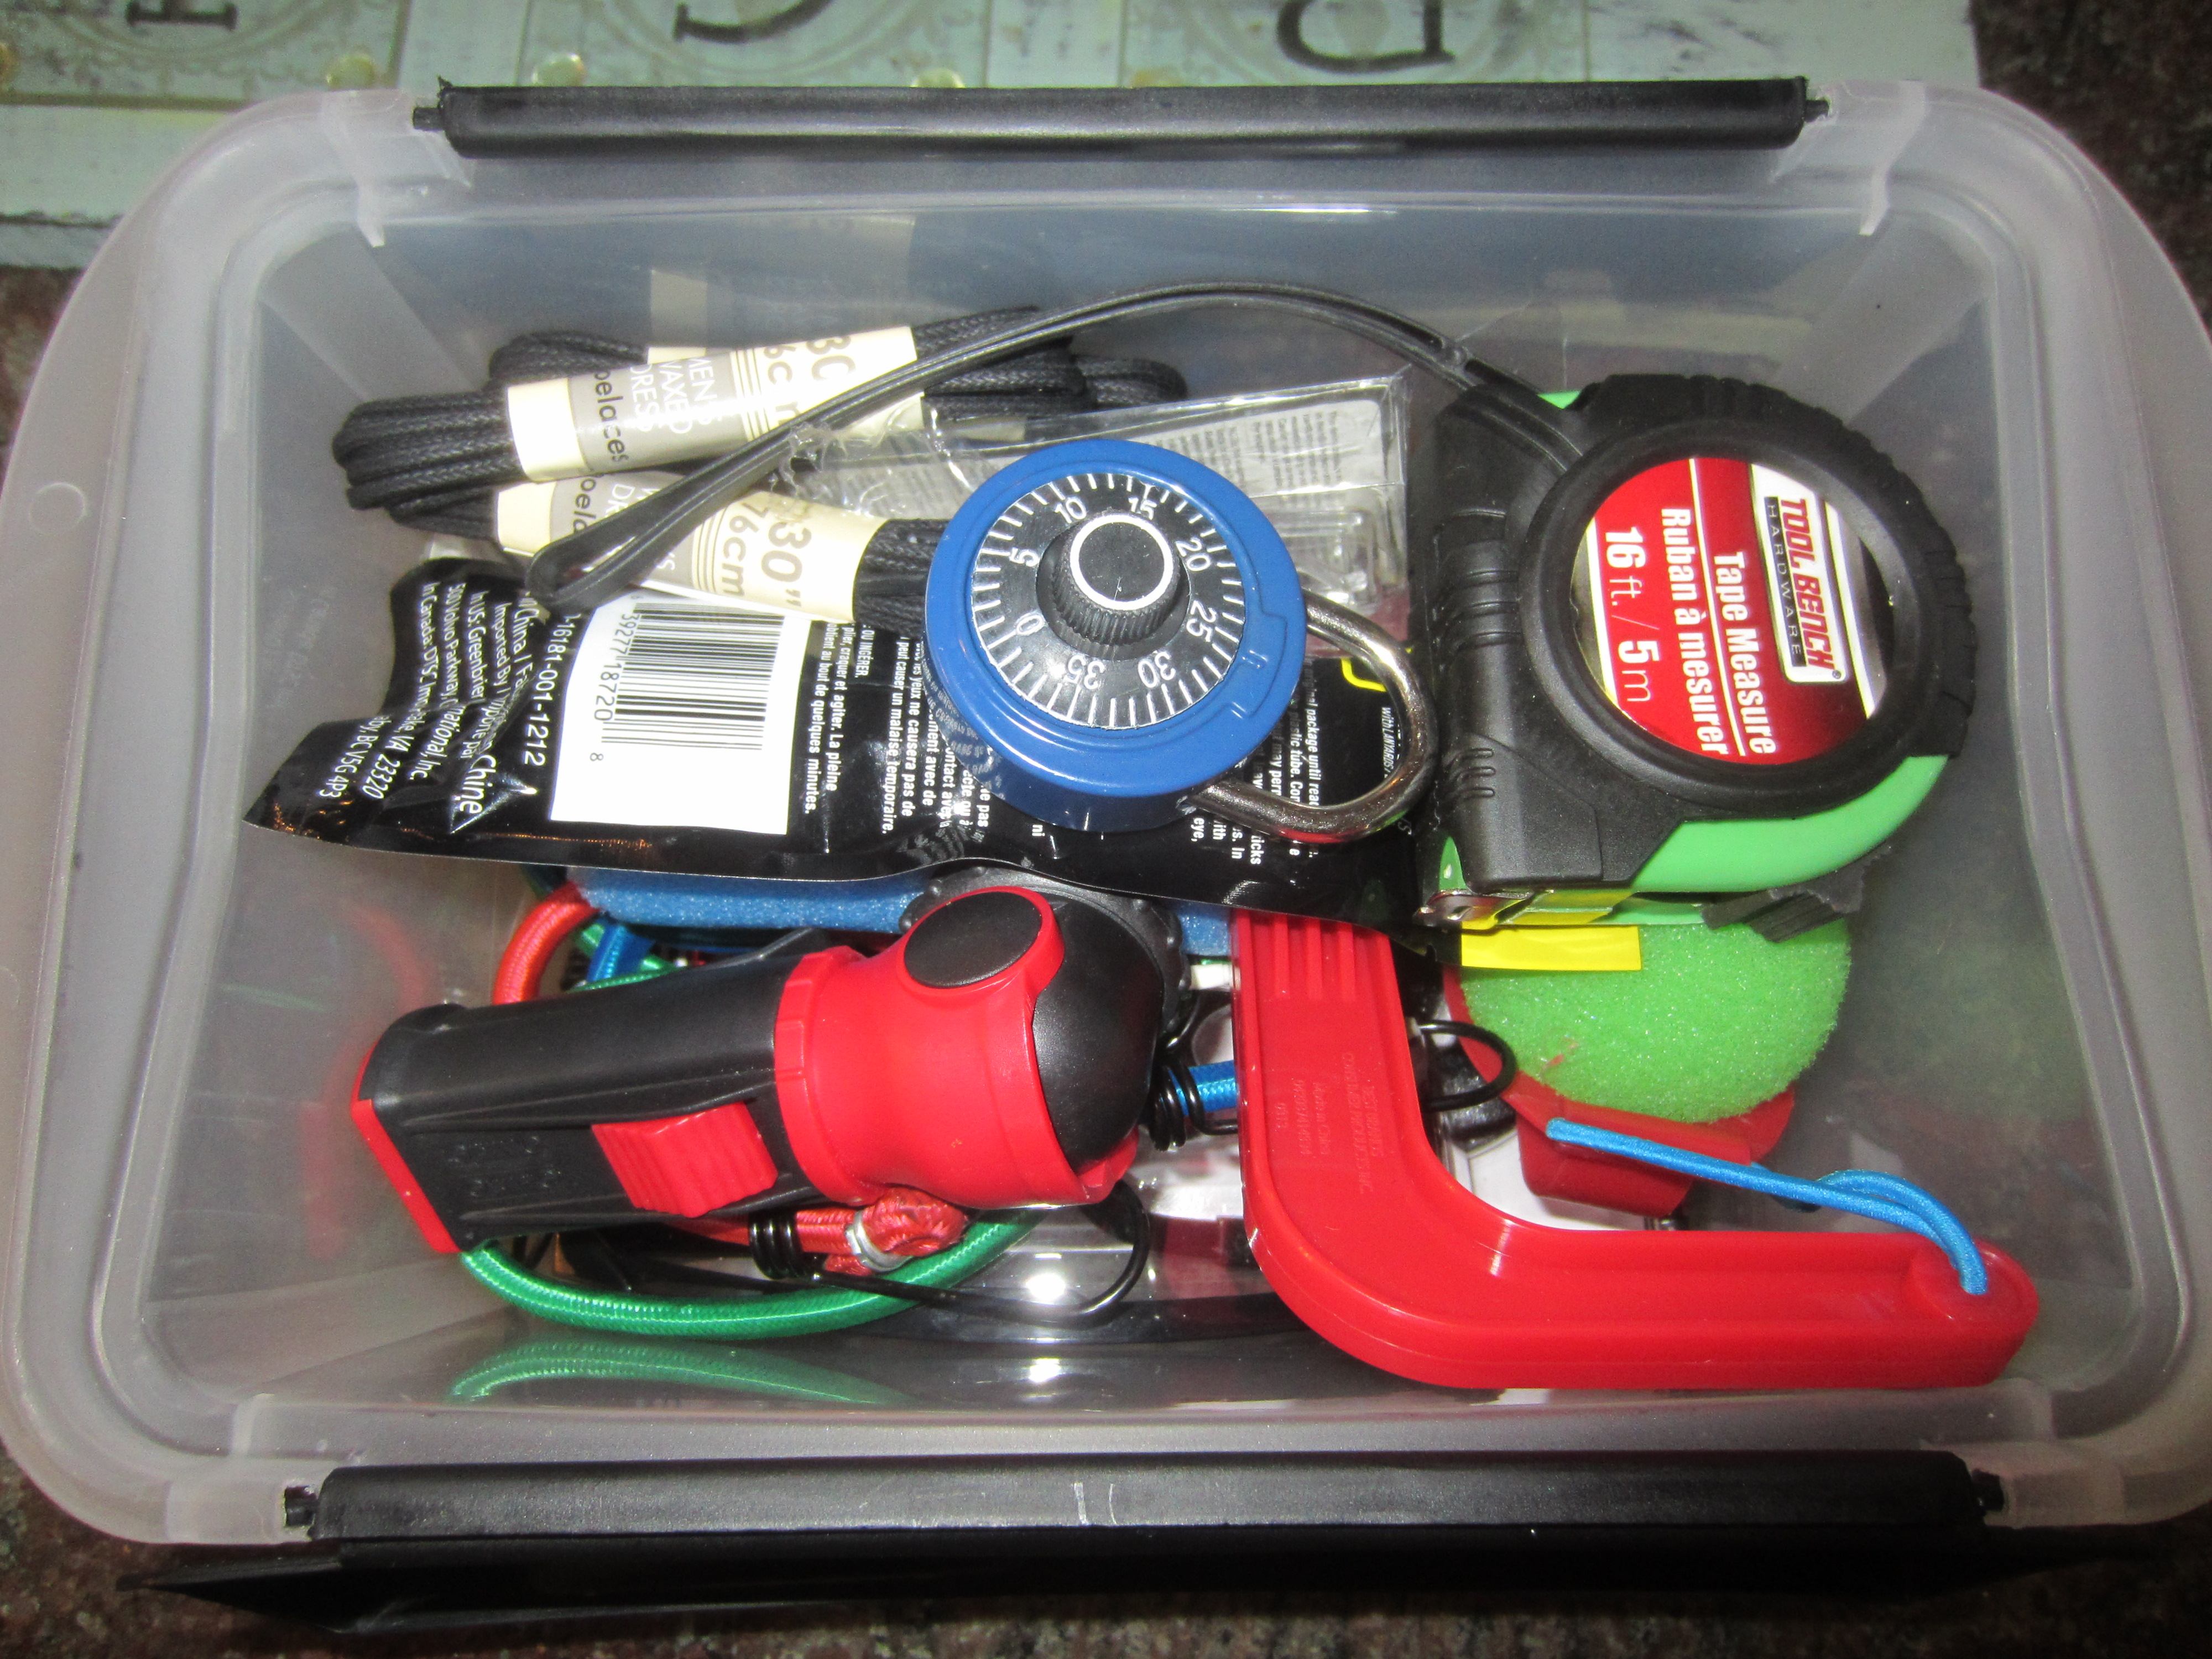
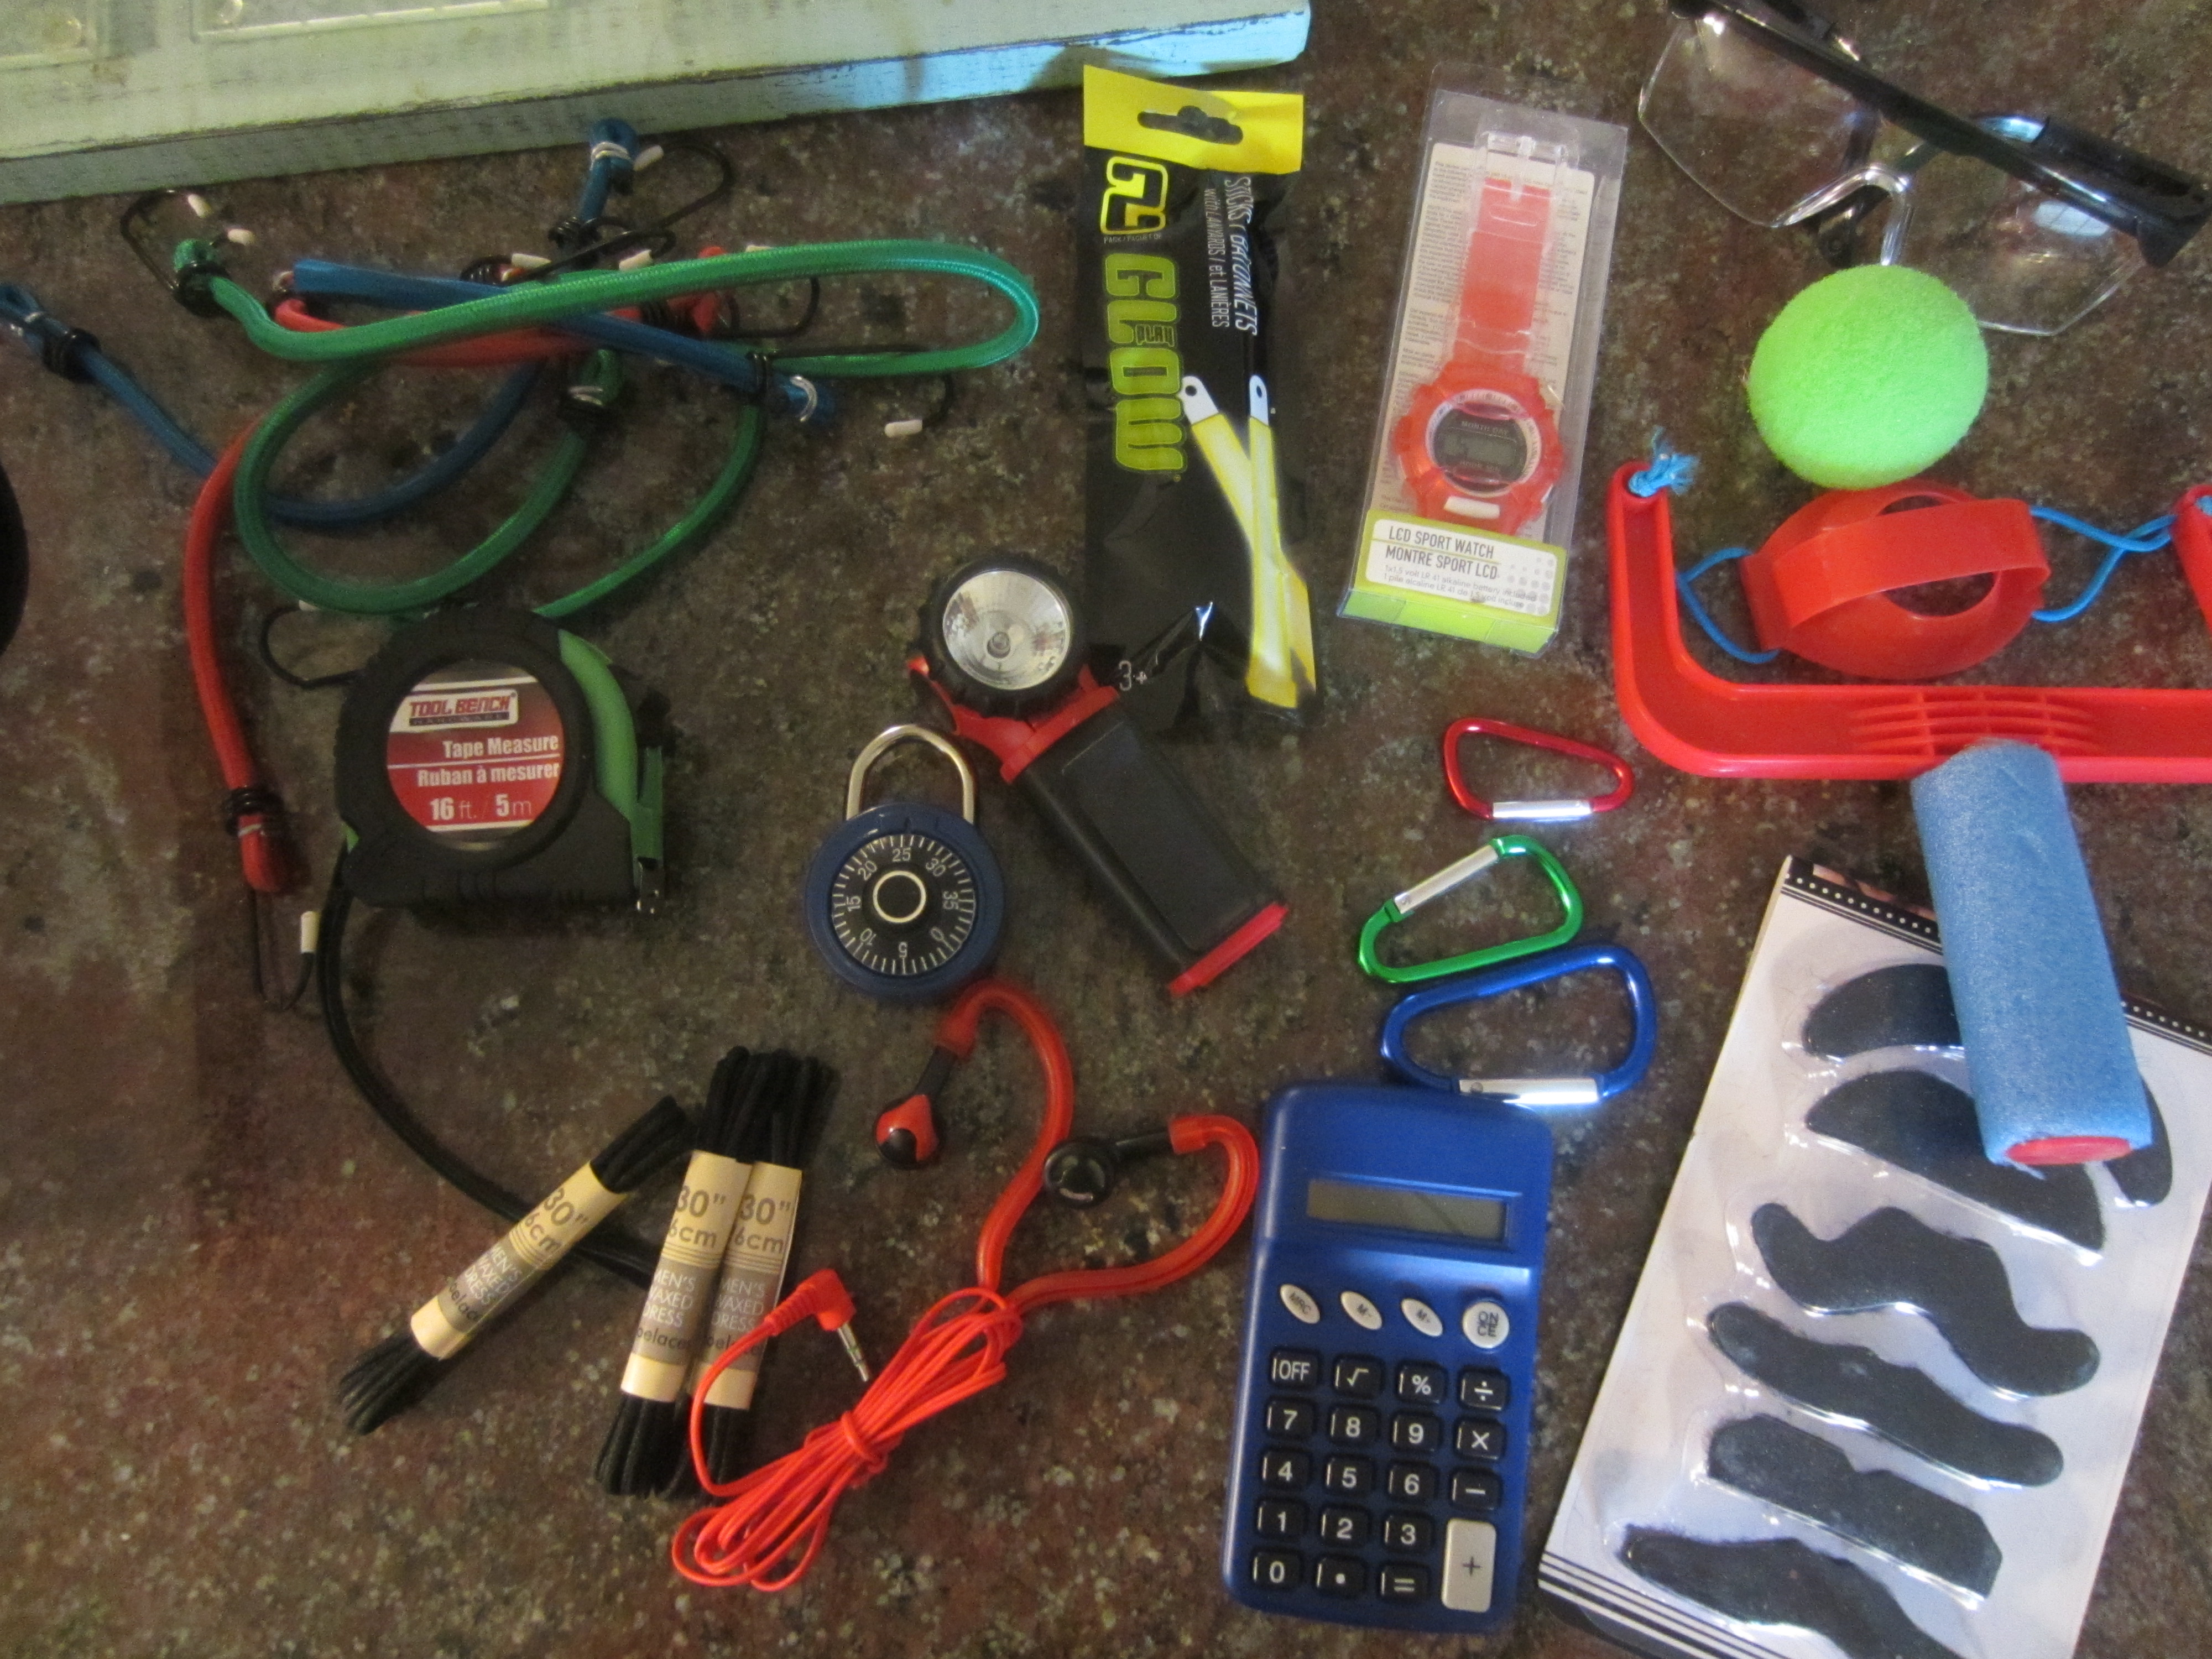
Contents: bungee cords, tape measure, shoe laces, combination lock, glow sticks, flashlight, ear phones, watch, calculator, slingshot, mustaches (to maintain their secret identities), key clamps, safety glasses. You can add as many or as few items as you wish!
I taped this letter to the top and copied the text below. Feel free to copy and paste this into a word document, add your own agent names and print for your own use! You’re welcome!
Free for your own use to copy and paste in a word document. Remember to replace the bold words to meet your needs:
Agent A:
Congratulations! Now that you are 4 years old you are officially a spy for SKIP (Spy Kids Imaginative Play)! This spy kit will equip you with anything you may need to carry out your secret spy missions. Beware! Do not blow your cover! Inside your kit you will find mustaches so you can maintain your secret identity at all times.
Only you will be able to access the materials inside of your kit. You must first put your left thumb on the thumb scan on top of your box. Then you must press the access code. We will tell you this code once, and only once. Please memorize it and tell no one! The secret access code is 1 2 3 4.
Welcome to the club, Agent. We know that you will be a good spy and will have many successful missions.
Happy Birthday,
Agents of the SKIP Academy
Agent J, Agent Capital L, and Agent-in-Training lowercase l
July 19th is my oldest son’s 6th birthday – OR as I like to call it – my 6th anniversary of becoming a MOM! Birthdays are a BIG DEAL to us mommies, too – mostly because of the HUGE milestone ::tear:: of our babies becoming a whole number older – and partly because of the huge expense on the bank account of throwing a birthday bash. And with 3 kids ::YIKES!:: it can be downright brutal to the piggy bank labeled, “parties.” This is why I spaced my kids out evenly throughout the year (joking… I mean, not even I could have planned that one out)… but we do save up for each party… February-April for Baby Girl’s spring birthday, May-July for Big Bear’s summer birthday, and August-October for Little Man’s fall birthday… so, yup… we spend all year SAVING for birthdays, yet we STILL party plan on a small budget.
Now, let’s see… 5 + 3 = 8 boy parties (plus that one year where my oldest got two parties… so make that 9 boy parties and this year I got to throw my very first GIRL party… but before I share with you the details of the latest party I just threw, I want to give you a great way to plan on a BUDGET! You ready?
Plan around what you already have!
Now sometimes it takes a little bit of creativity to see trash around your house and figure out a way to turn it into an awesome party detail, but open your mind and you’ll be surprised what you come up with!
Here are a few examples:
I introduce to you, the magical party power of trash!
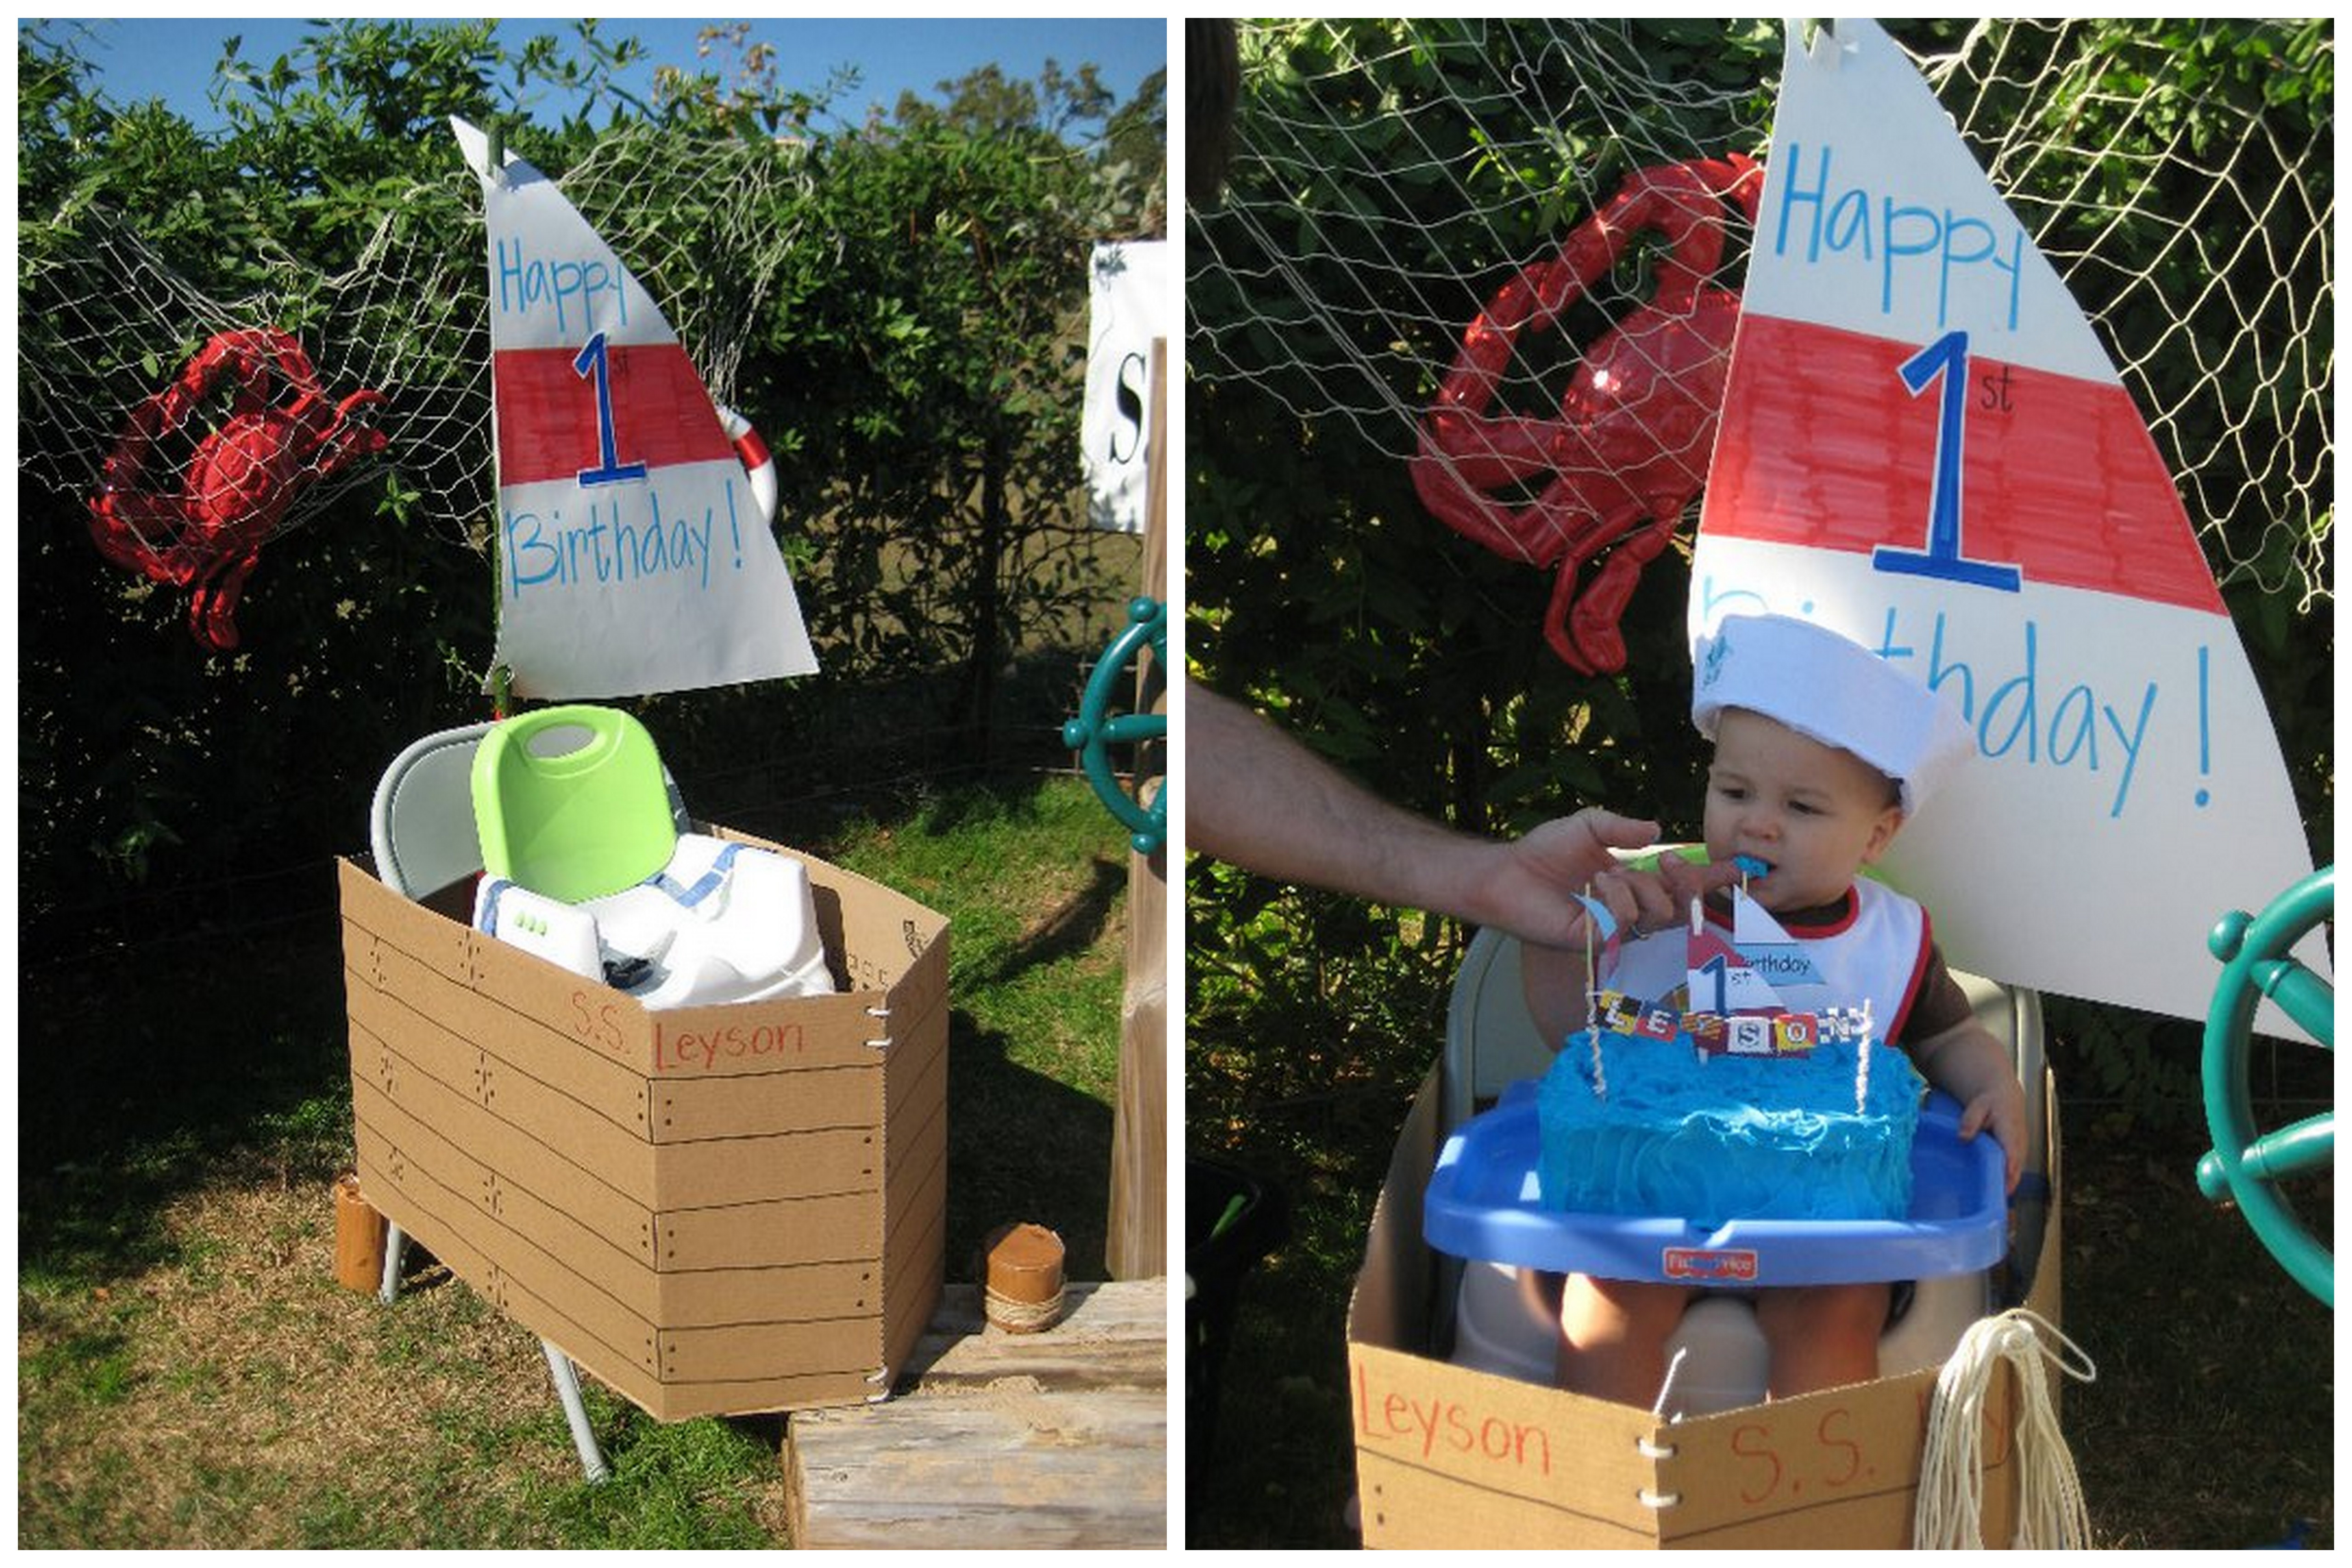
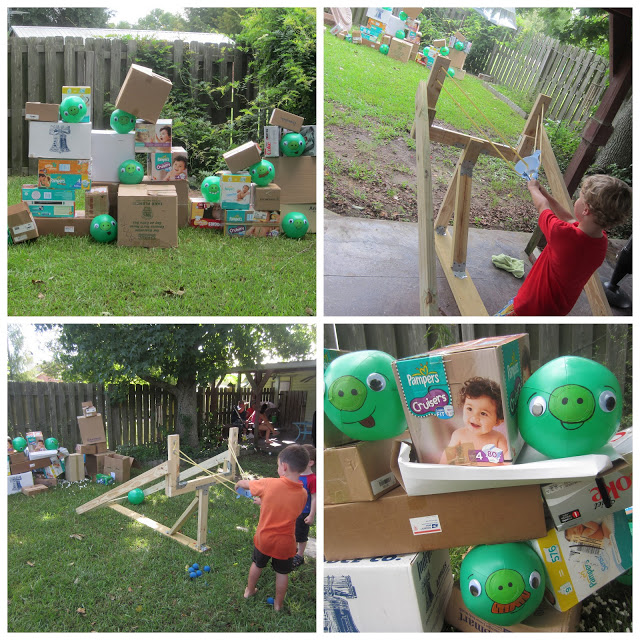
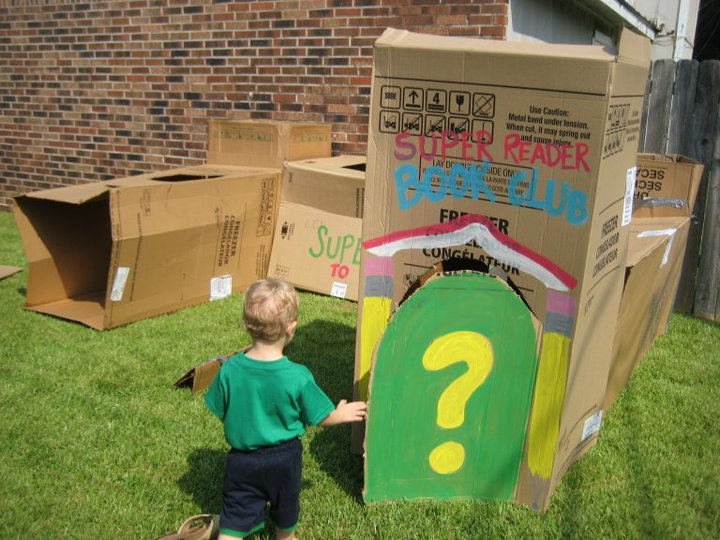
Cardboard Boxes
Cardboard Box turned Sailboat High Chair
Cardboard Box Piggy Fort for an Angry Birds Party (Notice all of the FREE diaper boxes on that fort!)
Contact your local appliance store for extra large boxes for a Super Why Super Readers Book Club!
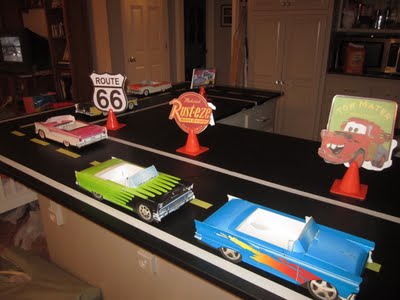
Plastic (dollar store) Table Cloths
Black table cloth + masking tape = road for snack trays cars! (Cars were found at a local diner that serves kids’ meals in cars)
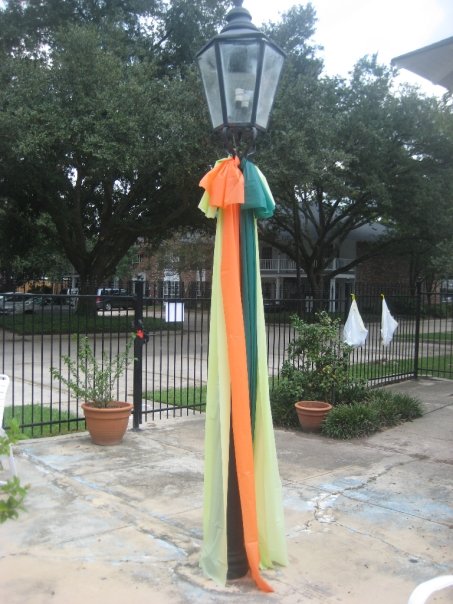
Plastic table cloths can add colorful, weather-proof decor to your outdoor party!
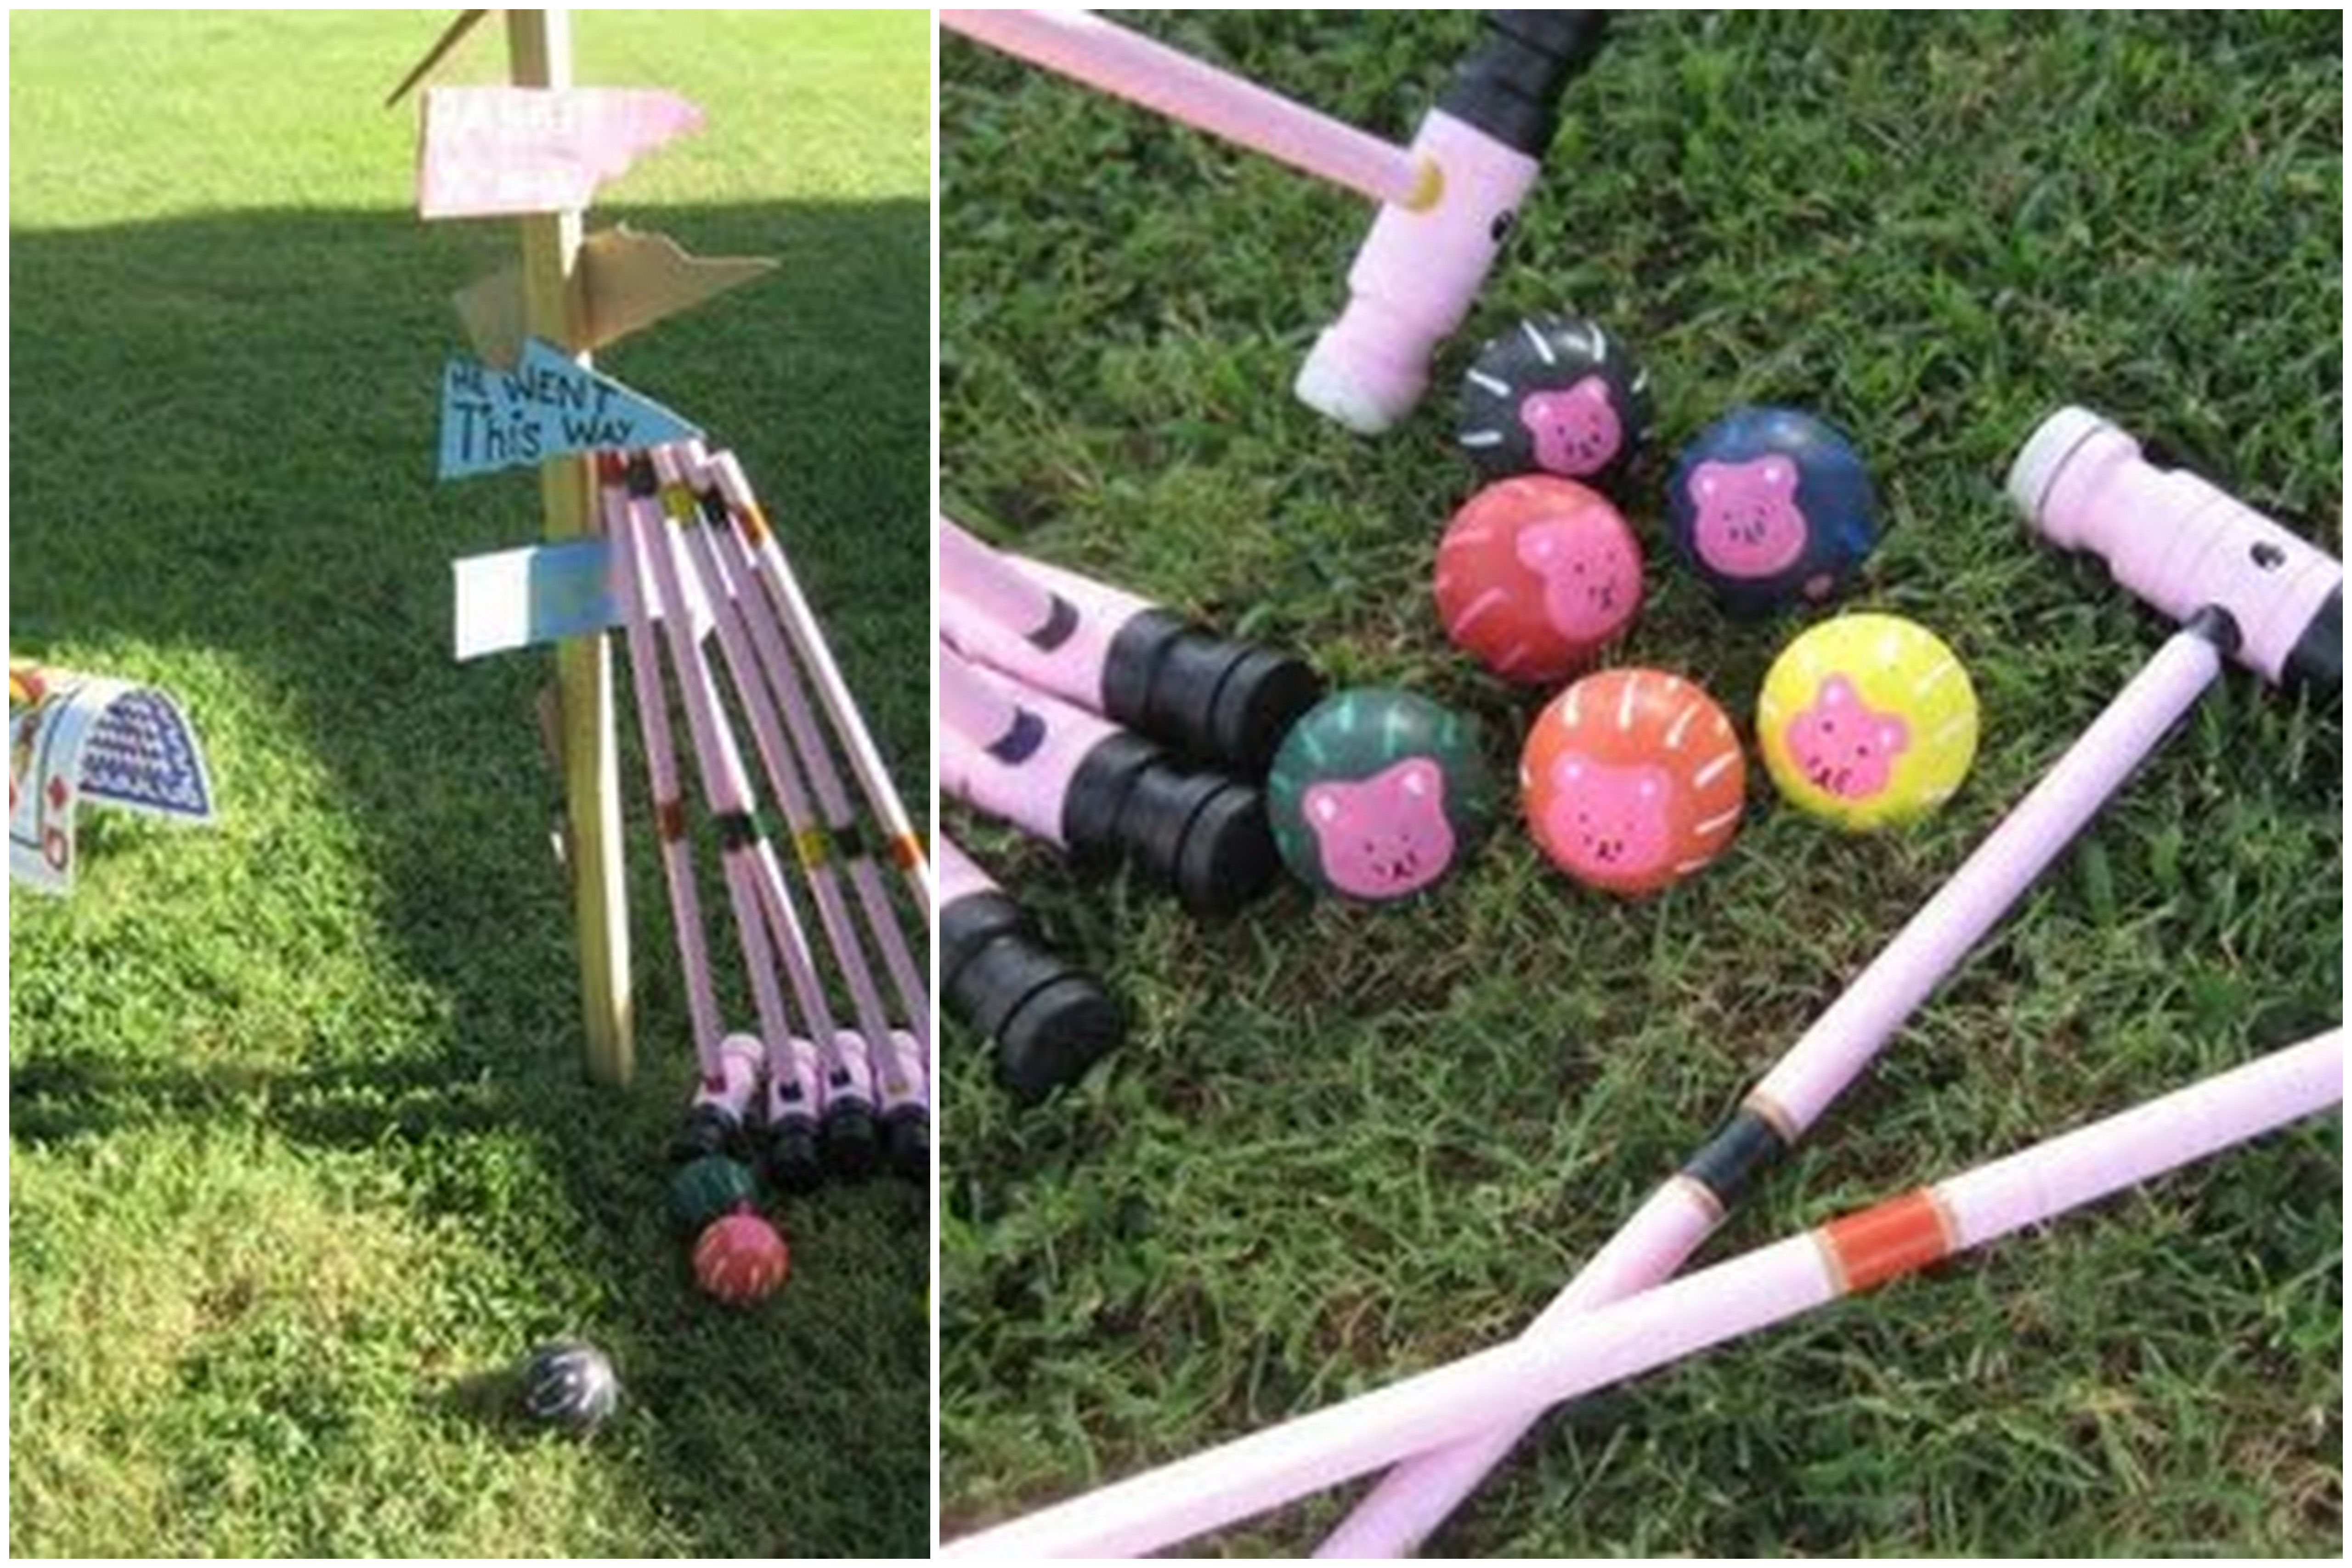
An Unused Croquet Set
Add some pink paint to a croquet set and you are ready to go for an Alice in Wonderland themed party! (the giant cards for wickets were purchased at a local party store)
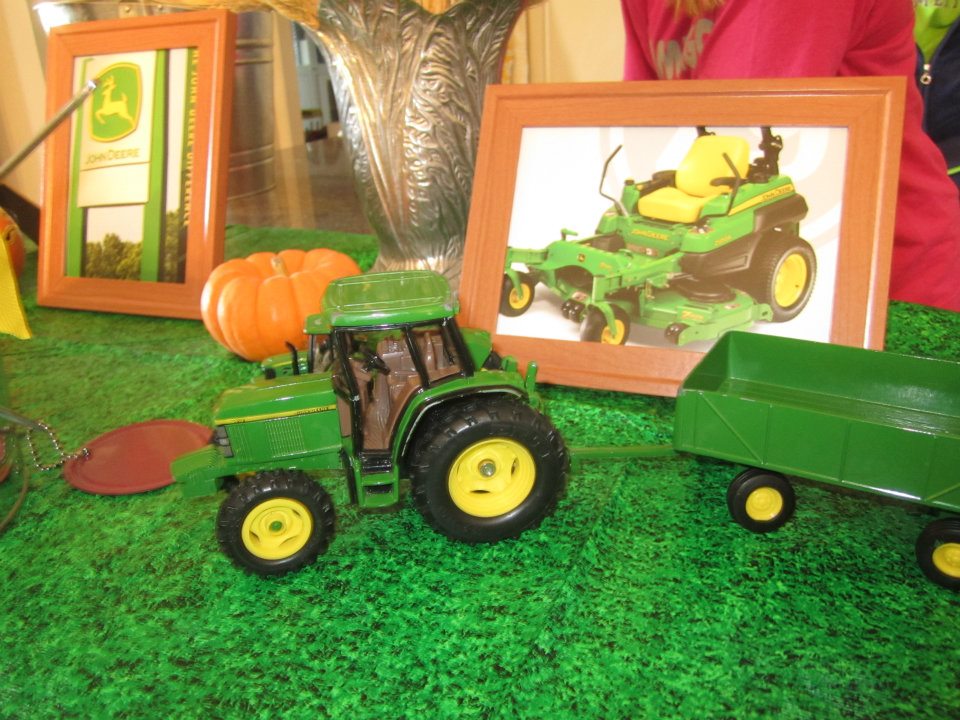
Brochures
I used a John Deere brochure to cut out pictures and put them in dollar store frames to use as decor around the food and cake tables for a Tractor-themed party.
and my personal favorite,
Weeds!!!
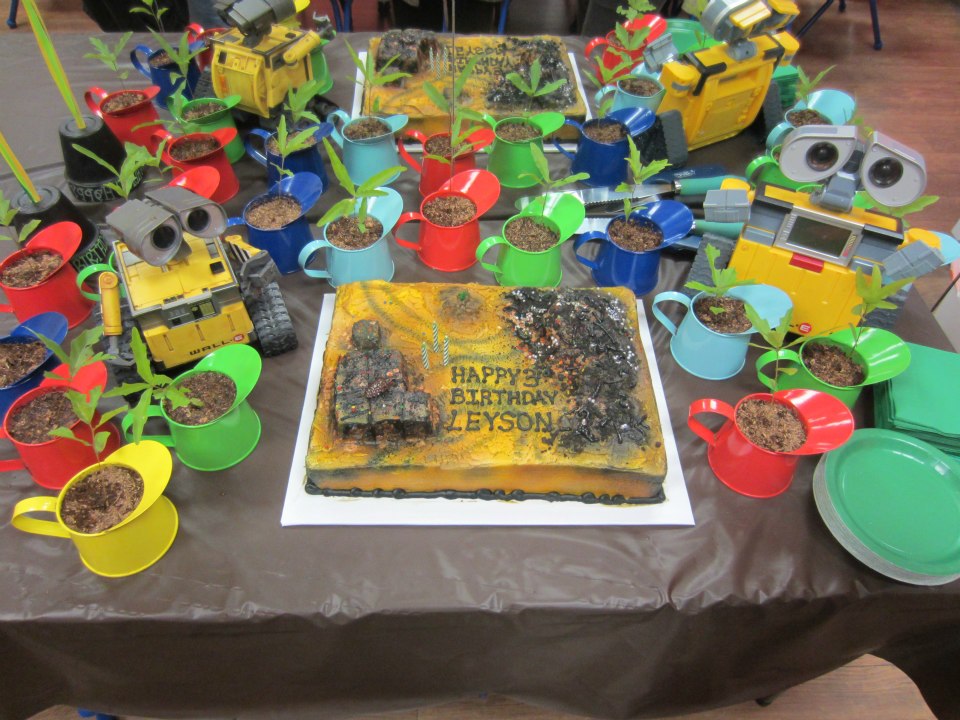
Having a broken lawn mower for a few months led us to discover that hundreds of tiny oak trees were growing in our yard – perfect for a Wall:E party!
Speaking of the Wall:E party, we reused the colorful watering can decor from the Angry Birds party and planted the trees inside (seen above). Recycle what you can from one party to the next!
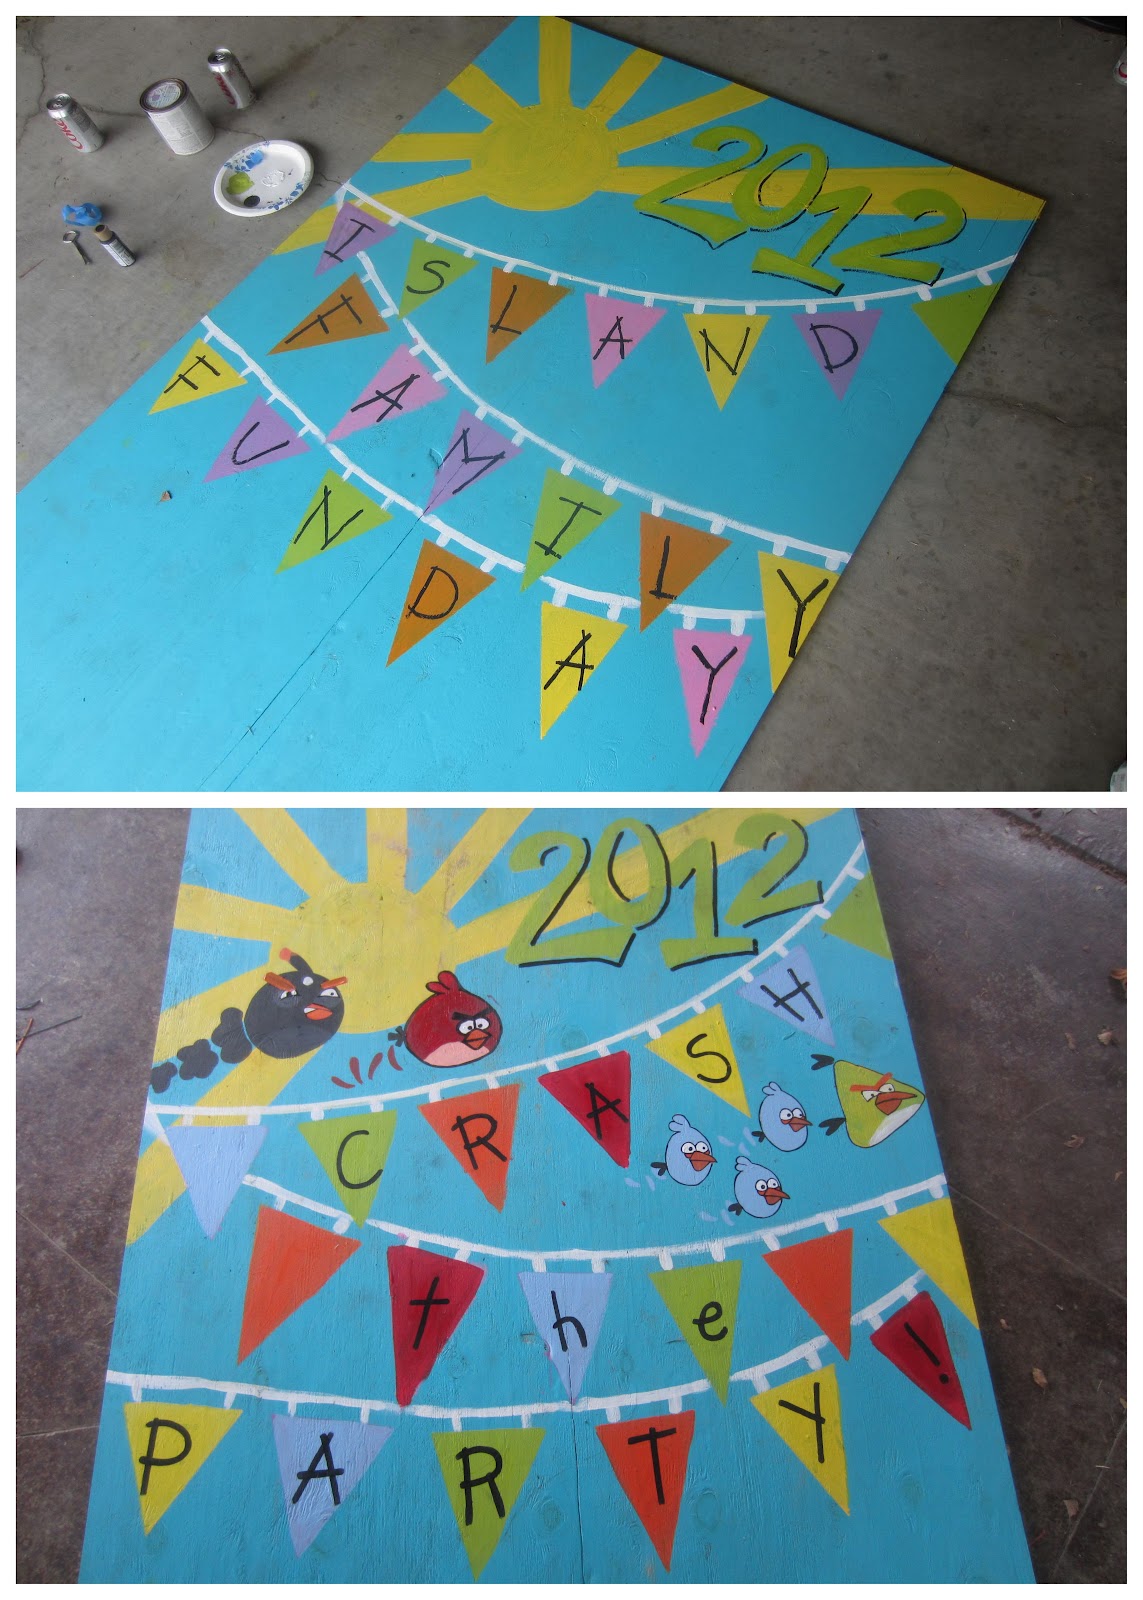
I painted this backdrop for my husband’s company picnic and for some reason it found it’s way back home with us. A month later, I was able to reuse it for my son’s Angry Bird party by just painting a few Angry Birds on it and changing the words on the banner! It was easier than making a whole new backdrop!
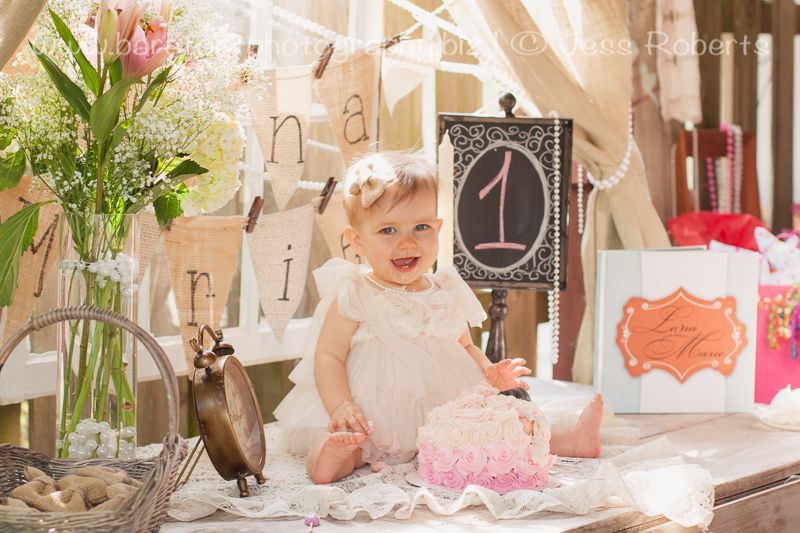
Last week, we celebrated my baby girl’s FIRST birthday! (Fastest year of my LIFE, I’m telling you!) The day could not have been more perfect! And though I wanted to do every single little thing I saw on Pinterest for her first birthday, I had to stick to a strict budget.
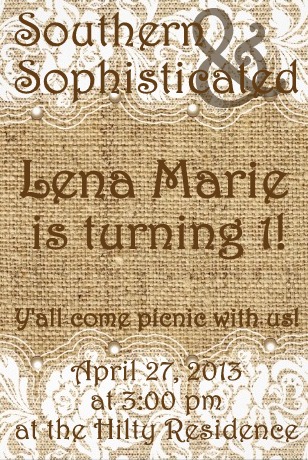
I kind of lucked out, though. See, a few years ago when my sister and brother-in-law got married, we decorated the whole wedding with BURLAP, so what do you do with BOXES of burlap lying around your house? You throw a Southern & Sophisticated party for your daughter!
I always make my own invitations on the computer and upload them to Walgreens.com. 4×6 prints are .19 cents each regularly and sometimes they have sales for .10 cent prints or 20% off all photo orders! Easy and cheap!
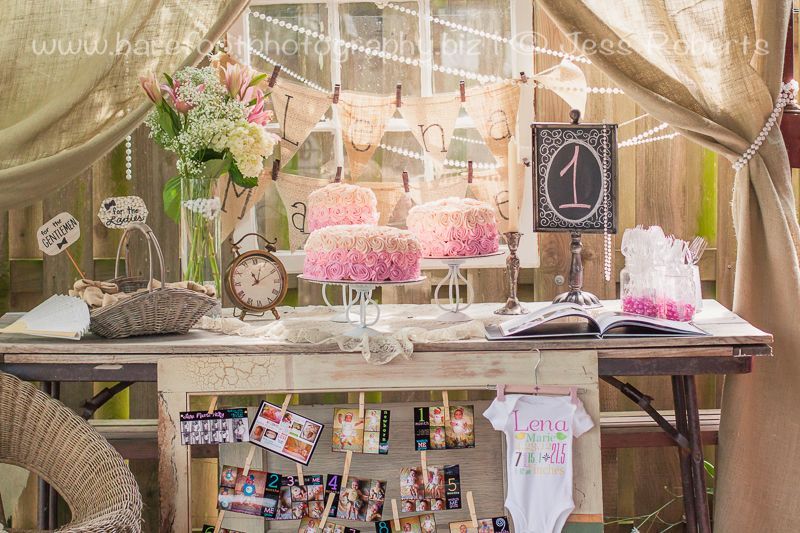
And a special THANK YOU to all of my friends who collected white and pink Mardi Gras pearls for me… and to my mom who collected all of my grandmother’s old doilies and crocheted table cloths… along with my sister who donated mason jars and burlap from her wedding… I was able to use the money I had budgeted for decorations to buy flowers to really make the party beautiful and southern and sophisticated!
Jess Roberts of Barefoot Photography photographed the entire party and my daughter’s 1 year photo shoot, and made the incredible storybook sitting on the table! She is located in Opelousas, LA, and I HIGHLY recommend her!
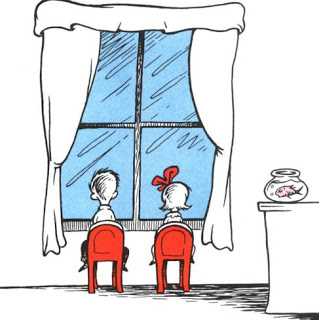
I had planned to run errands today, but alas, the thunderstorm has dampened my plans. (Under the definition of “parent” you can find the word “flexible” in bold print.) You know that opening scene of The Cat in the Hat where the two kids are just staring out of the window? Yes. That was us today. Even me.
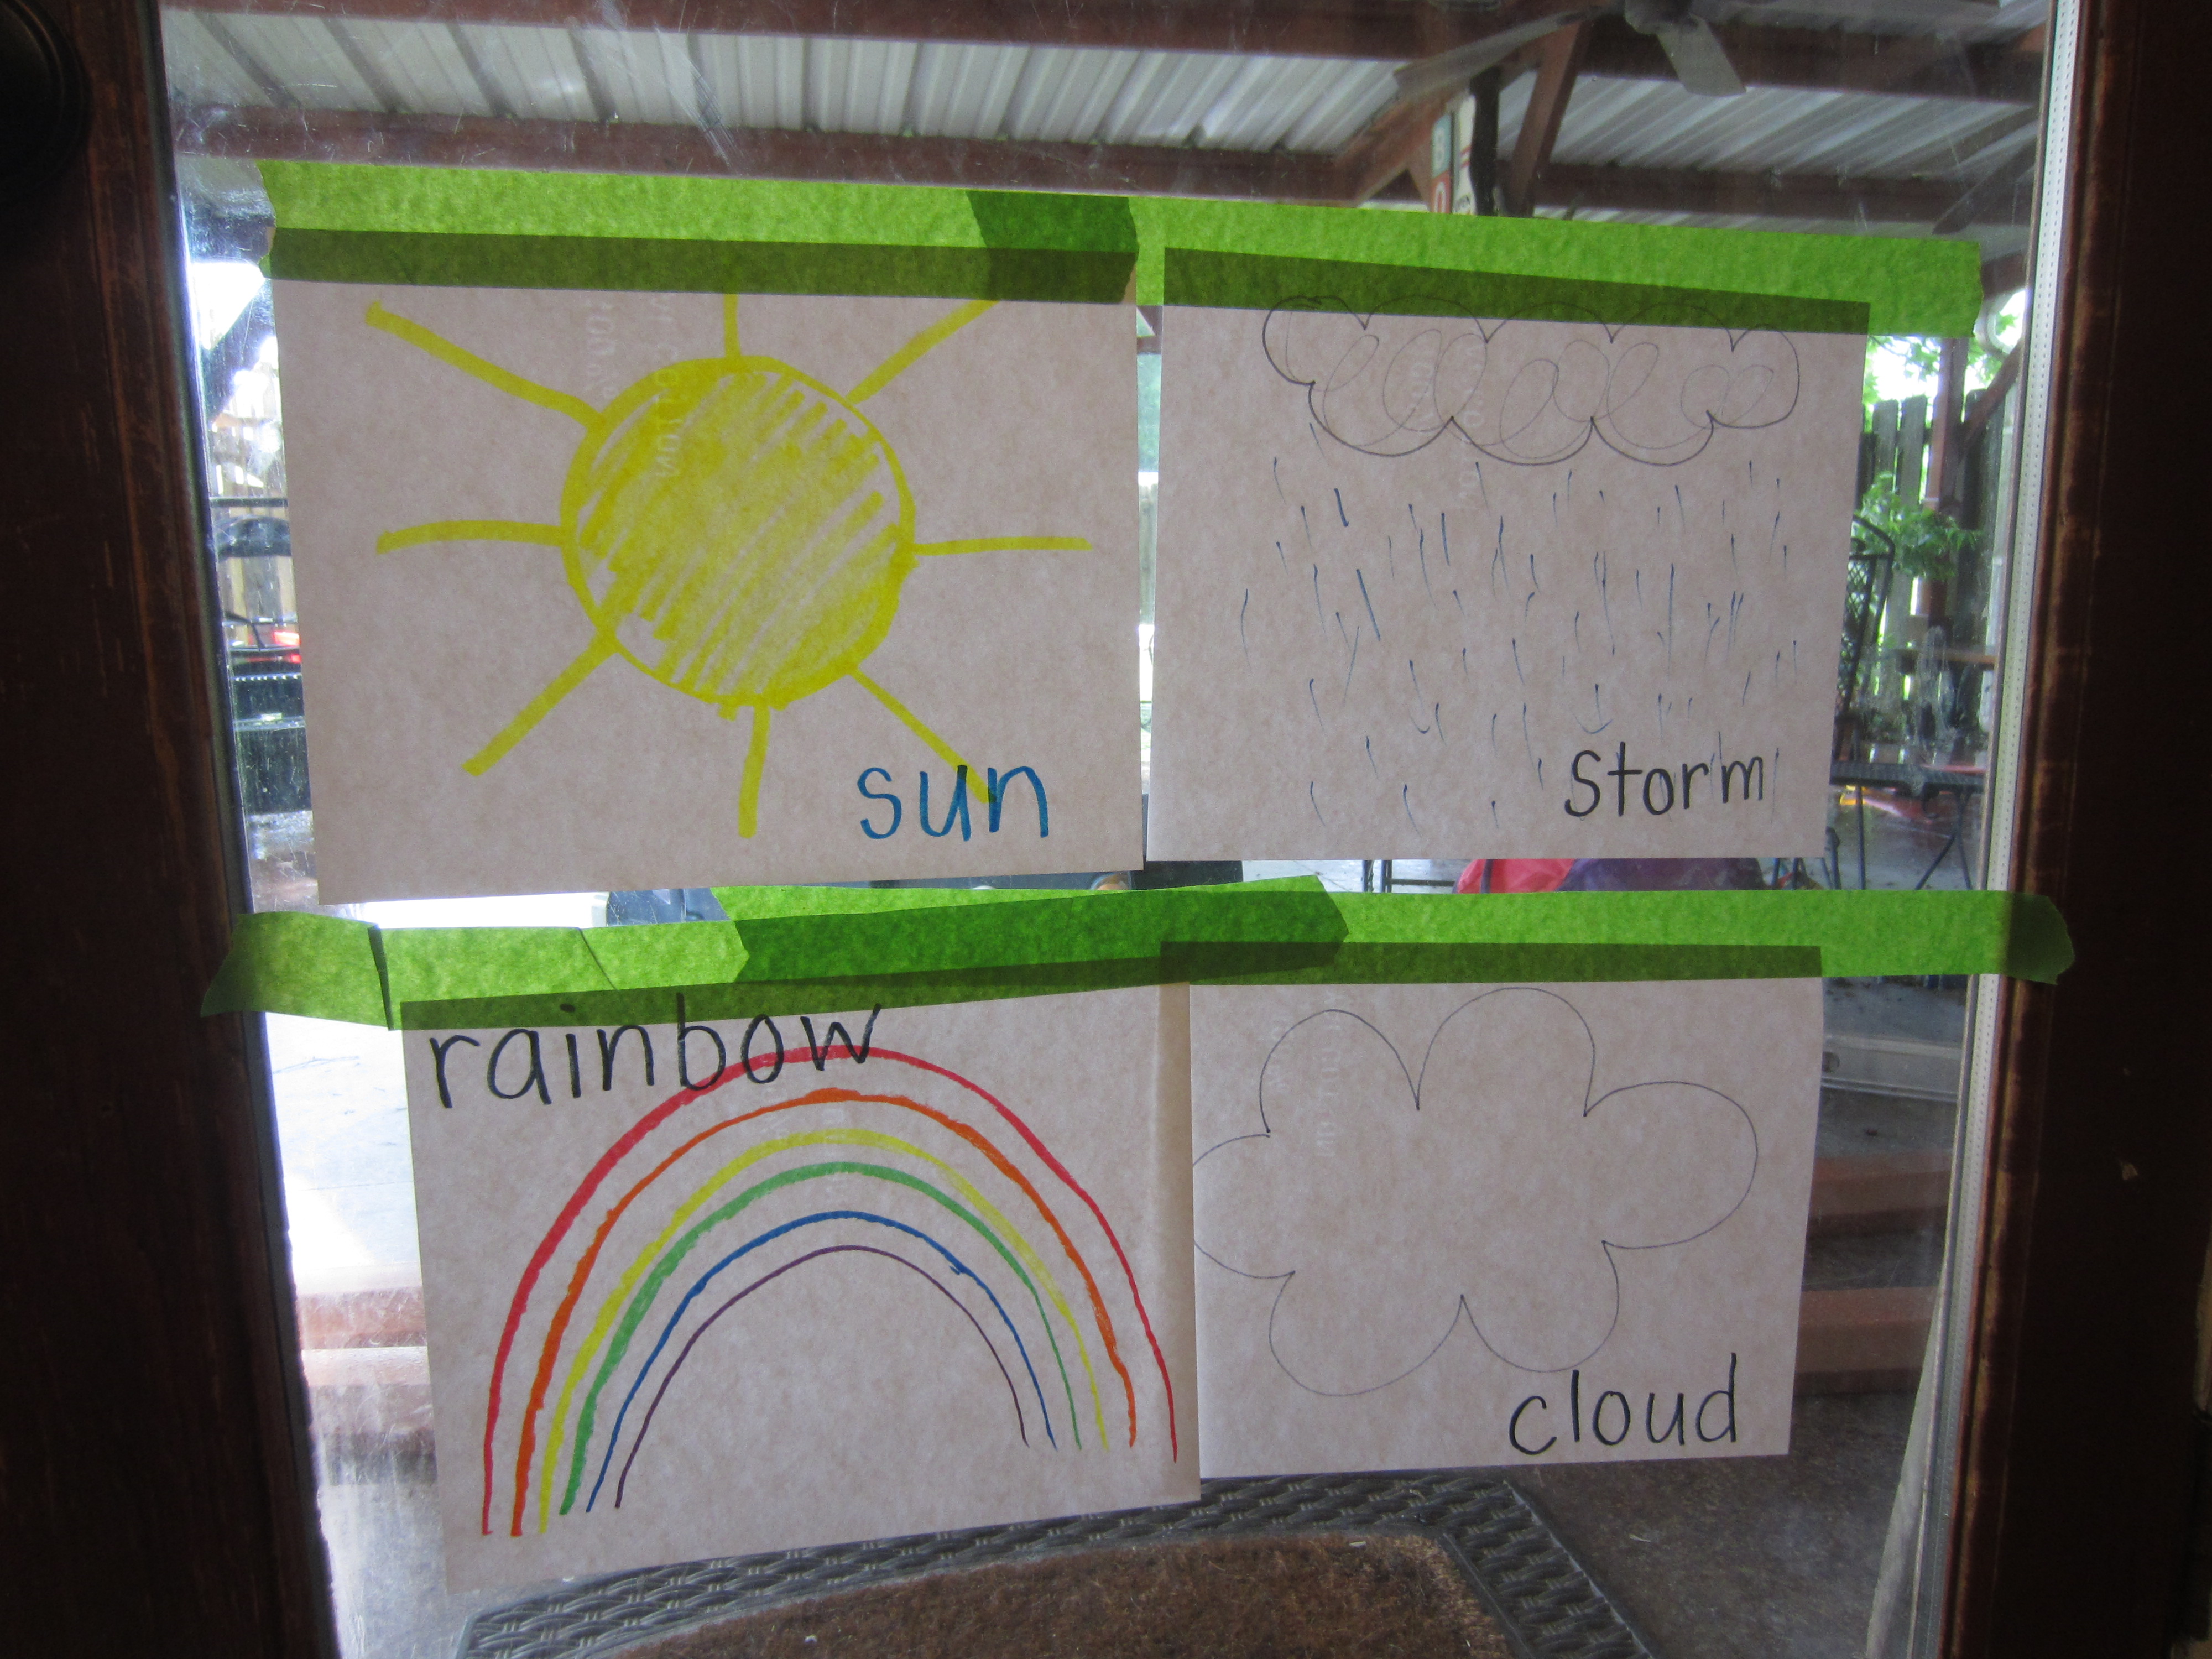
I brought some paper and markers over to the window for us to draw what we saw outside – a simple activity that throws in some drawing skills, vocabulary, sight words, colors, descriptors and more.
Mommy Teacher: “What color is the sky today?”
Without thinking, Leyson said, “Blue!” But then he looked more closely… “Das not blue!”
I explained to him that the clouds are covering the sun and they are filled with water which made the sky look gray.
Mommy Teacher: “And when the clouds fill up with water, the water drips out. That’s called rain! When it is raining this hard and you hear the thunder, that is called a storm.”
I drew a picture of some gray clouds and had him do the same on his paper. Then we each drew rain falling from the clouds, just like we saw outside. I wrote the word “storm” on my paper, and he did the same. Sounds easy enough, right? Because it is! The activities you do with your child do not have to be Pinterest-worthy; they just have to be age-appropriate and fun!
Drawing a picture of what you see and what you are talking about in conversation helps reinforce what you are teaching. Prompt your child to talk about what he/she is drawing. You will need to model both the drawing and the conversation…
Mommy Teacher: “To draw a cloud I am going to make a lot of humps. On the top it looks like lowercase m’s and on the bottom it looks like lowercase w’s. I am drawing gray clouds like we see outside. Can you draw a gray cloud?”
I told Leyson that when the sun comes out, we may be able to see a rainbow. He decided we should also draw pictures of a yellow sun and a rainbow with lots of colors. I wrote each of the words at the top and he did the same on his papers. We talked about the different colors too. He then also decided that we needed to draw one more picture of a cloud and we wrote the word cloud.
Mommy Teacher’s pictures…
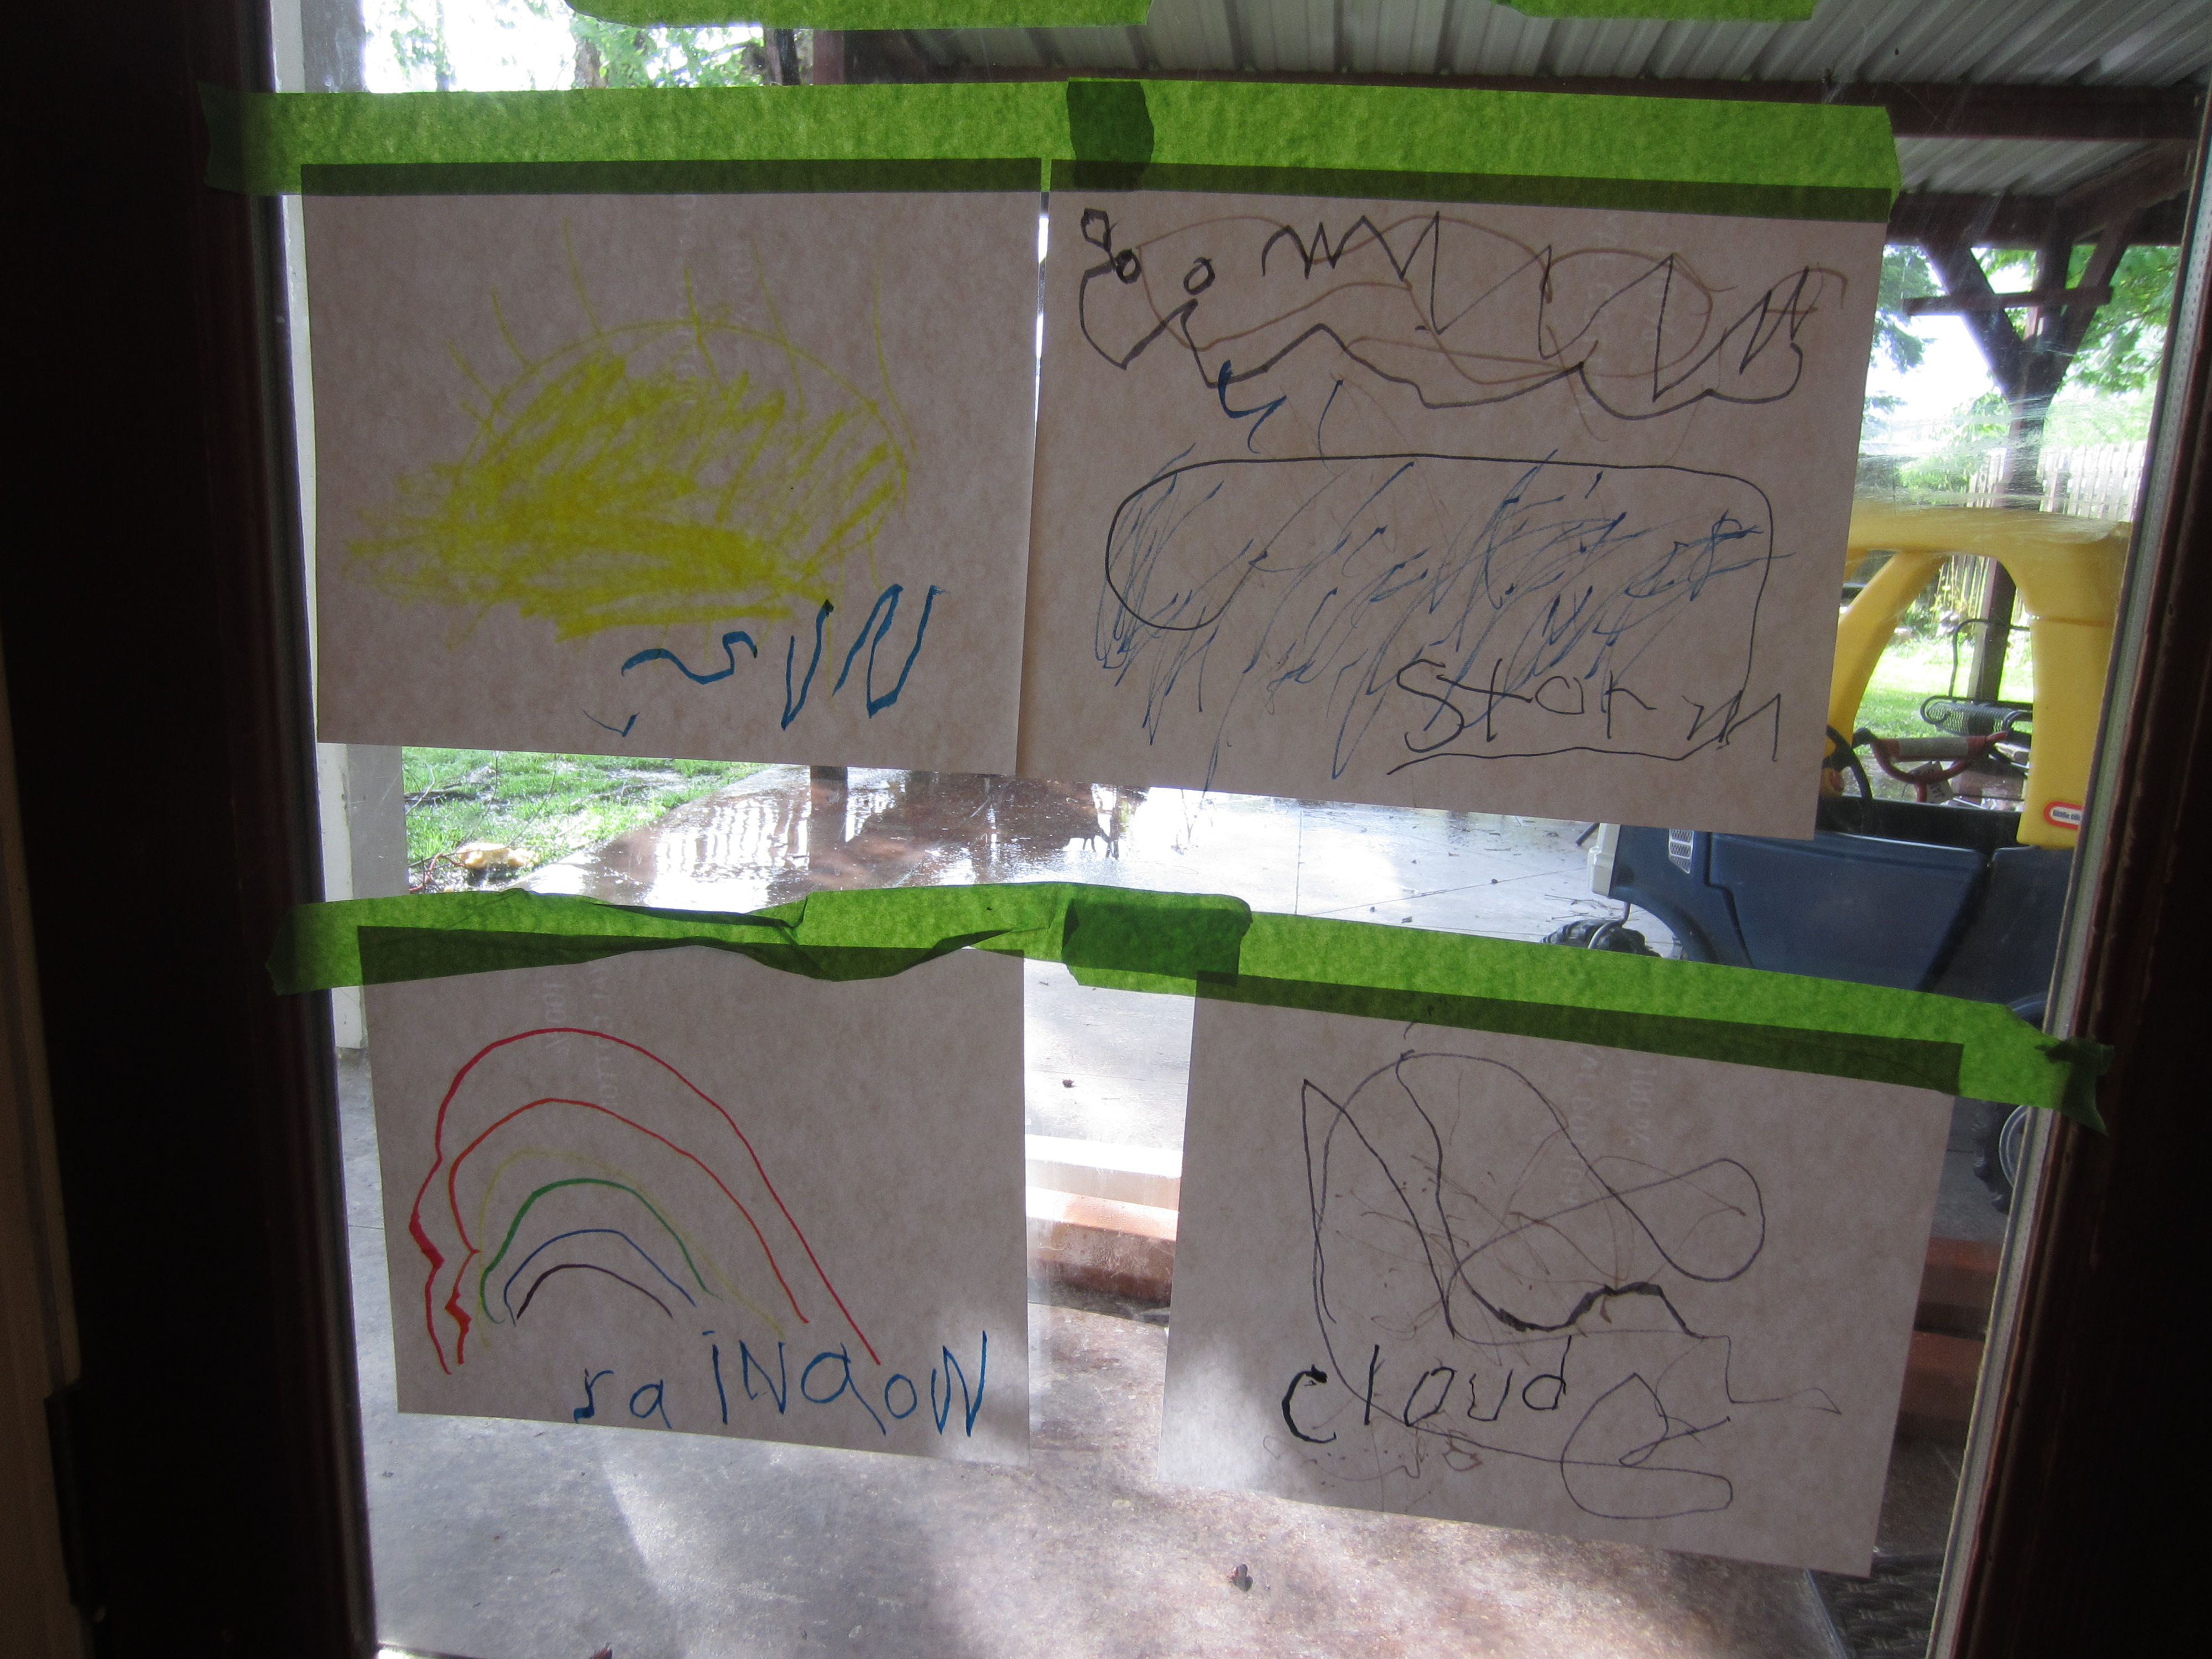
Leyson’s pictures…
I am going to keep these pictures up for a few days so we can continue to talk about the weather. We are experiencing a huge temperature drop too so I am sure we will be talking about warm and cold. With an older child you can explain about cool fronts and warm fronts and check out some weather maps online!
Here are some great interactive websites for your older kids:
Anyone else suffering from TMEEIMH (Too Many Easter Eggs in my House) Syndrome? They are everywhere you look at my house – despite my best efforts to sneak a handful at a time into the trash. But, don’t throw them away just yet! These plastic eggs can actually serve as practical learning manipulatives for you! My old teacher self used to actually buy dozens of them each year to use in my classroom for letter matching and rhyming words (I tell you, Jess and I share a brain because she does the same thing, too).
Leyson’s favorite word to read is “Leyson.” Well, that and “pizza.” In a past post I wrote about Busy Bags, I talked a little bit about the significance and progression of a child learning to read and spell his/her name:
WHAT’S IN A NAME?:
Kids are so funny when it comes to learning how to spell their own names. Most often kids learn how to spell their names before they completely understand the concept that letters make words when put together. Take my son Leyson, for example; anytime he sees a word that starts with an L, he says it spells Leyson. He thinks he owns the letter L. The same goes for the letters E, Y, S, O and N… he owns them all. You see, for young toddlers, they will not understand that the ORDER of letters actually makes a difference when spelling words.
Even in my kindergarten classroom, students who knew how to spell their names would sometimes slip into the idea of “owning” all the letters in their name and would write their names out of order. LUIS would spell his name UILS… still thinking that it spelled the same thing. Even more common would be for kids to write their names backwards (SIUL)… and several, get this, would write their names in mirror image! I can’t even do that! All of these are totally normal progressions when your child is learning how to spell his/her name…
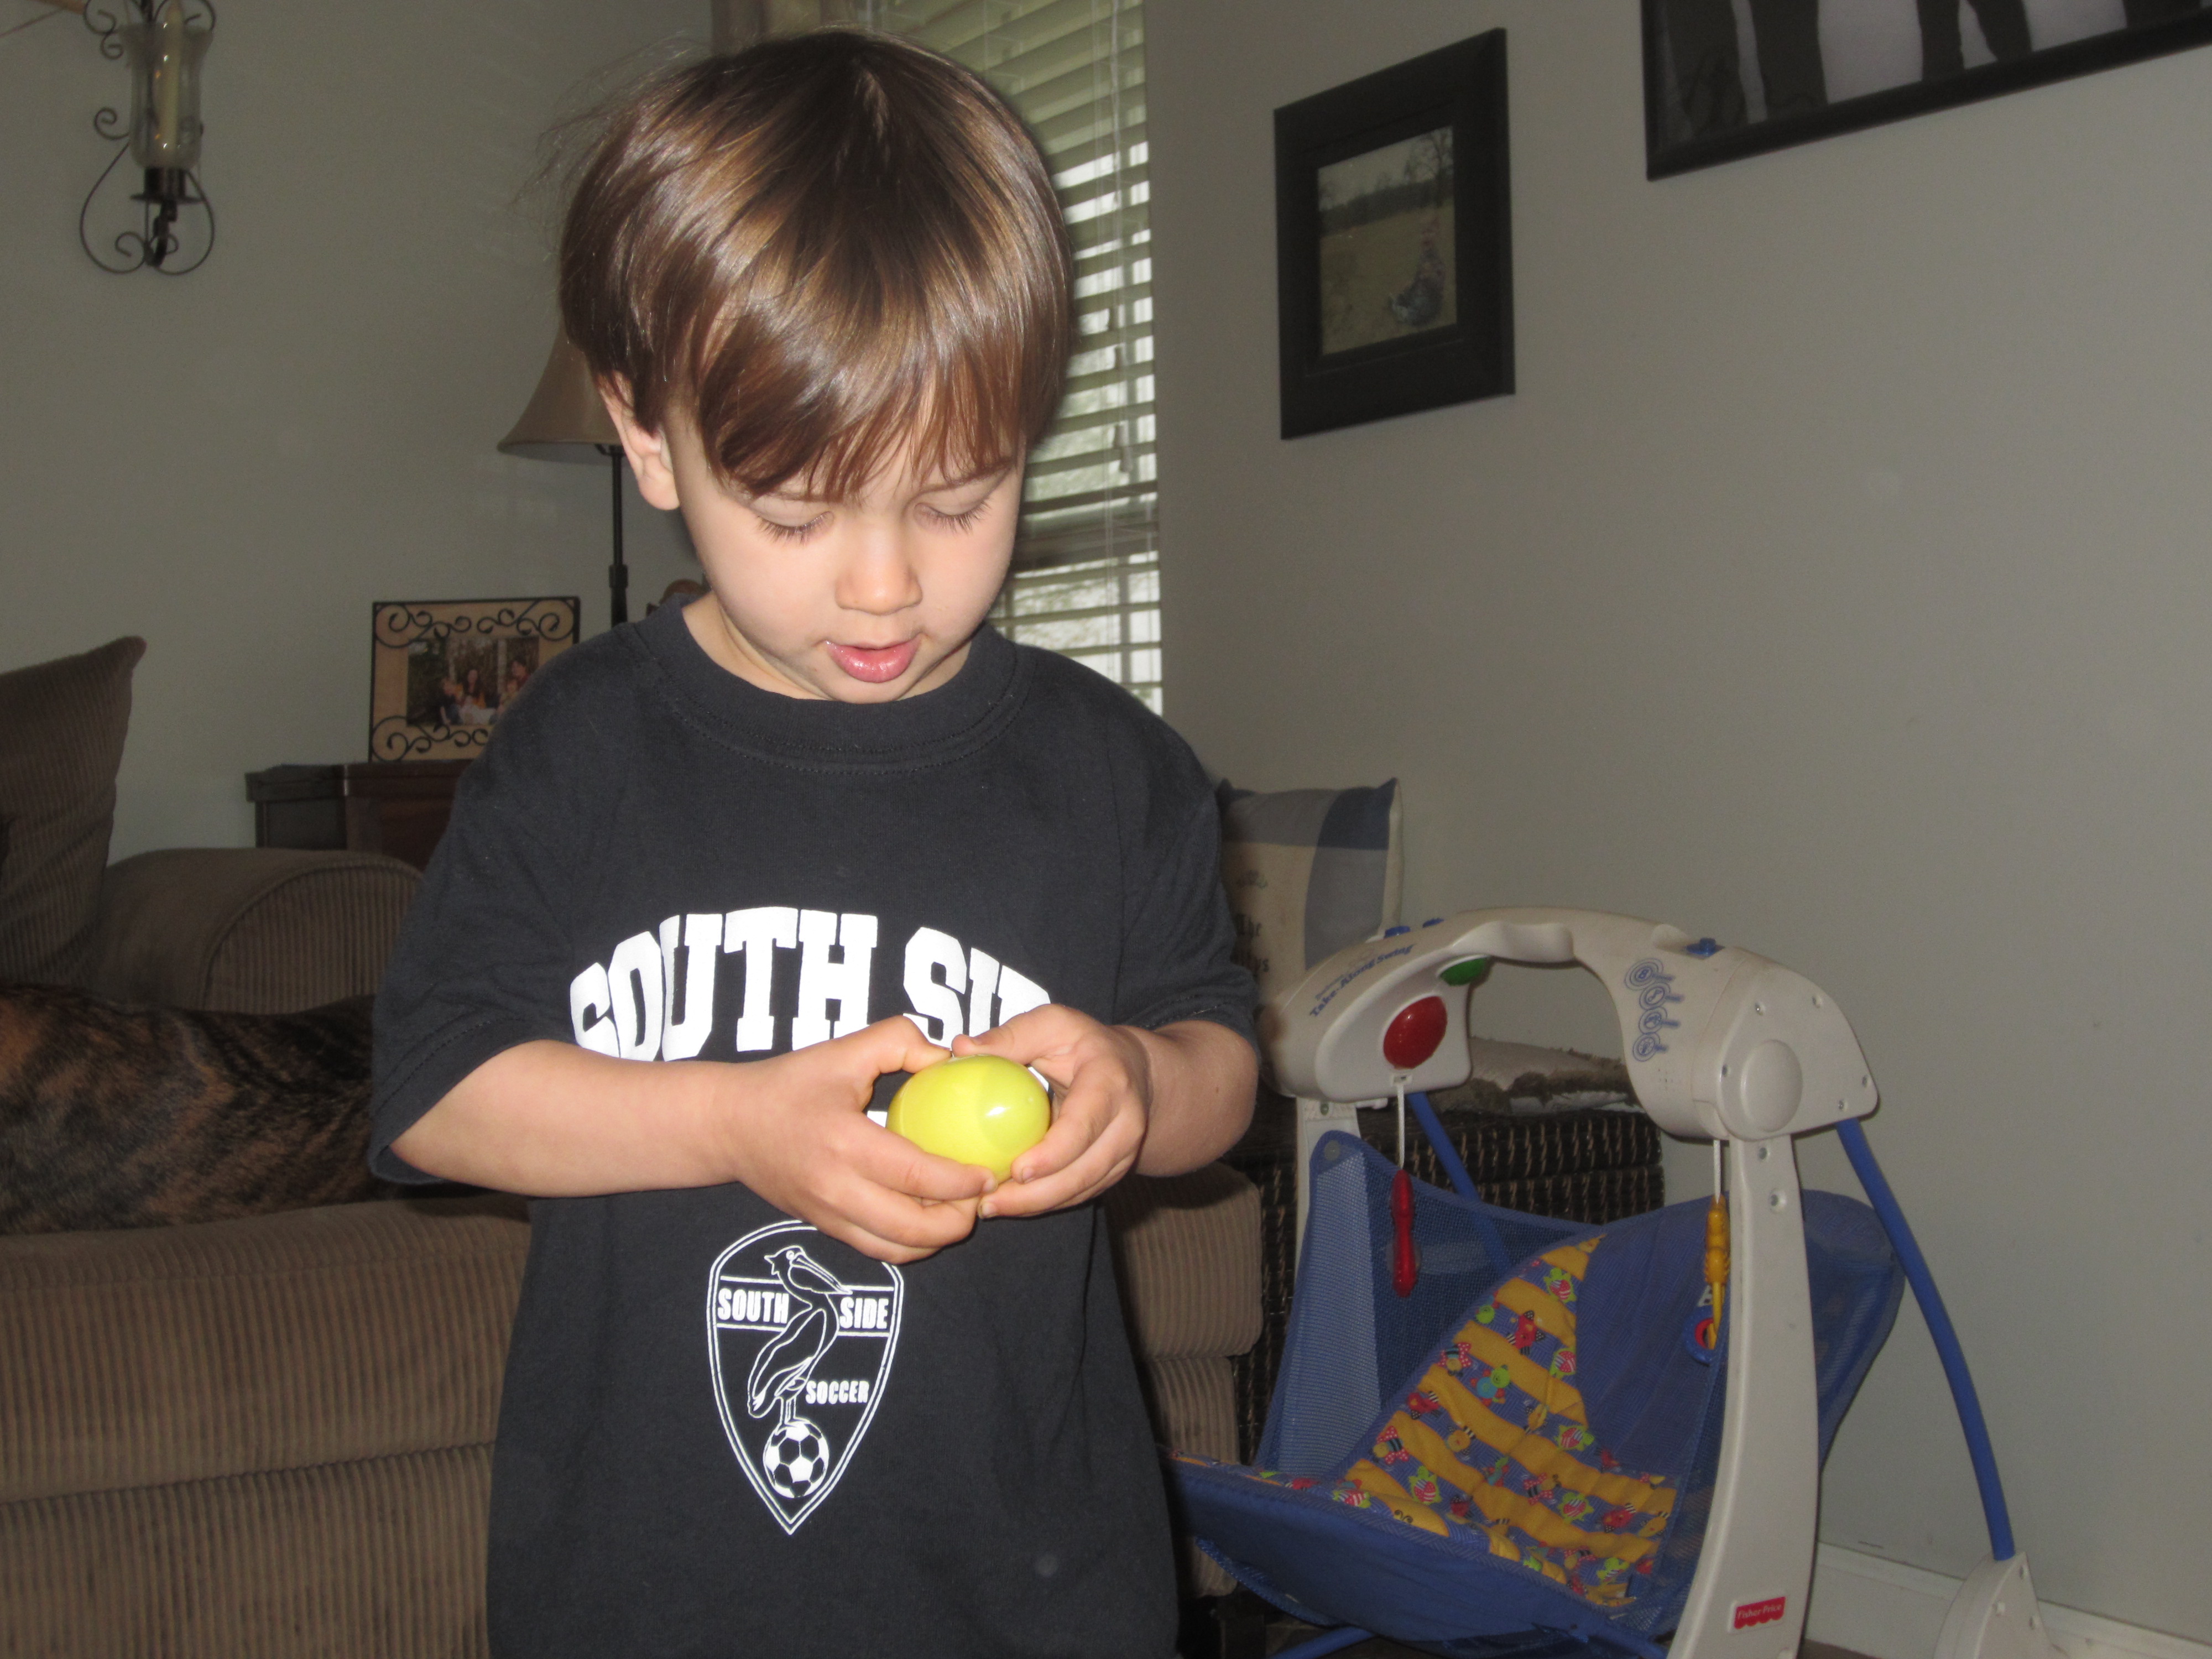
Well, here’s another activity that not only teaches the letters of your child’s name, but also teaches the ORDER of the letters – and, of course, we are using Easter eggs because, well, who doesn’t love a good egg hunt?
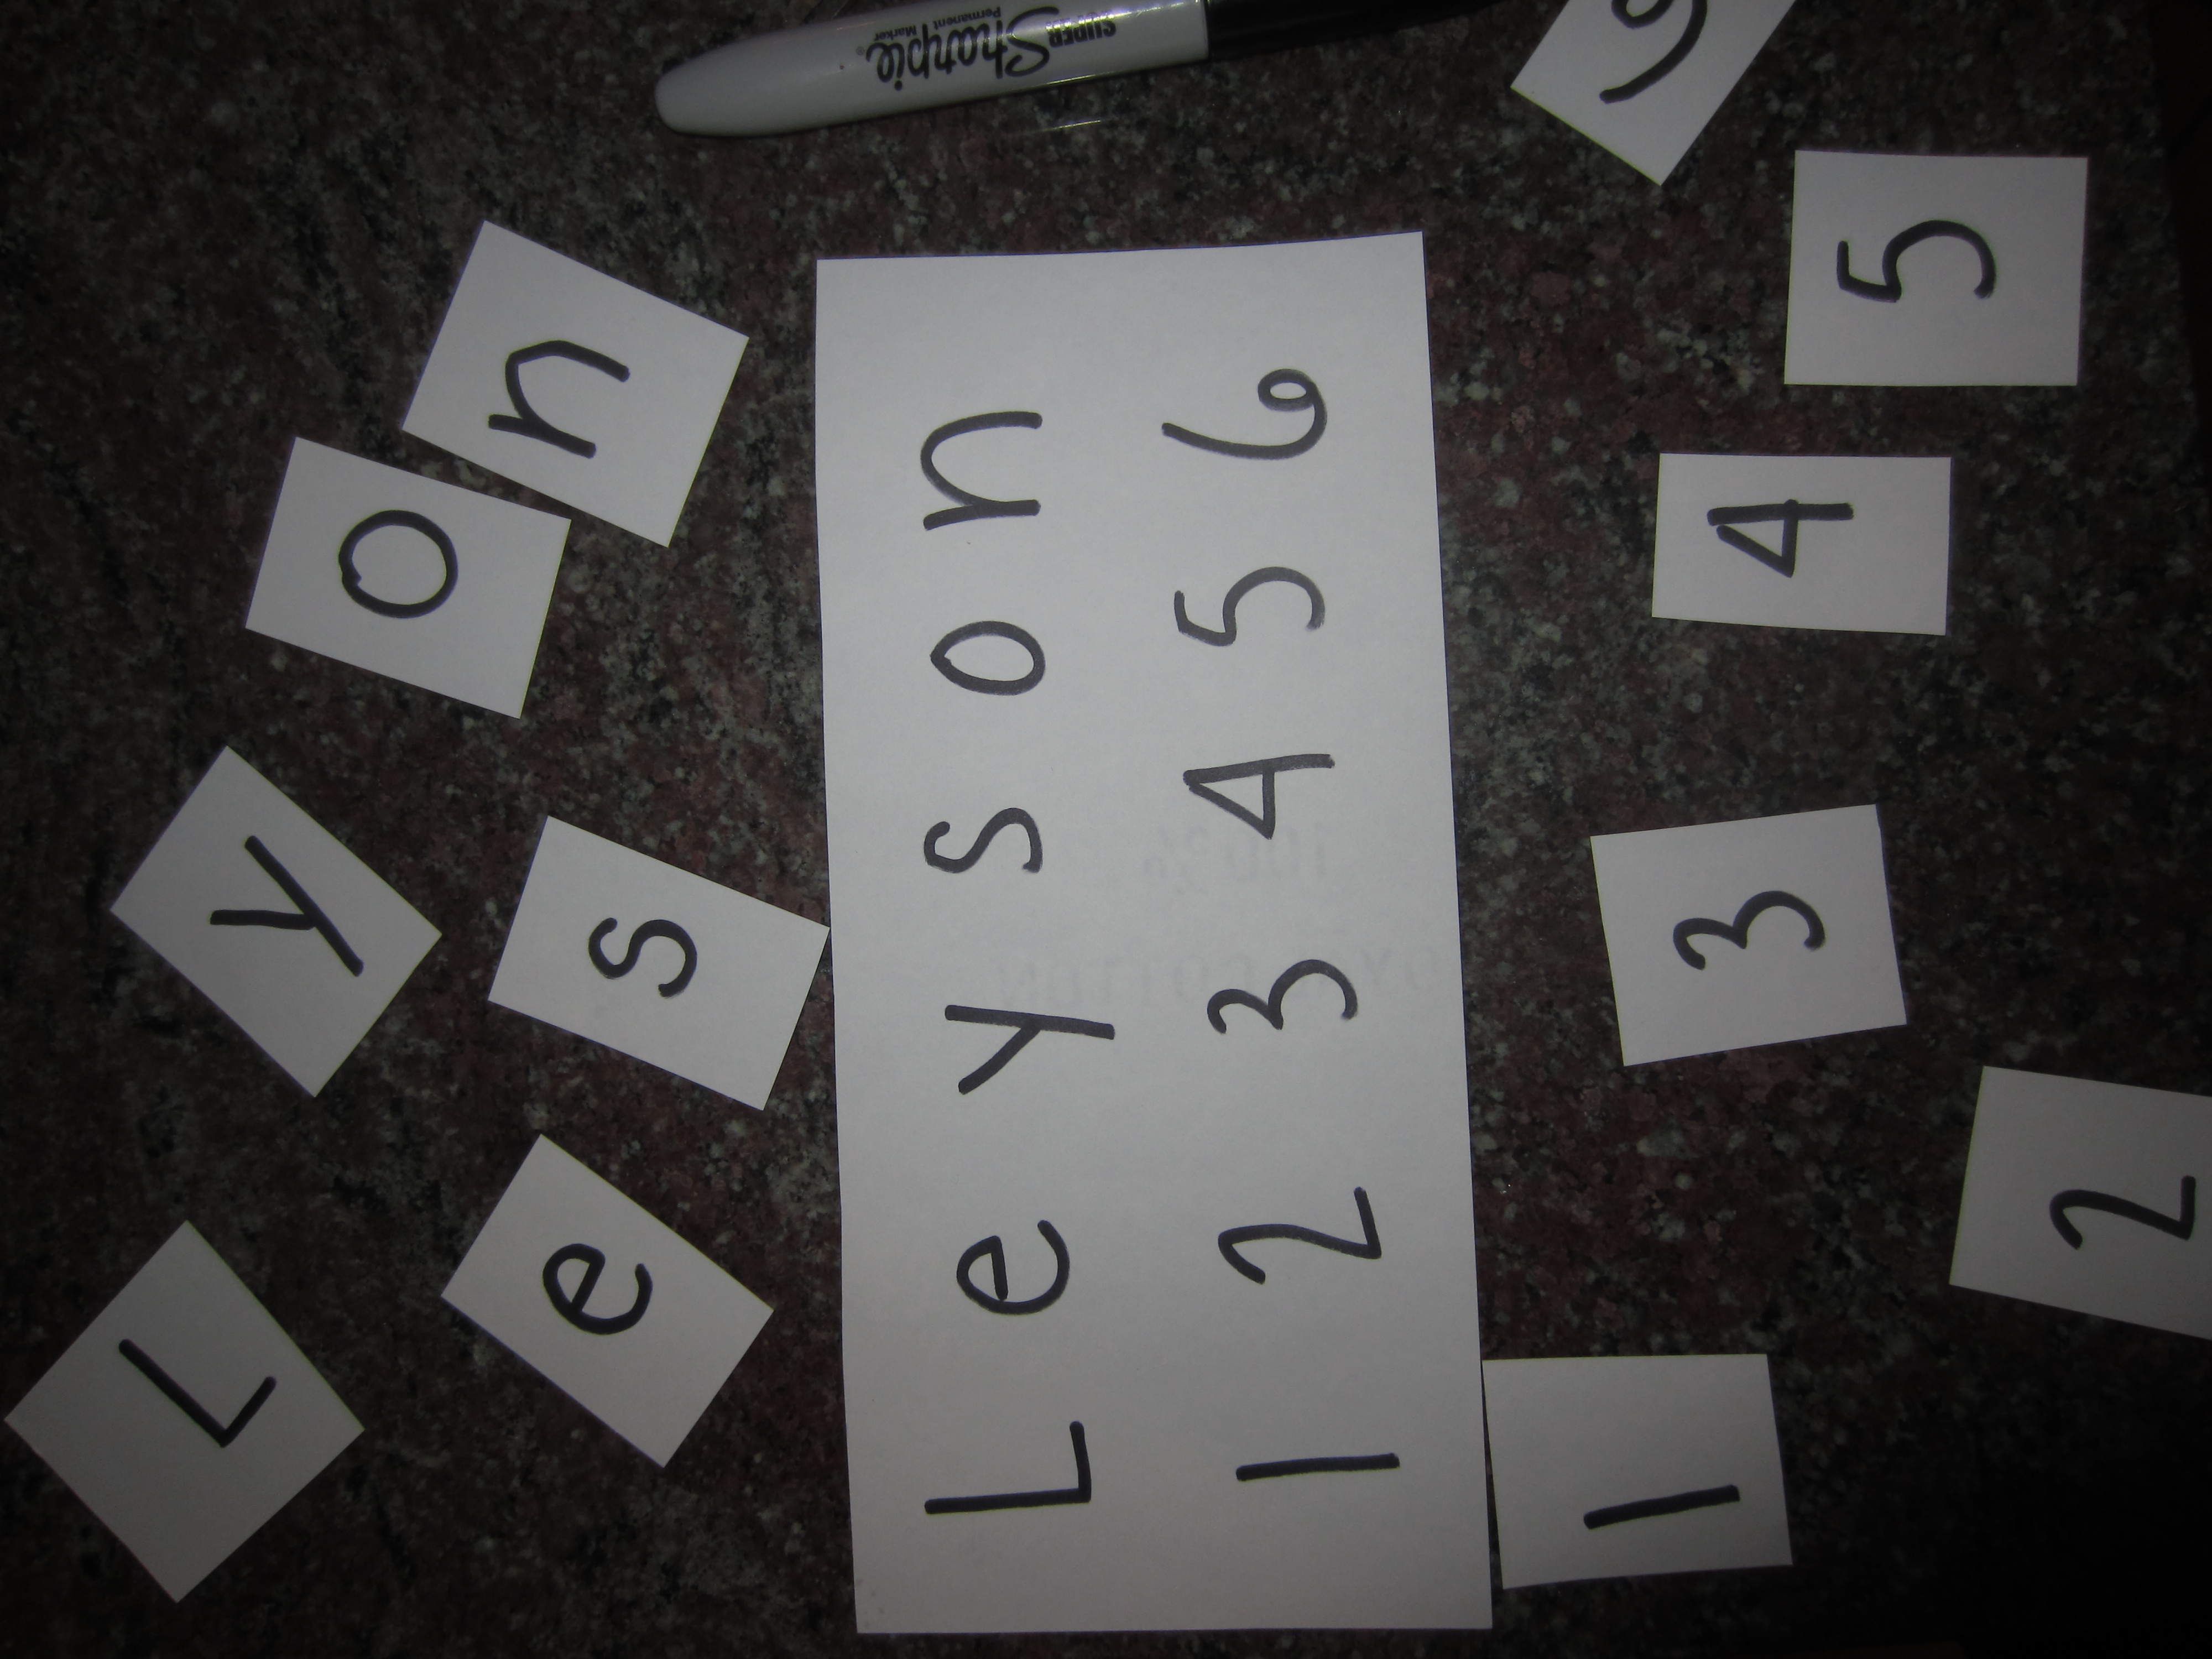
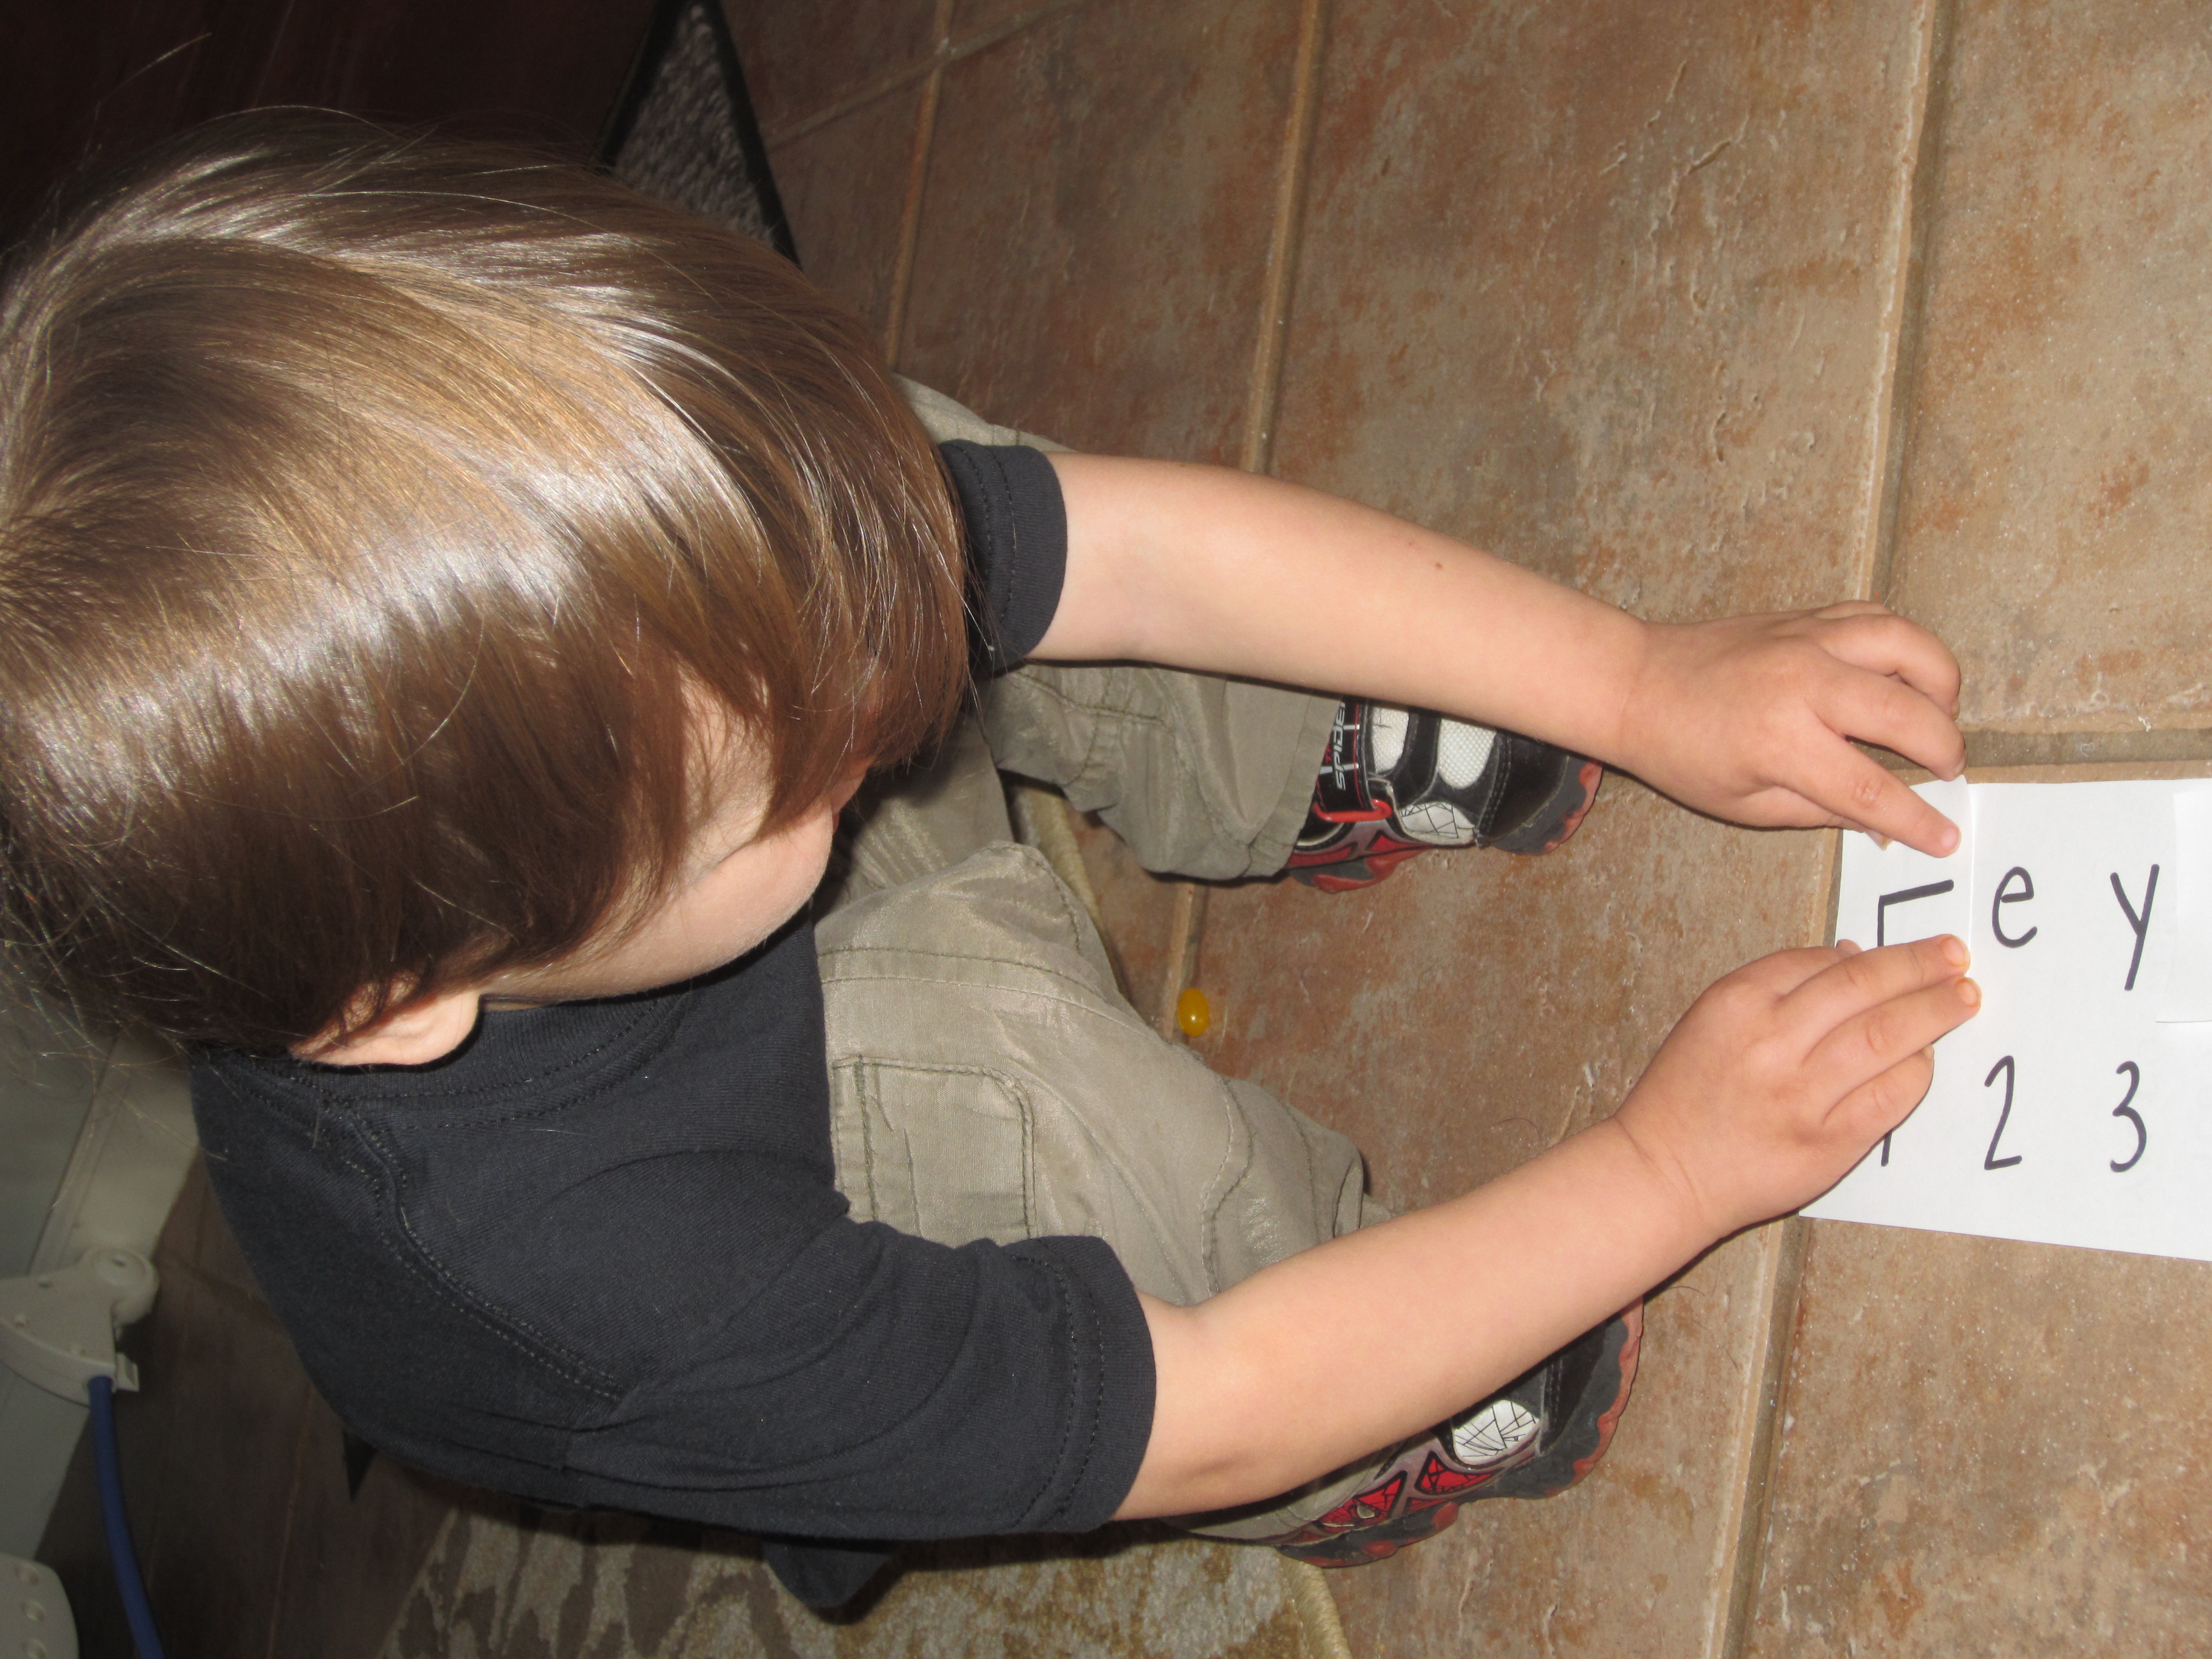
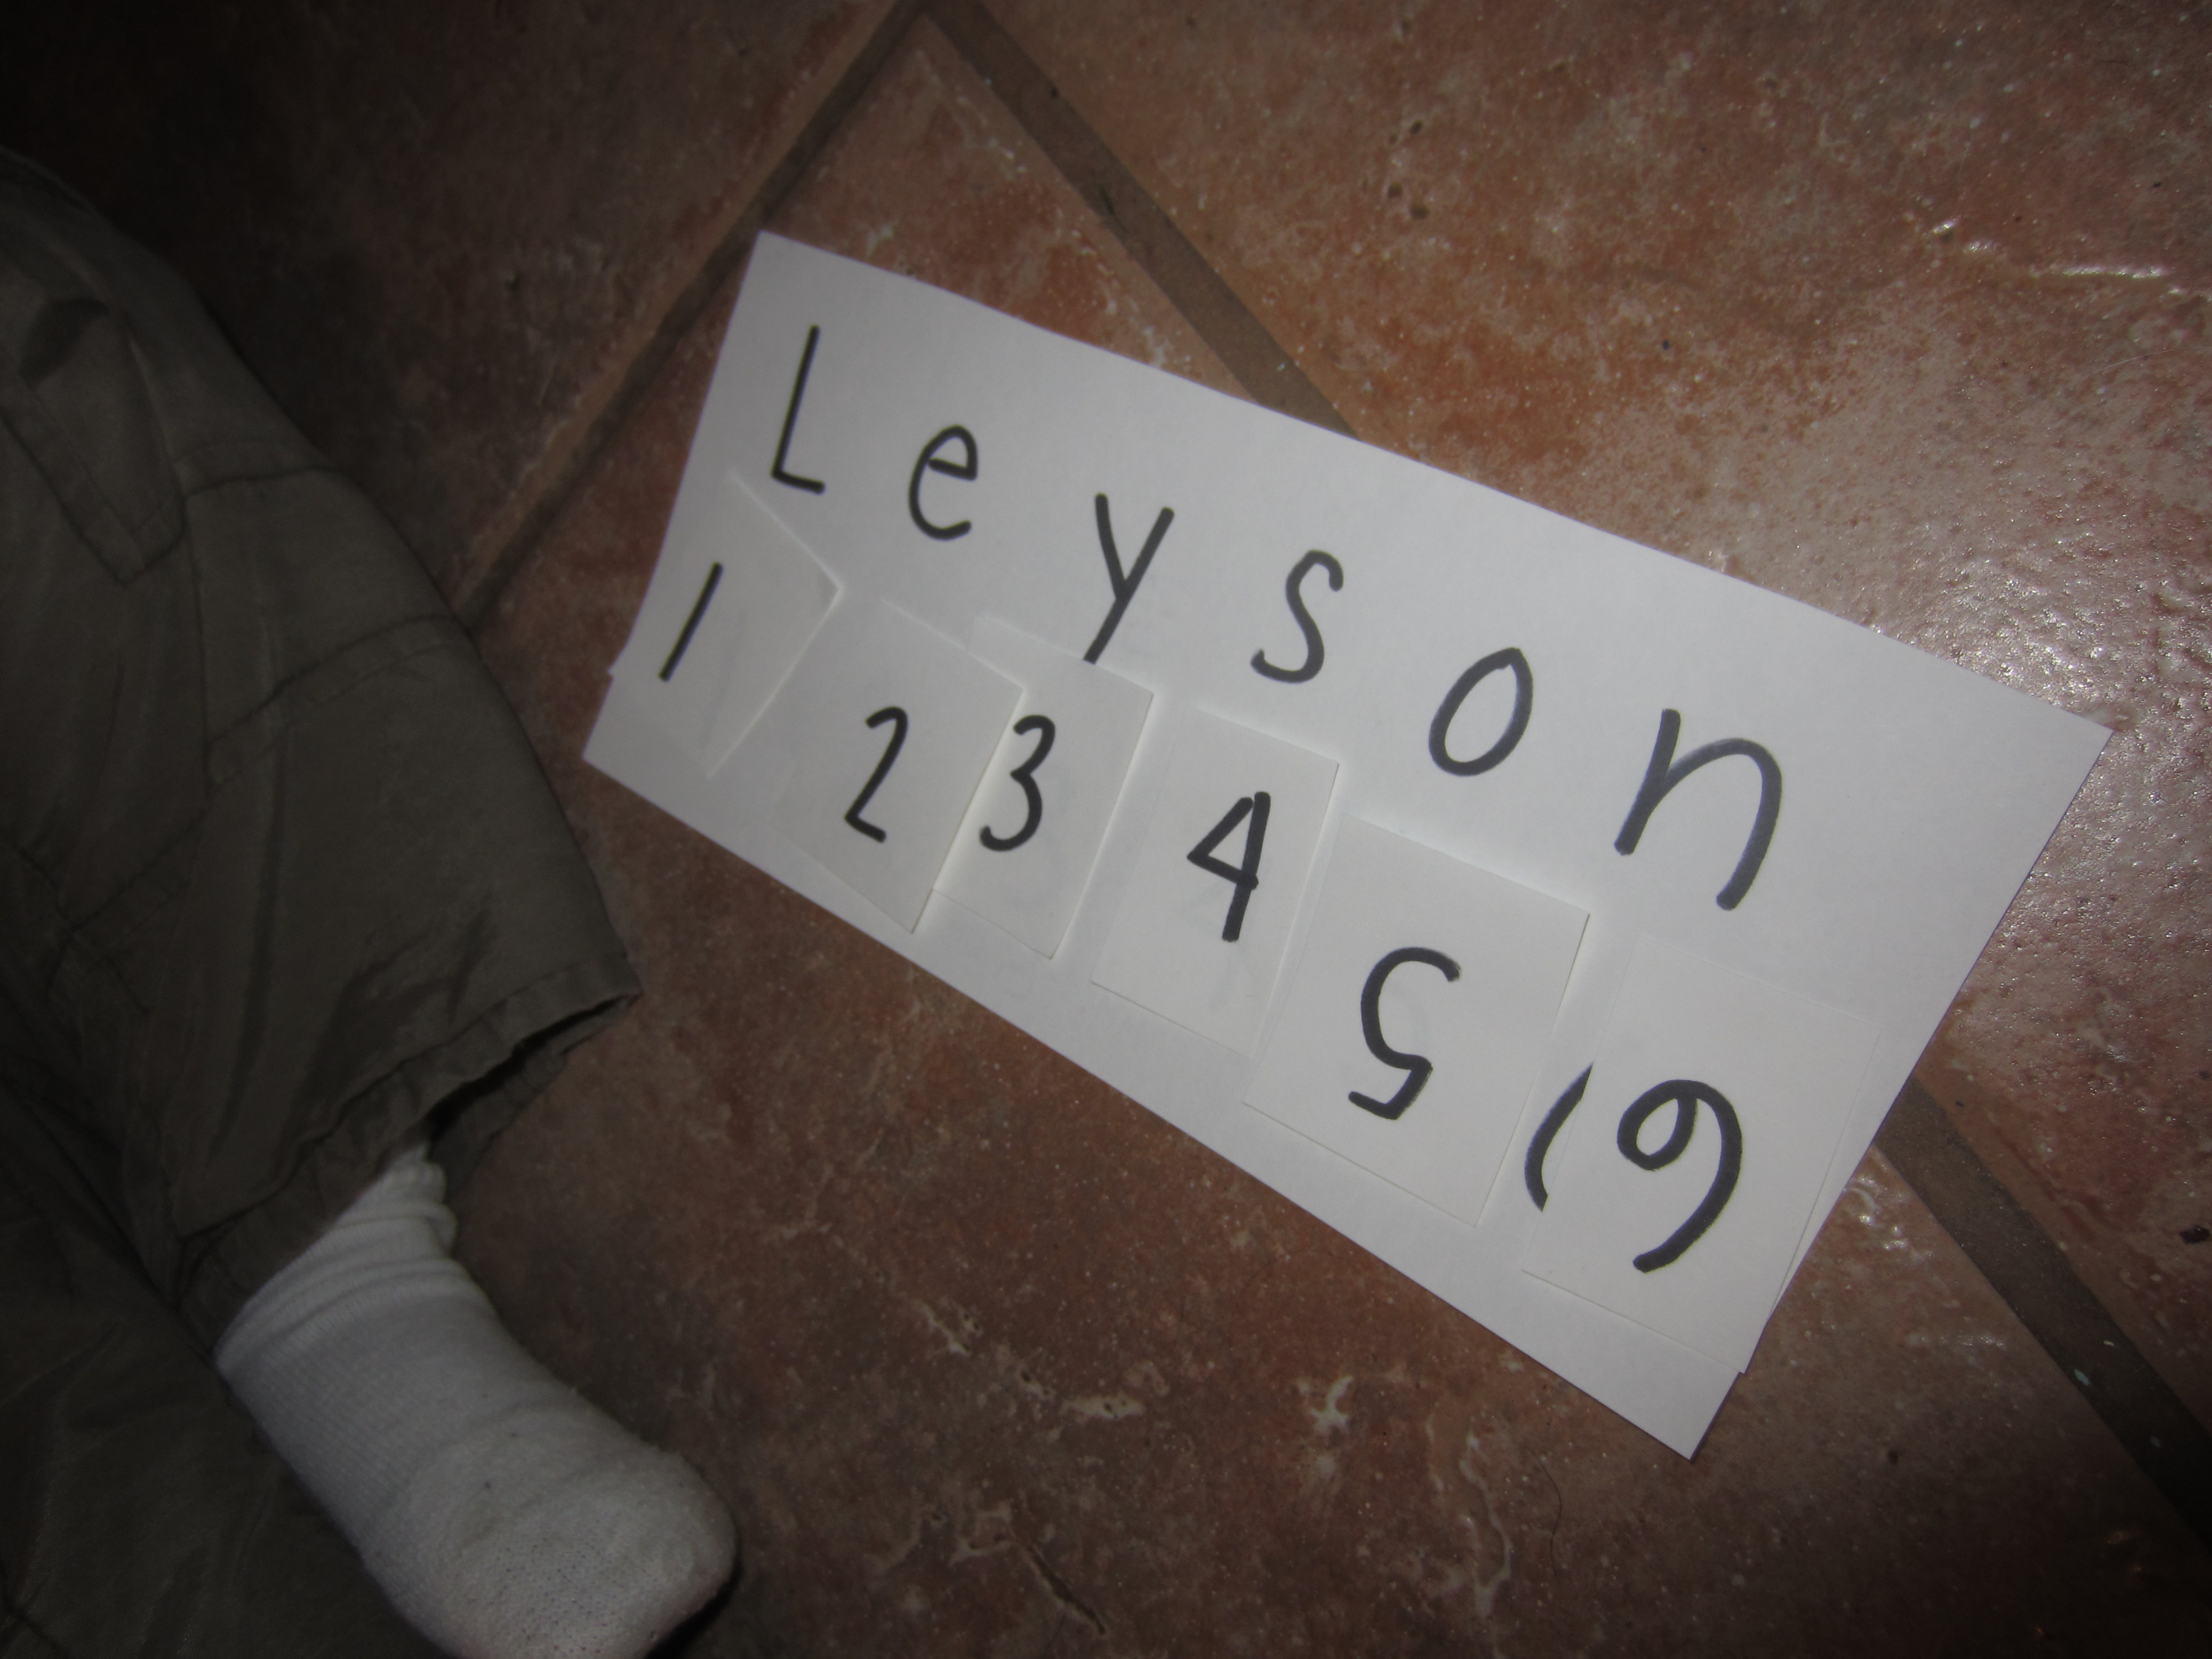
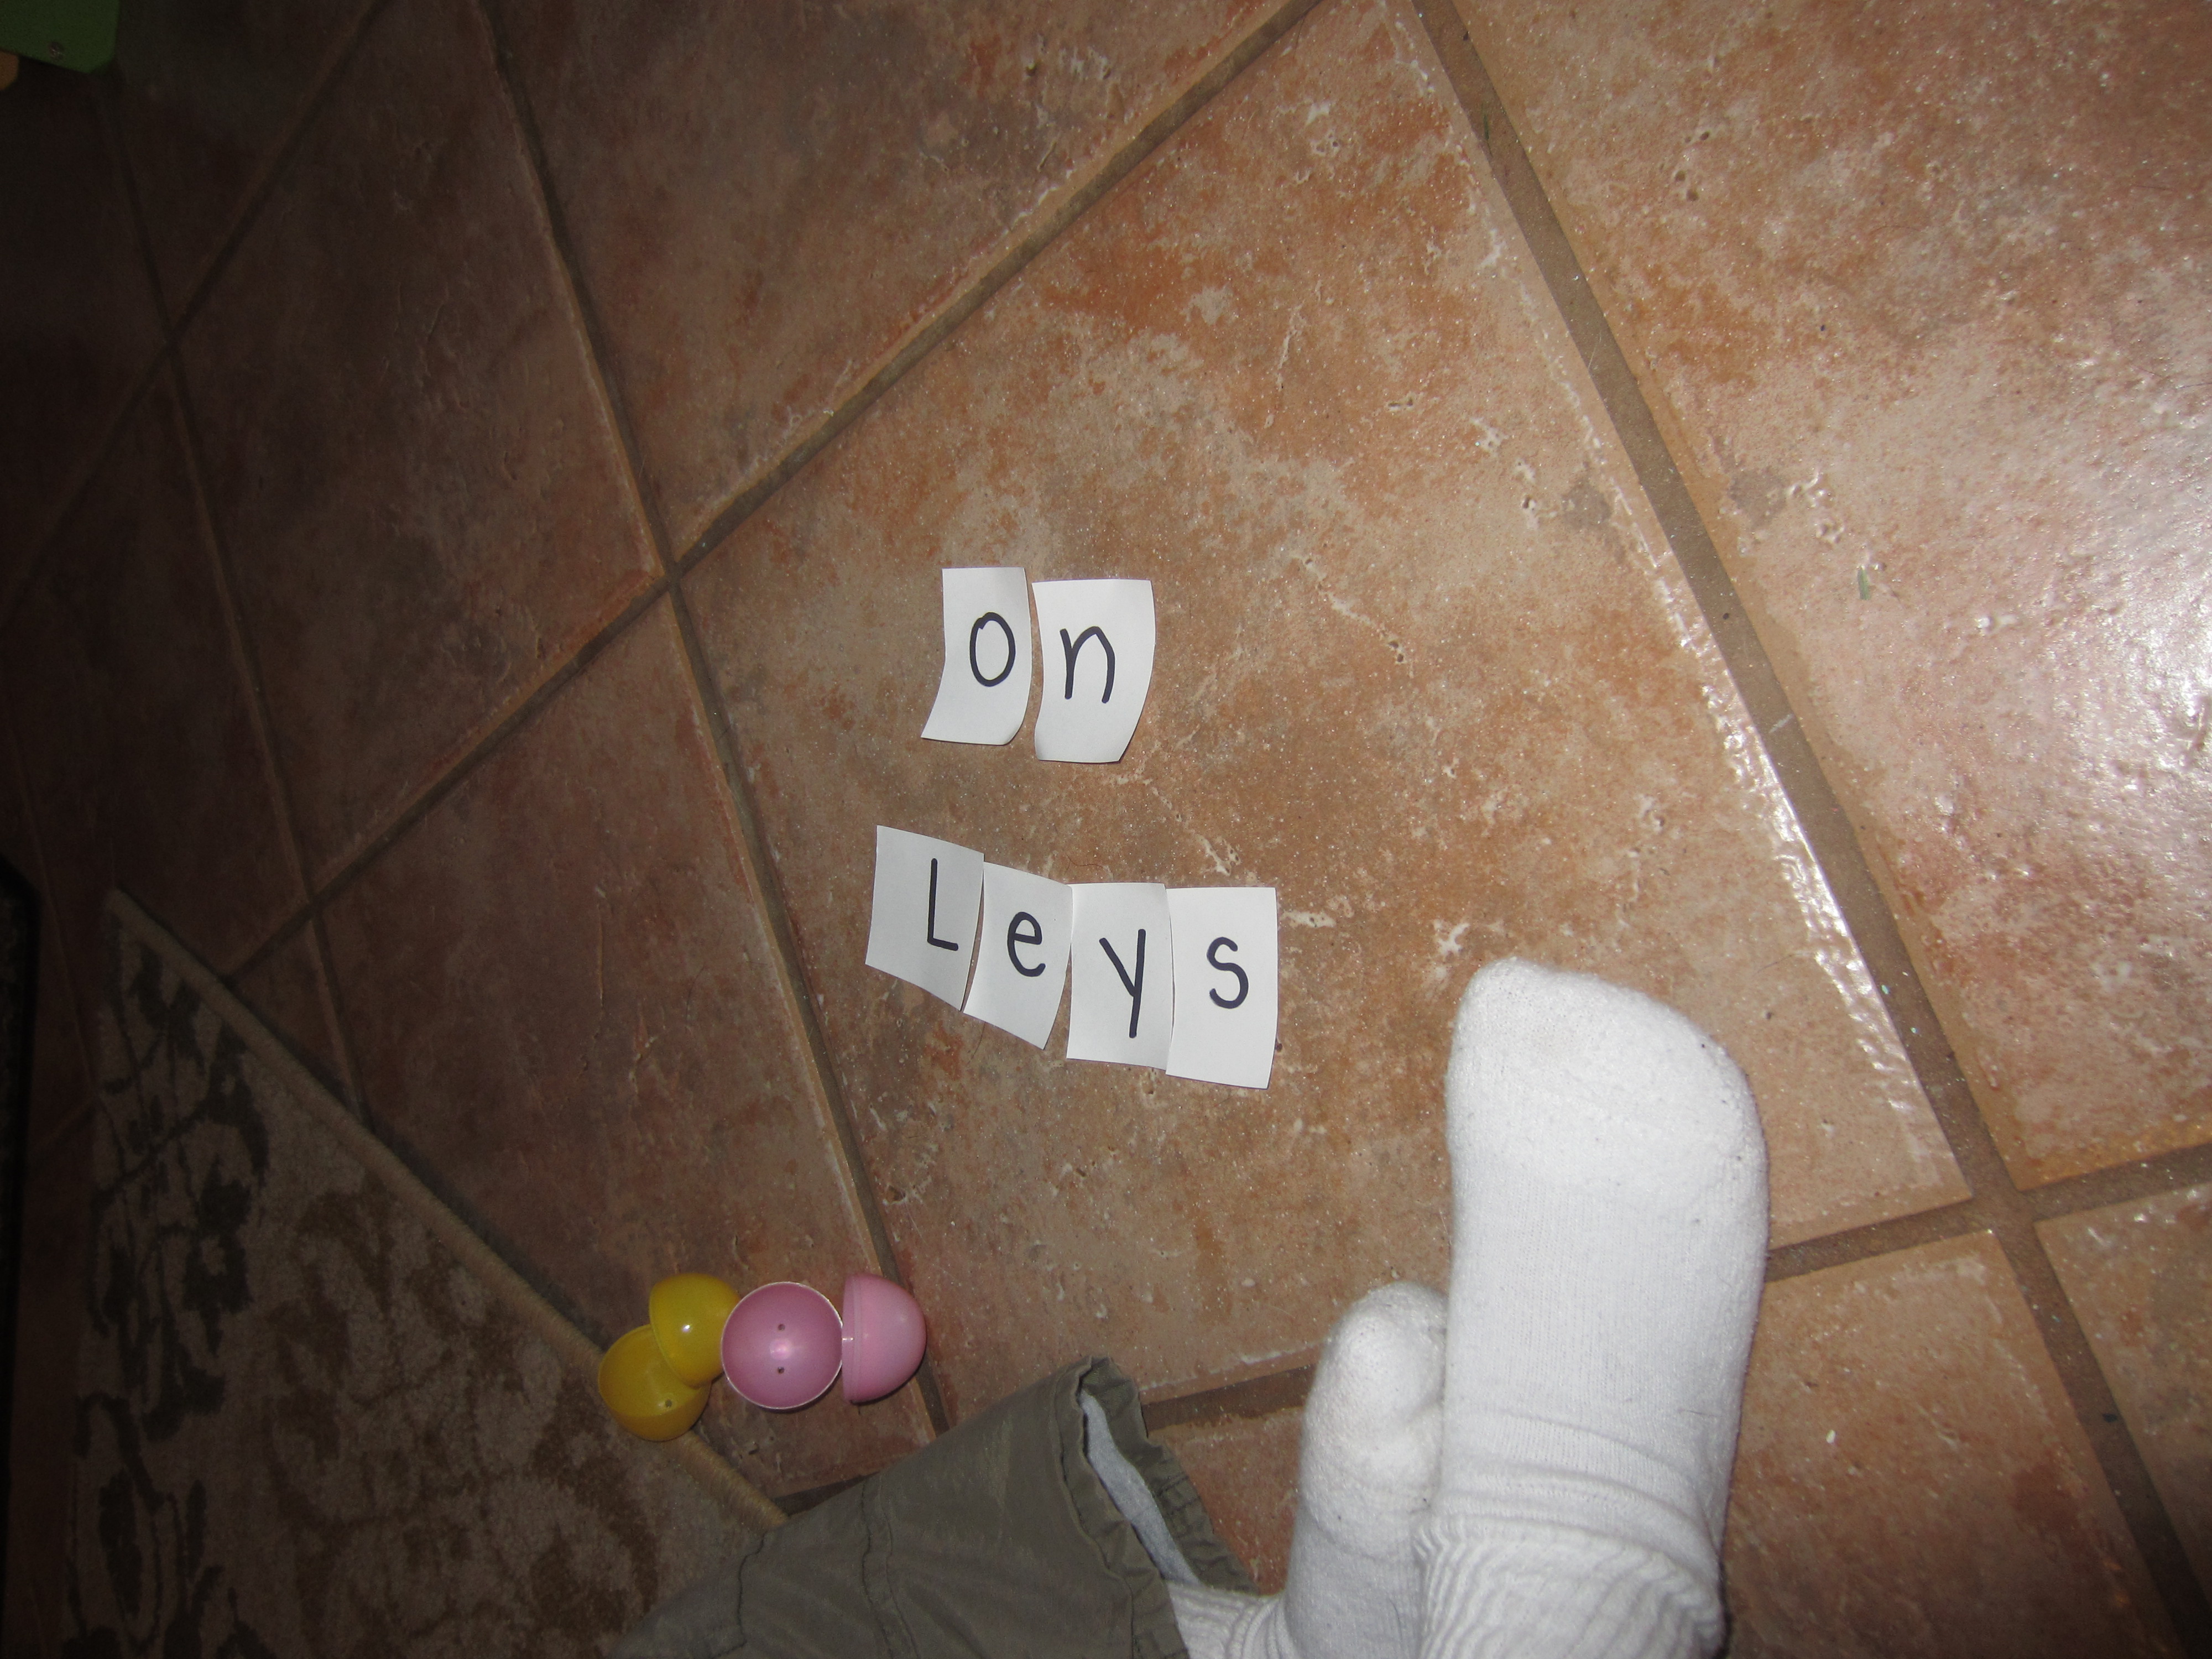
I first wrote Leyson’s name and underneath each letter I wrote the numbers 1-6. I did the same thing on another sheet of paper, but this time, cut out each letter and number.
We used 6 eggs… the same number of letters in Leyson’s name (no, that’s not a coincidence). I stuffed each egg with 1 letter and the corresponding number and then I hid the eggs around the room while Leyson was in the other room. Then, the hunt was on!
Once he found a letter and number inside of his egg, he had to tell me what he found:
Leyson: “It’s the letter L and the number 1!”
Mommy Teacher: “That’s right! Because the letter L is the FIRST letter in your name! L is the FIRST letter in Leyson!”
See that right there? Right there in the bold, italicized, CAPITALIZED print? See how I threw in some number recognition and some sequencing vocabulary? Sneaky, sneaky, Mommy Teacher!
Now, the reason I have his name and numbers written on another piece of paper is, yes, so he can see the ORDER of his name, but to also see which way the shape of each letter is supposed to go. Kids will recognize the SHAPE of the letter no matter which direction the letter/number is facing, so it’s important to also show them that they have to turn their letters/numbers around.
Reminder: a letter, number, symbol is a SHAPE much like a square is a shape. That’s why it’s so easy to confuse d, b, q, and p – they all have the same shape but are just turned different ways. But, I digress…
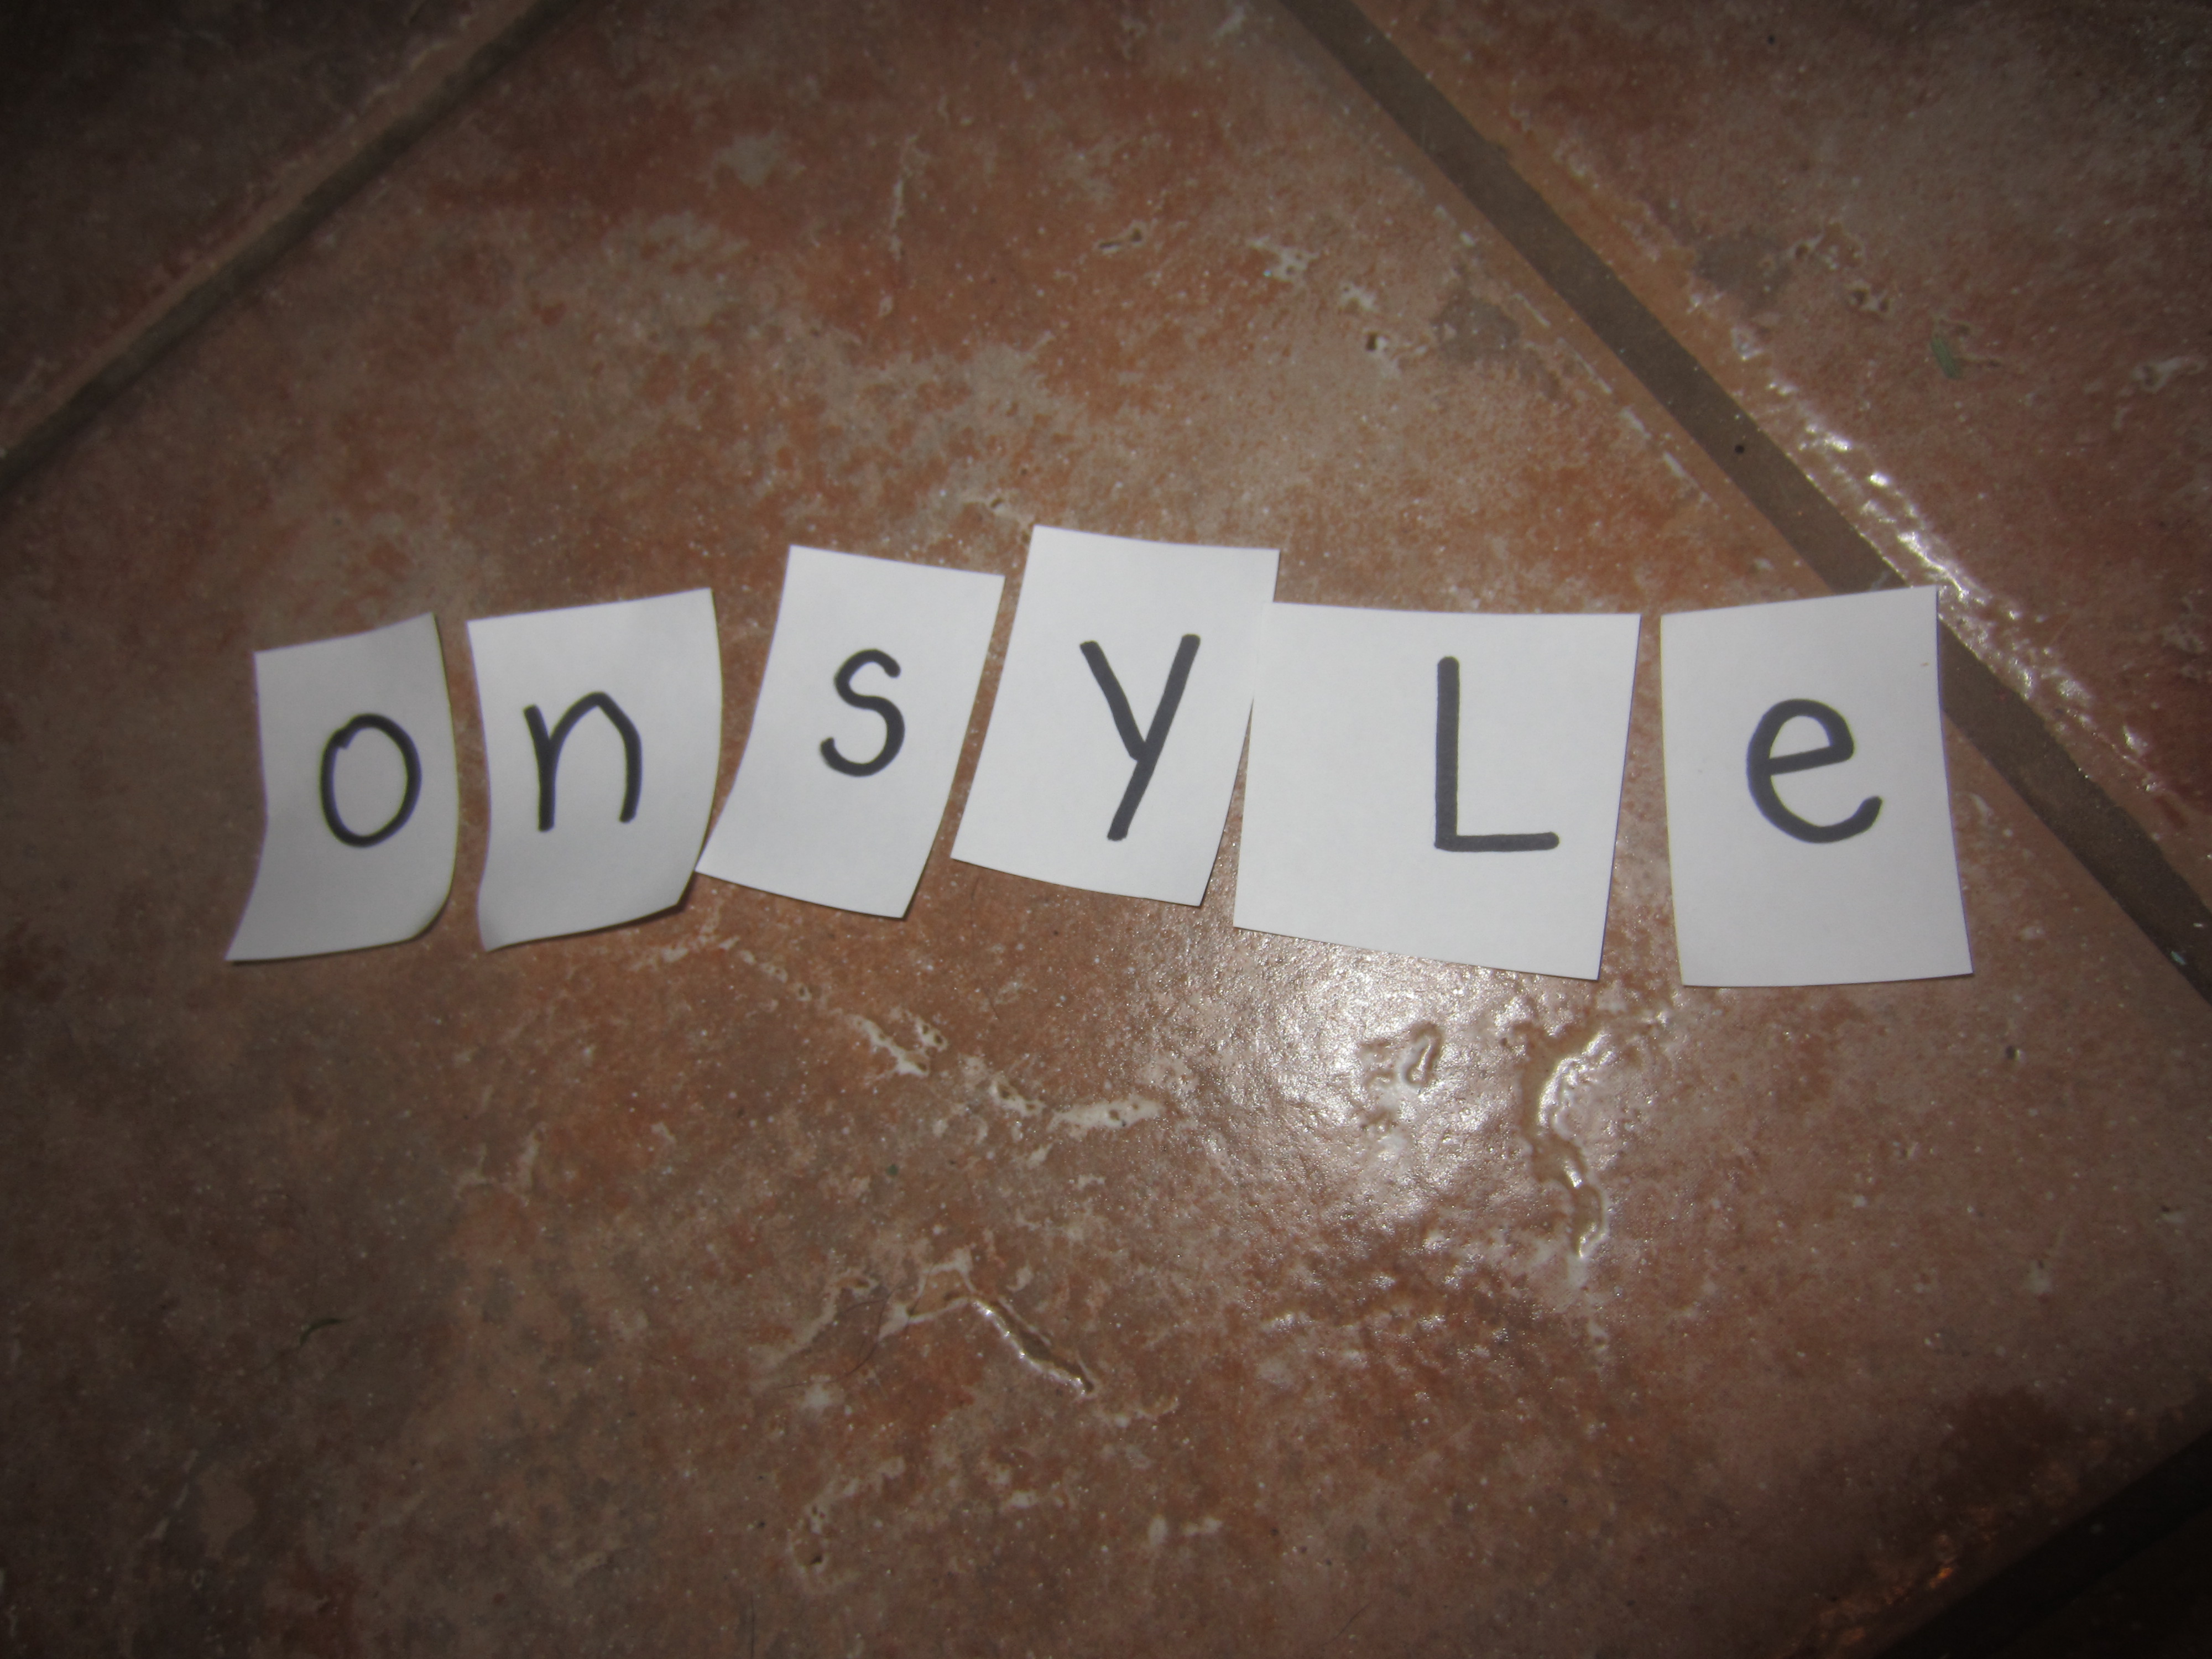
Next, I took away Leyson’s cheat sheet and asked him to spell his name.
Juuuust as I anticipated. So I brought out our language from the first activity…
Mommy Teacher: “What is the FIRST letter in Leyson?”
And he grabbed that L and put it underneath his scrambled name.
And the whole time he was singing his very own name song saying each letter of his name to the tune of “Bingo.” It really is magic how quickly they learn things when you tie a tune to it!
What other activities can you do with your Easter eggs? Sorting? Counting? Compare/Contrast? The learning possibilities are endless!
I had planned to do a different Easter craft activity every day this week, but you know what? This week FLEW by and we were never home!
Being Spring Break, I knew my kindergartner would want to be on the GO so I planned the week chock full of stuff… play dates to the park, zoo, arcade and more! So needless to say that by the time we got home, took naps, woke up, it was already dinner time!
Tonight we will be having a glow in the dark Easter egg hunt with all of our friends at our house! It will be so much fun! (If you want to do this, simply get a package of LARGE plastic eggs and glow in the dark bracelets to fill them. Then throw them in your yard. Bam! Glow in the dark Easter egg hunt).
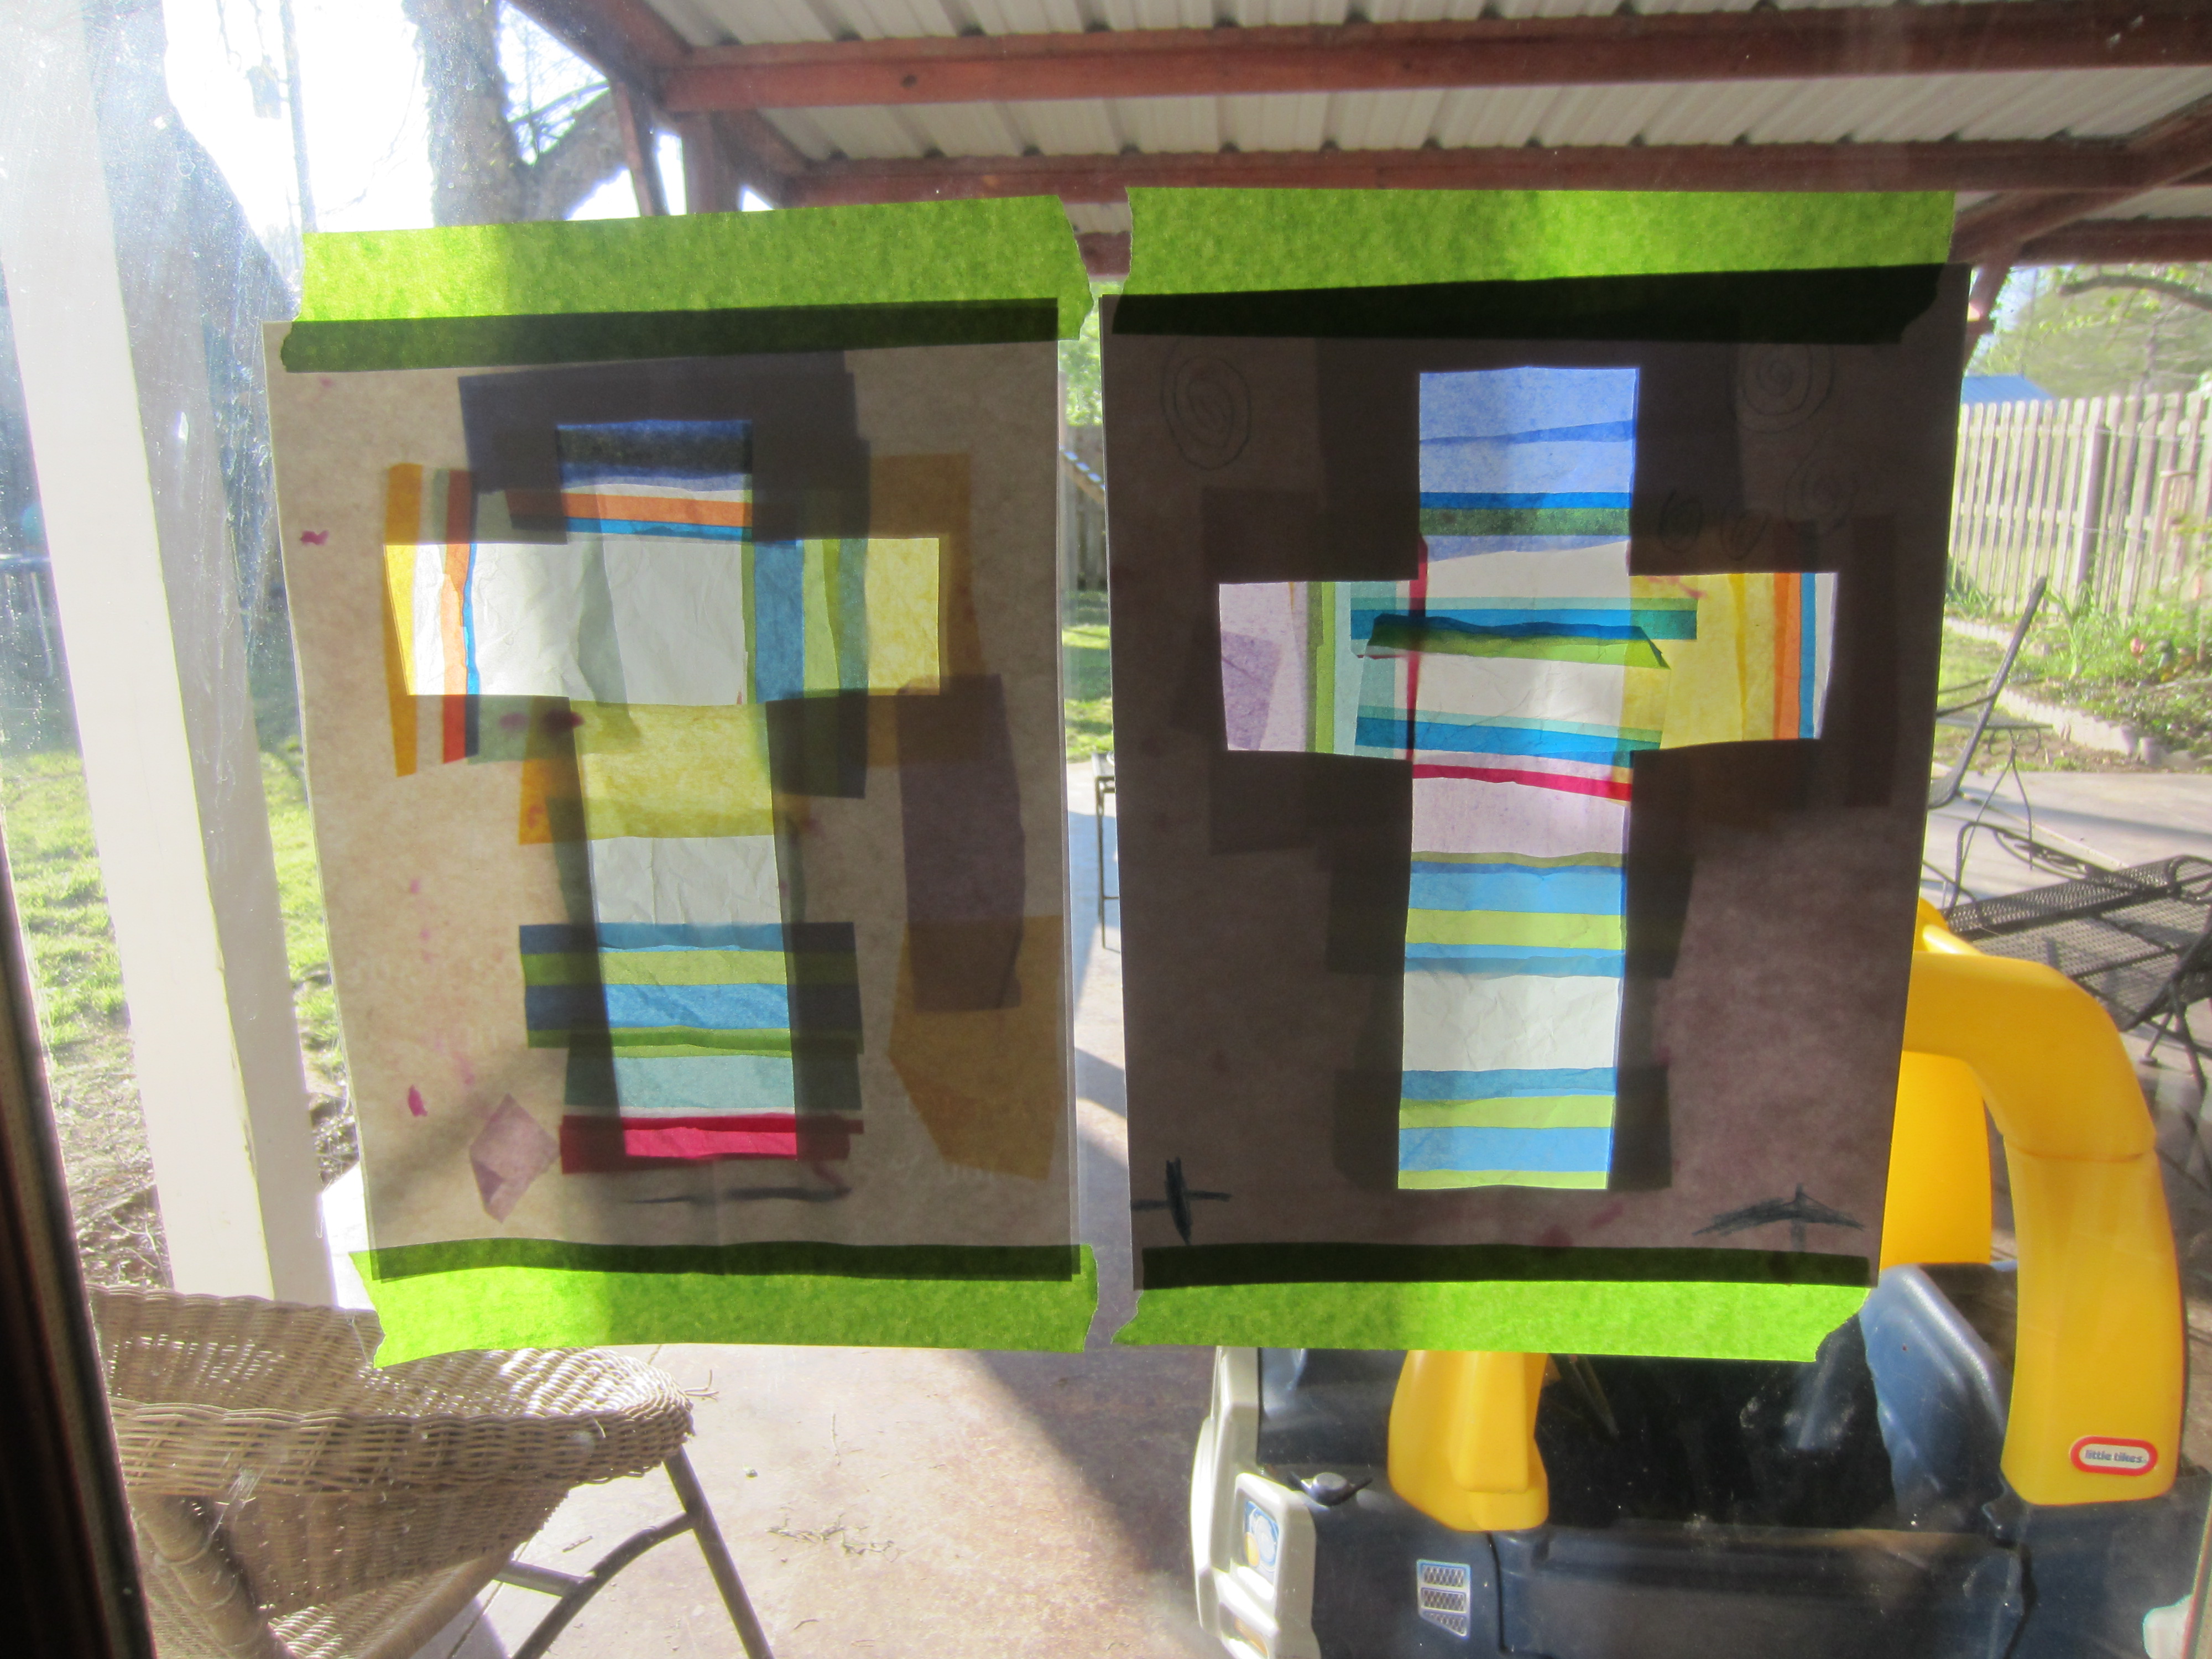
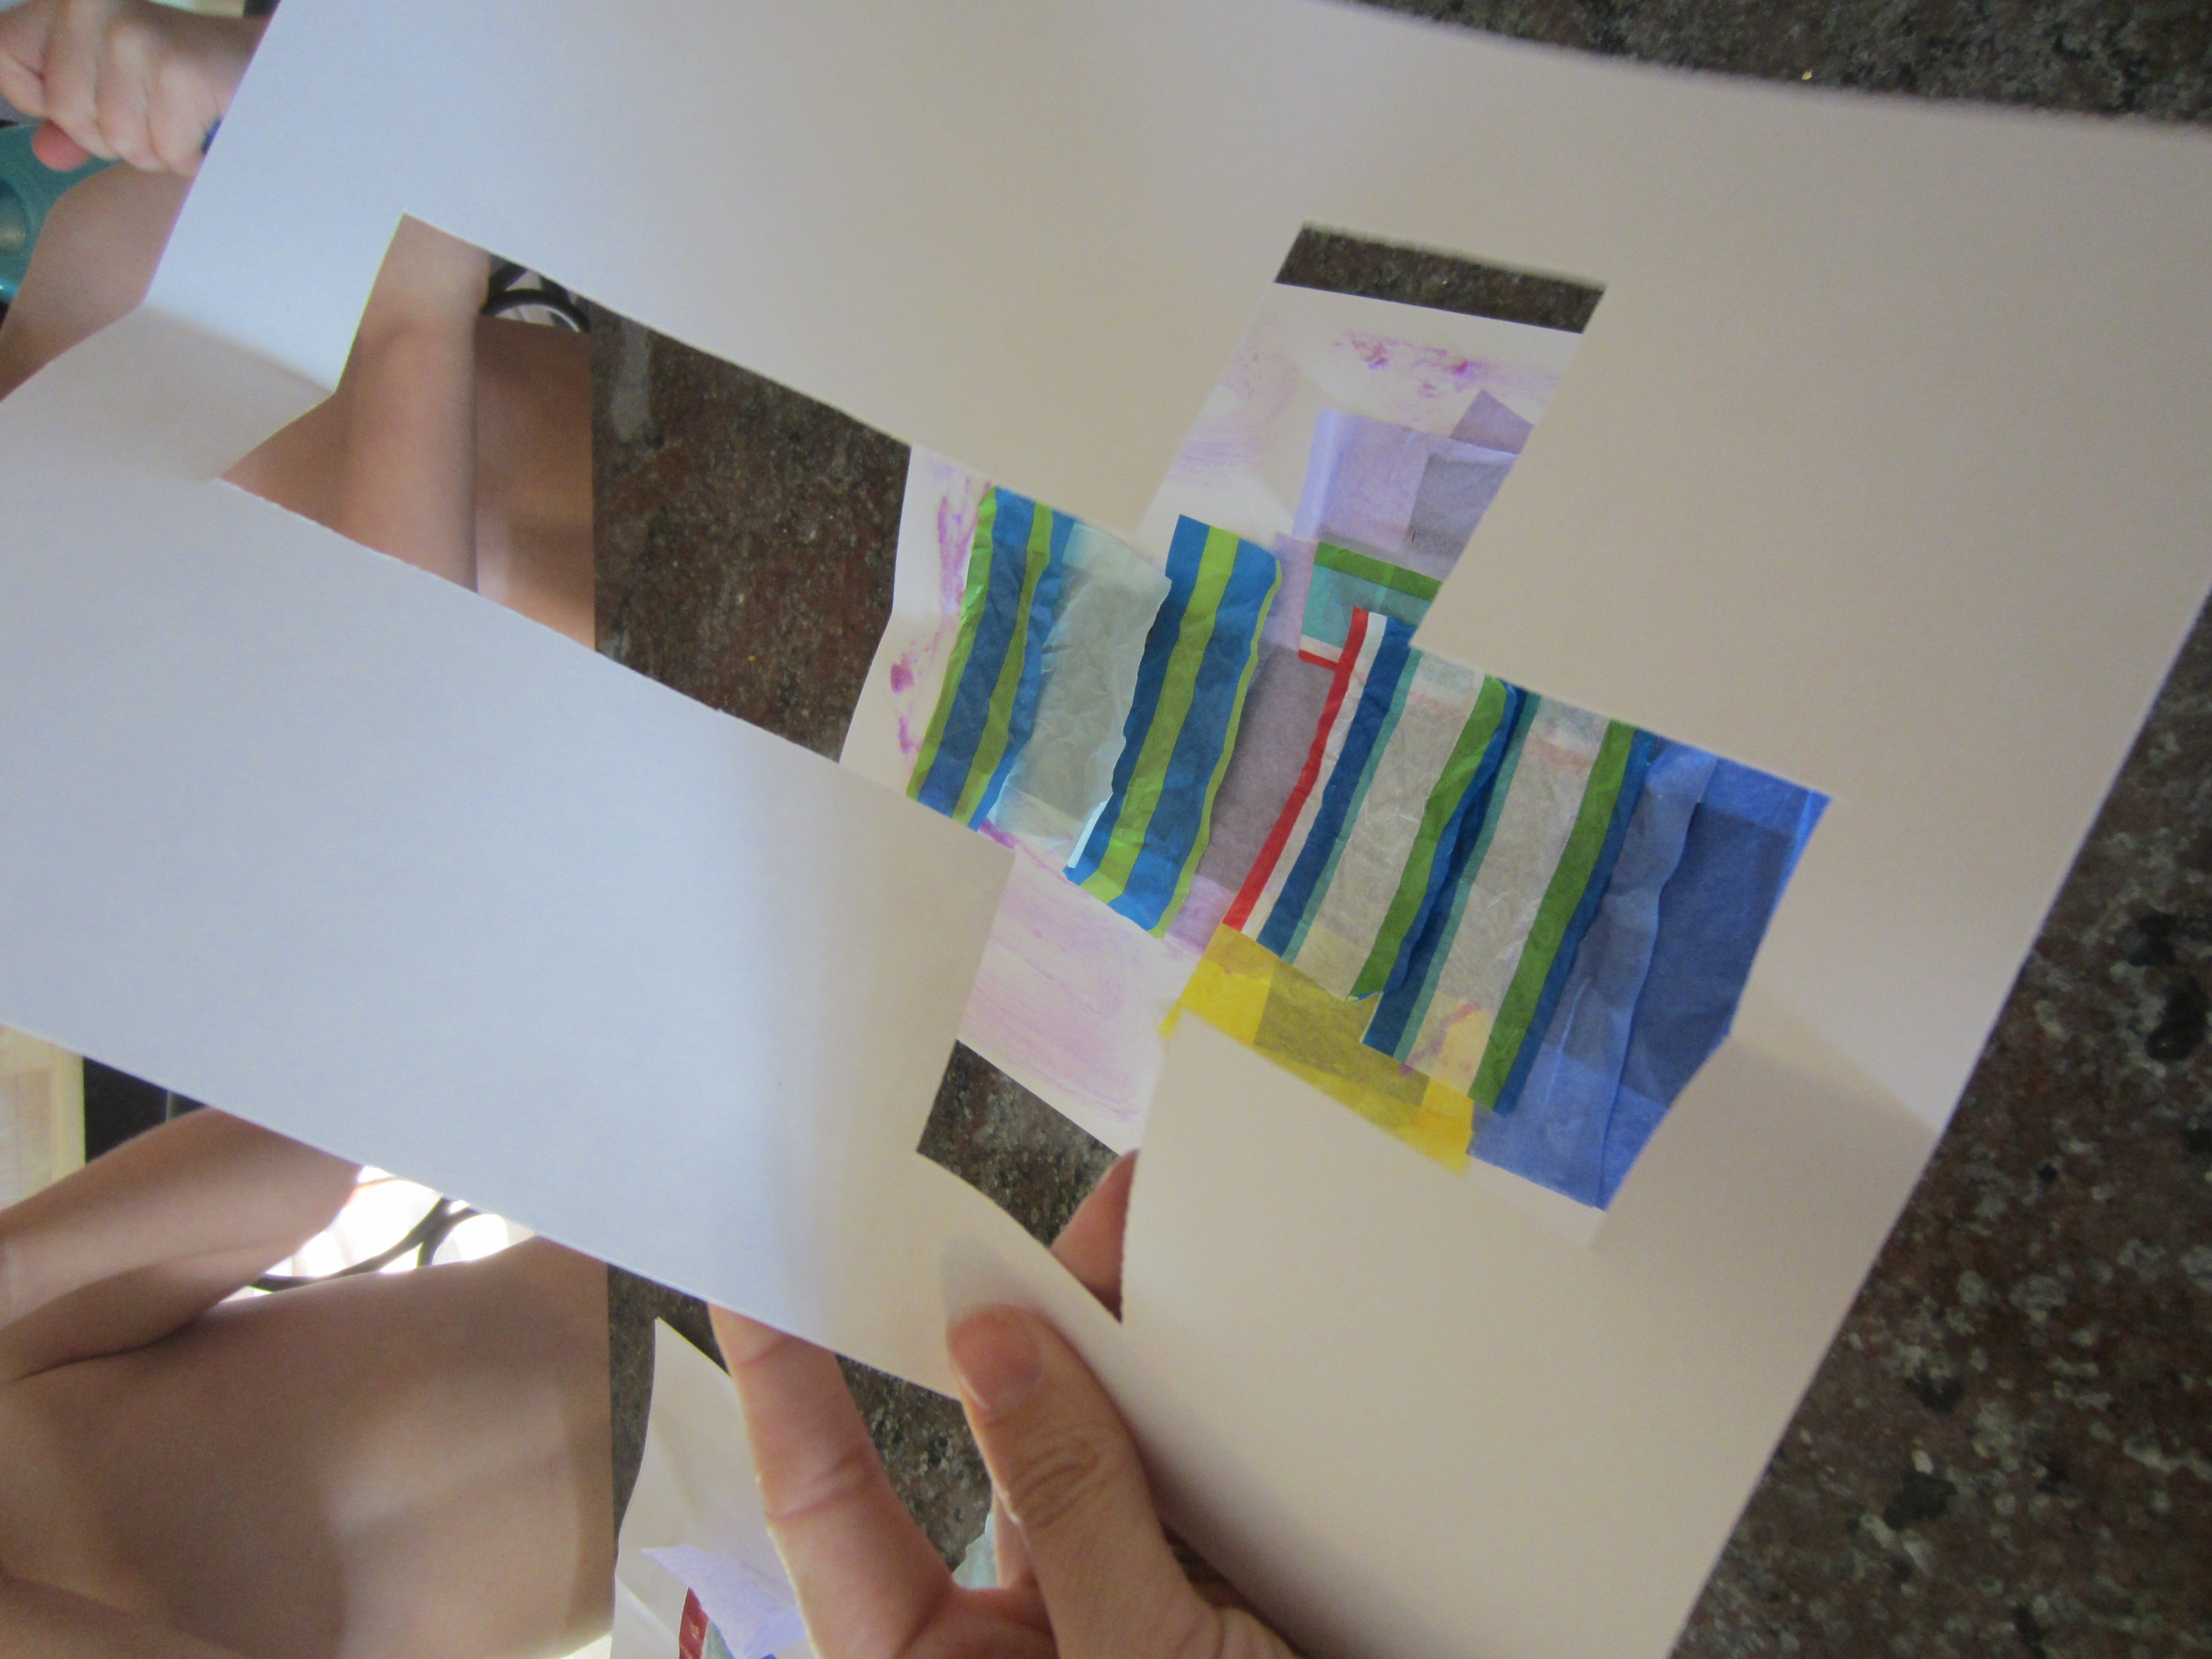
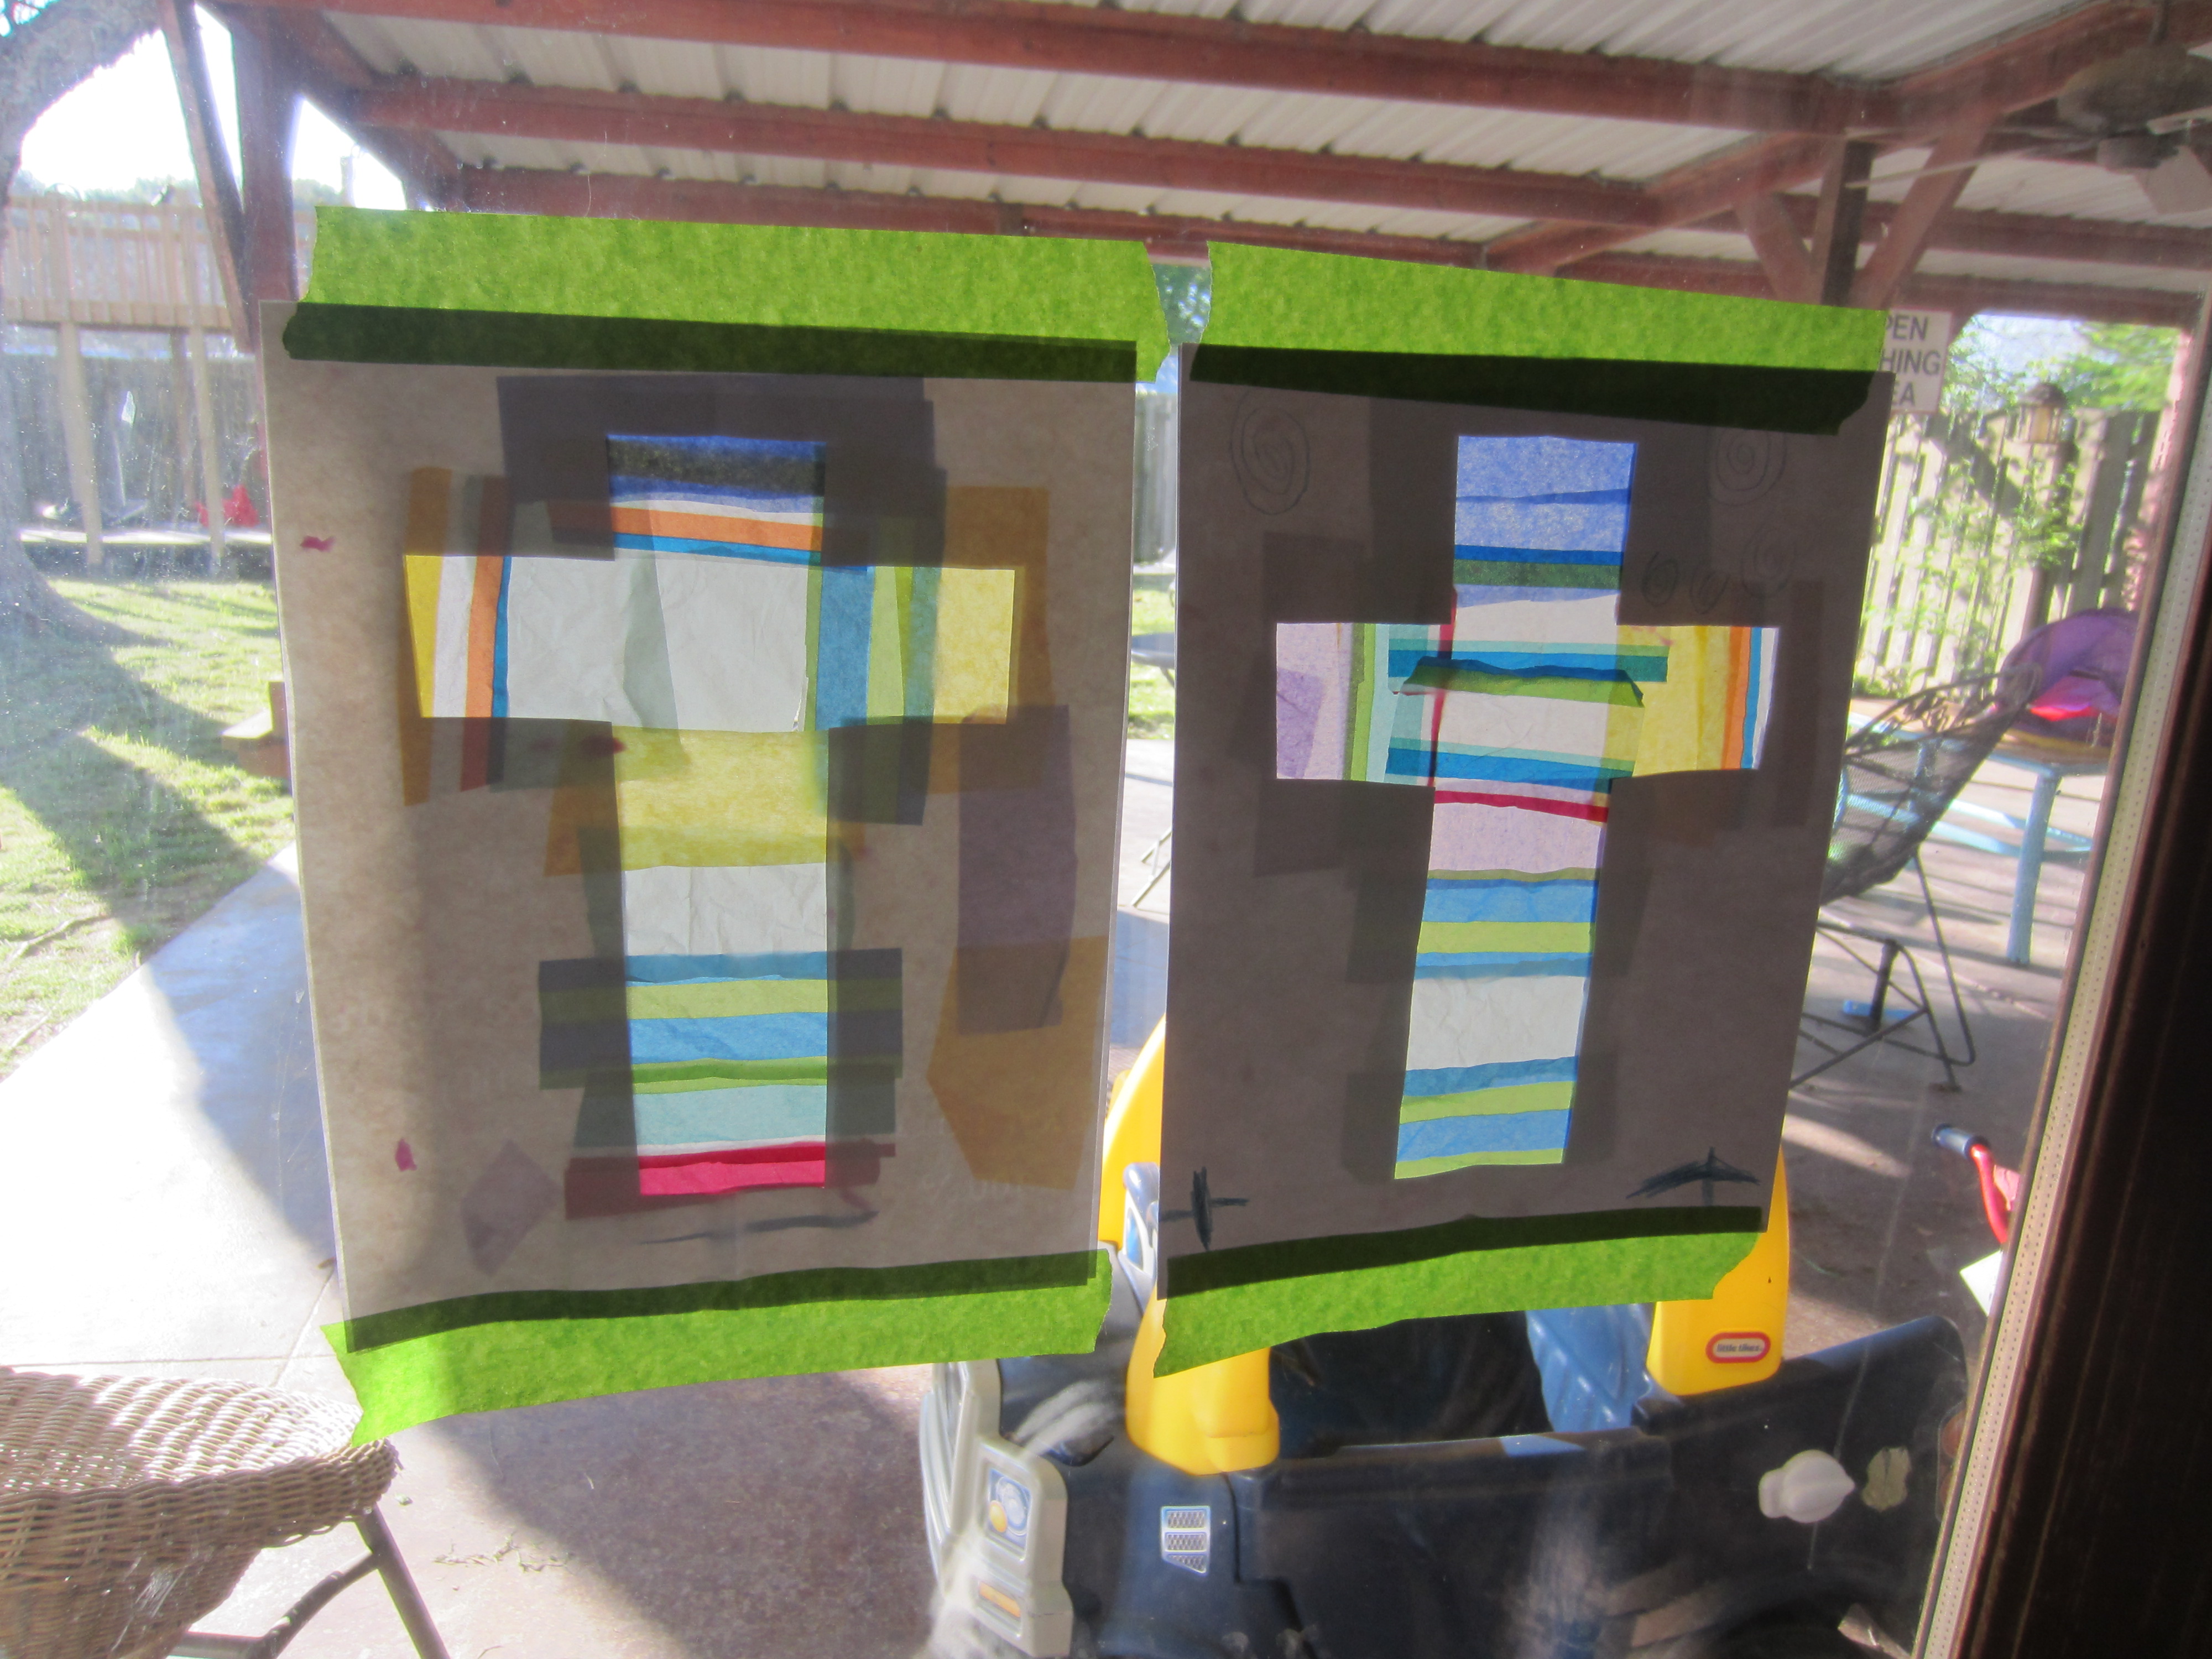
Anyway… onto the ONE Easter craft we were able to do – and we were able to complete it in about 15 minutes before we left for a play date one day this week! My kids call them Sun Crosses, for lack of a better name.
Materials:
2 sheets of paper per kid, scissors, tissue paper and stick glue
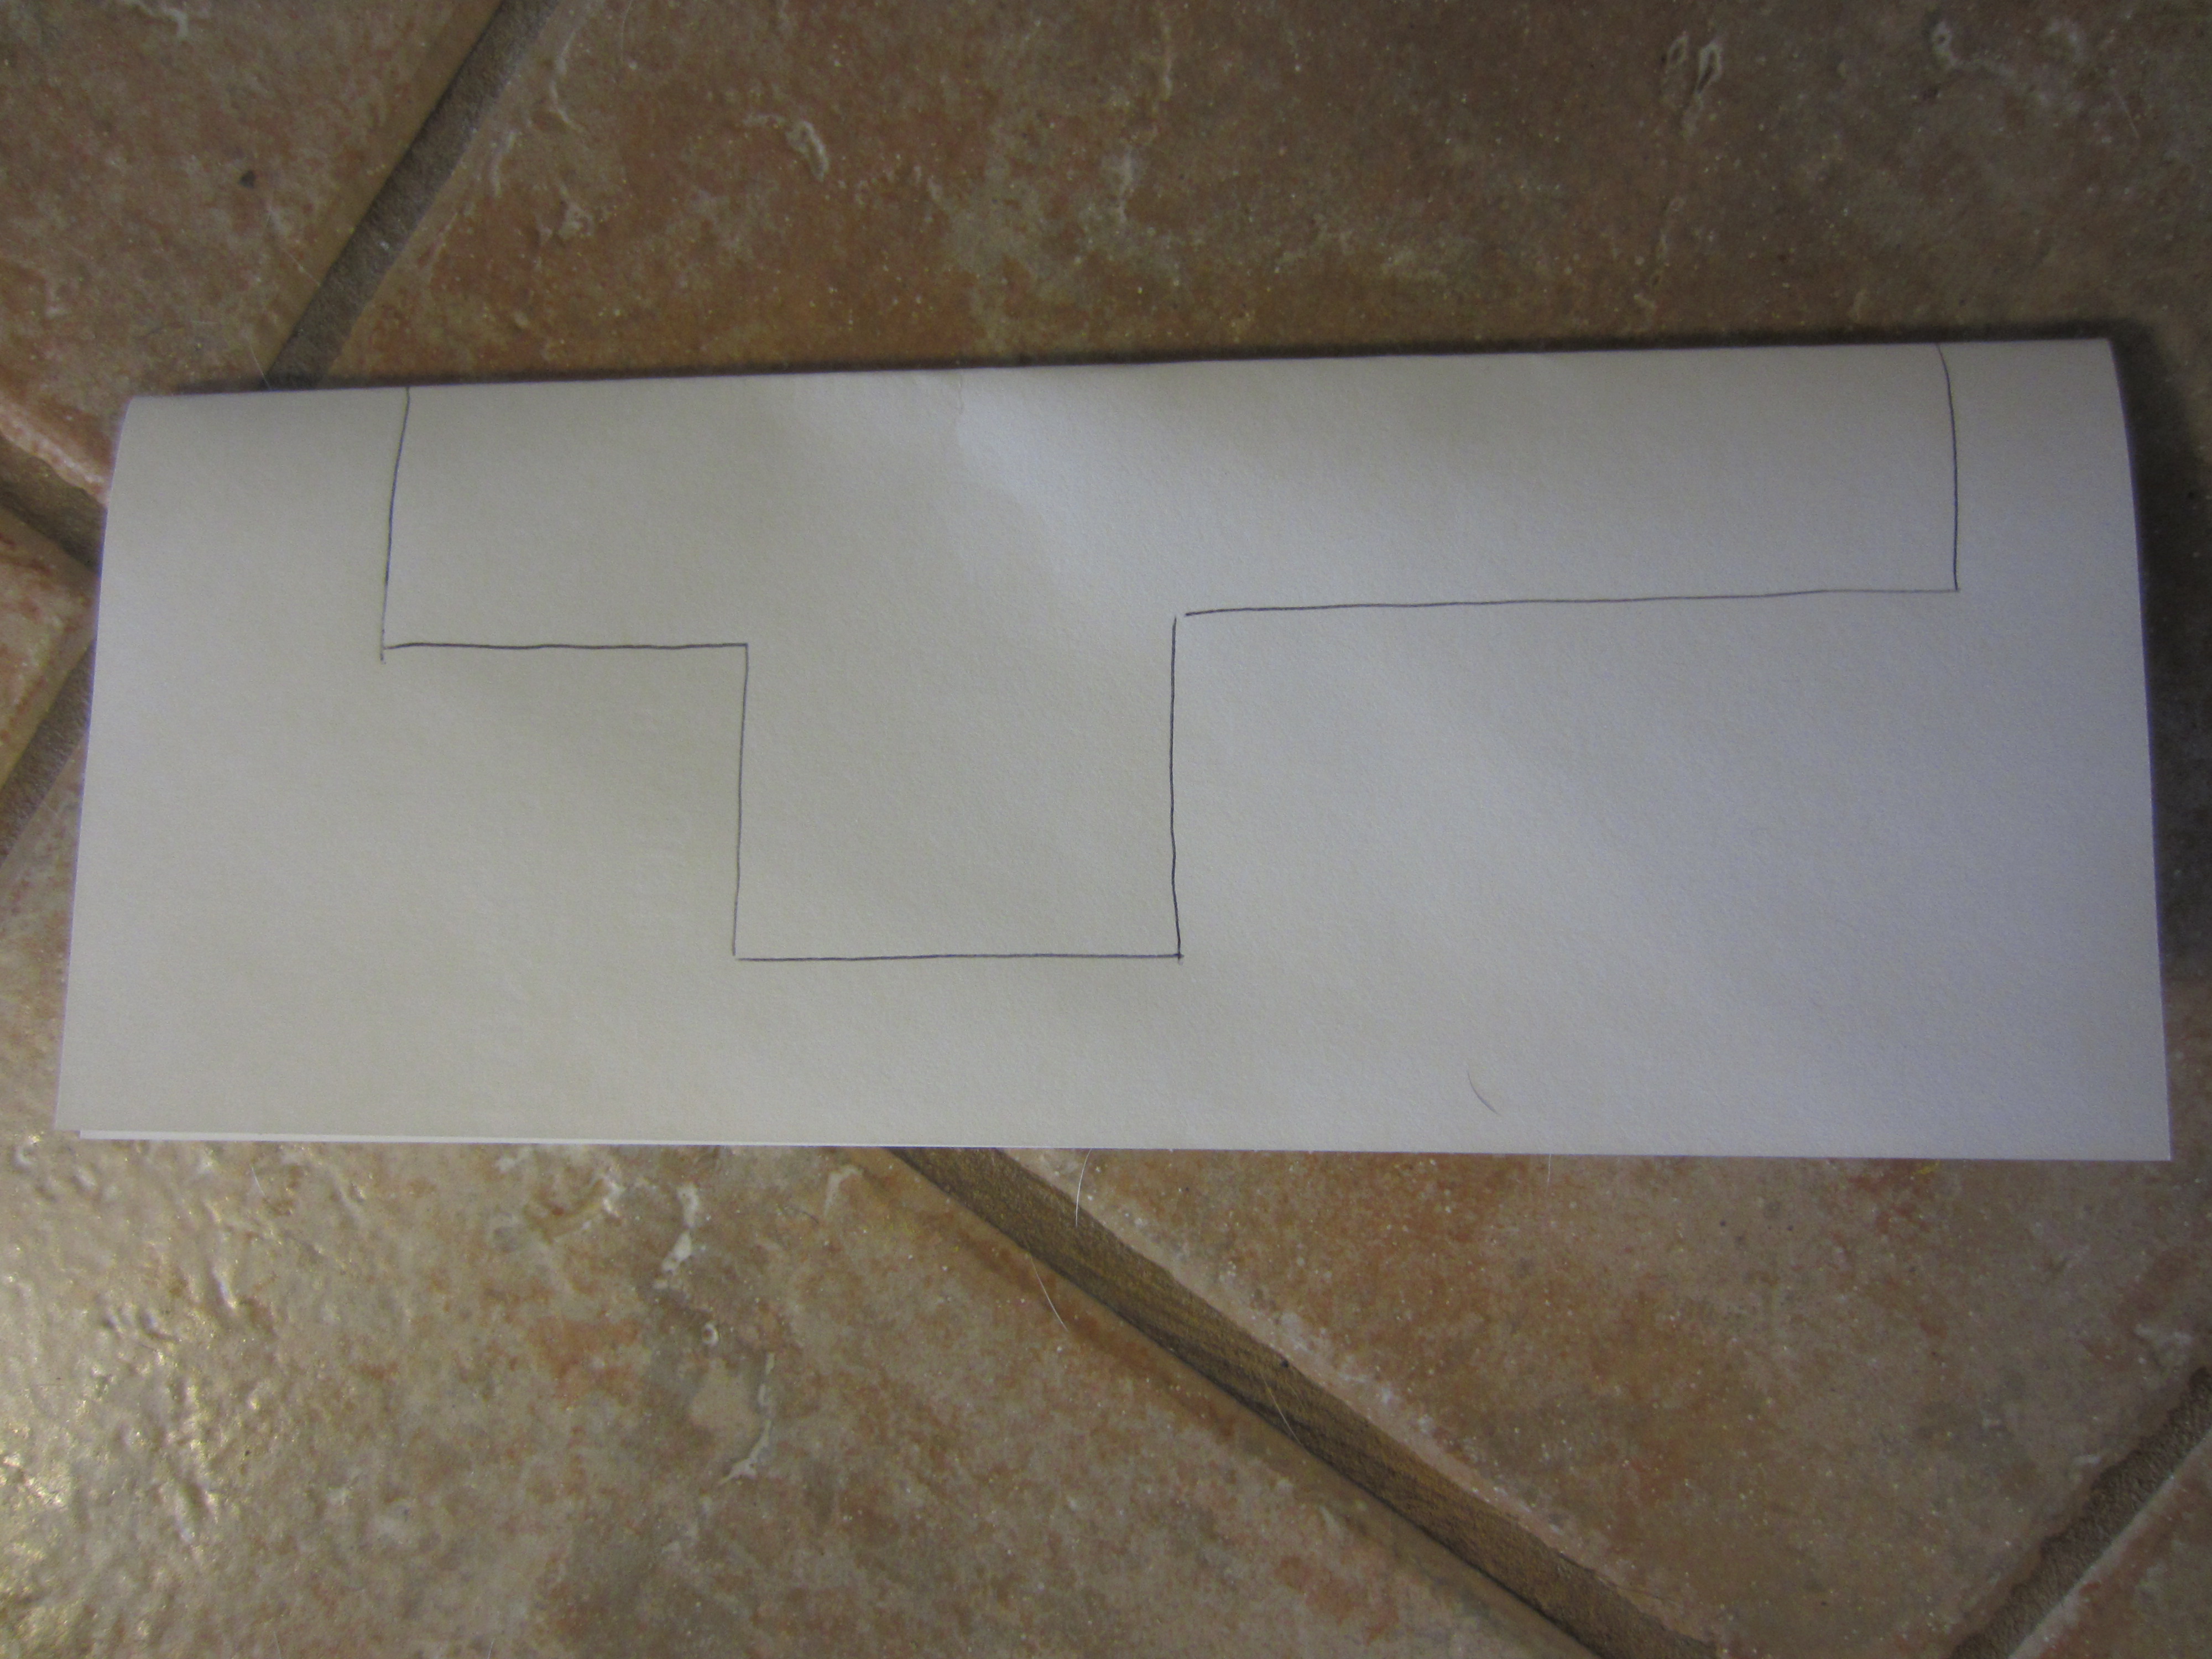
Step 1. Fold the 2 sheets of paper in half long ways together.
Step 2. Draw half of a cross on the fold.
Step 3. Cut out the 1/2 cross.
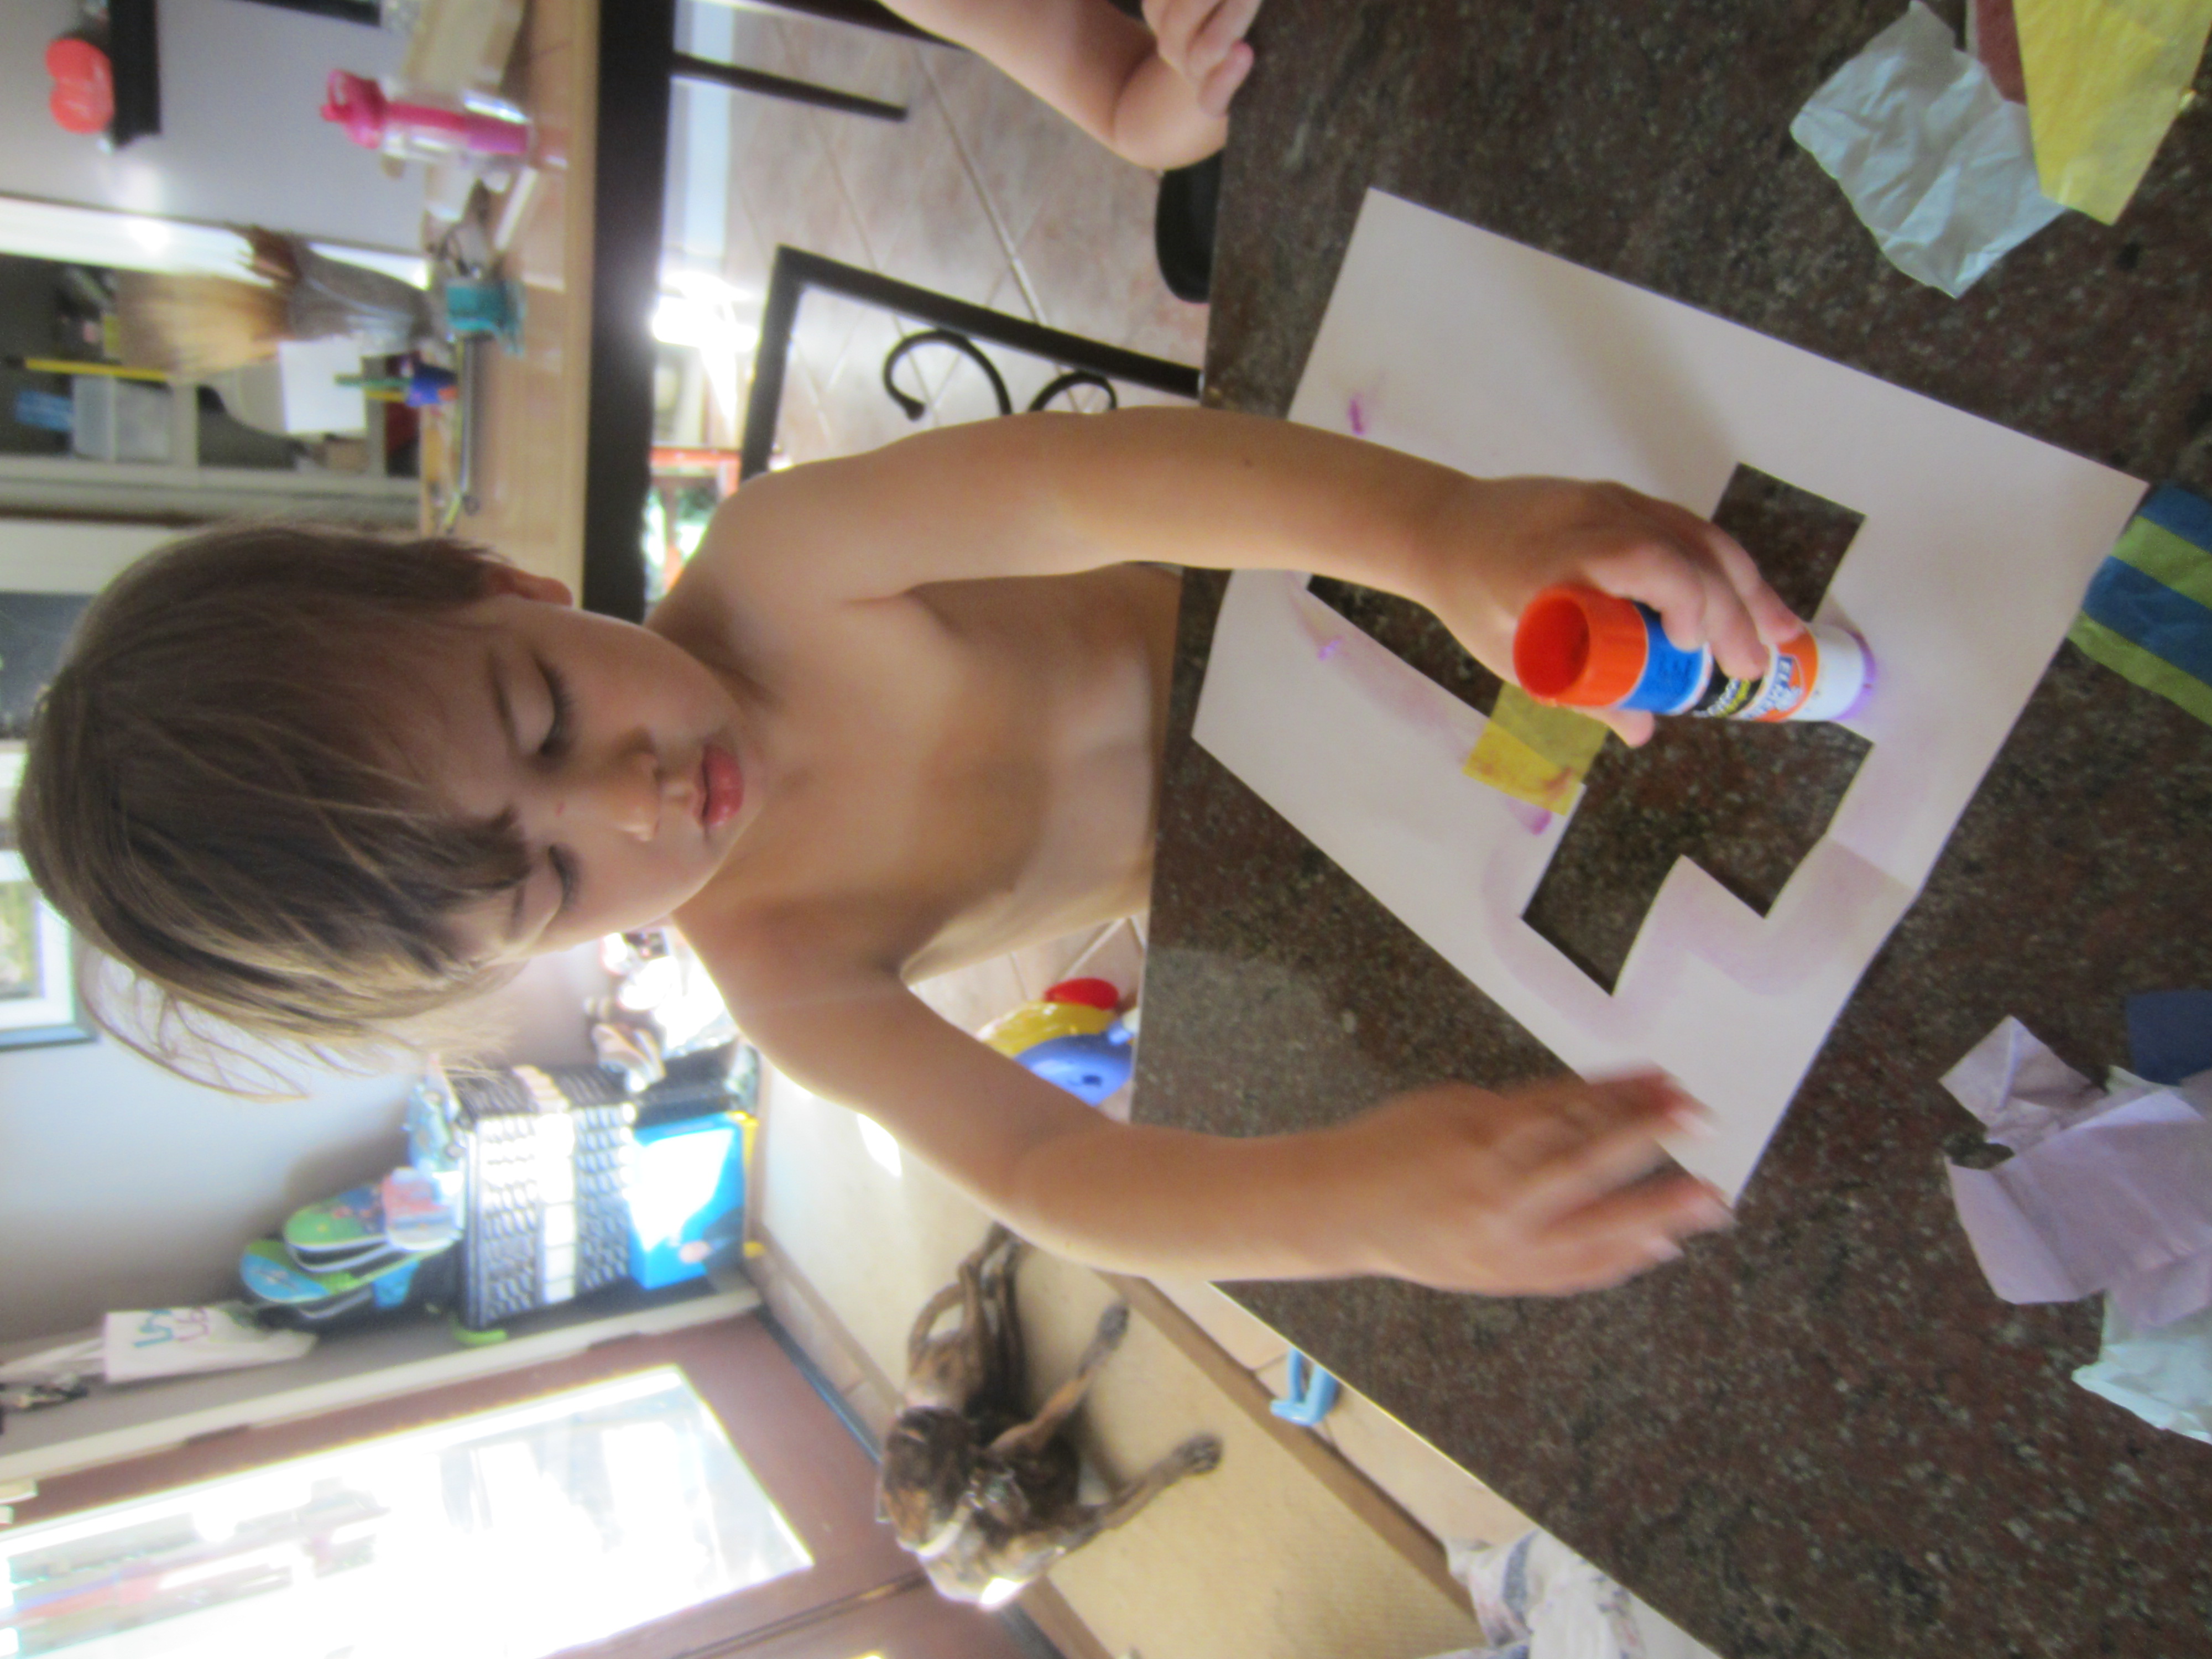
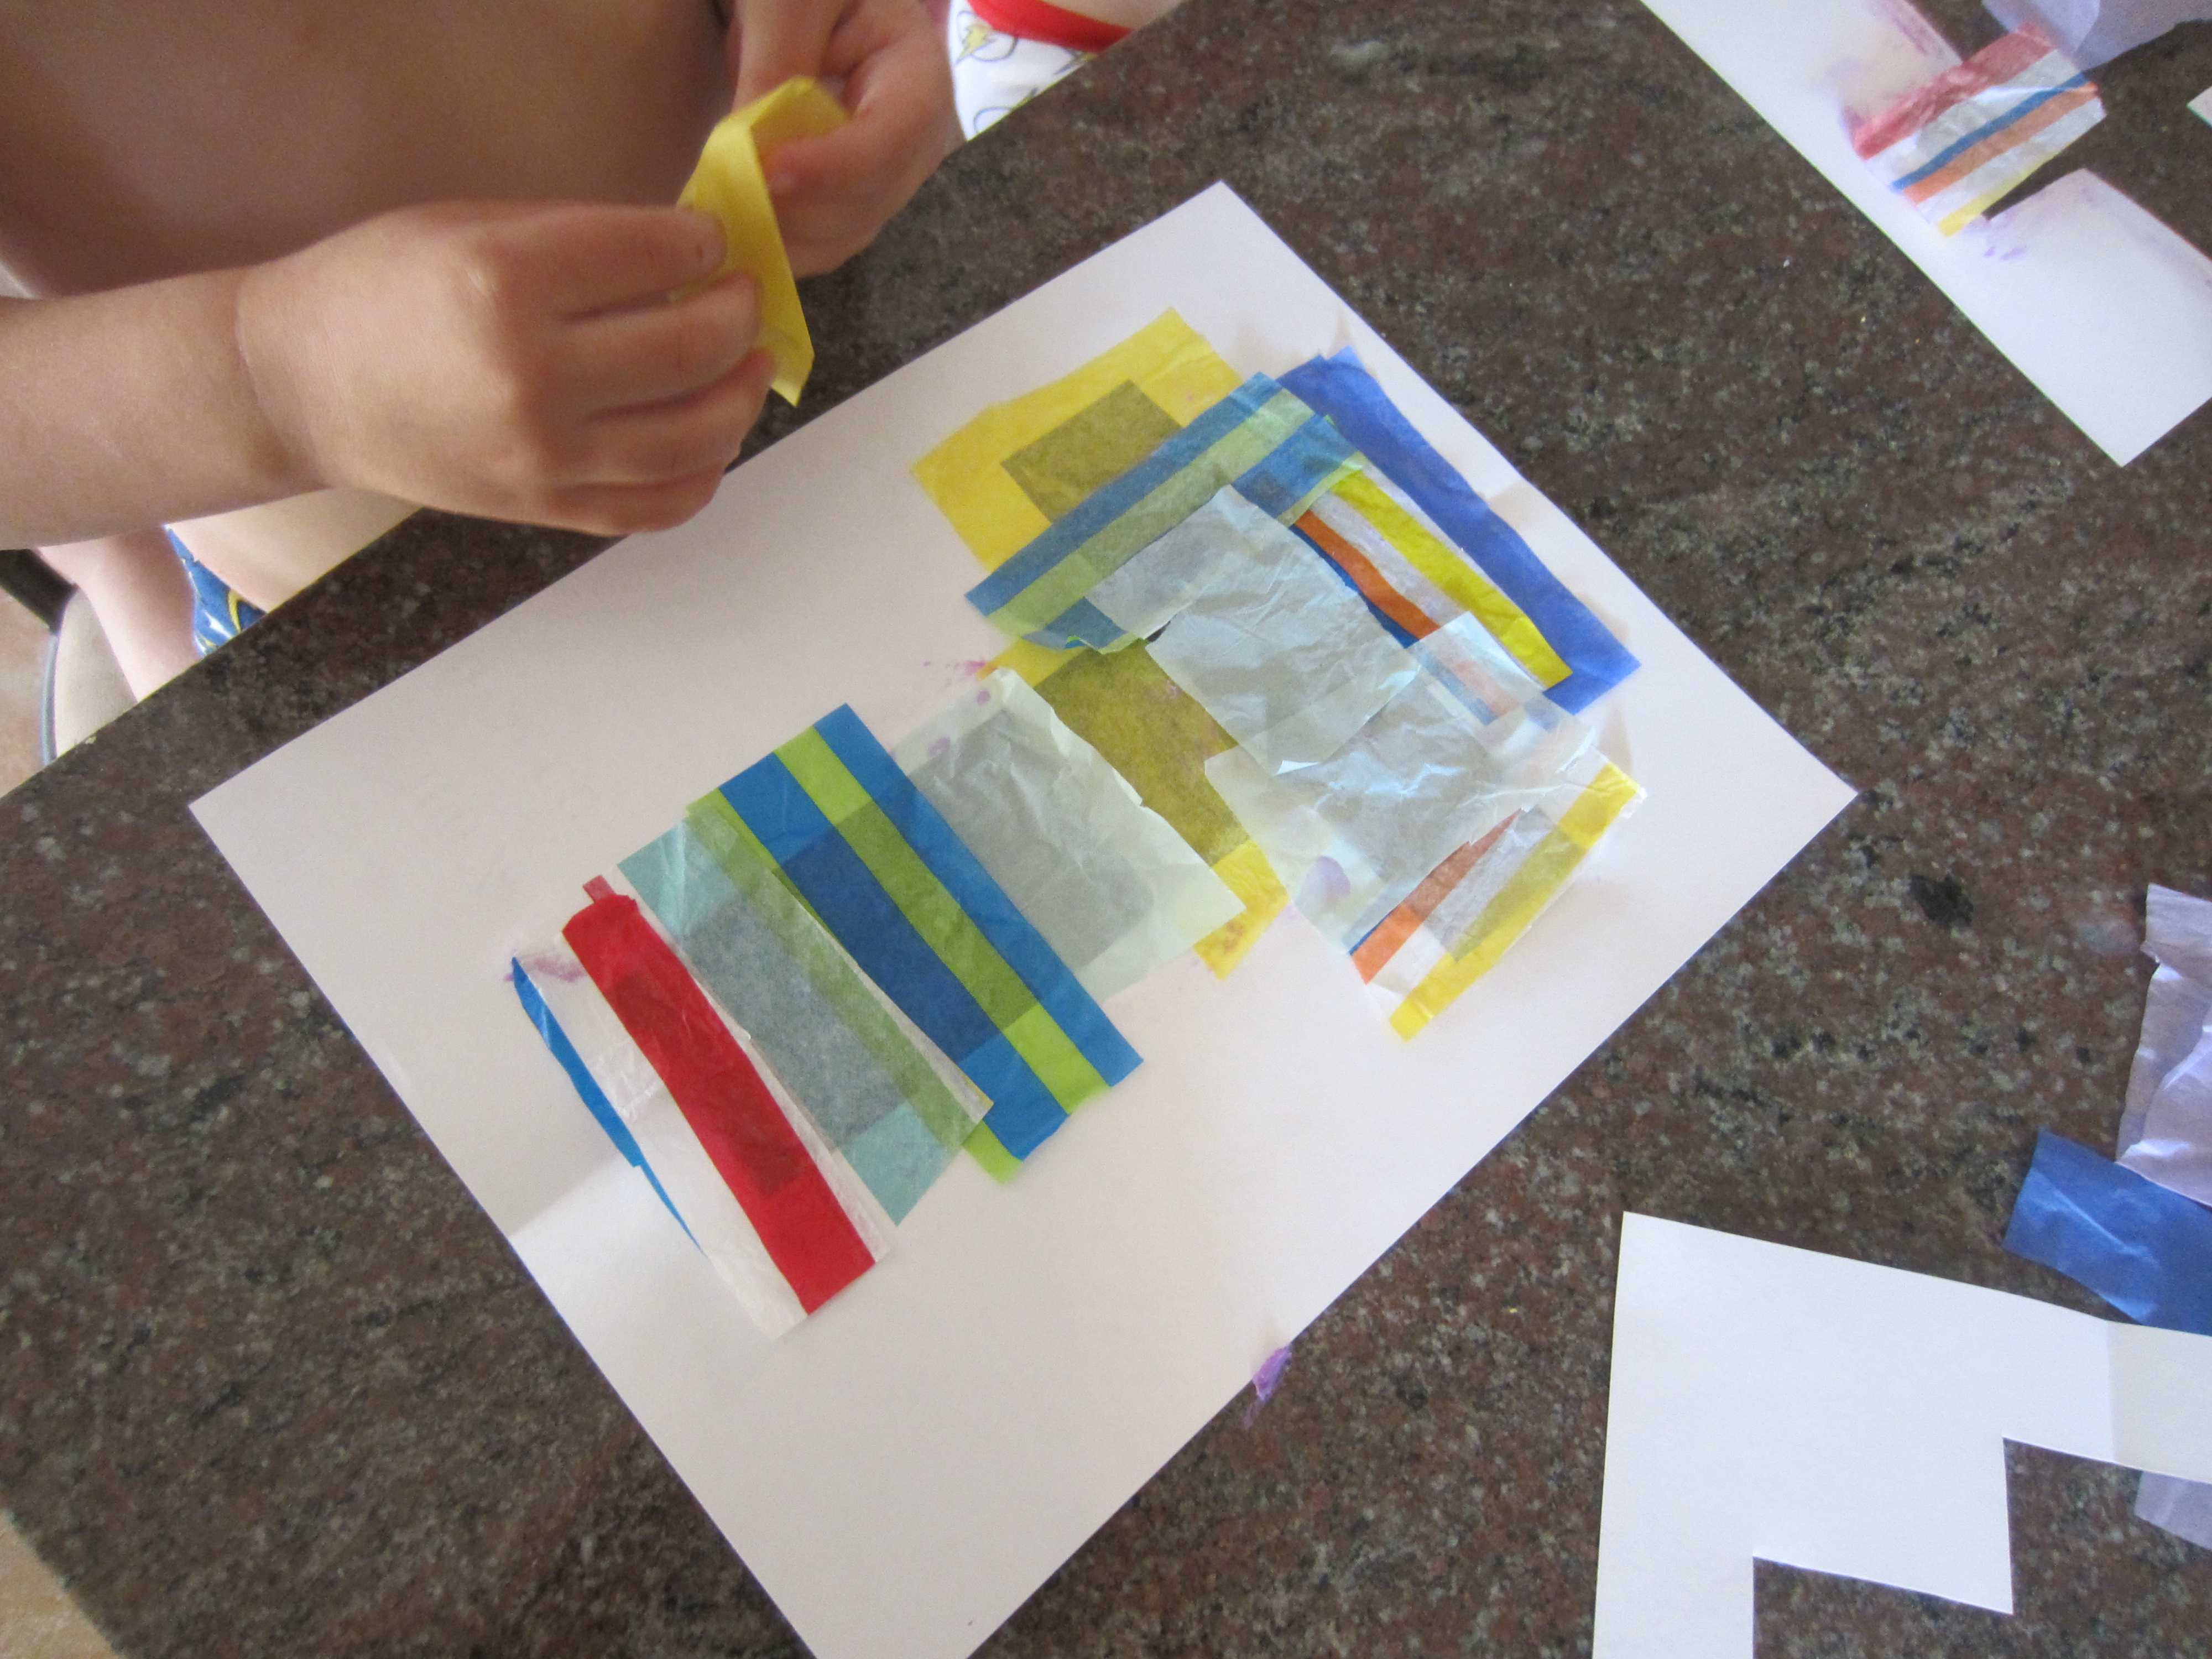
Step 4. Flatten one cross and cut 3-4 inch strips of tissue paper (or use one large sheet of tissue paper for your entire cross).
Step 5. Put the stick glue around the outside edge of the cross.
Step 6. Place the tissue paper across the opening for the cross. Do not leave any gaps.
Step 7. Take the other sheet of paper with the cross cut out and cover one side with the stick glue. Then glue it directly on top of the other cross on the tissue paper side.
Step 8. Add your own artistic flare around the crosses.
Step 9. Place in a sunlit window and watch the light shine through the cross!