Guiding Behavior

Would you like some string cheese with that WHINE?

We are teaching Sean Patrick A LOT right now.

 I try my best to purpose our “upcoming” days at night before I go to bed. Even if I just spend 15-30 minutes making a little “agenda” and some goals for the day. My goals might include some age-appropriate social studies skills like 1) caring for our pet 2) talking about our environment (signs, water, animals, places, workers) and some days I might focus on his social-emotional skills like self-control, communication, calming techniques, etc. But I mainly try to have a balanced day…which as a stay-at-home mom means a BALANCING ACT of mommy teaching, cleaning, feeding, changing, playing, managing, ETC.

Today I wanted to share some of my anti-whining techniques in a video and then share a printable I made for my little man since we are working on using our words and a big boy voice.

Telling him over and over “STOP WHINING” does not work for many reasons I could list, but these tricks and a few other positive reinforcement cues really help.

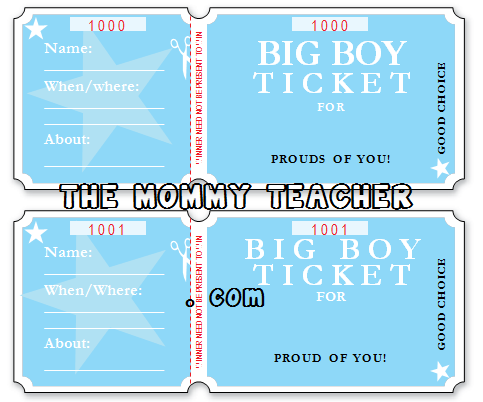
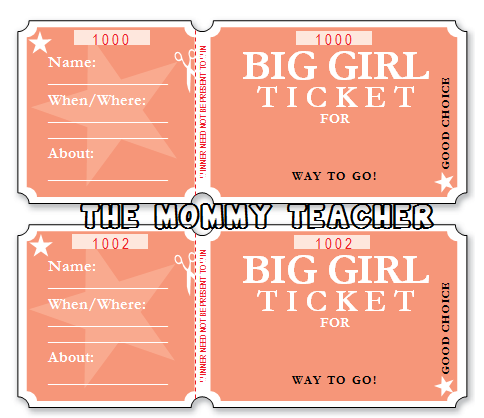
I made “raffle tickets” for Sean Patrick to receive to place into a jar each time he SELF-CORRECTS himself or CHOOSES to use his words/big boy voice or does something else that I notably want to reward him for.  When it is filled I plan to take him to the New Orleans Zoo or somewhere that we rarely get to go. I plan to fill out the left side of the ticket (talking out loud for extra positive reinforcement) and then tear the ticket.  He can place the right side in the jar and I will save the left side to share with daddy, MeMe, or family friends each chance I get so that he will be excited about his good choices.   I hope this is helpful to you as well!

Here is the  big boy ticket printable

Here is the big girl ticket printable

I used a Word Template to make these 🙂 Enjoy!

Remedy for the little one with the “I can’t” bug!

My son has been using the phrase “I can’t” a lot lately because he is so catious, but lately I have noticed that he is using it as a crutch. We went swimming in the lake on the fourth of July and when asked to go into the lake he cried out “I can’t” because he was scared. I don’t want to ignore his fears so we are going to be swimming in pools more often until he is comfortable. But, I also want to implement the “I can” mentality into his vocabulary as much as I have the influence to do so.

So, here are a few things that I have casually introduced to Sean Patrick and spent time encouraging him with in the past week.

1) We started off coloring an “I Can” book that I could read to him and encourage him to “read” to daddy and others as well.

2) We made a homemade video of him on my iphone acting out all of the “I CAN” actions from the book (I would’ve shared this, but he didn’t feel like putting clothes on for the video haha).

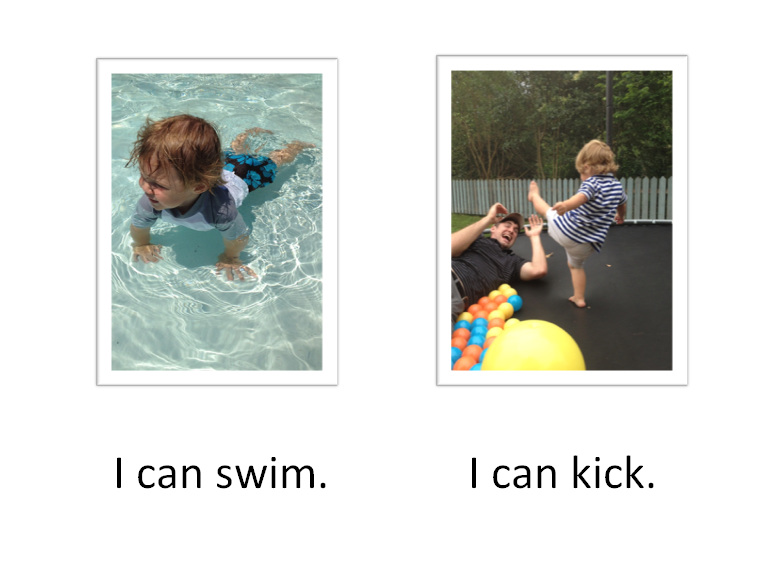
3) I started a little personalized “I can” book for him in a Word document:

And 4) I stumbled upon a Barney (yes the big purple dinosaur) video called “I Can Do That” featuring a group of friends playing “I Can _____” and then putting on a skit about it.

These tips are NOT a short-term “cure” for the I can’ts!  All of these ideas are things I am currently teaching toward a GOAL that we can replace “I can’t” with “I can.”  I’m sure there will be plenty of reminders 🙂

Self-Control … Body Language

The hot topic of the day….. self-control.  There are about 50 posts I could write (and read to learn about) the topic of self-control.  In fact, aren’t we all still learning to practice self-control?

No?

 Just me….

well alright.

Our little one’s brains are doing so much.  Their little brains are learning to communicate with their body parts, learning to control their emotions and harness their impulses, and lets face it….it’s hard!  I may WANT to push someone who is frustrating me to the extreme, but I have learned to harness my emotions, and CHOOSE to behave appropriately and sometimes even helpful in circumstances when someone flat out deserves the worst.   But our little ones have quite the learning curve when it comes to anger management in accordance with their body language.  My little two year old threw a fit at the end of storytime today and was flailing and kicking all over the place.  I realize that is his impulsive expression of disappointment, and I need to HELP him develop appropriate behaviors so they become a controlled response.

I found a GREAT article (and website) that addresses a FEW ways to reinforce acceptable behaviors at different ages and stages.  There are many other ways to develop little children’s understanding of appropriate responses, but I liked the mentality that is communicated here.

I am posting two videos below….please don’t judge me….I am a hot mess and so are my kids, but at 8:30 in the morning what do you expect?  They are simply an explanation and demonstration of a little technique that I came up with on the spot the other day to help Sean Patrick become aware of his body language.  I used techniques like this in my Kindergarten classroom so this teachable moment should apply to ages 2-5.  Hope it helps you!

Real Life Lessons From The Mommy Calling Blogger

I was following “Mekmommy” on Instagram and saw this fun, illustrated picture:

The Mommy Teacher that I am had to know the play-by-play and story behind this authentic, on-the-spot mini lesson.  Krista (this particular mommy teacher) is a mommy of three and the blogger behind “The Mommy Calling.”

So, here is the story shared by Krista that I hope inspires you the way that it inspired me:

“It all started b/c Maddox ran inside freaking out because our yard was full of spider webs. Of course, living in the country cobwebs will always be there, so I had to figure out a way to help him understand. It actually turned into a lesson about counting, adding, habitats, the food chain, a ton of things!

I tore some paper off of the butcher roll and drew a spider. As I drew it, we talked about how it has 2 parts to its body, the head and the body, setting up for a later conversation about the difference between insects and arachnids. Then we counted out the 8 legs as I drew them and talked about how there are 4 on each side and how 4+4=8.

I used a different color crayon to draw the “silk”. I drew some in the spider’s belly, and drew a line coming from the spider and as I drew a random “web” pattern I explained that as the spider moves with the silk behind him it makes the web. After I drew the web I talked about the uses of the web. I broke it down by first drawing the spider in the web telling Maddox that the spider lives in his web. Then I drew an egg sac and explained that this is where the spider lays its eggs and they hatch. I drew a bug flying on the outside of the web and a dotted line leading to the web explaining that as the bug is flying it gets caught in the web because it is so sticky. I explained that the sticky web is how the spiders catch their food to eat. I drew an arrow from the spider to the bug and explained how the spider will then eat the bug. I then asked him if he remembered what the web was for and we broke it down into living, laying eggs, and eating.

Maddox then got his own crayon to copy what I drew and he explained it back to me while I reinforced that there were 2 body parts and counting and adding of the legs (making sure he drew 4 on each side rather than just drawing out 8 random legs so he could visually see the 4+4=8). We didn’t go into the details of the web again, but again we discussed the live, lay eggs, eat. All-in-all it was about 15 minutes and he was so proud that he spent the next 15 minutes talking about it over and over and hung his picture up and called his daddy to tell him about it. In 30 minutes he learned so much about so many things. And it wasn’t anything that was hard to explain or too over his head. It was such a great reminder of how many important things they can learn without a classroom and without making it a boring ‘lesson.'”

Christmas Tree Counting Printable

I can’t wait to share my activity ideas and schedule that I am setting up for my little one, as well as another great giveaway on the way!

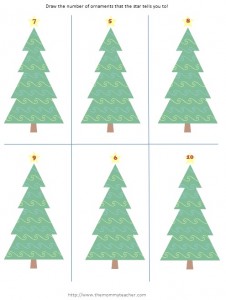
In the meantime, here is a freebie that I made for your little one to practice drawing sets of objects.  Don’t just hand your little one a set of crayons/markers and say “get busy.”

First, lay the Christmas Tree Counting Printable on the table with something small and colorful (like skittles) that you and your little one can use to practice counting sets together.

Then, point to one of the trees and show your little one how you might “decorate the tree.”  “Ooh, this tree has the number nine on the star, I’m going to decorate the tree with nine colorful skittles! One, two, three, four, …..etc.”

This is a great way to model the directions by showing your little one how to recognize the number and count out that given quantity, AND by modeling one-to-one correspondence (counting one object per given number).

After you have your little one  complete the hands-on round of the printable, on their own (assisting and prompting where necessary), then explain that instead of skittles, this time they will draw the number of ornaments (circles, candy canes, snowflakes, or whatever shape he/she wants).  Before they begin, model an example of how to do this on a separate sheet of paper.  And that’s it; now you have purposefully used a printable 🙂

Related Posts Plugin for WordPress, Blogger...

1 3 4 5 6 7 9