Month: October 2013

TMT Photo Shoot!

1 photographer + 2 Mommy Teachers + our 6 kids = total mayhem!

Jessica and I are bouncing off the walls after we had a super fun, high-energy, awesomely chaotic photo shoot with a local professional photographer and we cannot wait to see the results!

Kelsey Ryals of Kelsey Ann Photography had amazing patience while our 3+3 kids ran around spilling water, tracking play dough through her house, dumping toys all over the place, and drooling tootsie rolls as Jess and I danced around making funny noises to get the kids to cooperate for that magic shot – all while “Down by the Bay” and other kids’ songs played in the background.  Can you just imagine the scene?

IMG_20131028_155549_017 IMG_20131028_155506_968 IMG_20131028_155505_402 
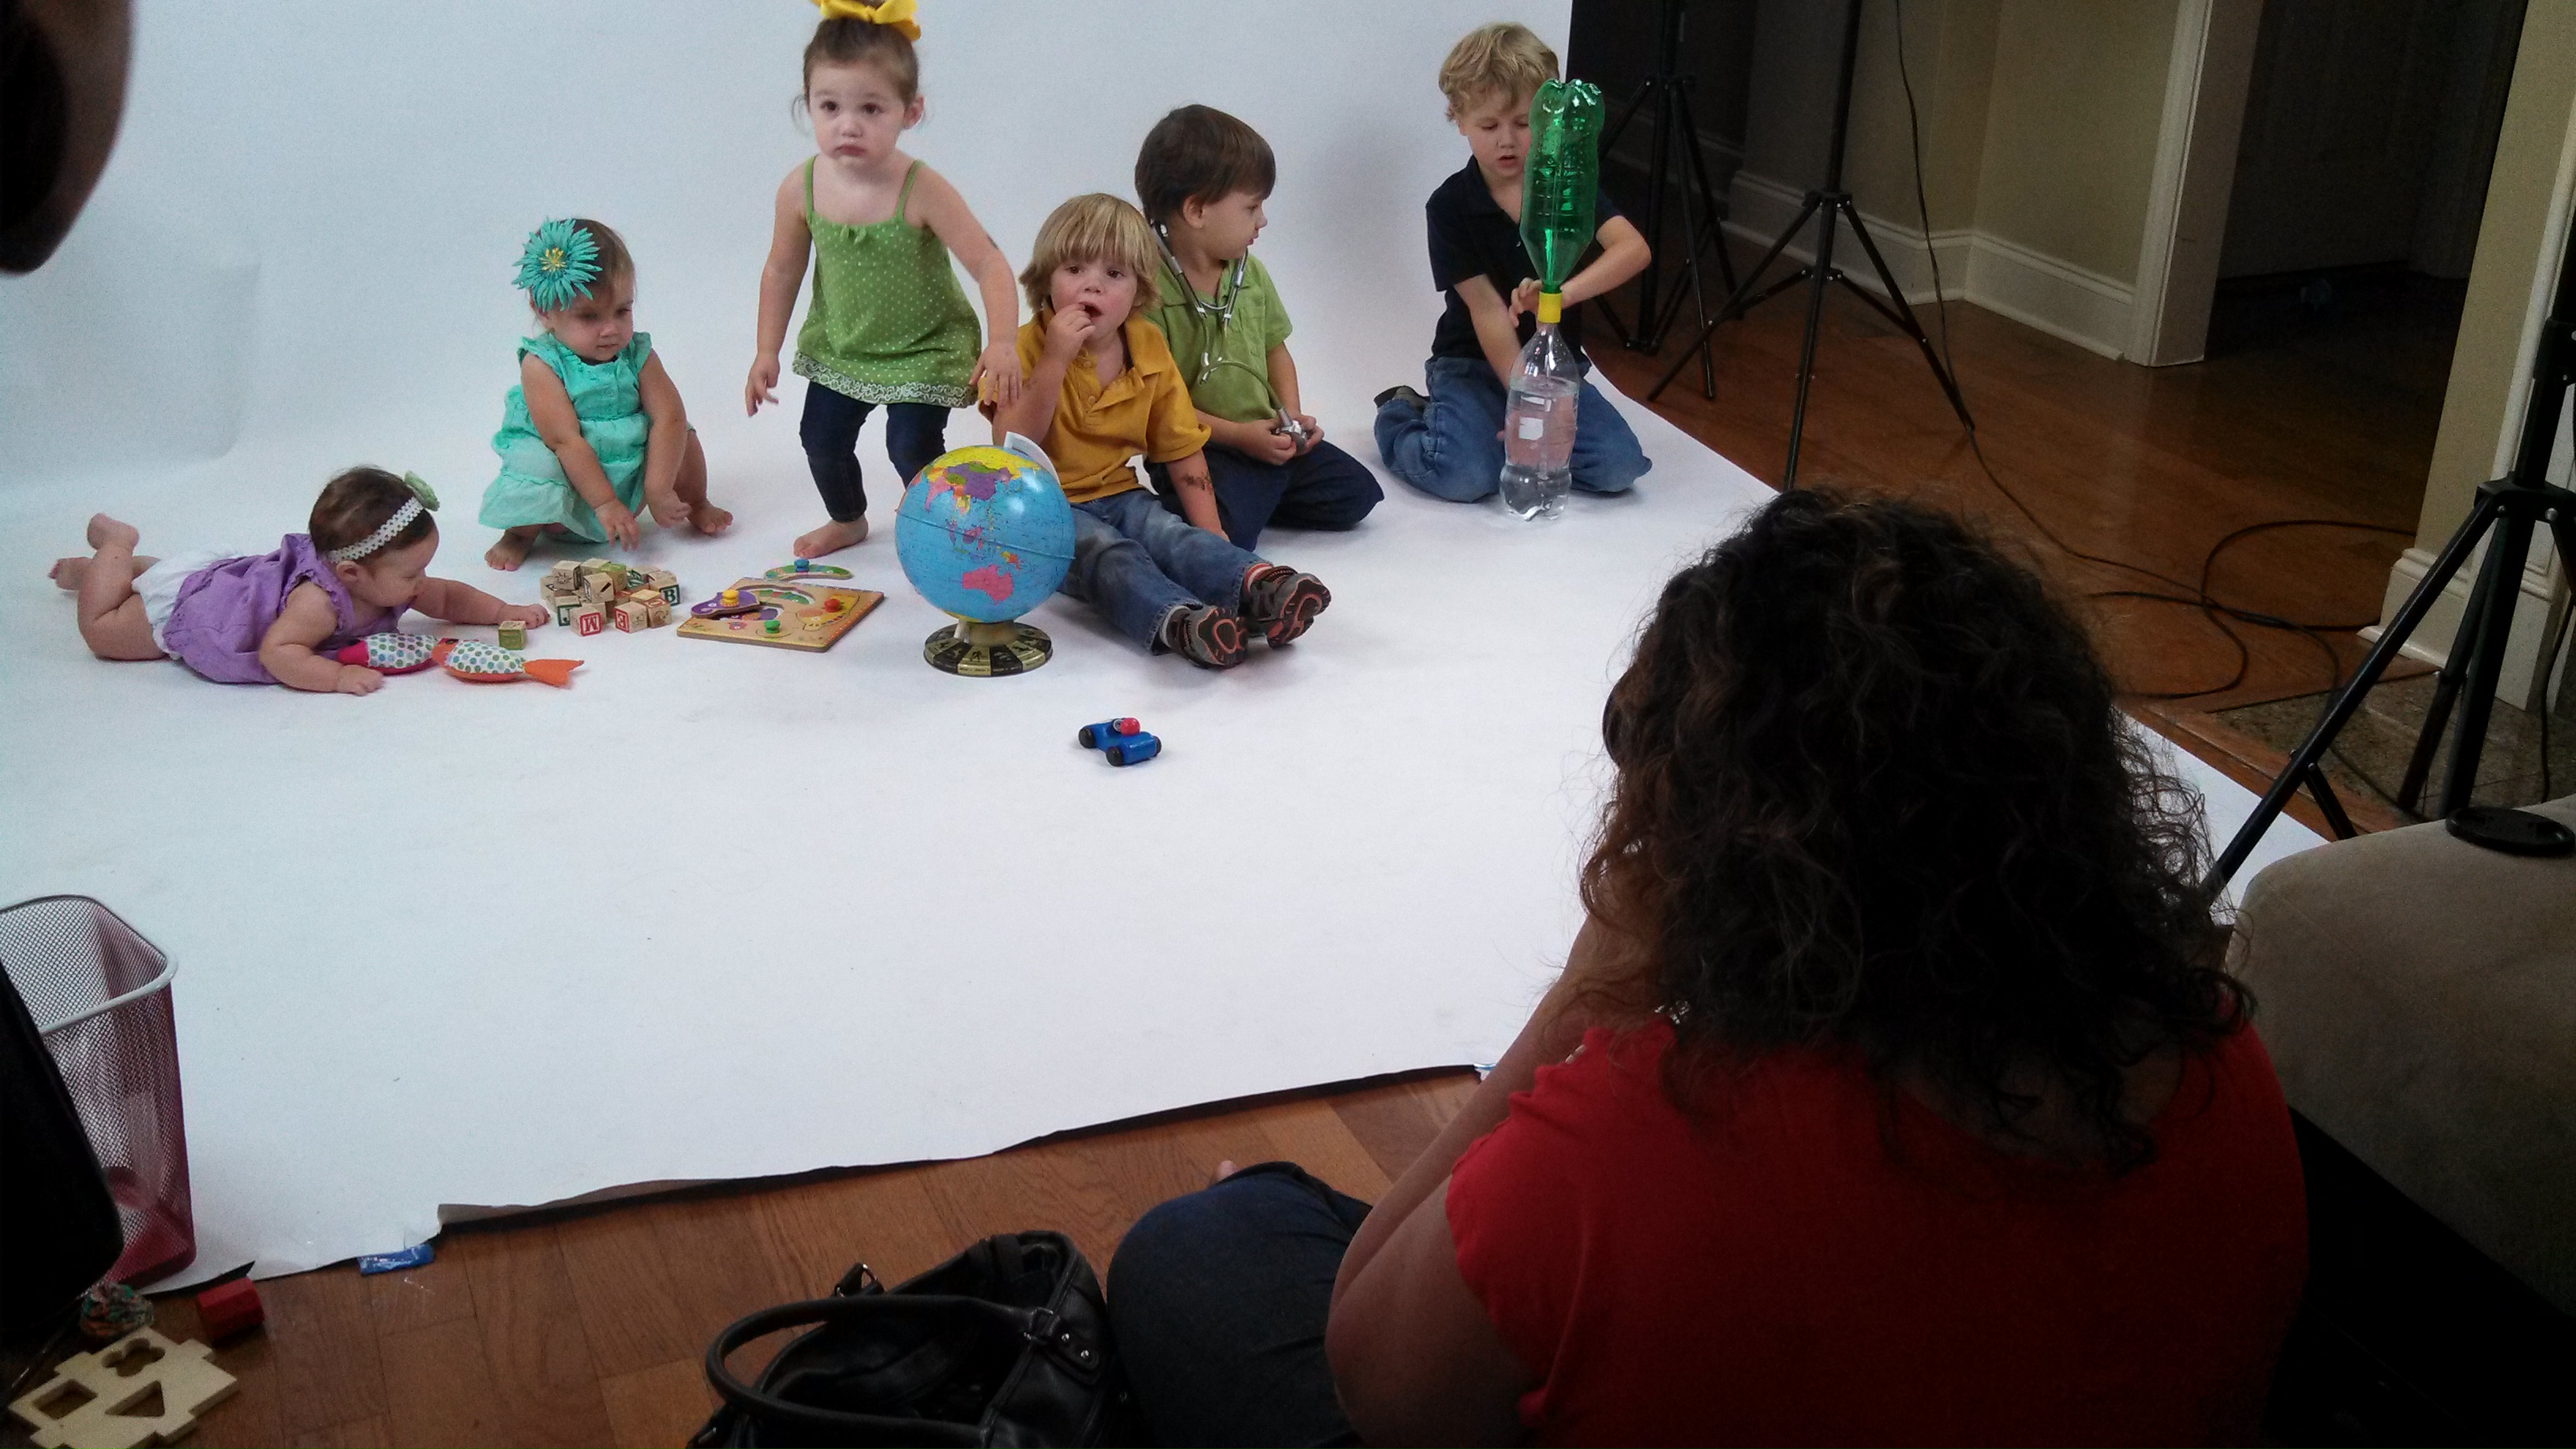
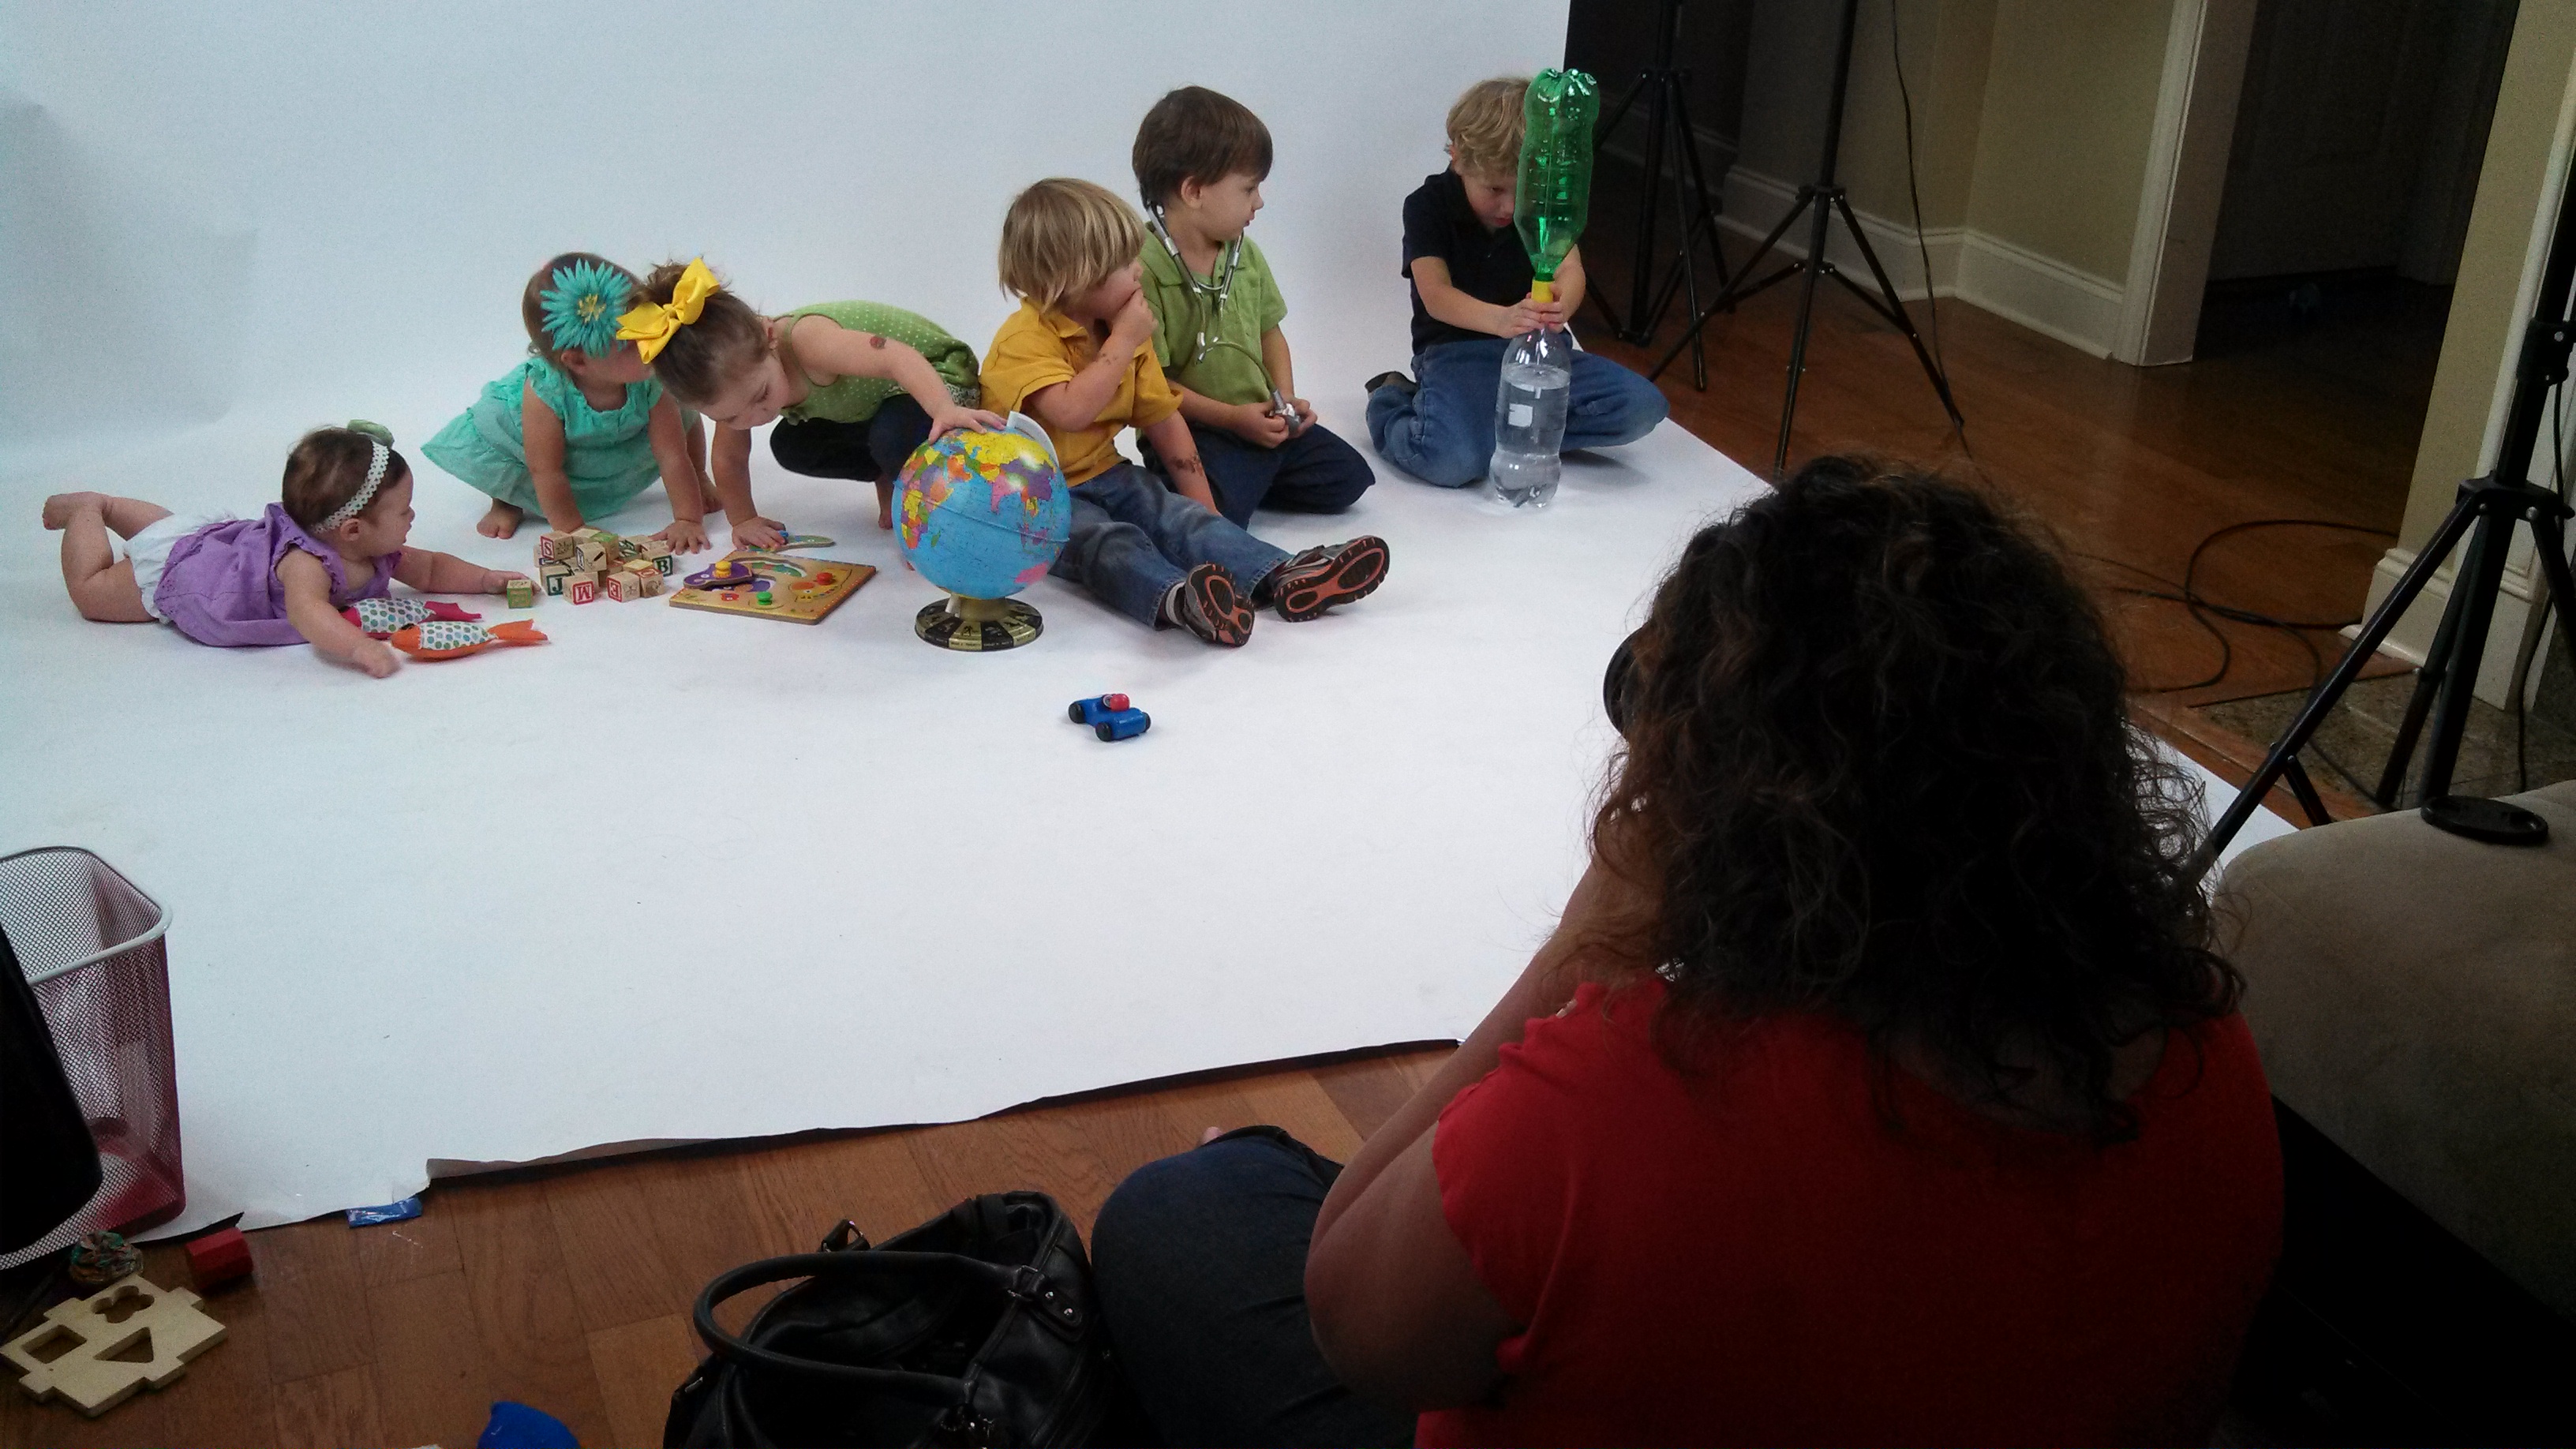
Whew!  Good thing Kelsey is a mommy teacher herself with her 4-year-old joining in on the fun, excited about the unexpected playdate at her house, otherwise our crew may have been completely overwhelming for a photographer.

Anyway – so many exciting things are coming to The Mommy Teacher and  we are just giddy with anticipation!  After seeing the sneak peeks from the shoot, well, let’s just say, the wheels are in motion for a makeover!

Many, many thanks to our photographer, Kelsey!  Please go visit the Kelsey Ann Photography Facebook page and visit her website to see her amazing portfolio:  http://www.kelseyannphotography.com .

If you are in the Lafayette, Louisiana area, Kelsey, a member of Professional Photographers of America, does lifestyle, wedding and studio photography – capturing the most precious moments of her clients’ lives!  She also participates in OpLove – providing photo sessions with military families, and Inspiration Through Art – photo sessions for families with children with serious illnesses or life-altering disabilities… ALL FOR FREE!!!  I am so humbled by Kelsey’s passion to provide forever memories to these families at no cost.

Thank you, Kelsey, for helping out these Mommy Teachers!  We cannot wait to see the final product and the changes to come on our site!

Boo ! Trace and Color

The other day I made a simple template for a zoo trace and color to tote along in our wagon for down times, I am going to re-make it using my own clipart soon, but for now it looks like this:

Zoo trace and color

Well, the VERY next day we were going to Boo at the Zoo so I wanted to mix it up and I had already made seasonal clipart so I toted this one along in the wagon…

Boo trace and color

I decided to make it a combined printable even though Halloween is right around the corner.

I thought you might want to tote this one around tomorrow on a walk and make it a scavenger hunt for decorations in the neighborhood so I figured I would go ahead and give ya this printable today!  If you don’t use it this year, bookmark TheMommyTeacher and you can always keep it for next year !

Click here…. BOO Trace and Color

Enjoy!


5 Tools to Make Reading Fun!

Let’s face it, learning how to read isn’t always the most exciting thing in the world, especially when you are practicing fluency with words that do not even exist (a common practice to gauge phonemic awareness and blending sounds).

James’ teacher sent home a new fluency folder that includes lists of non-sensical (made-up) CVC (consonant-vowel-consonant), sight and high-frequency words. Reading these lists can be absolutely BO-RING for both the reader (your child) and the listener (most often, you, Mommy Teacher).  It’s also super easy to get overwhelmed by unfamiliar words in these early reading stages, so, how can we make reading fun and enjoyable???

Here are 5 inexpensive and cheap tools that you can use:

1.  TRACKING FINGERS:  My son’s fluency folder came equipped with a rubber witch’s finger to use to follow the words left-right, top-bottom.  (I specifically wrote this post right before Halloween so that you can go pick some up at your local dollar store before the 31st!  You’re welcome!)  As soon as James hopped in the car from carpool he was pulling out his new fluency folder and showing us how to use his tracking finger… and now my 4-year old wants one too!

IMG_20131023_171938_876


2.  PUNCTUATION SWITCH:  Take a popsicle stick and draw an exclamation point on one end, switch it around and draw a question mark on the other end.  Read the story (or even just a list of words) by adding different emphases at the end of phrases.  A simple change in intonation can make for an interesting read with even the most boring of texts – or it can make a silly book even sillier! (A twist on this is to sing the text… one of my son’s favorites that I catch him doing even when he doesn’t have an audience listening.)

IMG_20131023_200451_412 IMG_20131023_200541_412

3.  CATERPILLAR CHART:  When I was teaching, I used a caterpillar chart to keep track of how many books we read throughout the year.  I wrote the title and author of each book we read on a different circular body segment of the caterpillar.  By the end of the year, our caterpillar’s body went half way around the classroom!

You can use a similar, smaller version at home by using stickers.  Start off by using a sticker for every word your child can read by him/herself, and then move up to simple books.  With your younger child, you can just keep track of the number of books you read to him/her.  Set a number goal of number of words or books you need to reach before your caterpillar can turn into a butterfly!

IMG_20131023_202021_936

“To help my caterpillar grow and grow,

I must read at least 1 book (or new word) a day.

Once he gets to be 10 stickers long,

He will grow wings and fly away.”

4.  WHISPER PHONES:  I am pretty sure Jessica has written a post about these before, but it’s always a fun reminder for next time you are at your local home improvement store.  Grab a PVC pipe and some 90 degree elbow fittings, cut it down to about 6 inches, and you have a great reading tool!  Teachers use these in classrooms all the time for young readers to hear themselves read out loud without making a lot of noise.  With these phones, even the quietest whisper is audible to only the reader.

IMG_20131023_200620_645

5.  MAGNIFYING GLASS/GLASSES:  Grab some goofy glasses or a magnifying glass and all of a sudden reading became a game!  Much like the tracking finger and whisper phones from above, this reading tool just makes reading a little more fun… well, to your pre-schooler or school-aged child… I, personally, don’t get it 😉  If you have some old sunglasses, punch out the lenses so your child can have some new, funky eyewear while being studious!

IMG_20131023_203411_676 What tools do you use to make reading fun for your child?  Share with us on Facebook or comment below!


Halloween Game {Heads Or Tails}

When we were “Boo’d”  the other day, we got some stickers in our little surprise basket that I wanted to do something with, but couldn’t quite put my finger on what that should be.

Then, for some unknown reason…. the following activity popped into my brain….I turned the stickers into a “heads or tails” game with just 5 SIMPLE materials:  2 sheets of stickers, one piece of paper, a marker/sharpie, and a coin bigger than the smallest sticker on your sheet.

game materials


jack-o-lantern coin ghost coin

I placed a jack-o-lantern sticker on one side of the coin, a ghost sticker on another side of the coin,


and then made a SIMPLE sorting sheet by drawing a line down the middle of the page and one at the top.  I place a sticker on either side of the sorting sheet.

simple sorting mat

I explained to Sean Patrick that we would flip the coin to see if it landed on heads (the jack-o-lantern) or tails (the ghost) and whatever it landed on would get to put that sticker on the chart under the matching sticker.

sorting stickers

playing with my sticker template
The next day we played again using the sticker activity printable I made on the computer and I liked it better because it was easier to do 🙂

I showed him one example and then he took over and got the hang of it.


SS Halloween Game I decided to make a printable for this in case you wanted to download it and save it in your files for any teachers, homeschoolers, or for all you organized moms.

As you can see, this halloween printable has other images in case you have different stickers and it has candy corn images in case you want to sort your autumn mix candy instead.  We sorted the candy corn and had a blast…. the dog was a little jealous!

candy corn sort

He had to color each space the matching color before he could eat each candy corn, and he got a little carried away at the end… maybe it was the sugar high.

Mommy wrote the numbers after he counted each side.

candy corn recording sheet

You can also use the other images in this printable to make playing cards for memory or Halloween Go Fish.

If you have younger kids that you would like to do this activity with, you can simply have them sort these items without any of the bells and whistles.  For the sticker activity, Just say “Let’s sort the groups of stickers.  Can you put ALL of the jack-o-lanterns on this side of the chart under the jack-o-lantern and ALL of the ghosts on this side of the page under the ghost?”

Finally, if you want the download it is just around $1 in my TeachersPayTeachers Store,

OR become a member and get this printable along with ALL of my other printables for just a few dollars more!!


Make My Pumpkin

In the spirit of Halloween, I wanted to do an art project with my 4-year-old while my 6-year-old was at school.  My middle child loves and cherishes this one-on-one time with Mommy.  Jess’ post on Monday inspired us to make our own Jack-O-Lanterns, but I had a different objective in mind.

I was also inspired by a “find the differences” book I was reading with Leyson that has two near-identical pictures side by side, but with subtle differences.  Each page asks you to “find (x-amount of) differences” which may be as simple as the omission of an object in the picture or a change of color, shape, size or placement of an object.

The objective of our activity was for my son to be able to both point out and fix the differences between my picture and his picture to make them the same, and also to recreate the picture I created… in this case, a pumpkin.

Materials needed:  construction paper, scissors, maybe some glue after the activity 🙂

IMG_20131021_085715_381

Mommy Prep:  Using orange construction paper, I cut out two large pumpkin shapes, and lots of different sized rectangles*, triangles, circles, squares and other various shapes with brown, yellow and black paper.

*I cut out 4 different types of rectangle stems to bring in some vocabulary to our activity:  short, long, thick, thin

IMG_20131021_085735_081 Leyson first had to close his eyes (or cover his face with a blanket because I learned that I can’t trust him to keep his eyes closed) and count to twenty while I arranged the different shapes to make a face on my pumpkin.  Apparently, counting to twenty now means omitting numbers 14 and 19, so we will be working on that again soon.

I started off with a simple face.  Two circles for eyes, a circle for a nose, a fat, brown rectangle and a U-shape for a smiley mouth.


When he got to 20, he pulled the blanket off of his face, he had to use the remaining shapes to make his pumpkin look just like my pumpkin.

IMG_20131021_085825_458

To make the project more challenging in other rounds, I layered some of the shapes such as using smaller circles on top of larger circles for the eyes.

The most difficult part of the activity was when I used only triangles to make a face and he had to figure out which direction the triangles were facing.  It’s harder than it looks!

IMG_20131021_091203_570

We experimented with all the different things we could learn from making pumpkins:

  • Feelings/Emotions: We made happy pumpkins, and sad pumpkins, and angry pumpkins, and scared pumpkins… and talked about why each pumpkin was feeling the way they were feeling.

IMG_20131021_090120_123

  • Counting/More or Less:  Sometimes Mommy’s pumpkin had 4 teeth, sometimes it had more or less.
  • Compare and Contrast:  “What is different about the nose on your pumpkin and the nose on my pumpkin?”  “Do our pumpkins have the same shaped mouth?”
  • Vocabulary:  Colors, shapes, sizes, parts of the face
  • Spacial Awareness:  “Are the eyes close together or far apart?”  “If you put the eyes in the middle of the pumpkin, can we fit a nose and a mouth too?”
  • Phonemic Awareness & Writing:  We segmented the sounds in pumpkin /p/ /u/ /m/ /p/ /k/ /i/ /n/… which is pretty hard to do when your child pronounces it like “po’kin” but we wrote the real word on the back of our project.

IMG_20131021_093142_009

When you are finished the activity, grab some glue so you can add some Halloween decor to your house!

IMG_20131021_092154_790

IMG_20131021_105651_367

Who needs to buy decorations from the store, when with a little glue and tape you can make your house ready for any holiday?!

Related Posts Plugin for WordPress, Blogger...

1 2 3