Month: January 2014

Displaying Art Work

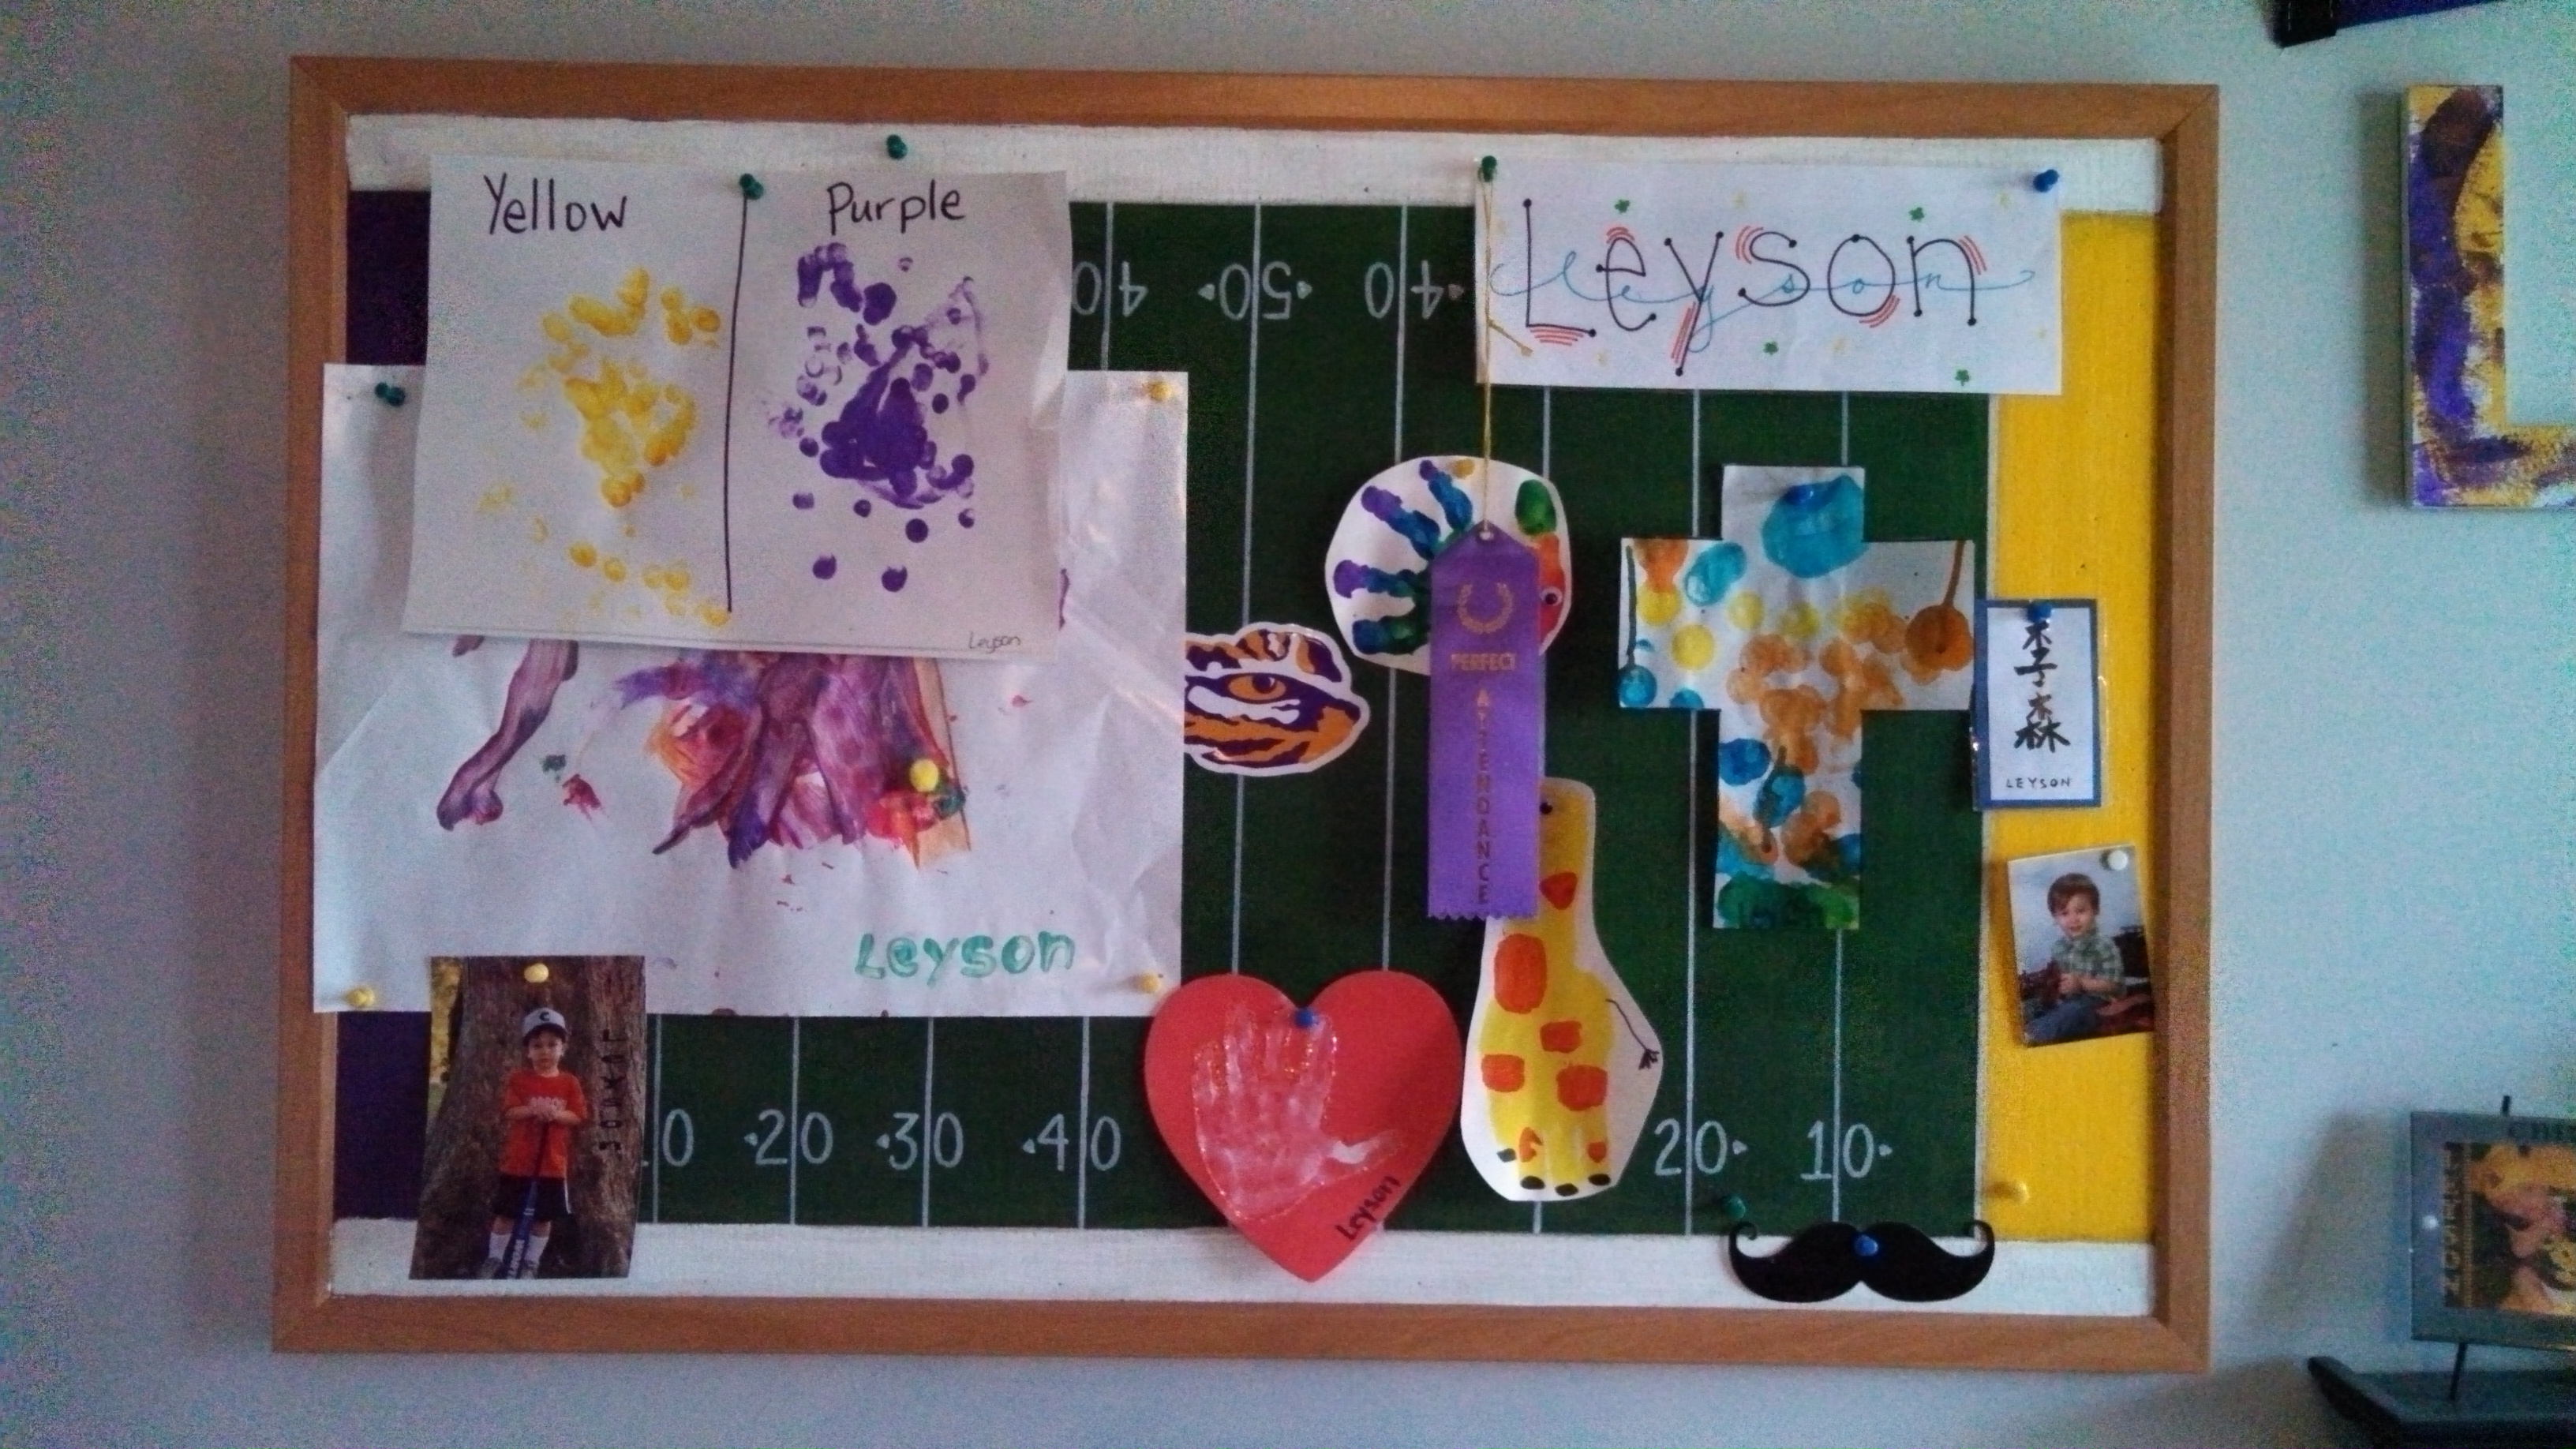
I took my son to see the doctor for his routine “return-from-traveling-with-a-cold” visit.  After asking the typical questions about his diagnosis, “Is he contagious?”  “What can I give him to stop the whining pain?” my next questions were, “Can I take a picture of your art work?” and “Can I blog about it?”  From the look on her face, this was the first time she had gotten asked that question at an appointment.

You see, I fell in love with how she had her own children’s artwork displayed in her patient rooms.  After she agreed to allow me to take pictures and blog about them, she showed me around the office to see all of her kids’ art!  I just loved it all!  It’s so hard to not just love a painting or drawing done by a child… even if it’s just lines and dots.

The ways that she had the different projects displayed turned simple child art into masterpieces… framed and hung as if they belonged in a gallery.  What child wouldn’t feel so special to have their artwork displayed so prominently in their home?

This is the one that especially caught my eye:

IMG_20140108_142508_413 
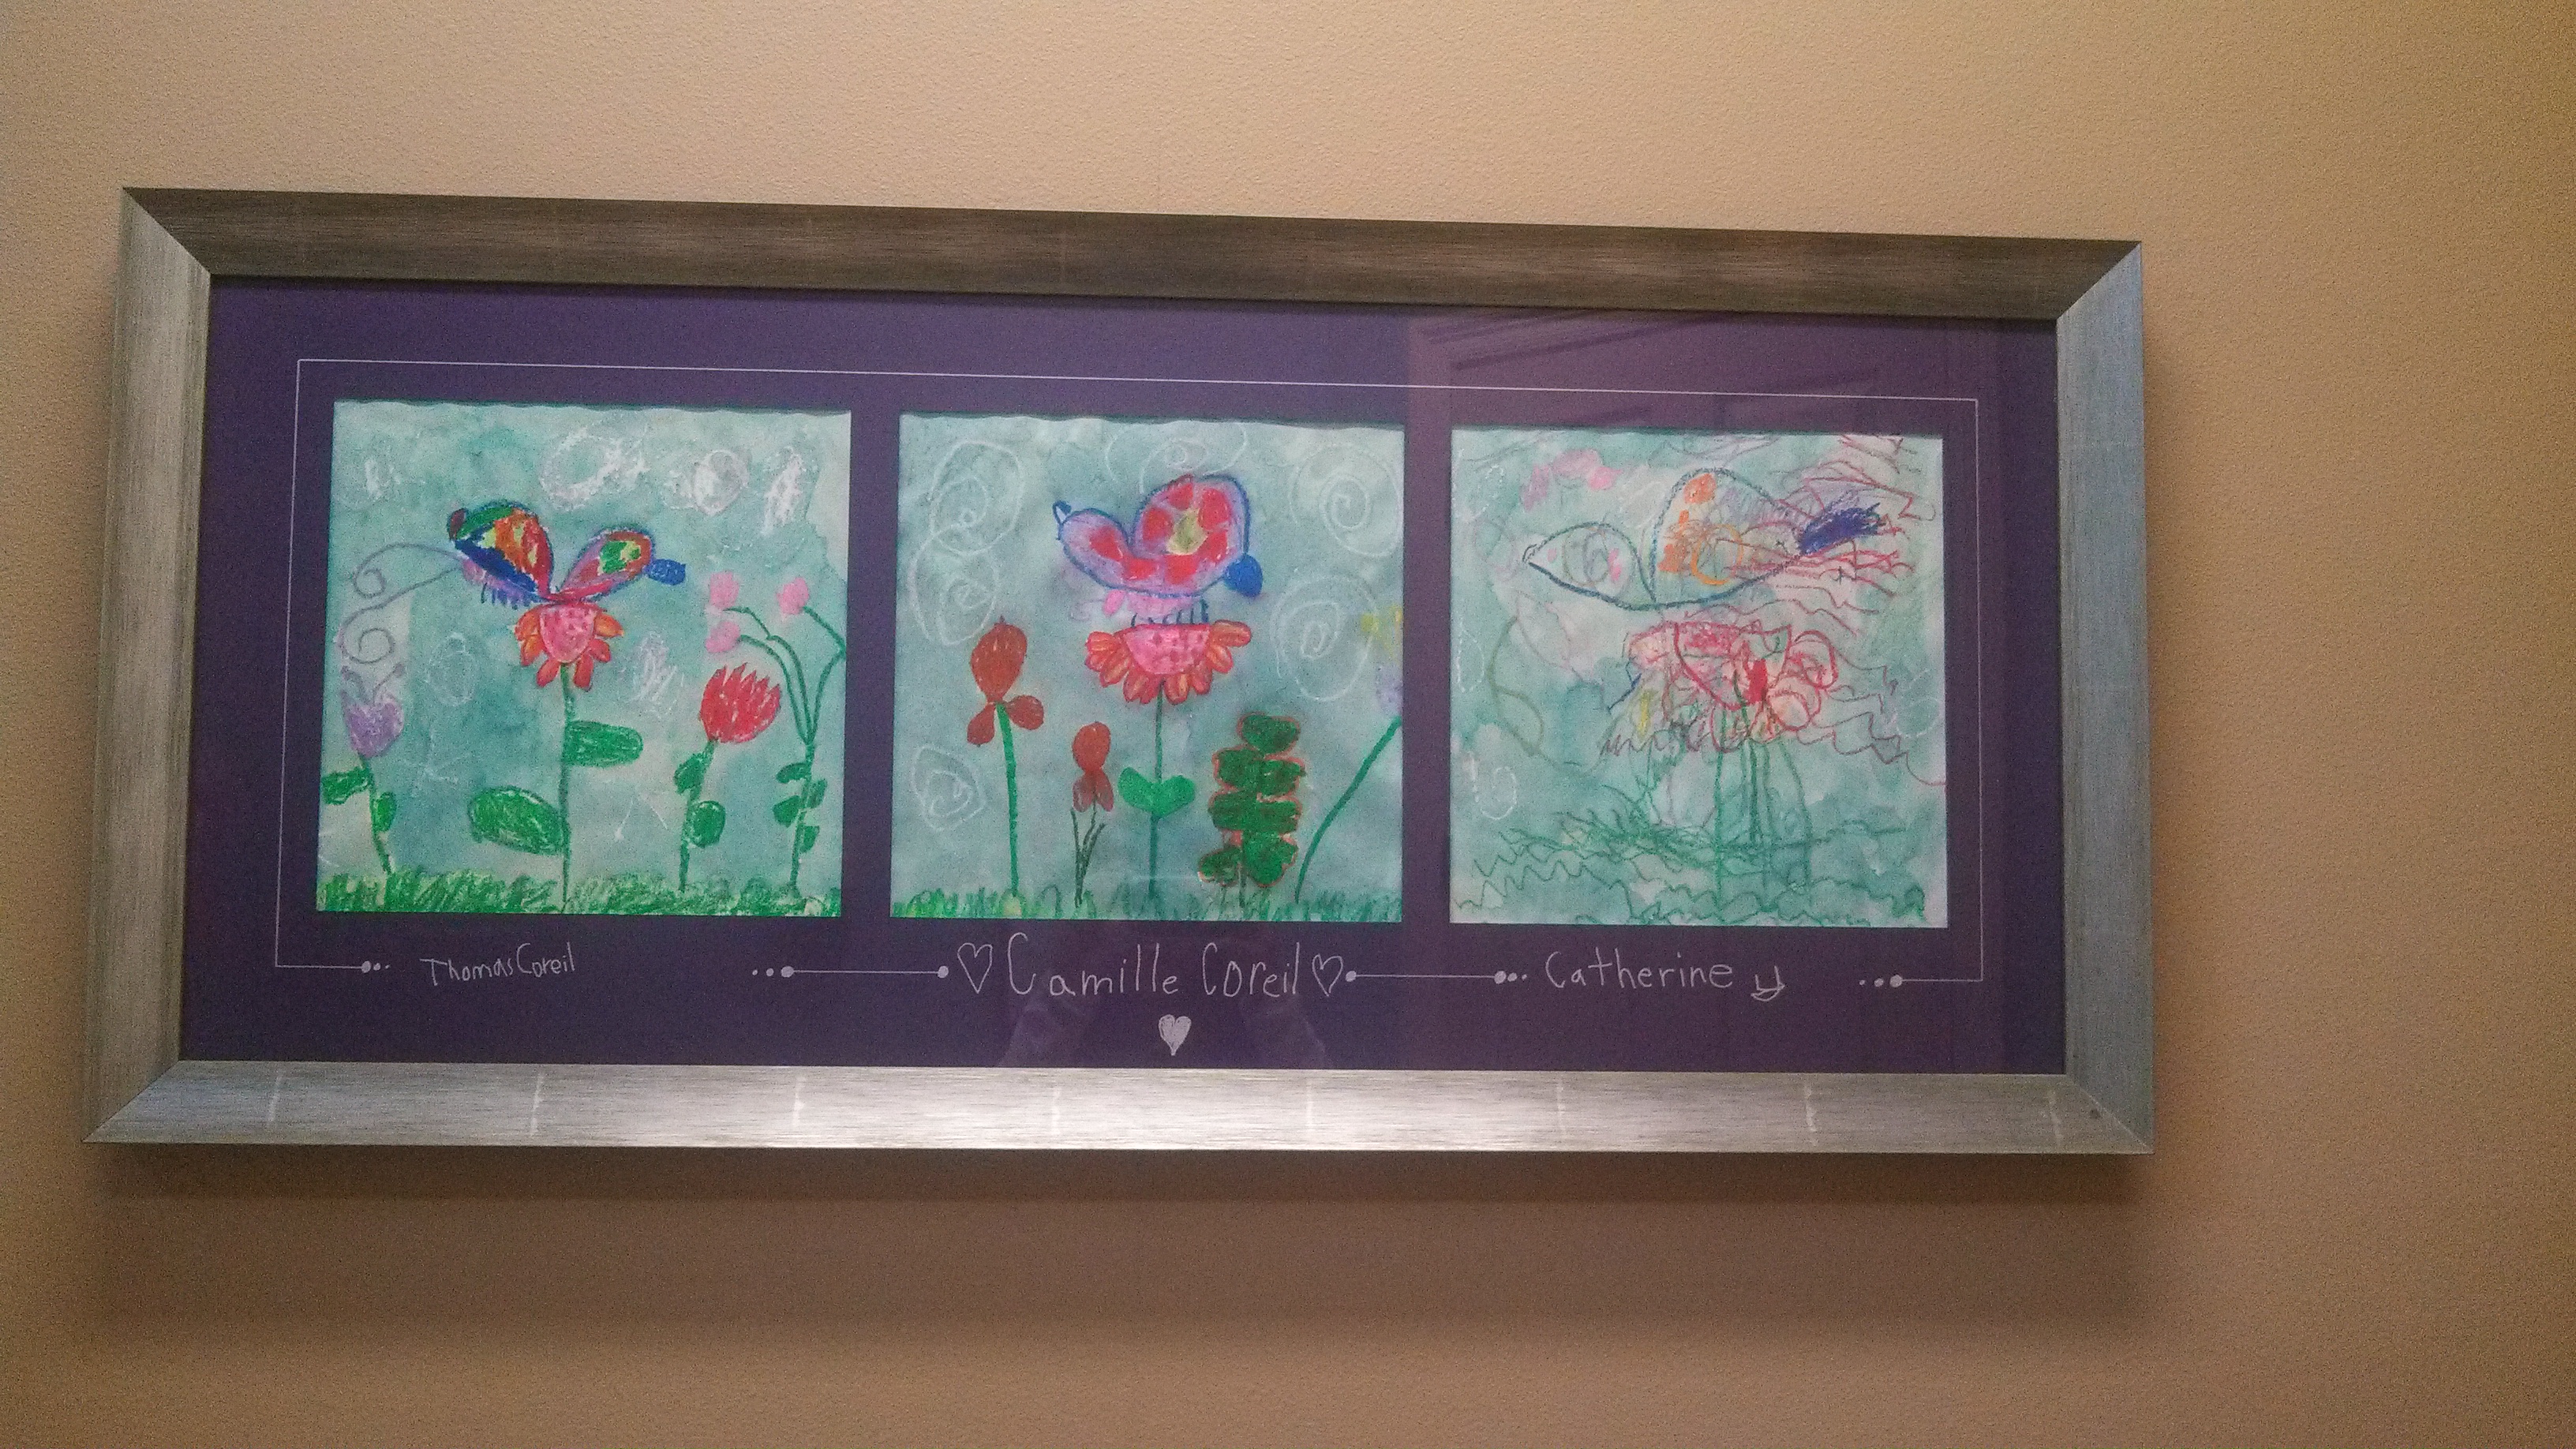
She took her kids to a local art class and this was the project they did with water colors and crayons.  I love this because she framed the same project done by all three kids.  It’s beautiful and so cheerful!

These paintings could have easily been placed in their baby boxes and forgotten for years until re-discovered down the road when the kids are heading off to college.  Instead, my eyes were immediately drawn to them when I walked into her office.

Arts and crafts stores such as Hobby Lobby and Michaels do custom framing, but you can also just bring them an old frame and whatever artwork/pictures you want to frame.  They will cut a matte to fit (that’s the purple part you see between the frame and the picture).  The matte is what makes this look so polished.

I also love how she had each of the kids sign their names under their artwork.  Real artists in the making!

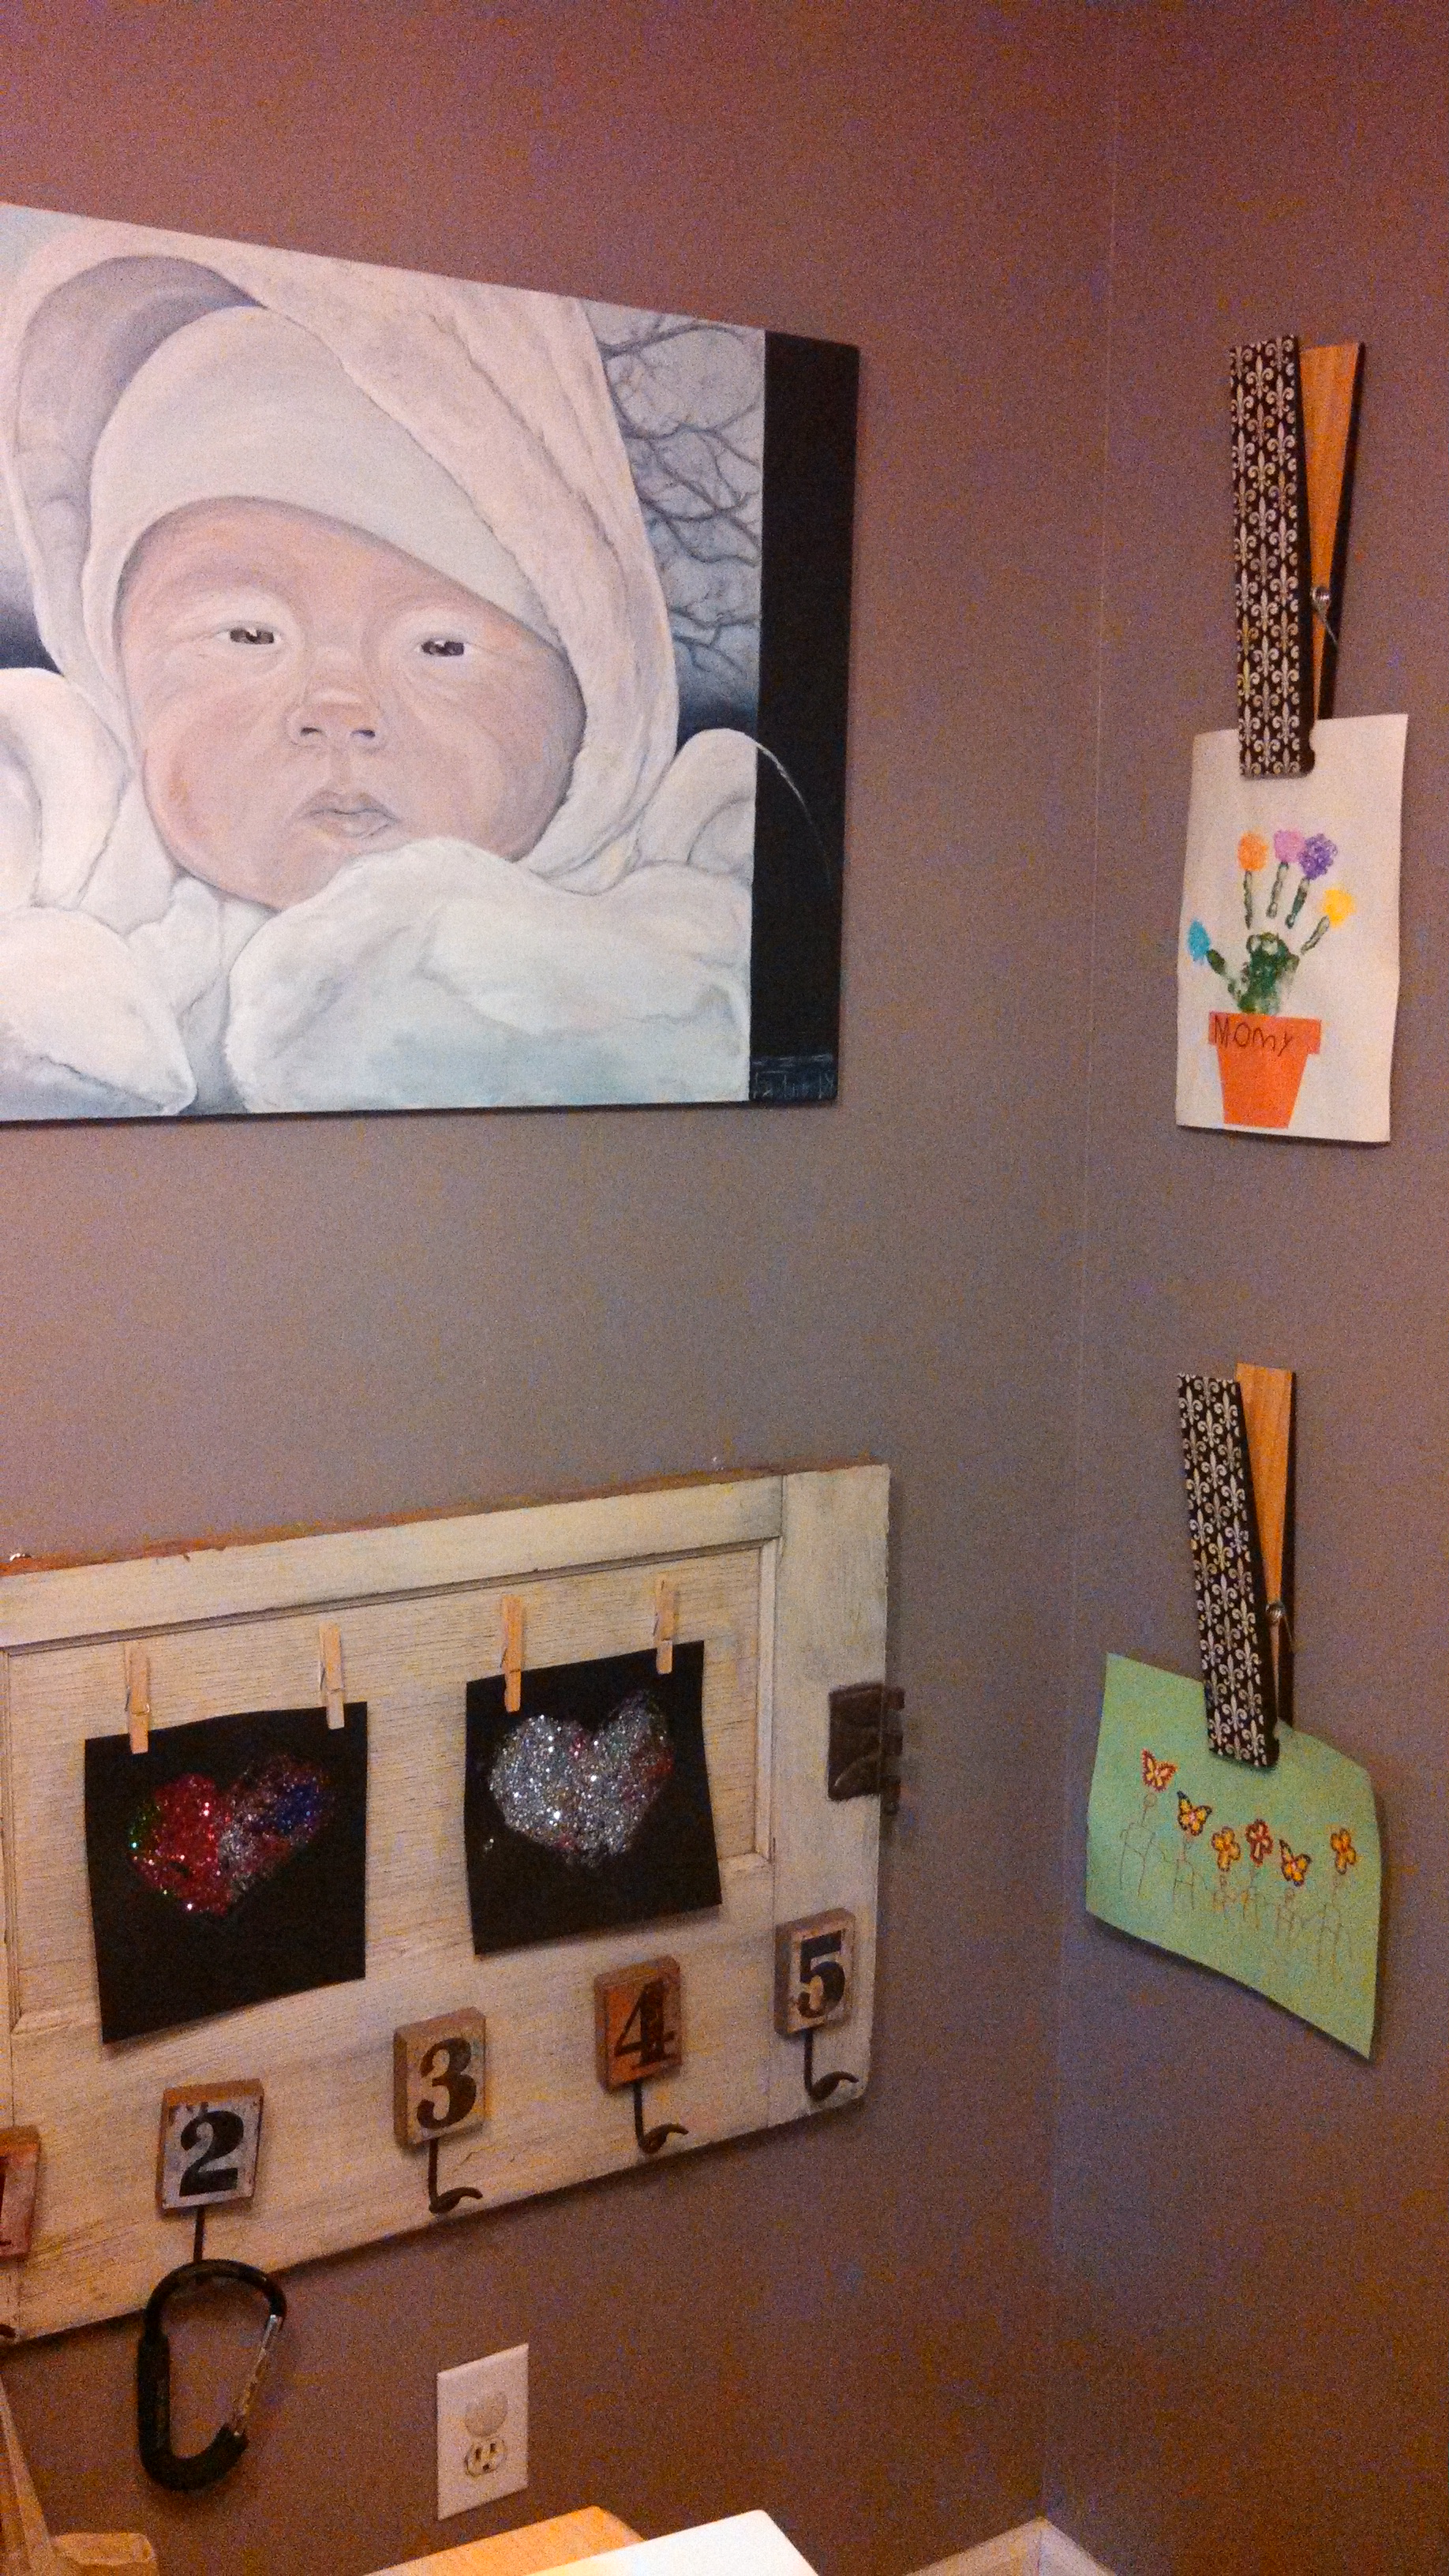
Here is my other favorite from another of the patient rooms:

IMG_20140108_144332_118 What a great idea to allow your child to use his or her own picture in his/her painting!  I can’t wait to do something similar soon!

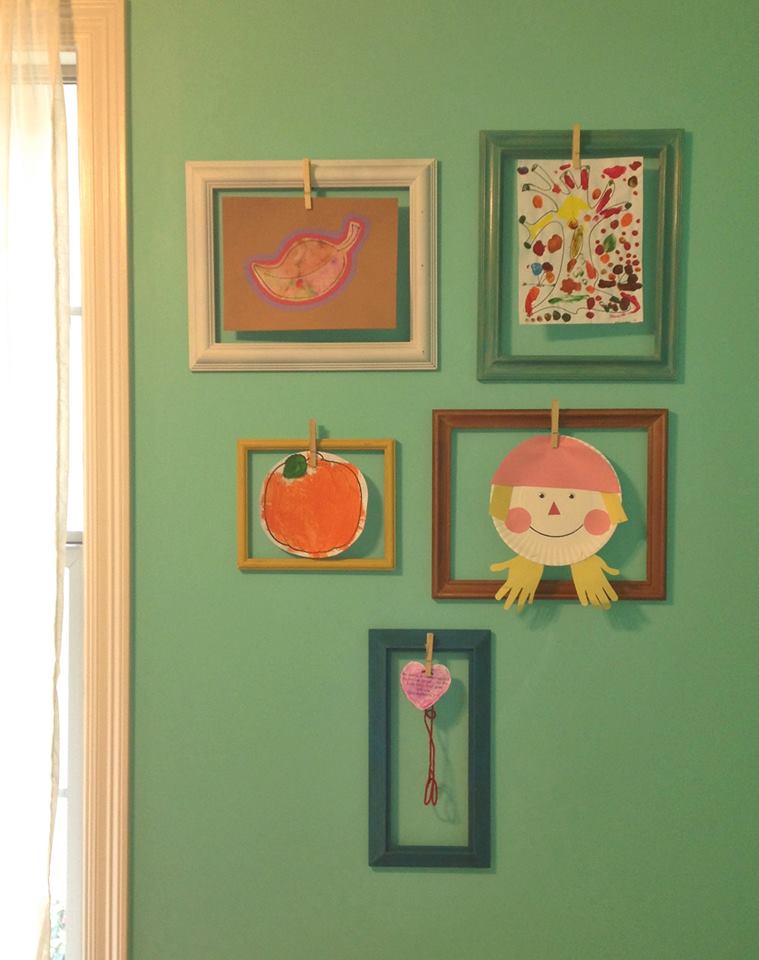
This also made me think of my friend’s house and how she displays her kids’ artwork:

1502687_10100239984196982_181946402_o 
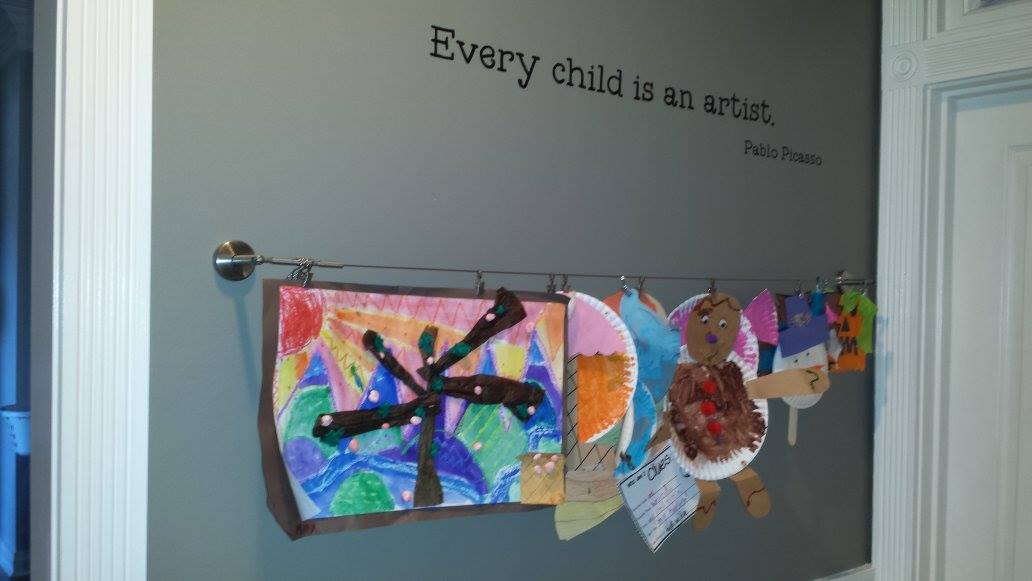
1. I love the wall decal with one of my favorite quotes and 2. I love the fact that this is interchangeable, but still clean.  (You can purchase a similar wall decal here on Amazon and the wall mount with clips here).

These ideas are all way better than how I have most of our artwork displayed (I’m pretty sure the whole alphabet will not fit on our back doors):

IMG_20140110_093017_846

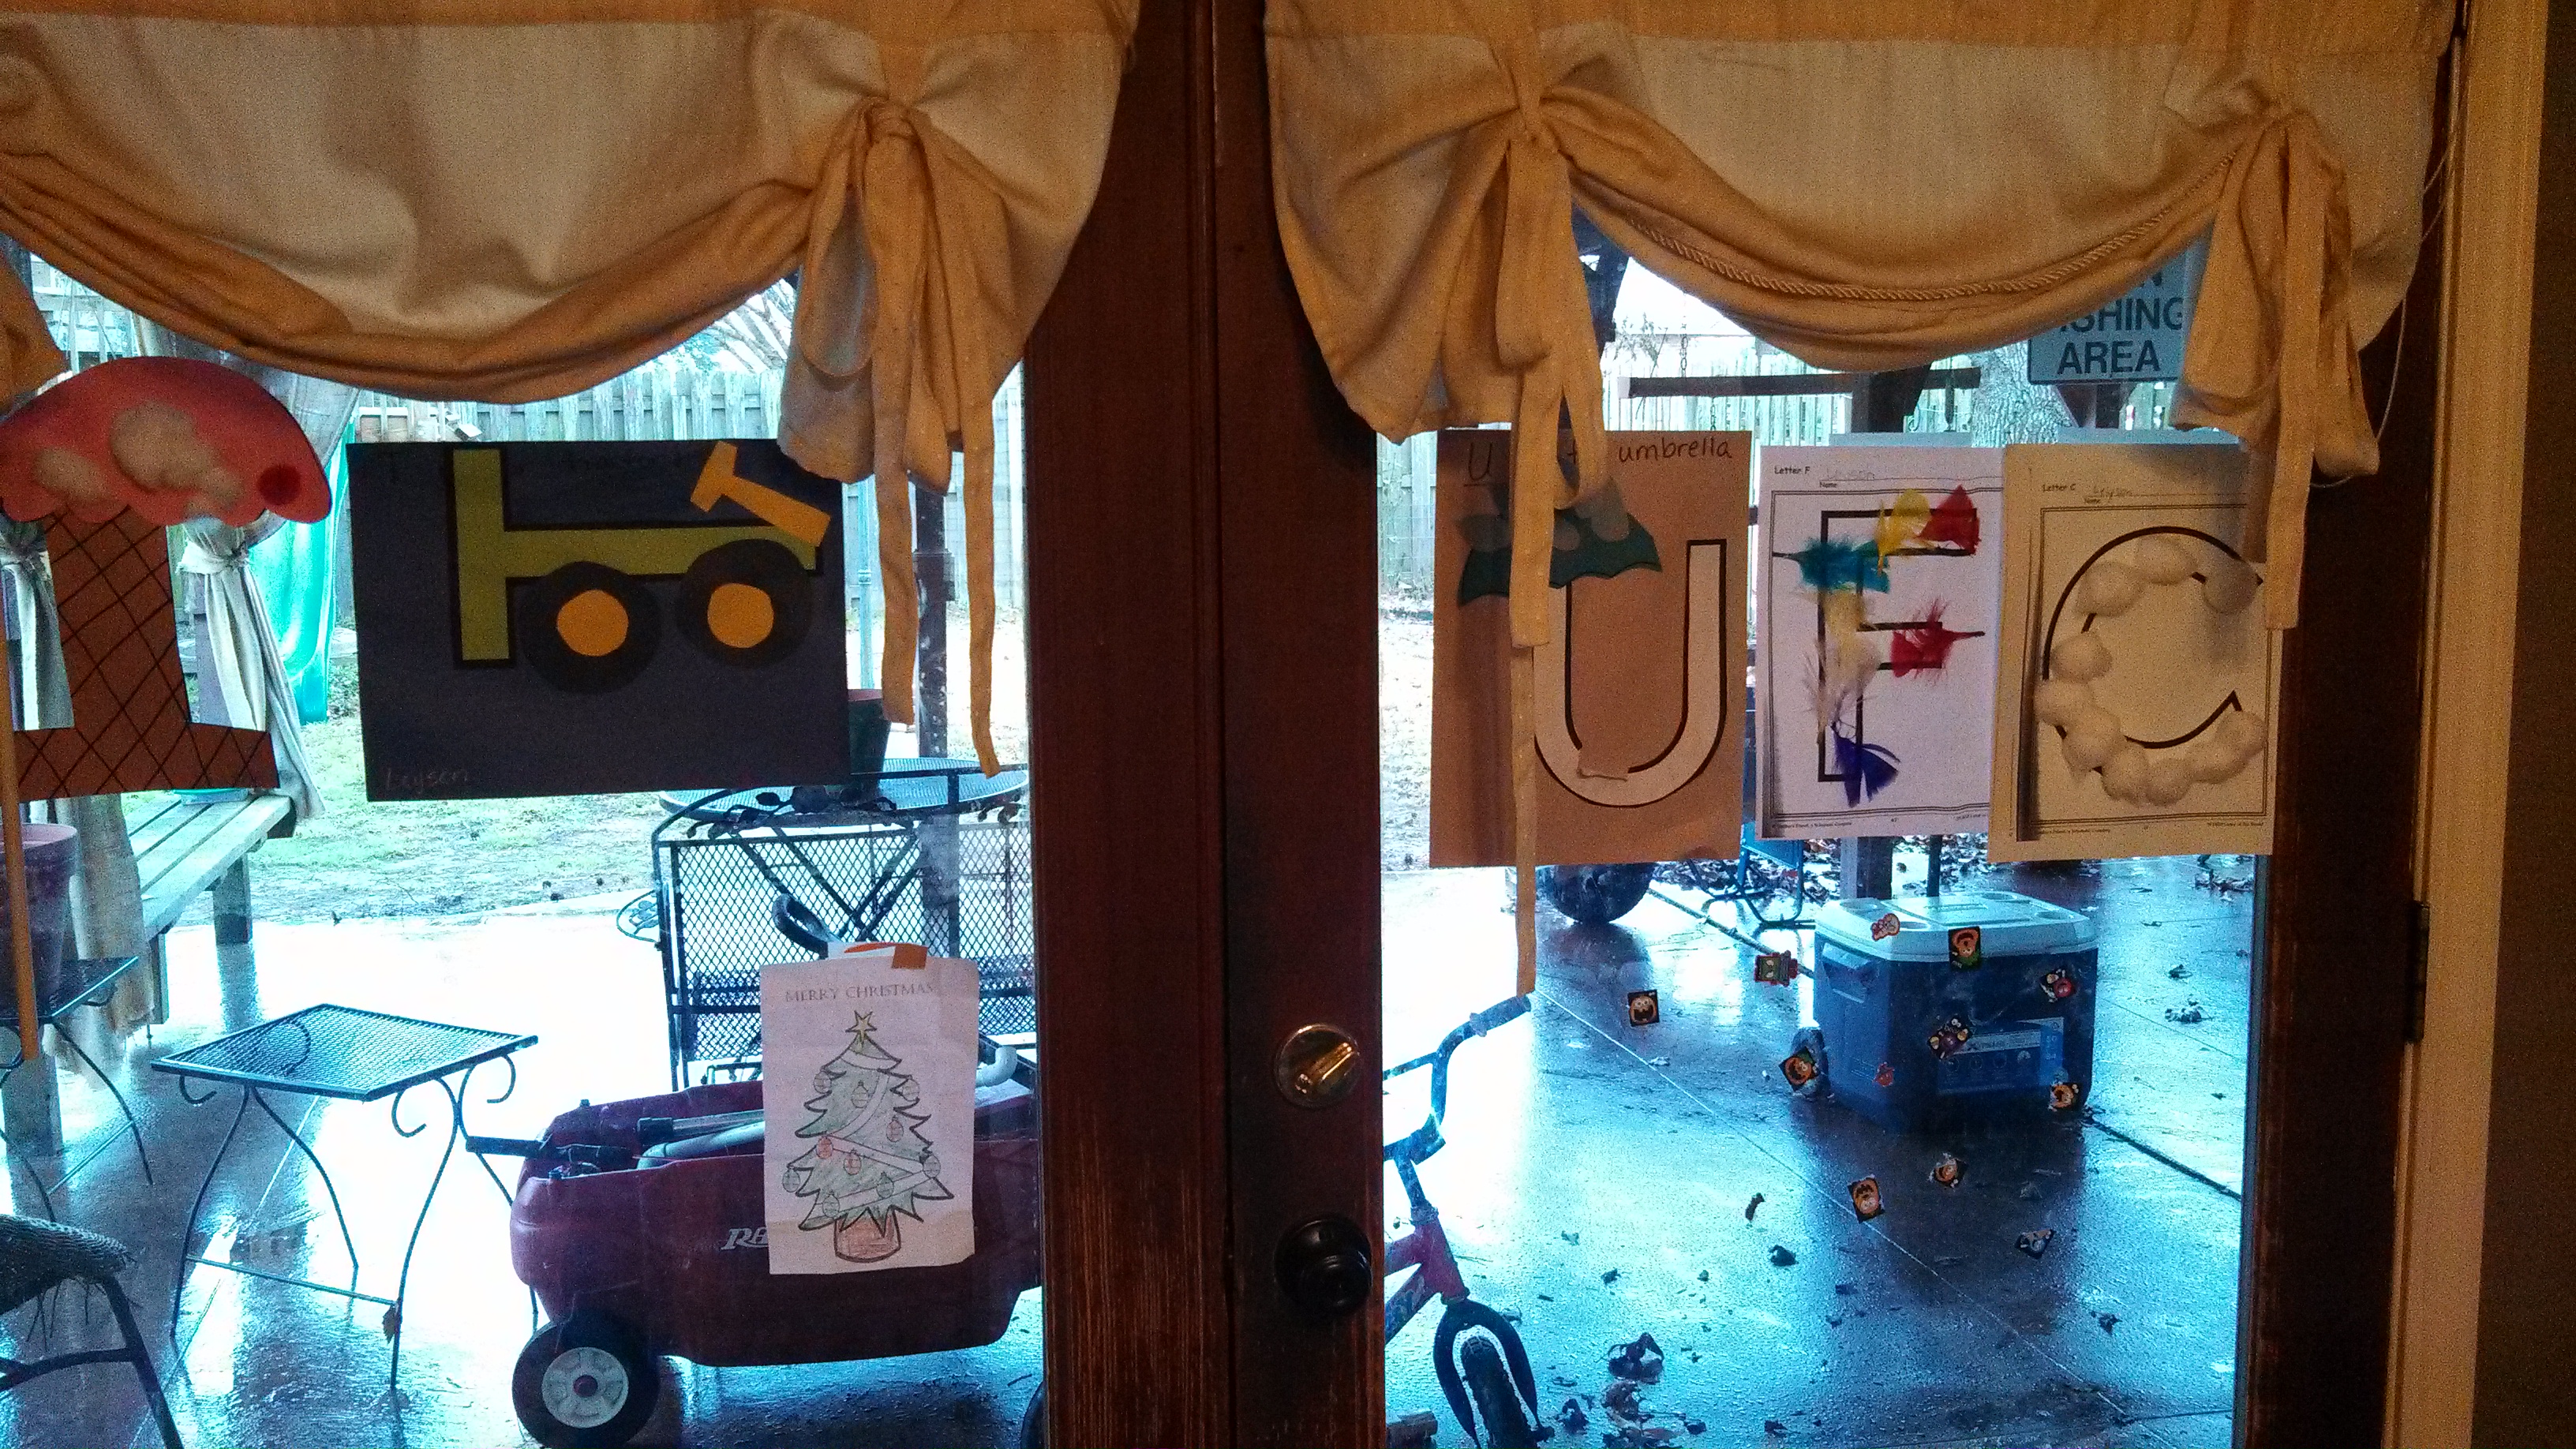
And obviously my kids now think they can stick anything on the doors since they are now covered in stickers as well.

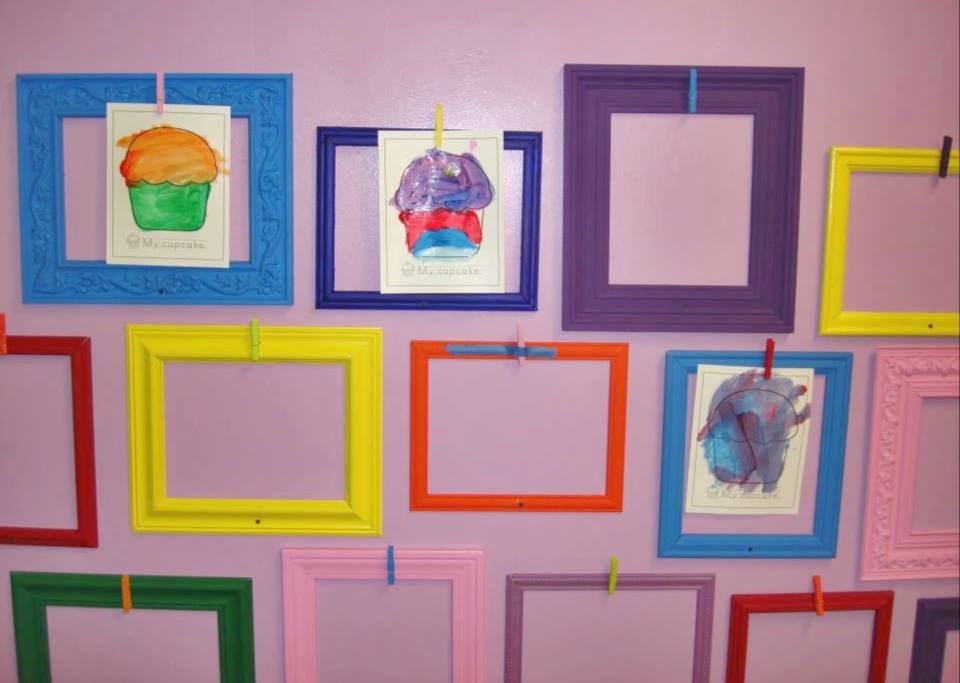
Here are two other ideas from my house:

IMG_20140110_093242_167

IMG_20140110_093059_264

Jessica also sent me these two amazing pictures and I am totally going to steal this idea because I love it so much!  Let the frame-collecting begin!

1552899_10102977038612785_1807117278_n

1555811_10102977038527955_67455725_n

How do you display your child’s masterpieces?  Please share with us on Facebook @themommyteacher!


DIY Play Kitchen

PLAY KITCHEN

Y’all, I have been DIY-ing to share with you the play kitchen and market that my husband and I made from an old entertainment center and a fishing rod and reel holder!  It was a lot of hard work, but in the end, it was way cheaper than buying a play kitchen from the toy store.  Another bonus was that I was able to design it so that it would look good in my living room since we don’t have a play room or space for a kitchen in the kids’ rooms.  I could not be more in love with how it turned out!

The key to making your own play kitchen is to have a good vision to see what could-be with a little TLC.  I found the old entertainment center at our local Habitat for Humanity ReStore (my favorite place for finds like this) for just $10… but my friend still had to talk me into buying it because I couldn’t quite see the vision yet!  Buuuut… It was 50% off that day and so I had to just try and see!  I was willing to lose the $10 if I completely made it look horrible (extra storage in the carport).  The top wasn’t in the best condition, but I could find something to cover it up.

The rod and reel holder was found on a local Craig’s List – type Facebook page.  I just randomly saw it and said, “That would make a GREAT market!” (There’s that vision I was talking about).  I talked the guy down from $30 to $15!  I’d like to say I have great negotiating skills, but I think he was just ready to get rid of it.

We already had some old fence panels lying around (we had to replace a few on our fence that our dogs CHEWED through… I have a few neurotic dogs)  and bam!  Free counter top! PLAY KITCHEN1

MAKING THE SINK:

We used a stainless steel mixing bowl for the sink.  I was originally going to use a dog bowl, but they were actually more expensive than the mixing bowls at Wal-Mart… I went with the cheaper and it’s actually deeper… $8 there.  I bought the faucet at the Habitat store as well.  It was $12, which was more than I wanted to spend, but it wasn’t used like the rest of them were and had a good shape to it. PLAY KITCHEN2

PLAY KITCHEN3

ADDING EMBELLISHMENTS:

I bought knobs for the stove and handles for the front sliding doors from the clearance section at Hobby Lobby and painted the burners on (and lightly sanded the burners to make it look more rustic).

I also bought a few baskets from Joann’s Fabrics that were 60% off, plus I had a 25% off in-store coupon!  I got my tiny market basket and my large play food storage basket for $15 total. PLAY KITCHEN4

PLAY KITCHEN5

I used an old piece of scrap wood for the shelf and decorated it with things all around my house.  The shelf brackets were purchased from Hobby Lobby when they were on sale for 50% off!  The window was an old find that I’ve had for months and I had no idea what to do with it until this project came along.  I have seen similar windows like this at local antique stores and my favorite Habitat store always has these lying around too!  PLAY KITCHEN6

PLAY KITCHEN7


My 6, 4 and 1 year olds ALL love their play kitchen!  We made this a group gift because we know all of them would enjoy this.  It has been the toy that has been most played with at my house since Christmas!   PLAY KITCHEN8

Below are pictures and links to the play kitchen items we purchased!  Enjoy!

Each of the kids got to open 3 gifts as well (just like Jesus got 3 gifts from the wise men).  Lena (age 1) got pots and pans because she likes to bang Mommy’s a lot.

042659o

James (age 6) got a cash register that has a working calculator because he loves learning how to count money (we played “store” a lot even before Christmas).

pTRU1-16865100dt

Leyson (age 4) got “Peel ‘N’ Play” fruit and vegetables since he loooves to cook.


51XWqwJndfL._SX300_

Name Hopscotch {Mommy Teacher Spotlight}

I love scrolling through Instagram and seeing what other moms have shared for the day.

A friend of mine posted this video of her little fella and it immediately caught my attention for so many reasons:

Kids learn best and practice the skills they are learning most effectively when they are connecting with their world by seeing AND doing.

So if you have a child with lots of energy (can you relate?), jumping while learning or practicing skills that they already know is incredibly helpful for their brain development and you might reap the benefits of a quality nap time or bedtime rest later. 🙂

Here is what Hendrix’ mommy had to say about it when I asked for the details:

“The reality is he came up with this on his own! We were writing each other’s names (you can see his “mommy” on the bottom left of the screen) and he started hopscotching on his! He is into trains and roads now, and before this we were making roads with all the places that we usually go to…mall, coffee shop, grocery, honeys house…and driving to each place with his toy cars. We were learning to take rights and lefts and u-turns. This hopscotch just came out of nowhere. :)”

Thanks Alisha for sharing.
PS… I wish I had your chalking skills. haha

Related Posts Plugin for WordPress, Blogger...

1 2