About US

The Birthday Party Whirlwind

If you have ever planned a birthday party then you know why it has been so long since Casey and I have posted…. We have been planning birthday parties for our kids 🙂
Well, we survived them and I’d like to share a great resource with you if you need some help planning a party for your little one….
Lauren Haddox Designs Etsy shop and her facebook page will have you in awe of all the beautiful themes and graphic designs that are perfect for all you pinterest peeps.  She has sooo many great packages & files of DIY printables for parties.  I loved her train theme that I used for my 3 year old’s party yesterday and she took some great shots of her design in action.  I want to share and I’m hoping super-mom AkA Casey will share her pics from her party here soon too.
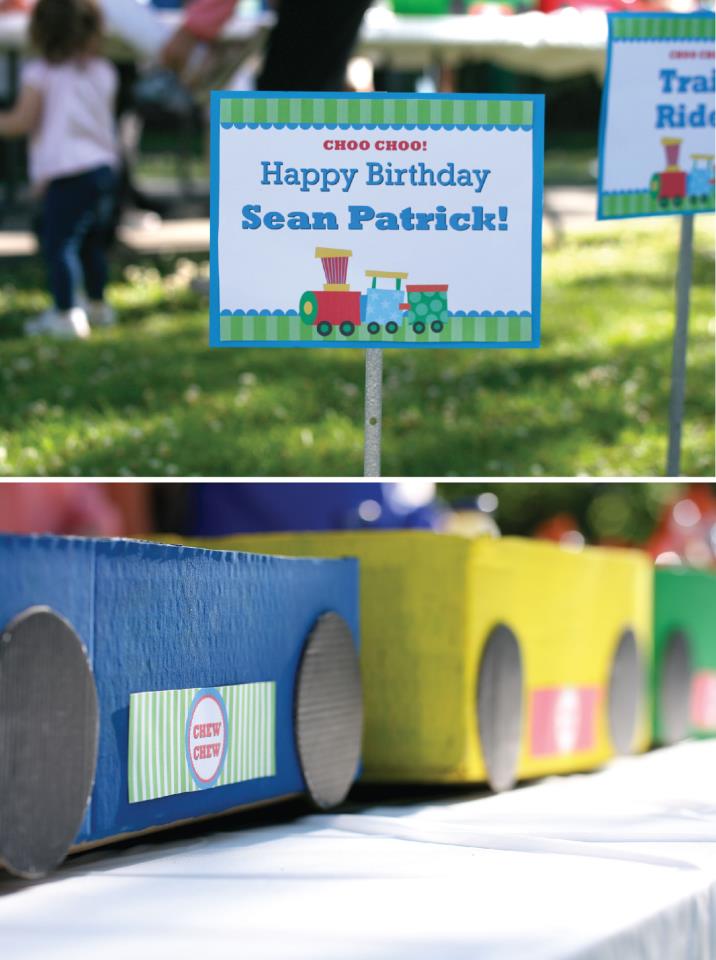
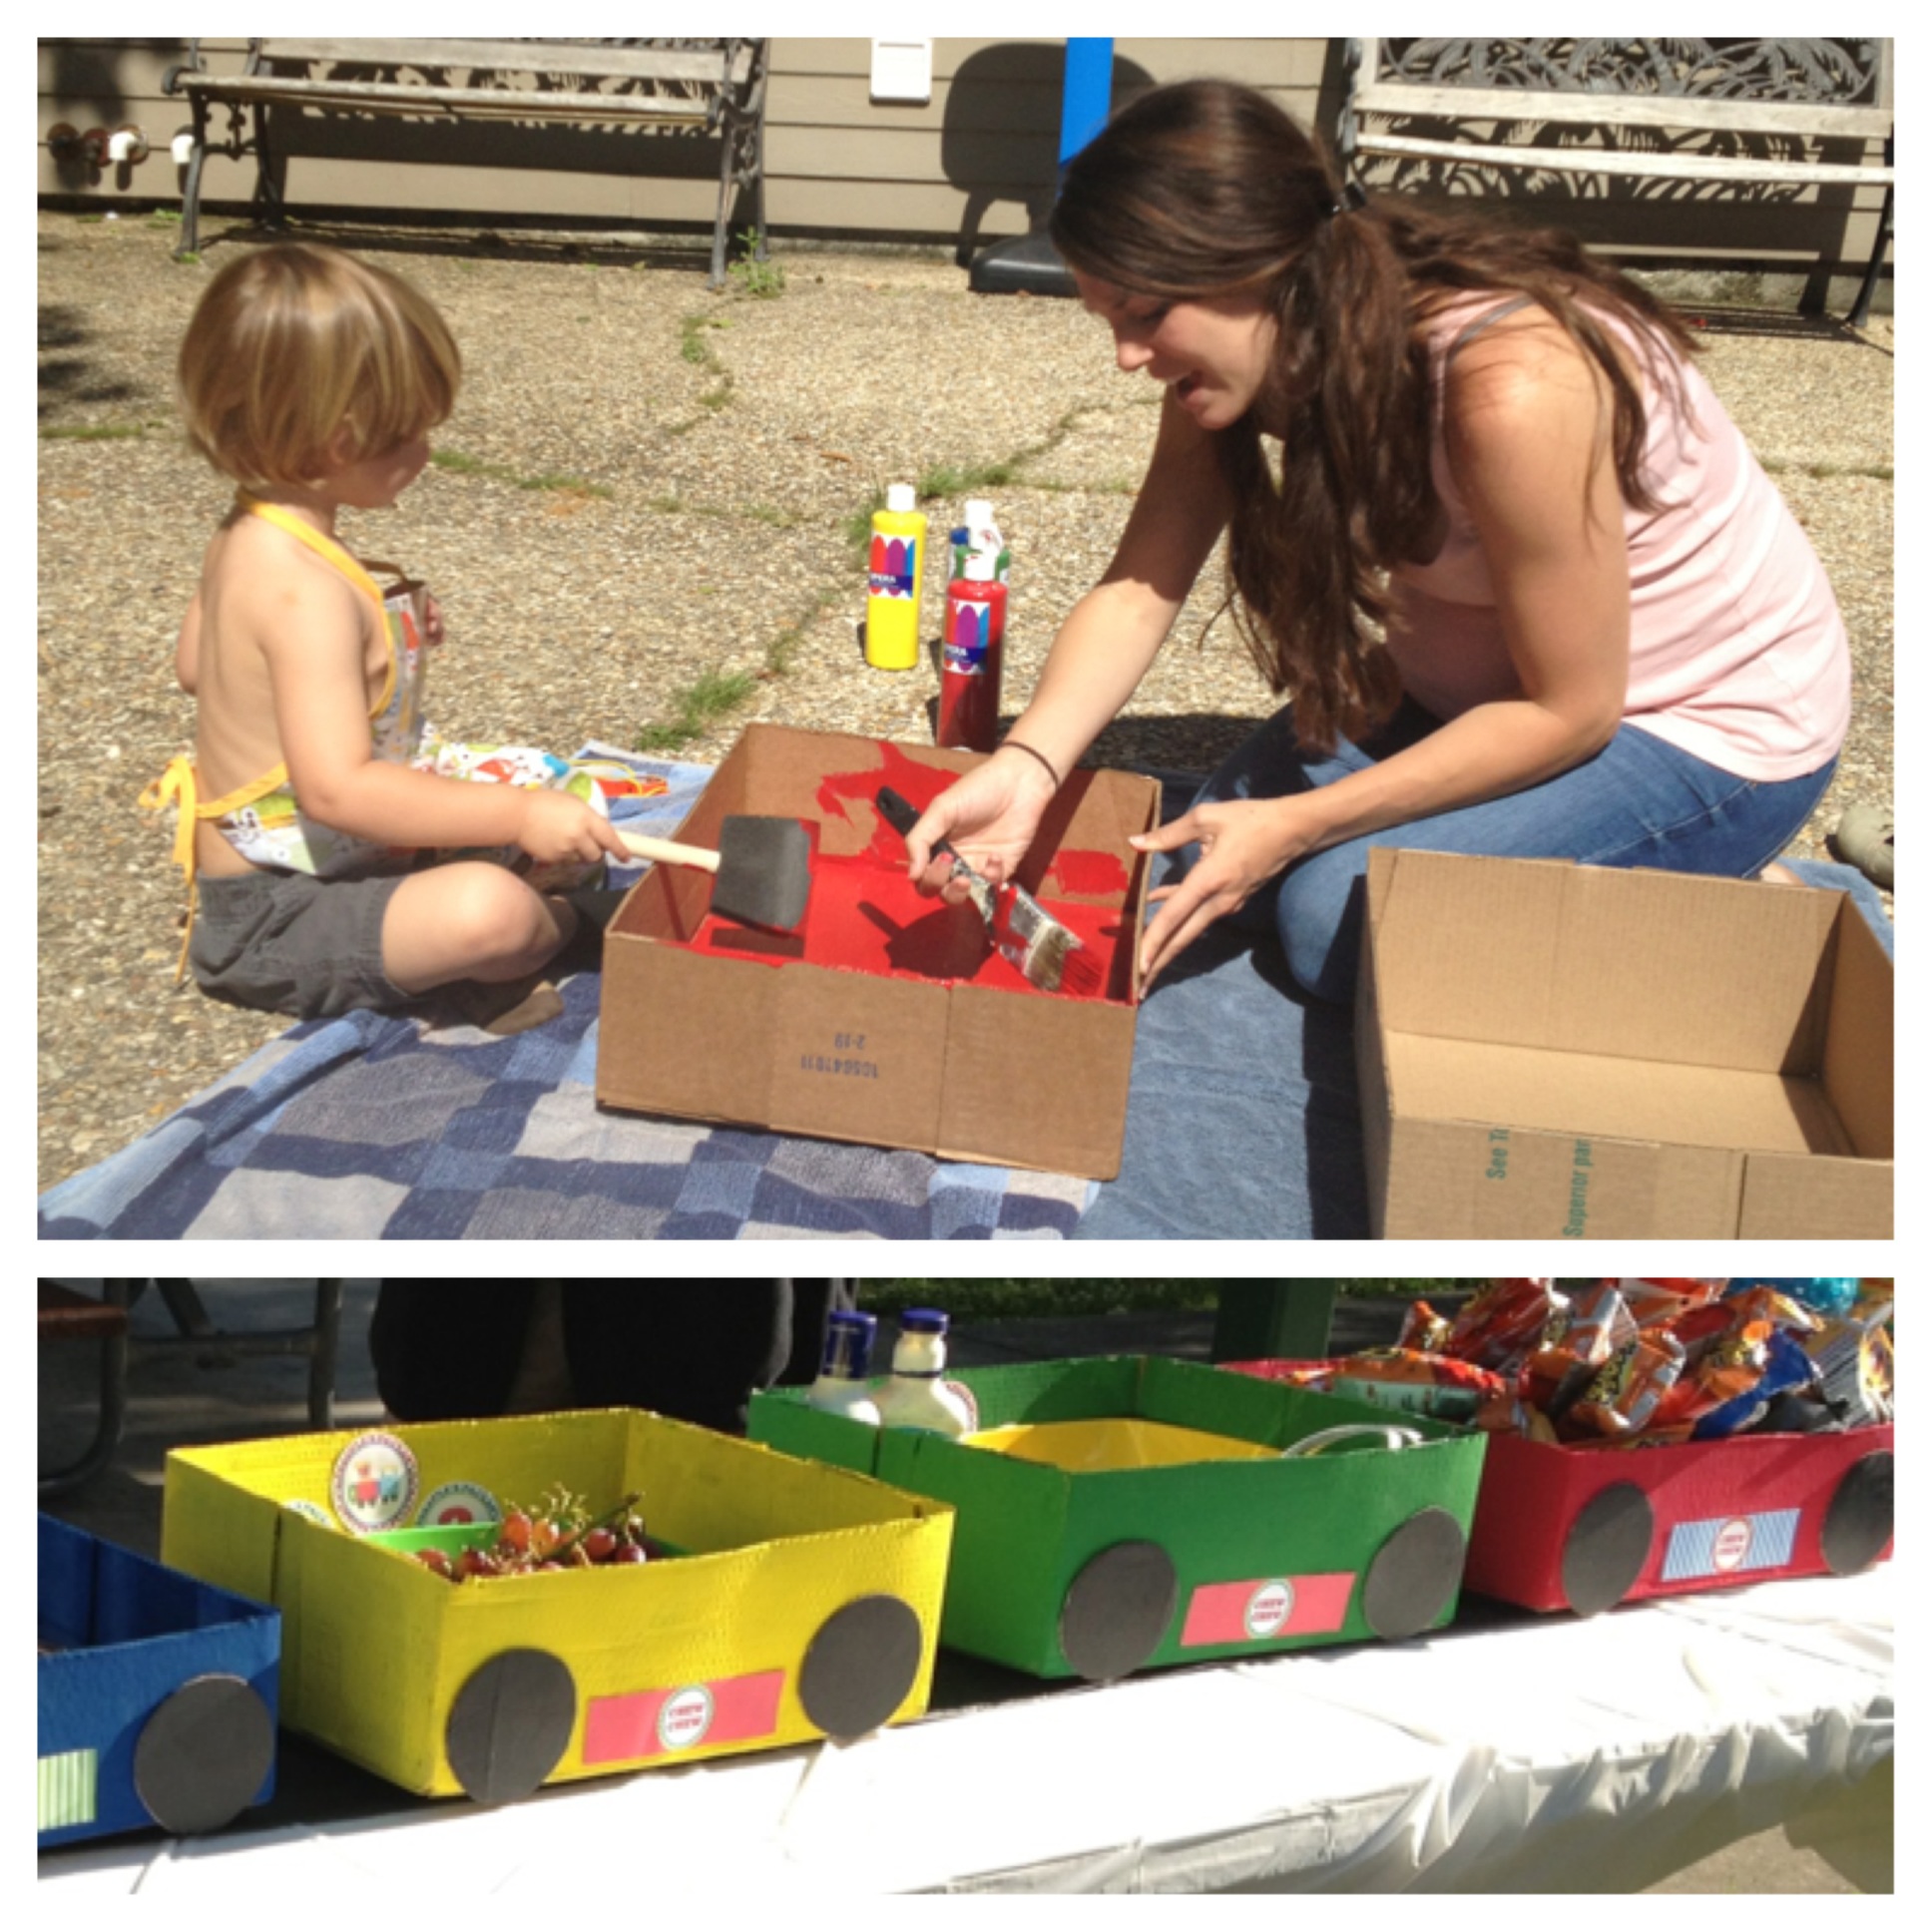
Getting ready for the party was fun too.  Sean Patrick helped me paint cardboard boxes the primary colors which was great teaching him how to paint on something that would be used at his party.  We cut black circles for the wheels and used the cute play on words “chew chew” to decorate each cart.

My 8 month pregnant self having a paint party with my birthday boy before his big day.

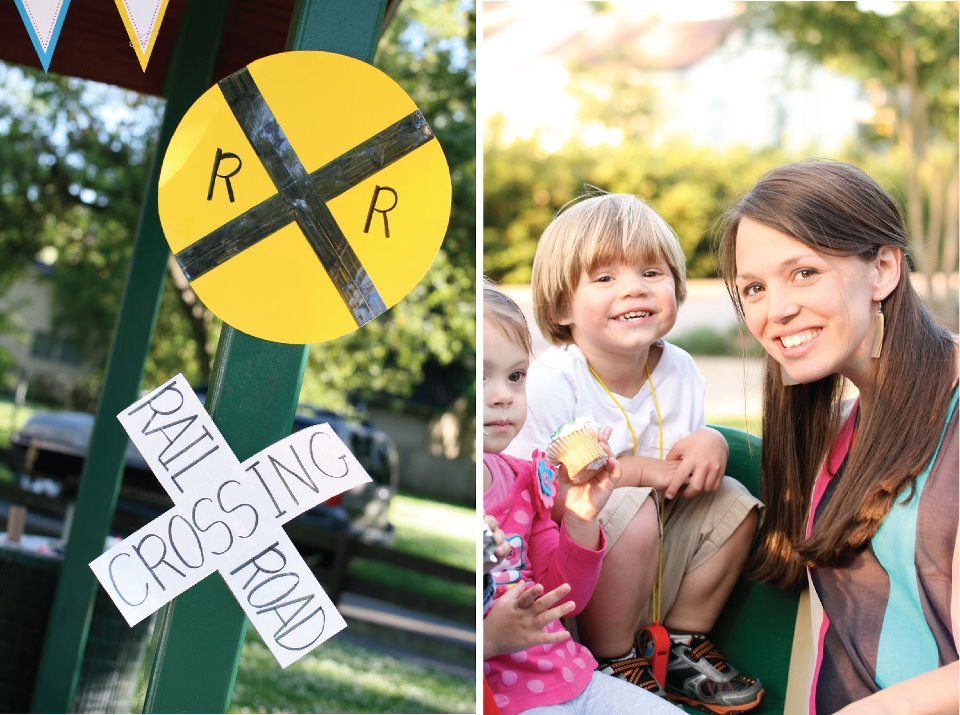
I got to teach him more about environmental print when we made the railroad crossing signs.  Making kids aware of “writing” on signs is a great pre-reading reference and geometry lesson too as you observe the shapes all around.
The Party favors: Sean Patrick loves my school whistle that I wear on my lanyard so I got whistles for the kids that I wrote their names on with a sharpie and passed out as soon as the kids got to the party.
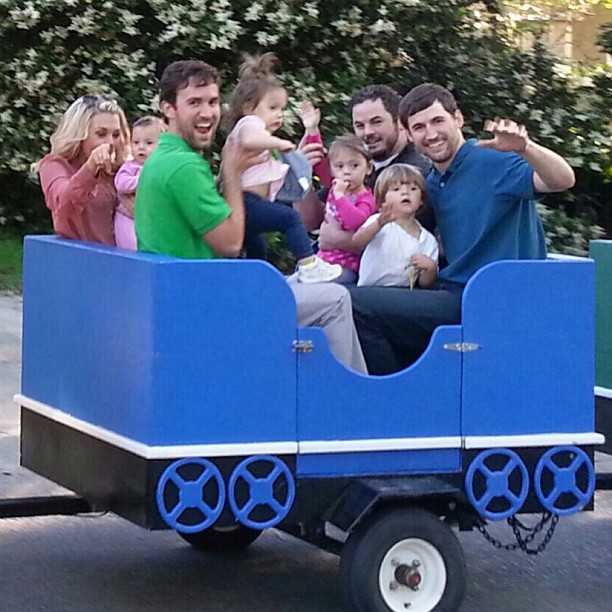
And the highlight of the party: the train!!! The kids had so much fun riding on the trackless train that Sean Patrick has been telling everyone about his “super-fast” train at his party.  Adding an expense like that can make a party overwhelming unless, like me, you let all family members know that if they want to chip in a little for the train in lieu of presents then it makes it more affordable (and then you don’t end up with lots of extra plastic in your house ).
Please comment with a link to your blogs if you have cute kid parties to share because I love the inspiration now that I have been converted by my friend Lauren to a party-planning mom… which is a small miracle because I avoided it like the plague for so long 😉

Mommy Teacher Spring Break

I remember when spring break used to be a week at the beach, party cups, and friends for days.
Now, my spring break (as you are going to see) still includes friends, but it revolves around my kids and not my suntan…. But who needs a suntan anyway right? …. Well, since you asked….I do.  But, I am 7 months pregnant and it was actually a chilly week so, that wouldn’t have happened anyway.
I have to admit,  ever since I went back to working full time … I miss my kids so much that I SAVOR my time with them even more.

With a week of just me and my angels, I took the liberty of jumping on board of EVERY playdate adventure I caught wind of, and here is what my crazy-busy, awesome week looked like:

Monday – Zoo DAY

Packed the wagon, clipboards, zoo checklist, and lunches…

baton rouge zoo

After nap time, we even made it to the neighborhood school playground and nearby park too… we really made the most of our day outside!

IMG_6729

Tuesday – Exporing Downtown Baton Rouge

We packed our lunches, umbrella strollers, and blankets and headed to a trolley stop in Downtown Baton Rouge.   We started singing “The Wheels on the Trolley…” when my baby started crying it was perfect timing for “The Baby on the trolley goes wah wah wah” haha

Trolley Ride Baton Rouge

We took a little stair-step picture of the kids from tallest to shortest in front of the State Capitol…

IMG_6751

After venturing to the top of the State Capitol, we had a picnic out front as we waited for the trolley to swing back around…

IMG_6771

Wednesday – Fire Station Tour and Easter Egg Hunt Party

My friend set up a local Fire Station Tour where we maxed out the place with the youngest crew possible…

IMG_6847

Sean Patrick was intrigued, and then scared, when the firefighter did his suit-up demonstration…

IMG_6856

The Easter Egg Hunt Party we went to was way too fun for a simple, last-minute thing my friend threw together….

IMG_6896

I’m still loving the bandana-liner idea from last year.

IMG_6894

Thursday – Louisiana Arts and Science Museum

The LASM in downtown Baton Rouge has a great little discovery depot that was so developmentally appropriate for my under 3 year olds.  It has so many age-appropriate learning stations for them to explore…

IMG_6945

Friday – Bass Pro Shop and Sunrise Assisted Living

We made our way to Bass Pro Shop in Denham Springs, La to take pictures with the Easter bunny…. only to get the memo a little late that we would miss the bunny all-together (live and learn!)  We found plenty to do…

IMG_6962

After “Driving” the stationary truck out front Sean Patrick “Rode” the statue of a horse too…

IMG_6974

Right before he picked out a fishing pole (that he uses every day!)

IMG_6982

Then, we went to visit my mom (who has Alzheimers) and decided to take a picture with the Bunny Decor at the Assisted Living Residence since we missed the bunny at bass pro…

IMG_6990

Weekend Fun – Crawfish Boils and Easter Celebration at the Camp

Finally, we wrapped up the weekend with two crawfish boils (dont be alarmed…below is a fake, plastic crawfish)…

IMG_7017

Took a family pic (minus smiles) …

IMG_7030

And went fishin in the lakefront (in the closest thing to a swimsuit) with the pole from bass pro…

IMG_7077

And I wouldn’t trade ONE minute of it…. for my old Spring Break tan 😉

I hope that if you are on Spring Break right now with your kids off of school that you are able to join forces with your friends and come up with some play dates… it makes for such memorable moments!

Cheap and Easy, Easter Bunny Gift Baggie

I found this idea in my teacher stash of Easter activities.  I almost always have paper bags, glue, markers, contruction paper, and scissors in my playroom cubbies.  So, for me, this was just a “sweep-the-playroom” kind of activity.

I wanted to put a little Easter picture inside of a little gift bag for Sean Patrick’s grandma and great-grandma.
Way better than a gift bag was this little craft idea I found in my teacher shed (the one on the left is my “example” and the one on the right is the one Sean Patrick made):
 
 
I just Cut a dip in the top of a brown bag (the side that opens) to so it left a shape that resembles a bunny.  You could cut a rectangle out of  the middle of the top of the bag if you don’t want them to be as rounded. (A white paper bag would be super cute too, but I was out).
 
I used pink, blue, & black construction paper to make the eyes, inner ears, nose, & whiskers.
 
Sean Patrick wanted to color it first of course (red is his favorite color if you haven’t guessed by now).
 
I always include my little bed-head one year old too.  (they are both shirt-less because I wanted to keep their cute shirts clean).
 
 
I then helped him cut/tear and glue little pieces of pink paper to a gluey oval in the inner ear.  Then he glued the eyes and nose (“just a dot, not a lot”)…. I glued the whiskers because I couldn’t find my glue stick which would be easier for him.
 
 
After we finished glueing, I grabbed a black marker, took his hand and guided him to make the pupil of the bunny’s eyes, the eyelashes, the little dots around the nose, and the mouth.
 
That was it!
We wrote a note from “Sean Patrick” on the back.
We put some Easter grass, starburst candies in some eggs, and the pictures inside & he will give them out when he sees them for Easter!
 

You can always add to it and share your ideas on facebook (like a cotton ball on the backside):

Plate ART

I threw out the uppercase  A-R-T  in the title of this post because even though my friend and I had a blast decorating plates with our kids, the following images do  NOT show plates that you can eat from or really even wash.  They will be on a plate stand in the kitchen most likely 😉

IMG_6139

My friend Allie and I are both 24 weeks pregnant, we both have a two year and a half year old, and we both have a one year old (this was not planned by the way).  So, we have had a sleepover this weekend to let our crazy worlds come together for a few days.  It has been so sweet, and funny, and crazy of course.  We decided it would be fun to let the little ones do an art activity together.

We found some pefect small, white melamine plates at Target and purchased some colorful sharpies, we headed back home to let our little ones decorate away. (PS – we learned the hard way that the bamboo melamine plates we found at Big Lots were a NO GO!  Just trust me on this one.)

My friend Allie can write really cutesie and I can NOT write cutesie at all so she personalized all of the plates for us.  Thanks Allie ! 🙂

IMG_6138

We threw aprons on the little ones and let them color on their plates….

Decorating Around Names

Then, we threw aprons on the one year olds and let them color on their plates (without their names on them), and we found out that this actually worked better to write the name AFTER coloring.

IMG_6136 IMG_6135

This next low-quality shot is just showing that I traced my little ones’ hands on the back and wrote the date.

IMG_6133

I had originally intended to make dinner plates, but it didn’t quite workout that way.  And after researching melamine and the process of making dinner plates, I was even more happy with the final product as a keepsake.  We wanted a fast and funky activity to do so this was perfect for the weekend.   But I found this if this is your kind of thing….. http://www.ehow.com/how_6913770_paint-melamine-dinner-plates.html  –  I’m sure I’ll make this happen in the future too 😉

Once again…here are my two kiddos plates…..up close and personal:

IMG_6146 IMG_6145

I am happy with the way they turned out!

Easy Busy Bag Ideas from Kidspired Creations!

Hi, Mommy Teachers!  It’s Casey, stopping by from Kidspired Creations!  I am Mommy to James (5) who just started Kindergarten, Leyson (3) and Lena (6 months).  I currently stay at home with the younger two but I taught Pre-K and Kindergarten before my Mommy days.

Leyson and I were playing (learning) today and were toying around with different Busy Bag Exchange ideas. We will be participating in a Busy Bag Exchange soon where all the moms participating bring gallon baggies filled with simple, hand-made activities for each of the kids who will be there.  If 15 moms participate, your child has 15 new Busy Bags full of super fun (and educational) activities!

Leyson and I came up with 3 different ideas today and I thought they would all be fun to share with you Mommy Teachers!

PATTERNS:

We used word strips (found at the Dollar Tree for, you guessed it, $1 per package) to glue colored squares in AB, ABB and ABC patterns.  I cut additional colored squares for Leyson to COPY the patterns on the strips by placing each of the colored squares below the square on the strip.  This will get him used to making patterns.  Saying the color out loud reinforces the pattern so he can also HEAR the pattern (helpful for an auditory learner – someone who learns better when hearing information).

After he was able to copy the pattern, I then taught him how to EXTEND the pattern.  At the end of the strip, he must finish the pattern by placing the appropriate colored squares that would come NEXT in the pattern.

The next step is to create his own patterns without looking at the strip.  From there you can create more complex patterns!  The options are endless!  Patterns are difficult to understand, so it might take a little time for your little one to be able to catch on.
WHAT’S IN A NAME?:

Kids are so funny when it comes to learning how to spell their own names.  Most often kids learn how to spell their names before they completely understand the concept that letters make words when put together.  Take my son Leyson, for example; anytime he sees a word that starts with an L, he says it spells Leyson.  He thinks he owns the letter L.  The same goes for the letters E, Y, S, O and N… he owns them all.  You see, for young toddlers, they will not understand that the ORDER of letters actually makes a difference when spelling words.

Even in my kindergarten classroom, students who knew how to spell their names would sometimes slip into the idea of “owning” all the letters in their name and would write their names out of order.  LUIS would spell his name UILS… still thinking that it spelled the same thing.  Even more common would be for kids to write their names backwards (SIUL)… and several, get this, would write their names in mirror image!  I can’t even do that!  All of these are totally normal progressions when your child is learning how to spell his/her name, so here is an easy activity to help:

You need two word cards (or index cards).  Write your child’s name evenly and legibly on each card.  Leave the first card whole, and cut out each individual letter on the second card.  First, have your child put each cut out letter on top of the letters on his/her name card, matching letter for letter.  Then, have your child put his/her name together underneath the name card.  Last, take away the name card and have your child put together the letters to spell his/her name from memory.  Be sure to say the letters out loud in order so your child can hear how to spell his/her name in addition to seeing it.  Jessica had a great post on singing a catchy song to learn how to spell a name.
HAMBURGER PLAY:

This game was Leyson’s idea.  He picked up a circle I cut out and pretended to eat it, saying it was a hamburger bun.  Bam!  Instant Busy Bag idea!

I used construction paper to cut out a top and bottom bun, hamburger, tomato, cheese, ketchup, mustard, pickles, lettuce, and bacon and we made a hamburger!  Not only is this a great pretend-play activity, but it was a great way to encourage language development and sequencing.  I had Leyson explain to me exactly how we should make a hamburger.  I encouraged him to use words such as “first,” “next,” “then,” and “last” in his explanation.  You can also add an extra element by writing numbers on each of the pieces to teach your child number order (1: the bottom bun, 2: the hamburger, 3: cheese, etc.).  For the beginning reader?  Write the words “bun,”  “pickle,” etc. on each of the pieces and then enjoy your nice, tasty treat!

I am still brainstorming different Busy Bag ideas!  If you have a good one, please comment below and share!  Hopefully after the Busy Bag Exchange I will have another post for you, so stay tuned!!!


Casey Dellinger Hilty

“One day, all children in this nation will have the opportunity to attain an excellent education.”
Teach For America
LA Corps 2005

Related Posts Plugin for WordPress, Blogger...

1 2 3 4 5