Guiding Behavior

Self-Control … Body Language

The hot topic of the day….. self-control.  There are about 50 posts I could write (and read to learn about) the topic of self-control.  In fact, aren’t we all still learning to practice self-control?

No?

 Just me….

well alright.

Our little one’s brains are doing so much.  Their little brains are learning to communicate with their body parts, learning to control their emotions and harness their impulses, and lets face it….it’s hard!  I may WANT to push someone who is frustrating me to the extreme, but I have learned to harness my emotions, and CHOOSE to behave appropriately and sometimes even helpful in circumstances when someone flat out deserves the worst.   But our little ones have quite the learning curve when it comes to anger management in accordance with their body language.  My little two year old threw a fit at the end of storytime today and was flailing and kicking all over the place.  I realize that is his impulsive expression of disappointment, and I need to HELP him develop appropriate behaviors so they become a controlled response.

I found a GREAT article (and website) that addresses a FEW ways to reinforce acceptable behaviors at different ages and stages.  There are many other ways to develop little children’s understanding of appropriate responses, but I liked the mentality that is communicated here.

I am posting two videos below….please don’t judge me….I am a hot mess and so are my kids, but at 8:30 in the morning what do you expect?  They are simply an explanation and demonstration of a little technique that I came up with on the spot the other day to help Sean Patrick become aware of his body language.  I used techniques like this in my Kindergarten classroom so this teachable moment should apply to ages 2-5.  Hope it helps you!

Real Life Lessons From The Mommy Calling Blogger

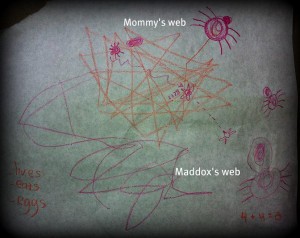
I was following “Mekmommy” on Instagram and saw this fun, illustrated picture:

The Mommy Teacher that I am had to know the play-by-play and story behind this authentic, on-the-spot mini lesson.  Krista (this particular mommy teacher) is a mommy of three and the blogger behind “The Mommy Calling.”

So, here is the story shared by Krista that I hope inspires you the way that it inspired me:

“It all started b/c Maddox ran inside freaking out because our yard was full of spider webs. Of course, living in the country cobwebs will always be there, so I had to figure out a way to help him understand. It actually turned into a lesson about counting, adding, habitats, the food chain, a ton of things!

I tore some paper off of the butcher roll and drew a spider. As I drew it, we talked about how it has 2 parts to its body, the head and the body, setting up for a later conversation about the difference between insects and arachnids. Then we counted out the 8 legs as I drew them and talked about how there are 4 on each side and how 4+4=8.

I used a different color crayon to draw the “silk”. I drew some in the spider’s belly, and drew a line coming from the spider and as I drew a random “web” pattern I explained that as the spider moves with the silk behind him it makes the web. After I drew the web I talked about the uses of the web. I broke it down by first drawing the spider in the web telling Maddox that the spider lives in his web. Then I drew an egg sac and explained that this is where the spider lays its eggs and they hatch. I drew a bug flying on the outside of the web and a dotted line leading to the web explaining that as the bug is flying it gets caught in the web because it is so sticky. I explained that the sticky web is how the spiders catch their food to eat. I drew an arrow from the spider to the bug and explained how the spider will then eat the bug. I then asked him if he remembered what the web was for and we broke it down into living, laying eggs, and eating.

Maddox then got his own crayon to copy what I drew and he explained it back to me while I reinforced that there were 2 body parts and counting and adding of the legs (making sure he drew 4 on each side rather than just drawing out 8 random legs so he could visually see the 4+4=8). We didn’t go into the details of the web again, but again we discussed the live, lay eggs, eat. All-in-all it was about 15 minutes and he was so proud that he spent the next 15 minutes talking about it over and over and hung his picture up and called his daddy to tell him about it. In 30 minutes he learned so much about so many things. And it wasn’t anything that was hard to explain or too over his head. It was such a great reminder of how many important things they can learn without a classroom and without making it a boring ‘lesson.'”

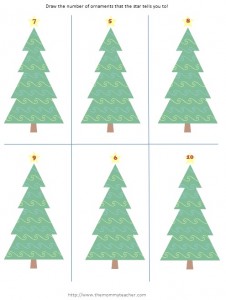
Christmas Tree Counting Printable

I can’t wait to share my activity ideas and schedule that I am setting up for my little one, as well as another great giveaway on the way!

In the meantime, here is a freebie that I made for your little one to practice drawing sets of objects.  Don’t just hand your little one a set of crayons/markers and say “get busy.”

First, lay the Christmas Tree Counting Printable on the table with something small and colorful (like skittles) that you and your little one can use to practice counting sets together.

Then, point to one of the trees and show your little one how you might “decorate the tree.”  “Ooh, this tree has the number nine on the star, I’m going to decorate the tree with nine colorful skittles! One, two, three, four, …..etc.”

This is a great way to model the directions by showing your little one how to recognize the number and count out that given quantity, AND by modeling one-to-one correspondence (counting one object per given number).

After you have your little one  complete the hands-on round of the printable, on their own (assisting and prompting where necessary), then explain that instead of skittles, this time they will draw the number of ornaments (circles, candy canes, snowflakes, or whatever shape he/she wants).  Before they begin, model an example of how to do this on a separate sheet of paper.  And that’s it; now you have purposefully used a printable 🙂

Using Words To Describe Directionality

A lot of parents assume their super verbal and proficient little ones have a wider speaking vocabulary than listening vocabulary.  It is not that your little one doesn’t “know” the words they are looking for, but there are certain language concepts that are not yet part of their speaking vocabulary.

For instance, if I asked your little one to look “under” the table to find my pencil, he or she probably wouldn’t hesitate.  Your little one probably knows the word “under” in context enough to search in the direction that I am referring to.  Or, if I am “under” a table and I asked your little one where I was he or she might state, “Under the table” using the position word “under.”  But, in the context that I had a doll “under” something and asked your little one to describe where the doll is in their words.  He/she may or may not use words to describe directionality like (under, next to, through, between, back, on top, over, above, etc.)

So, to work on developing this skill through a natural progression from head knowledge to incorporating these words into their oral voacbulary and using them abstractly, I am going to give you a series of position word activities using pictures of Casey’s little ones because she is such an awesome mommy teacher – check out her kidspiration blog 🙂

1) Playing Copy Cat Games:  Casey loves to play these games with her little “Leyson man.”  This is very similar to “simon says” – ask your little one to copy you as you place your hands “Over” your head, “between” your knees, “beside” your cheeks, etc.


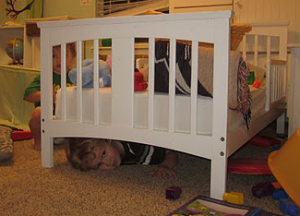
Casey's little one, James, hiding under the bed!

2) Hide and Seek: Hide a toy and give directions using position words for your little one to find it, “The block is between the couch pillows.”

3) Act it out with your whole body:  “Can you hide under the bed?  Can you climb on top of the stool?  Can you jump over the pillow?”  This part of the activity helps little ones meet the needs of learning through movement!Casey’s little one, Leyson, practicing position words with his farm animals!

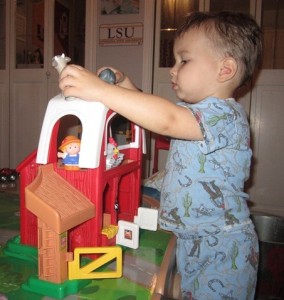
Casey's little one, Leyson, practicing position words with his farm animals!

 4) Act it out with toys:  “Can your cow jump over the farmhouse? Can your pig squeeze through the doorway?”  This helps the little ones needs to learn in a hands-on way!

5) Use words to give directions: Place something (like a doll’s purse) between two chairs, then dialogue with your little one “Pretend that I cant find the Barbie’s favorite purse, but you know where it is!  Without showing me, can you use your words to tell me where it is?”

Using Books as a Tool to Bridge the Social Gaps

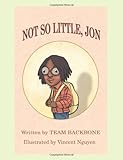
One of my sisters is a friend of John Rich, and she told me about the following book he helped to write, which I instantly wanted a copy of.  If you watched the “Celebrity Apprentice” this past season you saw that his team wrote a book about a boy, Lil Jon, overcoming fears on his first day of school.

Not So Little, Jon  (Volume 1)

Books like this are great to read with your little one over the summer if you are going to put your little one in any kind of program whether it be a formal school setting, a mother’s day out, or a daycare.  This can be great preparation or reinforcement for a little one to develop a sense of confidence in their individual personality, talents, and abilities to initiate social interactions. A few others I recommend:

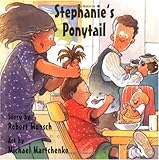
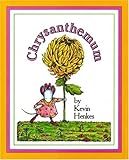
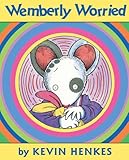
Stephanie's Ponytail (Classic Munsch), Chrysanthemum Big Book, Wemberly Worried

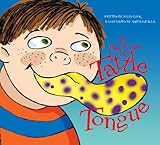
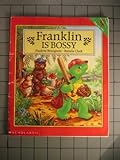
Additionally, if your little one is already dealing with some social complications due to tattling, shyness, uniqueness, bossiness, etc. I recommend learning about some of the literature available for children with those tendencies by reading the reviews and taking a peek inside books that can really bridge the gap that your little one might be struggling through concerning social development.  Books like:

A Bad Case of Tattle Tongue, How to Lose All Your Friends (Picture Puffins), Franklin Is Bossy

I hope you find these books helpful for discussing and guiding social development.  Books are great tools for helping children to gain perspective and to learn new ways to problem solve independently.

Related Posts Plugin for WordPress, Blogger...

1 4 5 6 7 8 10