Counting

Christmas Math Pack

Making these math pages reminded me of the homework I used to send home when I was teaching.  In fact, I actually made this because there was a parent whose child WANTED homework, but wasn’t getting any sent home in his folder as the holidays were approaching.

christmas math preview.001


Yes, I realize that not everyone would want homework (or homework like this) sent home.  But, I think everything is what you make of it, and I used to make these fun through the dialogue we would have and all the ways we would come up with to discover the answers to these “problems.”

Pages like this can get a bad wrap (pun intended).

If recording sheets are coined as “work sheets” then that can suggest that they are used in boring ways to accomplish boring tasks.

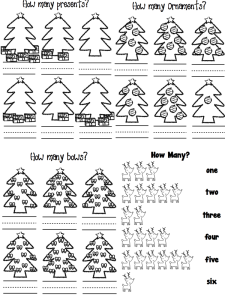
I would like to suggest that when counting the presents we would give each tree a child’s name and we are going to be Santa’s helpers to count how many presents are under each tree and take an inventory so we can report back to Santa how many presents each child received.

And for the one with the ornaments we are in charge of decorating the North Pole Christmas trees and we have to record how many decorations we used on each tree so we can keep track of them to use again next year.

You can also use these to teach the importance of taking your time, checking your work, and other similar skills that are important for hard workers.  If the elves weren’t hard workers Christmas just wouldn’t be the same.

This four-page printable is included in my membership because I sell in on TeachersPayTeachers, but if you check out my membership you might be shocked about how much you are getting for such a quick and easy deal.


I Like Pinterest Activities That I Can Do ASAP

Y’all, I love Pinterest; I do, but I have to say – I do NOT like activities that I can not do with my kids almost  immediately after I browse.

If I browse during nap time, I want to do the activities that I find that same afternoon.  I like to get my inspiration from pinterest but then I want to actually DO the activities.  Why use a pinboard if I don’t turn the ideas into experiences?

I think I have finally figured out what to do with my not-so-parent-friendly pins…  Lately, if I see an activity that I can’t do right away, I find out a way to make a printable for it.  That way, other moms can simply pin it, print it, and make it happen that day if they want to.

I also like sharing my experiences so that you feel that much more prepared to make the most of the activity… which is why I added an “ideas” page to my printable:

November Activity Printable With Ideas

Yesterday:

1) I made the November Corn Printable  during nap time, but I only printed one page.  I printed a page of corn that had the numbers on the husks.

2) I put a small handful of candy corn in a cup.

**The order of teaching something  is always  I DO (I will talk about it and show my child an example), WE DO (we will do it together), YOU DO (encourage my child to try it on his own).

So, I DO first:

3) I talked to my three year old “Today we are going to use candy corn to fill the ears of corn, but we will stop counting the candy corn when we get to the number that is on the corn.  Watch mommy….  See this is the number ONE, so mommy is going to count out candy corn until I get to ONE.  (I place one candy corn on the corn with the number one and say “One!”) “Okay I am going to stop right there because I counted to the number on the corn.”

WE DO:

“What do you think this number is (pointing to two)?”  (Two).

“Yes and two comes after one.  Can we put the candy corn on that ear of corn while we count to two?” (one, two).

“Wow you are so good at this! Do you know what number this is if this is one, that is two, then this might be….”  (Three!)

YOU DO:

“Yes, your turn, can you put three candy corns on top of the corn?”

4) We did this page again and then we ate the candy corn, but if your little one doesn’t like the taste of candy corn, it’s okay… I included little candy corn cut-outs so you can glue them on your candy corn.  🙂

**** If you want to download this activity, sign up to be a member for just $5 and get Access to ALL of my printables! – November Corn Printable

So,  PIN this printable if you like it, and follow me if you’d like to see all the things I plan to do with my kids each month!

candy corn printable

My original Pin-spiration was Candy Corn Counting – (I literally just ran out of construction paper and I love to make and save printables).  Thanks No Time For FlashCards. 🙂

Isn’t Corny Math is A-Maize-ing ? {Okay, I think I’m done}

Food Fun

Hi!  I’m Casey from Kidspired Creations!  I have been a guest blogger a few times on The Mommy Teacher am very excited to now be co-blogging with Jessica!  I am a former Pre-Kindergarten and Kindergarten teacher and am currently a stay-at-home Mom of 3 little ones ages 5, 3 and 10 months.

I have to admit that despite my best attempts, not all of my Mommy Teacher moments get the best reception from my kids.  I think if I say, “Let’s make a pattern!” one more time, my 3-year-old might throw a toddler tornado-sized tantrum.

IMG_6932[1] Yes, my kids can get burnt out on lessons from this Mommy Teacher; however, I know how to win them over every time:  food, particularly pizza.

I recently saw a recipe on Pinterest that involved cutting zucchini in half long ways, carving out the insides and filling them with various deliciousness.  I decided that these “zucchini boats” would make great pizza crusts!   This idea perked interest with my kids so quickly that I couldn’t prep fast enough.

Zucchini Boat Pizzas

-Ingredients:  zucchini, pepperoni, mozzarella, pizza sauce

-Pre-heat oven to 350 degrees.  Cut zucchini long ways and spoon out a trench on the inside.  Spread a few spoonfuls of pizza sauce inside.  Fill with mozzarella cheese.  Top with pepperonis.  Place on the oven for 15-20 minutes or until zucchini is tender.

Easy peasy… and so delicious that even my super-picky 3-year-old was digging into the “green crust.”

Here are the different skills we covered while making our pizzas:

Math IMG_6931[1]

– Sequencing: “What is the first step to making our pizza?  What comes next?”

– Measuring:  “How long is our zucchini?  Let’s measure in pepperonis.”

– Adding:  “Our pizza needs 3 pepperonis.  There are 2 pepperonis on the pizza now.  How many more do we need to add to make 3?”

-Counting:  “How many pepperonis are on your pizza?”  How many pepperonis are there all together?”

-Multiplying:  (for the school-aged child)  “If we have 3 pepperonis on 10 pizzas, how many pepperonis are there all together?”

-Time:  “Our pizzas need to cook for 20 minutes.  Let’s set the timer.”

Motor Skill Development IMG_6928[1]

-Pouring and spreading the sauce with a spoon

-Sprinkling the cheese using our fingers

-Using the pincer grasp to separate the pepperonis

Language Skills

-Sequencing Vocabulary:  first, second, next, then, last, before, after etc.

Health and Nutrition:  Learning about making healthy choices by substituting with fresh vegetables and what food groups are being included in dinner

Following Directions and Recipes:  Following step-by-step or a series of directions is different than following one direction at a time.  “So, I put the pepperonis on first right???  No?  Well, what do the directions tell me to do?”  You can take this a step further than I did by drawing or writing out the recipe for your child to have a visual to follow.

Social Behaviors:  being a happy helper in the house!  It is important for kids to take ownership over household tasks and doing it with a happy heart!

* * * IMG_6933[1]

My kids do not like to try new things, but since they made the dish themselves they were eager to dig right in!  More surprisingly was my 3-year-old who didn’t shed any tears before his taste test!  That’s quite an accomplishment at our dinner table!  Everyone was happy… even the baby who got pureed zucchini that was scooped out of the middle of our boats.  Bonus!


Busy Bag (Take Three)

I started adding step-by-step teaching tips for some of my recent Busy Bag activities that Sean Patrick is experimenting with but this is taking me some time for a few reasons:

1) I like to introduce one activity every few days and really spend time maximizing the teaching opportunties from that “game” as Sean Patrick calls them.

2) I am a mommy teacher so I don’t spend much time on the computer – this blog is my hobby and I try to carve out more time in my day actually spending time working with and playing with my little ones 🙂

3) I like to spend time adding teaching tips for older children as well because I believe that EVERY activity can be and should be accommodated to each individual child.

So….at that….here is another activity….and one just in time to make use of all those Easter Eggs floating around your house 🙂

Egg Counting (The Link attached has other GREAT ideas, but try not to take them at face value….make a little step by step teaching plan for each activity because a “lesson plan” can structure the pace and aid the learning process)

This activity has MULTIPLE uses… to teach counting one to one and to teach addition in the most organic way by teaching about all the ways to get to a number (1 + 1 + 1 + 1= 4 ; 2 + 2 = 4 ; 4 + 0 = 4)


I suggest that you work on counting to, or adding to, ONE number at a time.

1) Start with the smaller side of the eggs on their backs….if you are working on the number four then place four egg halves on their backs.

2) “Let’s use the Easter Eggs to see all the different ways we can count to four!” or for older kids “Let’s……ways  we can add to the sum of four”

3) Place one pom pom in each egg (I switched to the small pom poms after the first try because I wanted all of them to be able to fit in one egg half when attempted) One and one and one and one is four! (four younger kids you can use “and” in  place of “plus” and “is” in place of “equals” just for now while they are being introduced to adding.

3) Dump them out and say – let’s see if there is another way to fill the eggs to count to four …One, two and one and one is four so two and two more is four.

4) Continue this until you have exhausted every means of arriving at the sum of four.  For older children model and demonstrate how to write out each problem.

5) Pick a number close in proximity to the number you worked on (like 5) and do it again….together this time.

6) Pick a number easier than the original number (like 3) and allow your little one to try on their own as you watch and make encouraging comments.

Related Posts Plugin for WordPress, Blogger...