If you have had a chance to do any of the activities with your child, or if you plan on it, please TAKE PICTURES 🙂
With your consent, I would love to post some pictures of you and your child working on an activity, or a modification of the activity, on my visitors share page.
Updates
I added a resource to the post “Number Fun” because I figured not everyone knew how to use/download a new font. So, to make it easier on you, I made a PDF for you to print of the the numbers 1-10 in “Color Font” for the color rubbing activity.
I don’t plan on uploading activities on Saturdays and Sundays, but I did add a new page to the mix that is going to be a quick reference for activities. It is “Activity Archives”. I plan to upload all my activities to that page so they can all be found in one place. Feel free to print and share with others, but they are not to be reproduced for financial gain. Thanks!
Number Sense
In my last Math post “Number Fun” I talked about some of the attributes of numbers that children need to learn. I mentioned that children need to learn that each number has a quantity; most children can count to a number but have no idea what the number represents.
When we think of a number, we can picture the number itself in our minds, we can picture where the number stands on a number line, what numbers are greater or smaller than the number, and we can picture all the different ways that number amount could be rearranged spatially. It takes a lot of repetition and hands-on experience to store a repertoire of number concepts into a memory. So get busy!!!!
If your child still doesn’t know their number names “1, 2, 3 4….”, up to 10, out of order, then they may not be ready to learn the number amount yet. Master the basics first.
Here is a number activity for your child to practice counting one object at a time in a set group of objects and identify the number they counted. Ask them to count each group of objects and find the number to draw a line from the amount to the number.
Why Rhyme?
Little Miss Muffet would be glad to know that her legend lives on. We all grew up reading, singing, and memorizing a variety of nursery rhymes, but would you know that children are still expected to know nursery rhymes? Yep…it is a GLE (Grade Level Expectation) for pre-k and k kiddos. There are a few reasons behind this seemingly dated benchmark. 1) Children are expected to be able to recognize familiar songs and rhymes for extended learning in classrooms, 2) Children are expected to utilize their memory, 3) Hearing and making up rhymes is a reading indicator!
I understand if you tuned me out for the first two reasons but did you hear what I said? Yes, rhyming is a tier on the reading ladder. If a child can hear and make up rhymes then that means that they can manipulate sounds in words, and manipulating sounds is a big chunk of what reading consists of in early readers. Rhyming is a definite pre-reading activity. 🙂
So, go crazy around your house speaking in rhyme: “Are you ready Freddy?” “See you later gator!” “After a while, crocodile” “That’s easy cheesy!”
Explain to your child that rhymes sound the same at the end of the word. So you can say two rhyming words in a sing-song way and it sounds almost the same, but if you say two non-rhyming words in a sing-song way then it just sounds awkward.
So, check out some mother goose books from the library and read some nursery rhymes to your kids and, of course, here is a hands-on activity.
Open the Rhyming activity attachment. Print it, see if your child can identify all the pictures (name them), and ask your child to color all the words that rhyme with “sat” red (-at word family) and then color all the other pictures whatever other color they would like.
Note: The first rhyming activity you do should focus on seeing if they can hear a rhyme or not. So, if you take out this sheet and say the names of everything on the paper, dont just ask them to find the rhyming words. Ask “Does cat rhyme with sat?” Then, “What about bear? Does bear rhyme with cat?” Say them right next to eat other and wait for a “yes” or “no” from your child. For example, “Cat, sat?” “Bear, Sat?” Give guidance for the activity. If your child says “yes” to cat, say “Good listening! Color it red because cat rhymes with sat!” If your child isn’t getting any right, put the activity sheet away and work on just making up silly rhymes and give this a lot of practice before continuing or moving on.
Writing with a twist!
Writing can be such an exciting thing for a little one, but it can also be frustrating and even painful. Yes, painful. Just like when your hand gets a cramp after you have been writing for a little while, children have not used those little muscles in their hands much. So, they need to develop their fine motor skills before they have the endurance and coordination needed to write. If you want to give your child a chance to develop those fine motor skills, give him/her plenty of informal writing time (coloring, chalking, stenciling, etc), but be sensitive if your little one wants a break. There are so many ways to exercise their little hands to prime for writing –including cutting with scissors….Yep! Let them cut with a child-safe scissors (monitoring of course) – watch how they hold the scissors…you will be surprised that they need a lot of assistance….be patient! At first, don’t even give them things to cut out, just ask them to cut up lots of paper. I always explain to my students that there is a time and place for everything so this is their chance to “be out of control” because I don’t want them cutting up just any paper any time making a mess when I haven’t planned for it haha.
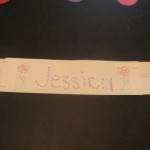
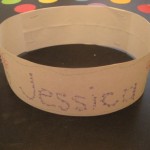
Activity: Trace name, decorate and cut fringe on their “crown.”
Step 1: Fold a piece of paper, cardstock, or construction paper in thirds. I didn’t get out the ruler and measure ya’ll, but if you are a perfectionist…measure away!
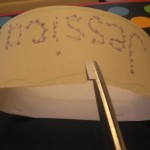
Step 2: Cut along folded lines. I didn’t get out my paper cutter either, but by all means…
Step 3: Staple –or tape- the ends together. I staple with the flat side on the inside of the strip so it doesn’t irritate their forehead.
Step 4: Freehand a dot-to-dot of their name for them to trace.
Step 5: Let them decorate! Remember that even scribbling works those little muscles in their hand.
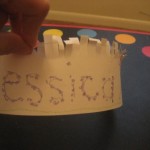
Step 6: Let them cut “little bites” all around the top…you may have to hold their hand to help. Then let them ruffle the edge.
Step 7: Measure their head with the strip and hold your place where you need to staple/tape.
Step 8: Give them some “Queen” or “King for the day” choices 🙂
*My 6 month old son had to model my hat haha


