Month: June 2012

Self-Control … Body Language

The hot topic of the day….. self-control.  There are about 50 posts I could write (and read to learn about) the topic of self-control.  In fact, aren’t we all still learning to practice self-control?

No?

 Just me….

well alright.

Our little one’s brains are doing so much.  Their little brains are learning to communicate with their body parts, learning to control their emotions and harness their impulses, and lets face it….it’s hard!  I may WANT to push someone who is frustrating me to the extreme, but I have learned to harness my emotions, and CHOOSE to behave appropriately and sometimes even helpful in circumstances when someone flat out deserves the worst.   But our little ones have quite the learning curve when it comes to anger management in accordance with their body language.  My little two year old threw a fit at the end of storytime today and was flailing and kicking all over the place.  I realize that is his impulsive expression of disappointment, and I need to HELP him develop appropriate behaviors so they become a controlled response.

I found a GREAT article (and website) that addresses a FEW ways to reinforce acceptable behaviors at different ages and stages.  There are many other ways to develop little children’s understanding of appropriate responses, but I liked the mentality that is communicated here.

I am posting two videos below….please don’t judge me….I am a hot mess and so are my kids, but at 8:30 in the morning what do you expect?  They are simply an explanation and demonstration of a little technique that I came up with on the spot the other day to help Sean Patrick become aware of his body language.  I used techniques like this in my Kindergarten classroom so this teachable moment should apply to ages 2-5.  Hope it helps you!

Education Near and Far

Has it been almost two weeks since I’ve posted? That is absurd. What have I been doing? I guess us Mommy teachers are being pulled in so many directions that sometimes we don’t even know which direction we just came from.

But, I can pinpoint where my mind has been…..  I can’t get my mind off the images of Haitian children.  My husband went to Haiti with an amazing organization and movement called “Respire Haiti” and God had been stirring my heart for the children in Haiti LONG before this trip.  My heart has AlWAYS had a steady beat for the country of Haiti because my parents were very invested in the people of Picot, Haiti for as long as I can remember.  The poverty astonishes me and the contrast to the way our kids live is baffling.  The privilege it is for a Haitian child to have an education is humbling.  Just read here for ONE example.

I have been praying that God will use my passion for education to benefit others both locally and globally.  And I have never done this kind of thing on my blog before, but I am linking an opportunity to donate to the Respire Haiti ministry to build and start a school for Restaveks where there is a great need in Gressier, Haiti.

Click Here to read about this opportunity, Read about the ministry, and Give if you feel led.

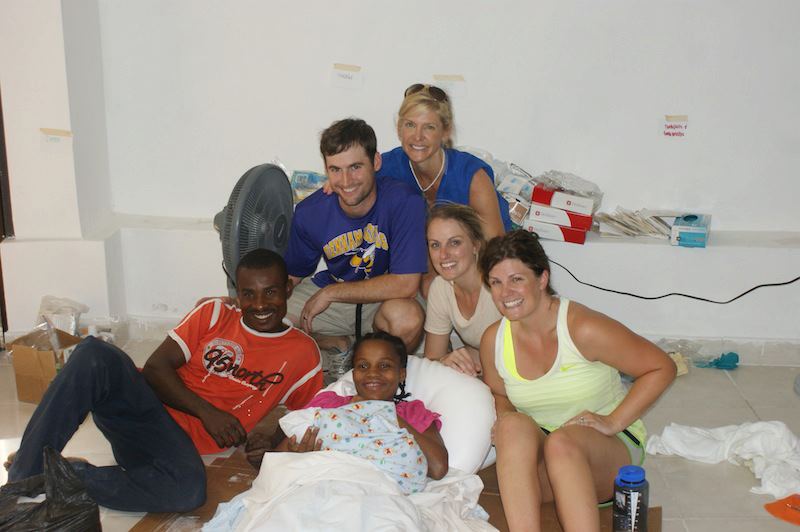
My husband, Patrick, is pictured above with the rest of the medical team that served from our church Chapel on the Campus and a Haitian couple with their new baby girl.  They helped deliver a baby and the story about that is linked here.

Geoboards

One of the teaching tools that I used to have in my classroom was a math geoboard.  What is a geoboard?  It is a teaching tool usually made up of five rows of five pegs on a square shaped plastic board.  Rubberbands are used to explore the basic characteristics of geometry, but it can be used to practice other skills as well.

 I used them for a few different things…I used them to reinforce shapes, numbers, letters, tangrams, counting, and more!

Here are a few different deals on amazon:

My favorite is the transparent geoboard because you can place a template behind it and it will help your little one “trace” the shape.

Here are my step-by-step teaching tips to introducing the geoboard to your little one:

1) First, I ALWAYS allow time for exploration with a new teaching tool.  Kids want to study it with their senses first before they can focus on what you are teaching them about the new “toy.”

2) I talk about it.  “This board has a fancy name.  It is called a geoboard, can you say that?” (time for response). “It has pegs that can hold rubberbands in place.   So, if I wrap a rubberband around this peg, and stretch it out to this peg on the same row, it makes a straight line.  Can you try that?”  (time for response)

3) Explore it’s features together.  “There are a lot of pegs on this board to hold rubberbands….I wonder how many there are. What is your best guess?” (time for response) “Let’s count them.”

4) Take a turn.  “I’m going to place a rubber band straight across the top row, one going straight down on the left side, and one going across on the bottom row.  What do you think this looks like?  What could I make with these three lines in place?”  (time for response)

5) Share a turn.  Let’s make something together.  Any ideas?  (time for response) Have a scratch sheet of paper in a geoboard template ready to brainstorm how you might make it.  Make it by helping your little one.

6) Give your little one a turn.  Let your little one try making something on their own and you stand by for affirmation and guidance.

I’d love to hear your thoughts… first time hearing about geoboards,  do you use them regularly, whether or not you would even consider using them, etc.

Related Posts Plugin for WordPress, Blogger...