Outdoor Activity

5 Backyard Soccer Games For Kids – Thanks to U.S. Soccer Star Kristine Lilly & Dr. Pepper Snapple

Are there any parents out there lost in summer?
Some days I’m lost in the best ways….playing and swimming the day away with my three kids.
Other days, I’m lost in an August daydream when I will have even a few hours to run errands alone.

Even though I might get a little antsy some days for a little reprieve, I really admire (and am inspired by) moms who have not allowed their work load or daily tasks to drown out what really matters as a parent… making time for family.

So, it’s not very often that you get to spotlight a mom who has accomplished so many life goals as an athlete and entrepreneur (read bio at the end of the post!).  AND she also shares tips for moms like me, with young kids, to make time as a family (perfect timing in light of summer and the World Cup!).

U.S. soccer legend Kristine Lilly, a two-time Olympic gold medalist and Play Ambassador for Let’s Play, an initiative led by Dr Pepper Snapple Group to get kids and families active nationwide, shares tips below on how she transforms the soccer drills she learned on the field into fun games that keep her kids active all summer long.

1. Dribble Relay

o Set up some small orange cones or plastic cups in a zig-zag pattern.
o Divide your family into two equal groups and give one person from each team a soccer ball. Have the team members stand on opposite ends of the yard.
o To begin, the team member with the soccer ball has to dribble around each cone to the other side, tag their teammate and pass them the ball.
o Then, the teammate has to dribble the ball back through the cones and race to the other end of the field. The team to complete the obstacle course first, wins!

2. Kick-out Keep-away

o Great for a large group of kids, give all players a soccer ball (or any type of ball they can kick around) except for the person who is “it.”
o Set up four cones or plastic cups on each corner of your “field,” and when the game begins, all players dribble their ball while the person who is “it” tries to kick each ball out of bounds.
o When a player’s ball is kicked out of bounds, he/she is eliminated. The last player with a ball wins!

3. High-Five Goals

o Set up a couple of markers to signify a “goal.”
o Pass the soccer ball to your child, and have them kick it back to you.
o After three kicks back and forth, tell them to run over to you and give you a high-five, and then kick the ball into the goal. This is a great game for little ones!

4. Sideline Sprints

o Put a mark on the lawn or driveway about 15 yards away, or whatever distance works best for your space.
o Run to the line and back five times.
o Next, do five jumping jacks and count them off together out loud.
o Continue the sequence, but this time, run to the line and back four times, and work your way down to one time. It is a great workout game for parents AND kids, and helps little ones learn how to count.

5. Hydration Station

o It’s so important to stay hydrated when you’re playing outside in the heat. I like to keep a small cooler filled with cold water or juice in the fridge so I can easily grab it and during outdoor play in the summer.
o Just make sure your kids don’t drench the “coach” after they score a goal!

Kristine Lilly Kristine Lilly is a mom and an American soccer player who last played professionally for the Boston Breakers women’s professional soccer team. She was a member of the United States women’s national soccer team for 24 years and has appeared in more international matches than any other player in the sport, appearing in her 352nd and final match against Mexico in a World Cup qualifier in November 2010. She is the founder of the Kristine Lilly Soccer Academy and author of an e-book, Girls Soccer: My Story. Lilly lives with her husband and their two daughters outside of Boston, Massachusetts.

How Does Your Garden Grow? 5 Garden Activities

banner

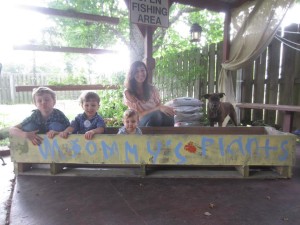
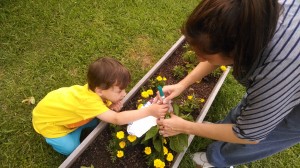
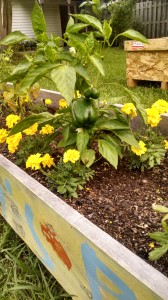
Last Mother’s Day, my kids gave me a great planter for us to start a home garden!

970018_10102217913375845_1261013702_n My husband works at a factory and they frequently get shipments of equipment that come in these long crates that are perfect for starting a garden (especially because they are free).  Keep your eyes peeled for wooden crates and pallets and you can get free planters as well!

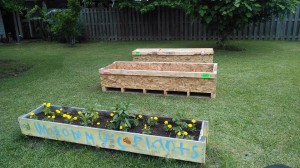
This year we have a few more!

10251951_10103298616323475_9182112865024686846_n

Now, this is a little intimidating for me because I do NOT have a green thumb… but my husband is a little bit better at watering…and my kids are REALLY good at watering… a little too good as they sometimes over water.

So many early childhood teachers will grow plants in the classroom for kids to learn the parts of the plant, how to care for a plant, and what plants need to grow: soil, water, sun.  Here are a few activities for you to do at home to teach your kids about growing plants if you have or plan on starting your own garden at home.

1.  Journal:  Have your kids document plant growth.

  • Pre-schoolers – model drawing sketches of what your plants look like each week and then give them a crayon for them to do the same (may not look like much, but they will at least think they are drawing a plant).  Introduce vocabulary such as plant, green, grow, sun, soil
  • Pre-K – have them add words to their drawings (even if their words are just a mix up of letters – write what they are trying to spell underneath).  Vocabulary:  the name of the plants, ex: bell peppers, parts of the plant
  • Kinder – write a sentence or two describing the plant.  Vocabulary and discussion:  the name of the plants, ex: bell peppers, parts of the plant, why plants are important
  • 1st grade and above – a paragraph (minimum) documenting any changes they may see, how long they watered, what time of the day they watered, etc.  Vocabulary and Discussion:  the name of the plants, ex: bell peppers, parts of the plant, describe why plants are important, how they reproduce, nutrition and the benefits of eating home grown foods

2.  Predict:  Have your kids predict what is going to happen throughout the summer with their plants, use your journal from above to help document, then calculate results by a certain date at the end of the summer.

  • Calendar Math:  Using a summer calendar, mark the day you plant your plants.  Have your kids each choose a different date in which they predict they can start picking their ripe produce.
  • Measuring:  Using a ruler, guess the size of the produce and how tall the plants will become by the end of the summer.  Have them draw this out on poster paper to compare at the end of the summer.
  • Counting:  Predict the amount of produce each type of plant will produce.
  • Science – Weather:  predict the number of rainy days versus sunny days
  • Comparison:  predict what type of plant will produce the biggest/smallest, most/least amount, greenest, etc. produce

3.  Experiment:  Get several seedlings that are the same type and are all similar in size.  Experiment with different amounts of sunlight or soil type or watering schedule (choose one) to see what is the optimal amount for that particular plant.  Plant several seedlings in each of the different conditions to get the best average outcome.  And, go back to the first activity:  journal 🙂

4.  Create a Cookbook:  As your plants are growing, decide as a family what you are going to use your plants for and create a family cookbook together!  Take pictures of your growing plants to include in the “ingredients” section of each recipe.

BONUS:  Include a raw versus cooked taste test of each fruit/vegetable to include that 5th sense that we often don’t get to use in a classroom.

5.  Dissect the Plants:

  • Science:  learn about the different plant parts including the parts you don’t see… inside the stem, the roots, inside the fruit and flowers.  When you are finished, use the roots, stem, leaves, flowers to make art on a poster board.
  • Math:  Compare/Contrast the different types of plants:  length, leaf shape, fruit, root length and thickness and number of roots
  • Art:  Create leaf prints by placing a piece of paper on top of the leaves and using the edge of a crayon to etch the shape of the leaf.  Draw the type of produce next to each leaf.

BONUS:  One of my friends started a private Facebook group for some of her friends who wanted to start a home garden.  On it we are sharing pictures and knowledge with each other and when the produce is ripe, we will be having garden picking parties!  It is nice to see what everyone else is growing (and these ladies know way more than I do about gardening so it’s helpful too)!  I encourage you to start a similar group for your friends with green (or slightly unripened) thumbs.

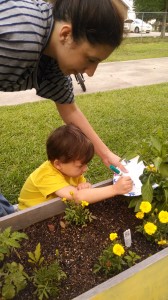
It is so wonderful seeing how excited my kids are to watch our plants grow!  Right now, we just have bell peppers and cherry tomatoes, but we hope to fill our other planters soon!

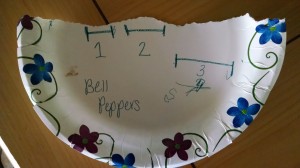
Leyson and I tore a paper plate in half to draw our measurements of the peppers (paper plates are sturdier than sheets of paper thus easier to measure the peppers on).  We used a marker to draw a line on each side of the paper and later use a ruler to measure from line to line.  We numbered our peppers 1, 2 and 3.  Measure them week by week so you can see how much they grow in one week.

IMG_20140512_113850497

IMG_20140510_191016269 IMG_20140510_190829946

IMG_20140510_191123344_HDR

How does your garden grow???  How have you involved your children in your garden?

5 Wait-Time Children’s Games for Crowd Control

LSU’s Mike the Tiger came to my son’s school the other day for a surprise birthday visit!

It was such a memorable experience for ALL of the children.

But, it actually could have been CRAZY and chaotic if I didn’t “think fast” and come prepared with a few ideas to keep the kids somewhat calm.

It could’ve turned into a bunch of injured kids or an injured Mike, but I always keep a few tricks up my sleeve.

Any time I am in front of a big group of kids, I always try to get them to do something along WITH me.  So, here are my 5 top picks to fill wait -time or keep crowd control when you have a group of kids to organize.

1) “Silly Says” – Today we played “Mike Says” and everything he did, we had to do.  I play this with kids a lot and I just play “Silly Says” – whatever silly thing I do, you do.

2) “Going on a Bear Hunt”  – I was at the park once trying to keep the kids away from the sandbox and this chant did the trick!

3) “I Spy” – The classic game – I usually play it in a variety of ways. “I spy something shaped like…. I spy something that starts with….   I spy something the color….  I spy something that sounds like…. I spy something that rhymes with…”  You get the picture.

4) “Mirror Fingers” – hold up the same number of fingers that I hold up in a different way.

5) “Imitate my Clap”  – this is an old teacher-tactic where the kids simply have to listen and follow the beat that the leader makes.

A couple other easy ones:

1) Coordinate “Little Sally Walker” – you may have to YouTube it if you aren’t sure what that is.

2) Play “Man in the middle.” One person stands in the middle of a circle and throws the ball to someone on the outside (who can’t move their feet).  Whoever catches it and follows the rules becomes the man in the middle.

3) Play “Duck, Duck, Goose!”

4) Sing  “If you are Happy and You know it” – I always come up with lots of things to add to the song like “wag your tail, hop like a frog, roar like a lion, etc”  STRETCH IT OUT! 🙂


Name Hopscotch {Mommy Teacher Spotlight}

I love scrolling through Instagram and seeing what other moms have shared for the day.

A friend of mine posted this video of her little fella and it immediately caught my attention for so many reasons:

Kids learn best and practice the skills they are learning most effectively when they are connecting with their world by seeing AND doing.

So if you have a child with lots of energy (can you relate?), jumping while learning or practicing skills that they already know is incredibly helpful for their brain development and you might reap the benefits of a quality nap time or bedtime rest later. 🙂

Here is what Hendrix’ mommy had to say about it when I asked for the details:

“The reality is he came up with this on his own! We were writing each other’s names (you can see his “mommy” on the bottom left of the screen) and he started hopscotching on his! He is into trains and roads now, and before this we were making roads with all the places that we usually go to…mall, coffee shop, grocery, honeys house…and driving to each place with his toy cars. We were learning to take rights and lefts and u-turns. This hopscotch just came out of nowhere. :)”

Thanks Alisha for sharing.
PS… I wish I had your chalking skills. haha

Plastic Pool Toys

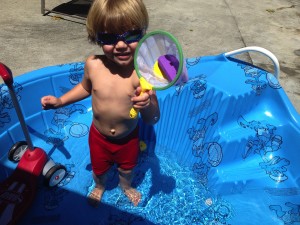
We have always had ABC foam letters (and numbers) in the bath tub, but my mother-in-law didn’t know when she bought Sean Patrick a little fishing net that it would end up becoming a little teaching tool for the bath AND the backyard plastic pool…

Sassy Developmental Bath Toy, Catch and Count Net

fishing net in the pool

Here are a FEW things you can use with just a little fishing net, letters, and bath toys whether you are in the tub or outside in the plastic pool…
1) Can you catch the letter “S” for me? {letter recognition}
2) Can you catch the letter that says /s/ (make the sound of a letter)? {letter-sound associations}
3) Can you catch the animal whose name has the sounds /fr/ – /og/ ? {phonemic awareness}
4) Can you catch the toy that rhymes with “moat”? (boat) {Rhyming}
5) For older kids… can you catch the d-o-g? (say the letters or spell it on the bath wall with the letters and they have to sound them out)
6) For younger kids… can you catch the green animal? {color recognition}


We are also having a blast making letters with the water shooter toy thingy (what is it called anyway?)…

Mini Eliminator Water Blaster, Foam Water Gun, Water Shooter. Light and Easy to Use. For Kids Over 5 Years Old

Mail Attachment

Related Posts Plugin for WordPress, Blogger...

1 2