Writing and drawing can be interconnected in many ways. Most of my writing posts incorporate fine motor skill development for 3-5 year olds because their writing skills go hand-in-hand with being able to have control and coordination. The other aspect of writing includes knowledge of formation; putting letters, shapes, and numbers images into their working memory.
Writing ability for a 3-5 year old is not just learning how to write letters, it can also include learning how to draw and put shapes together to make pictures that resemble real life imagery (such as a picture of a person, animal, place, etc.)
So, today’s activity is to start with a circle bear. This teaches your little one familiarity with an everyday shape, but it also teaches them how to use one in illustrations which builds confidence for a young child who is still in the process of acquiring writing and drawing skills.
The Sneaky Teacher
Today you are going to do something a little different than normal. You are going to pick a surface in your house that you want to clean, but one that can be cleaned with shaving cream…this post isn’t called “the sneaky teacher” for nothing….
you are going to clean, and teach at the same time. I personally would pick the bath tub, but you may have something else in mind.
Let your child help you rub shaving cream all over the bath tub and then say “ooohh, let’s use our fingers to write and draw!” Some great writing activities would be: writng your name, their name, any letters your child knows, introduce letters your child doesn’t know, numbers, shapes, and anything in between. This is a fun, child-friendly way to write, strengthen motor skills, learn and practice letter and number formation, and clean your bath tub all in one!
Shaving cream is great for cleaning surfaces such as a bath tub (google to make sure it is for your bath depending on the material) but be careful that it does not get in your child’s eyes!!! Monitor this time and clearly communicate before beginning that they need to keep their hands away from anything except the bath tub. Tell them it could hurt their eyes and mouth if they touch their face, etc.
For other tips and info. read “writing with a twist” and “the timeless teacher” writing posts 🙂
As always, have fun!
The Timeless Teacher…
There is no way to know how long teachers have been using play dough or modeling clay as a means to teach their students to form letters. It is fun, practical, and it teaches children to form letters in a hands-on, meangingful way. IF they can form it, they can write it….once they get the motor skills down.
So my writing activity for today is to 1) Write the letters you want your child to practice onto cardstock with a highlighter or yellow marker. 2) Let your child trace over the letter you made (starting at the top) with a pen or other writing tool and then help them form the clay. If it is the letter A, for example, as you write the letter you might say “I am going to make the letter ‘A’. It is a tall letter so I am going to start at the very top and slide down the slide this way (to the left) then do it again because that was fun! Slide down this way (to the right) and then climb across the monkey bars in between. Your turn!” 3) Start working with the clay/play dough. When you are forming the clay you might roll it out like a snake and begin to make the pieces of the play dough to cover the letter. While you form the dough you might say something like, “Okay let’s make the slides, and then the monkey bars for the letter ‘A’ so we can pretend to slide down again”.
Like my recent post “Do your know your ABC’s” said “Always Be Creative;” when you are making up how to form the letters, think about what it reminds you of or ask your child what it reminds them of.
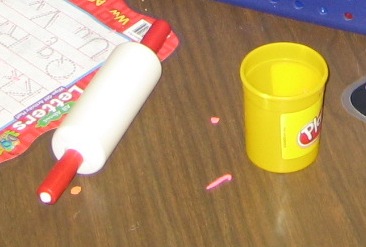
If you want to use your kitchen roller to roll out the play dough, why not? Have a ball.
Writing with a twist!
Writing can be such an exciting thing for a little one, but it can also be frustrating and even painful. Yes, painful. Just like when your hand gets a cramp after you have been writing for a little while, children have not used those little muscles in their hands much. So, they need to develop their fine motor skills before they have the endurance and coordination needed to write. If you want to give your child a chance to develop those fine motor skills, give him/her plenty of informal writing time (coloring, chalking, stenciling, etc), but be sensitive if your little one wants a break. There are so many ways to exercise their little hands to prime for writing –including cutting with scissors….Yep! Let them cut with a child-safe scissors (monitoring of course) – watch how they hold the scissors…you will be surprised that they need a lot of assistance….be patient! At first, don’t even give them things to cut out, just ask them to cut up lots of paper. I always explain to my students that there is a time and place for everything so this is their chance to “be out of control” because I don’t want them cutting up just any paper any time making a mess when I haven’t planned for it haha.
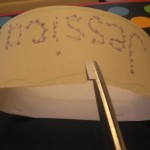
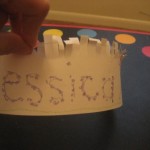
Activity: Trace name, decorate and cut fringe on their “crown.”
Step 1: Fold a piece of paper, cardstock, or construction paper in thirds. I didn’t get out the ruler and measure ya’ll, but if you are a perfectionist…measure away!
Step 2: Cut along folded lines. I didn’t get out my paper cutter either, but by all means…
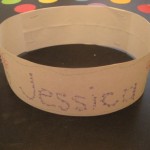
Step 3: Staple –or tape- the ends together. I staple with the flat side on the inside of the strip so it doesn’t irritate their forehead.
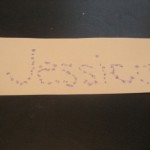
Step 4: Freehand a dot-to-dot of their name for them to trace.
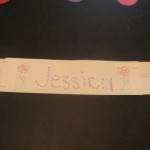
Step 5: Let them decorate! Remember that even scribbling works those little muscles in their hand.
Step 6: Let them cut “little bites” all around the top…you may have to hold their hand to help. Then let them ruffle the edge.
Step 7: Measure their head with the strip and hold your place where you need to staple/tape.
Step 8: Give them some “Queen” or “King for the day” choices 🙂
*My 6 month old son had to model my hat haha

