Patterns Round 3

Maybe you took my advice and purchased some cubes, maybe you didn’t haha, but that’s okay, we’ll try to work with what you have.  All that to say, today, I want you using different color cubes (blocks, LEGO’s or something that can attach together) to represent the movement patterns we have been developing over the last couple pattern lessons. 

If you read the post “Math On My Fingers” you might remember the “I do, we do, you do” teacher strategy.  First you will model an example of how to do the activity, then you will do one with your little one, and then you will see if he/she can do one on his own.

Pour out the blocks on the floor/table in the room you are working.  Start out with a movement pattern.  “I am going to make a pattern with my hands, can you join me when you think you know what it is: (snap, clap, snap, clap, snap, clap….). Good job! How many different motions did I do with my hands? (wait for a response) Well, let’s see, I snapped and I clapped…..so, I did two different things with my hands.  So I am going to pick two different colors and I’m going to try to make that pattern by snapping them together and repeating it over and over just like my sounds (build a tower like this: red, blue, red, blue, etc.).  See, if I were to read the colors it would sound just like my movement pattern: snap, clap, snap, clap.  Do you think you can make my pattern with two different colors?  I’ll help you 🙂

Let’s try one together with new motions and new colors.

Finally, can you make one up all by yourself?

This should be the sequence of the activity.  If you have ANY problems, questions, or roadblocks, please

I’d love to help in any way I can.

But remember to make it fun, keep the duration as long (or short) as their attention span can handle, and practice this same skill over and over again before you move on to the next pattern skill 🙂

Stamp Book

Today we are going to combine a writing and a reading activity to make one meaningful experience.

If you read the post “Tracing Stamps” this is an extension activity of that article.   If you haven’t read it, don’t miss out~see what it’s all about  🙂

If you don’t have stamps, or the money to buy these stamps, you can just as easily download the “trace font for kids” for free (click on my link or type it into google), then you will just type the words that your little one will trace into a word document.  Or, you can even make your own dot-to-dot letters for your little one to trace if you are feeling super frugal! 

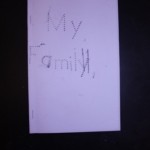
This activity is a book that I made with my friend’s children.  It is a “My Family” book about the people most important to your little one.

I simply:

1.  Took 3 pieces of paper (you may need more if you have several family members), stacked them on top of each other, and folded them in half; stapling them on the folded edge. 

2.  Asked the little ones to help me find the letters to stamp and trace the book’s title, “My Family” as well as each member of the family on the corresponding pages.  As a side note, allow them to include pets if they consider them family. 🙂

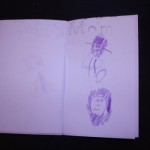
3.  Helped the little ones draw a picture of each person or pet.  Read the “Drawing a Person” post for tips and pointers.

4.  Read the finished product to the “author” of this book, and then asked them to read it back to me.


This activity is a great way to practice fine motor skills, writing meaninful words, practice drawing, practice sounding out words (if you accomodate the activity for that purpose), practice finding letters from the stamp collection (letter identification), practice directionalilty (placing the letters in order from left to right on the page), and practice letter formation.

As always, have fun!

Fill in the Rhyme

“Jack be nimble, Jack be quick, Jack jump over the candle________”

This is the third phase of rhyming: Generating the rhyme that would complete the sentence.  However, you and I not only intrinsically rhyme, but we are familiar with this rhyme and if we are not, we could just use our deductive reasoning to figure that the word missing is “stick.”

Little children are trying to learn patterns in familiar rhymes so that they can acquire these skills.

So, first I want you to read your child some nursery rhymes or other rhyming books you may own, and after they are familiar with them, read them again without the second rhyme, giving them a few seconds of “wait time” to guess what rhyme is missing.

Then, I want you to print the following template:

Color The Rhyming Picture

Color The Rhyming Picture Poem

Poetry

You are going to ask them to generate the rhyme and then color in the picture for the poem, or you can just ask your child to color the picture that rhymes with _______(for example, “fun”-and the answer would be “sun”).  My suggestion is to allow your child to name all the images in the picture first so that they will not be so confused when trying to identify the rhyming picture.

Patterns (Round 2)

Following up on the “Pattern Introduction” post, here is an activity and some info on the next phase of introducing patterns….

Before we start, if you have been doing the rhythmic patterns I want you to practice some more, introducing the letters ABC.

So you might clap, snap, snap, clap, snap, snap while saying “A, B, B, A, B, B” because you are doing one thing and then another so you move to a different letter of the alphabet to name that movement, and so on and so on.  This is due to the fact that universally movement patterns, color patterns, and shape patterns are often represented using the letters of the alphabet. 

You can teach them this by saying “If I am doing two motions then I need two letters to stand for them so I am going to use the first two letters of the alphabet ‘A’ and ‘B’.  Let’s try an AB pattern: stomp with the right foot, stomp with the left foot, but lets use the letters to stand for our stomping, ‘A, B, A, B’ while stomping left, right, left, right.  If I clap when I say ‘A’ and I snap when I say B then it would sound like this ‘A, B, B, A, B, B’ but if I made up a beat with 3 movements then I would need the next letter in the alphabet to stand for the new movement: Touch your head, shoulders, knees, head, shoulders, knees…. ‘A, B, C, A, B, C.’”

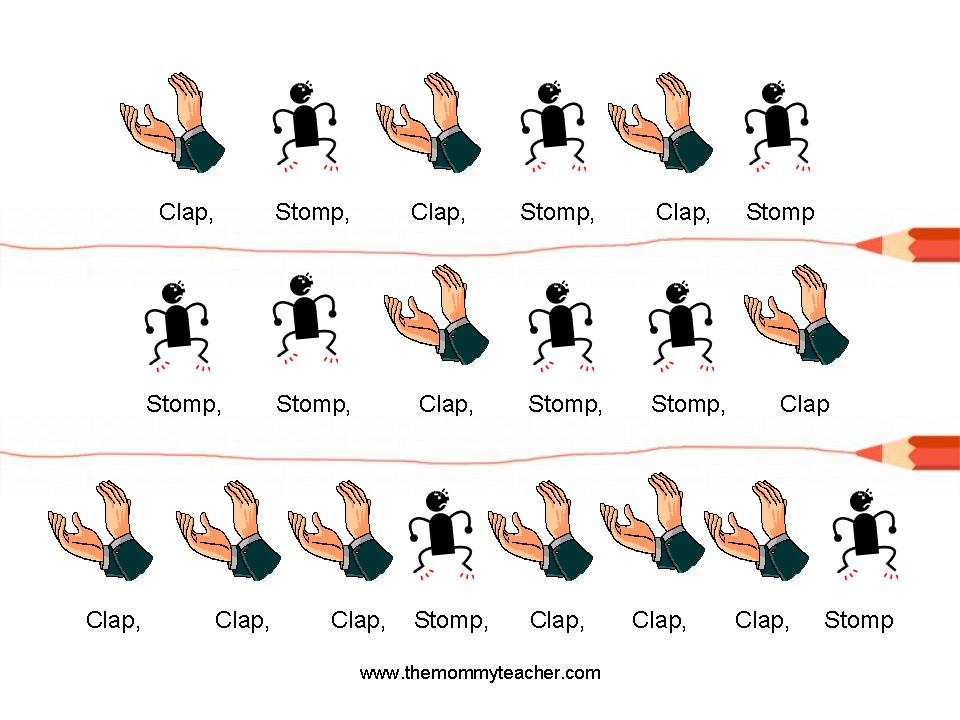
So, the next phase of patterns is allowing some symbol (like letters) to represent the movement, but other than introducing letters verbally as we just have as a listening and doing activity, we are going to incorporate visual representations of the movement.  So your child is going to follow a pattern, by looking at pictures, not just listening and following along with you.

Here are 3 separate patterns to follow, click on the image and print it out; see if your child can tell what movements to do by “reading” the directions: 

Take pictures of your child doing other movements, put them into a word document in a pattern, and print.  Your child will have so much fun with that!

Drawing A Person

Drawing a person is a very meaningful experience for little ones. For most children, this is the first figure they can identify that they have drawn themselves.  There is a progression that follows.   Children initially draw a circle for a head, then the arms coming out of the head, then the legs coming out of the head, etc.  It take a while before children develop their person into a more comparable human form with a head, body, arms, legs, facial features, and possibly even hands and feet. 

This is an activity that helps their writing development in many ways.  It helps with fine motor skills.  It helps children to communicate through drawing (similar to the purpose of writing). Additionally, it gives children a template to build on incorporating their creativity.

So, today’s activity it to sit down with your child with a sketchbook and some colored pencils and model drawing a person (draw your child or someone else who is of importance to your child).  Talk through each part and ask them questions.  What shape is their head?  What is under their head? (neck/body) What color should I draw their hair?  Should I draw boy clothes or girl clothes? 

Finally, write the name of the person you drew while talking about each letter and sound.  This is a great lesson for young children to begin brainstorming how to communicate through written language.

Related Posts Plugin for WordPress, Blogger...

1 72 73 74 75 76 82