Recently in my mom group we were talking about how we are more likely to pin, than to DO the activities with our kids.
I admitted that this was a tendency of mine too but that I had recently committed to make a habit to plan on DOING at least one activity from my Pinterest boards a day… which may mean that I need to pick one the night before to make sure I have what I need.
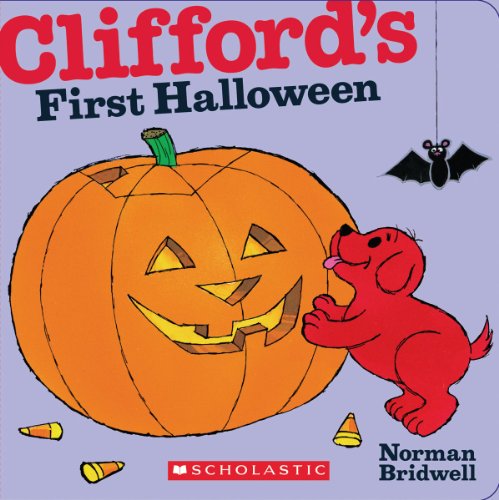
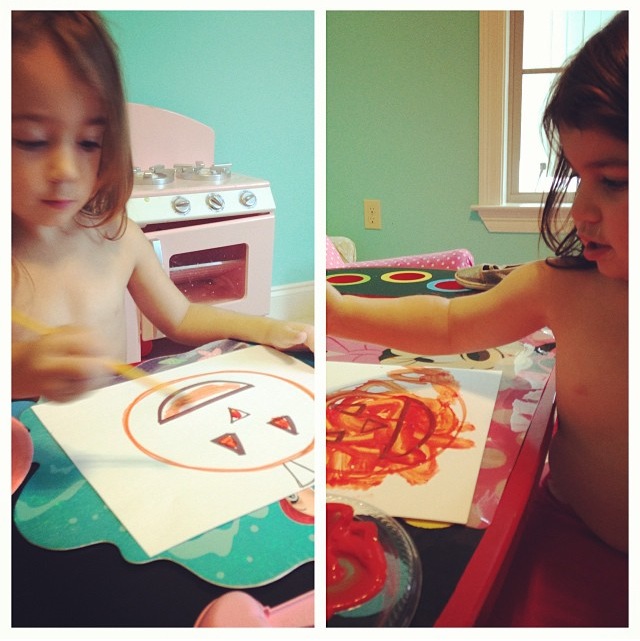
The activity I’m going to share today isn’t one that I had on my Pinterest Board “October Activities” but it will be added today because it was always one of my favorite activities in the classroom and I had fun doing this activity with Sean Patrick.
I read this book so I could show the kids a jack-o-lantern and we could talk about the colors, shapes, and function of a jack-o-lantern
(If you do not participate in halloween you can still make this craft asa Fall pumpkin).
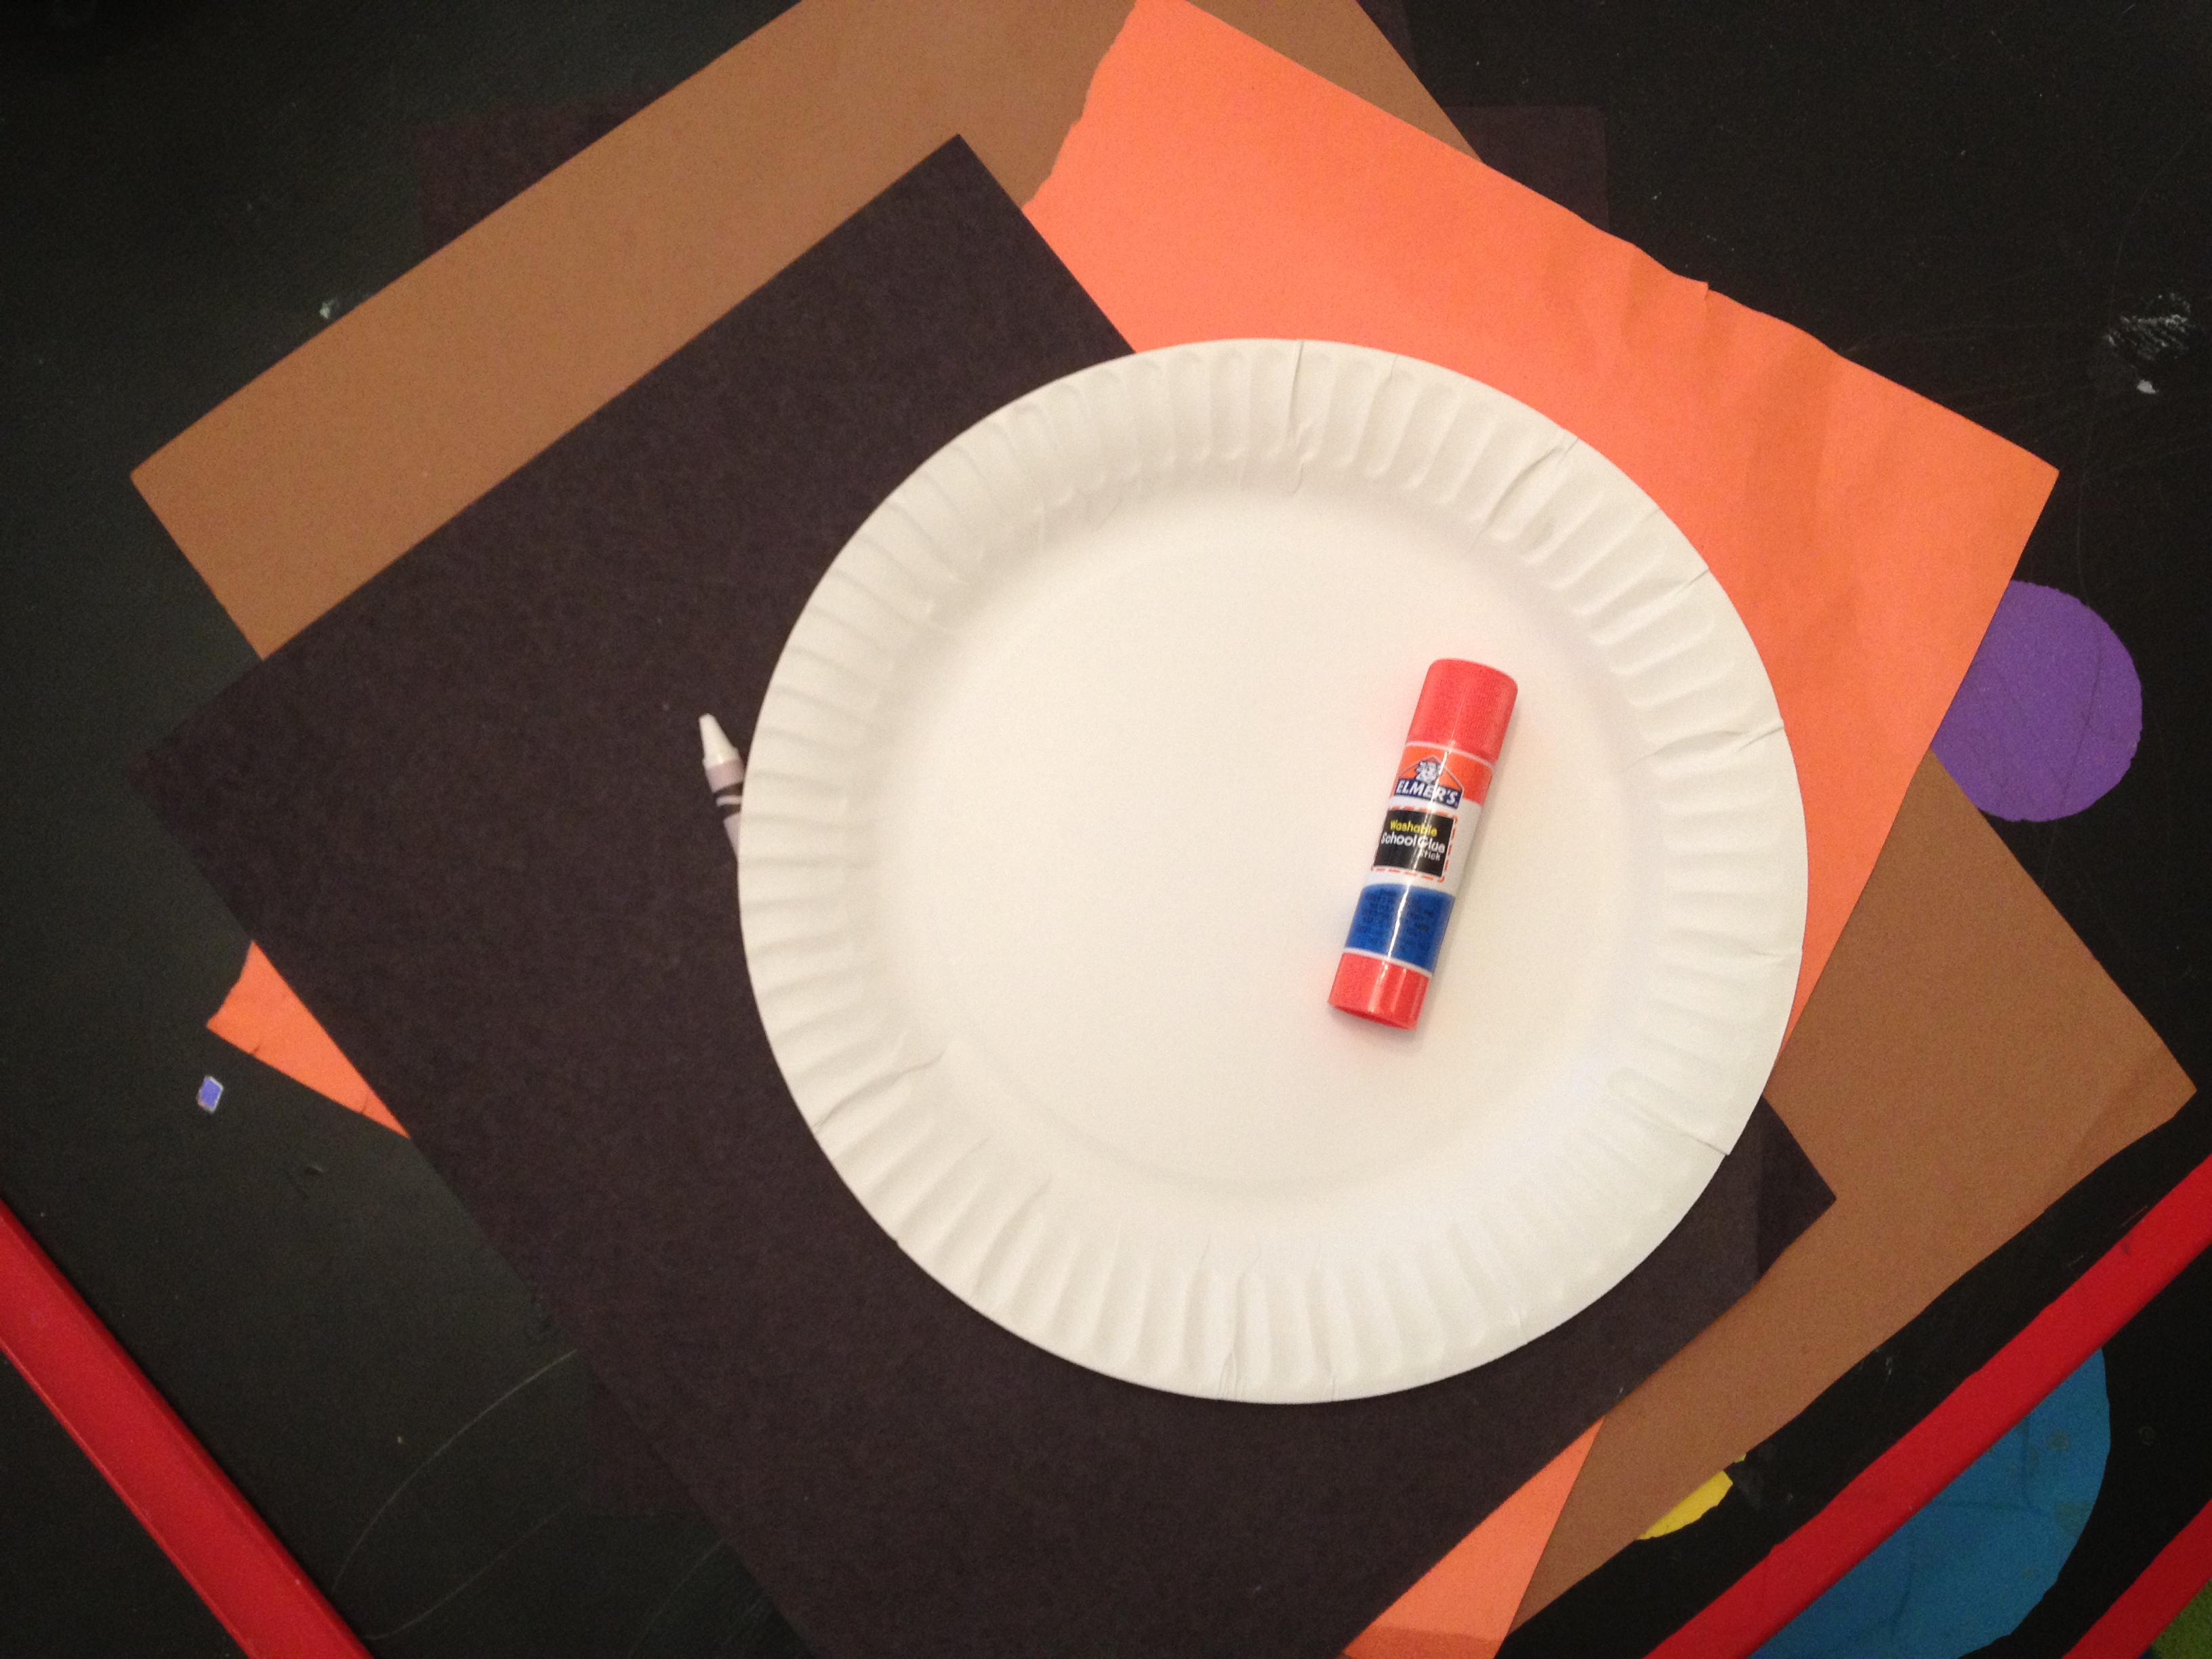
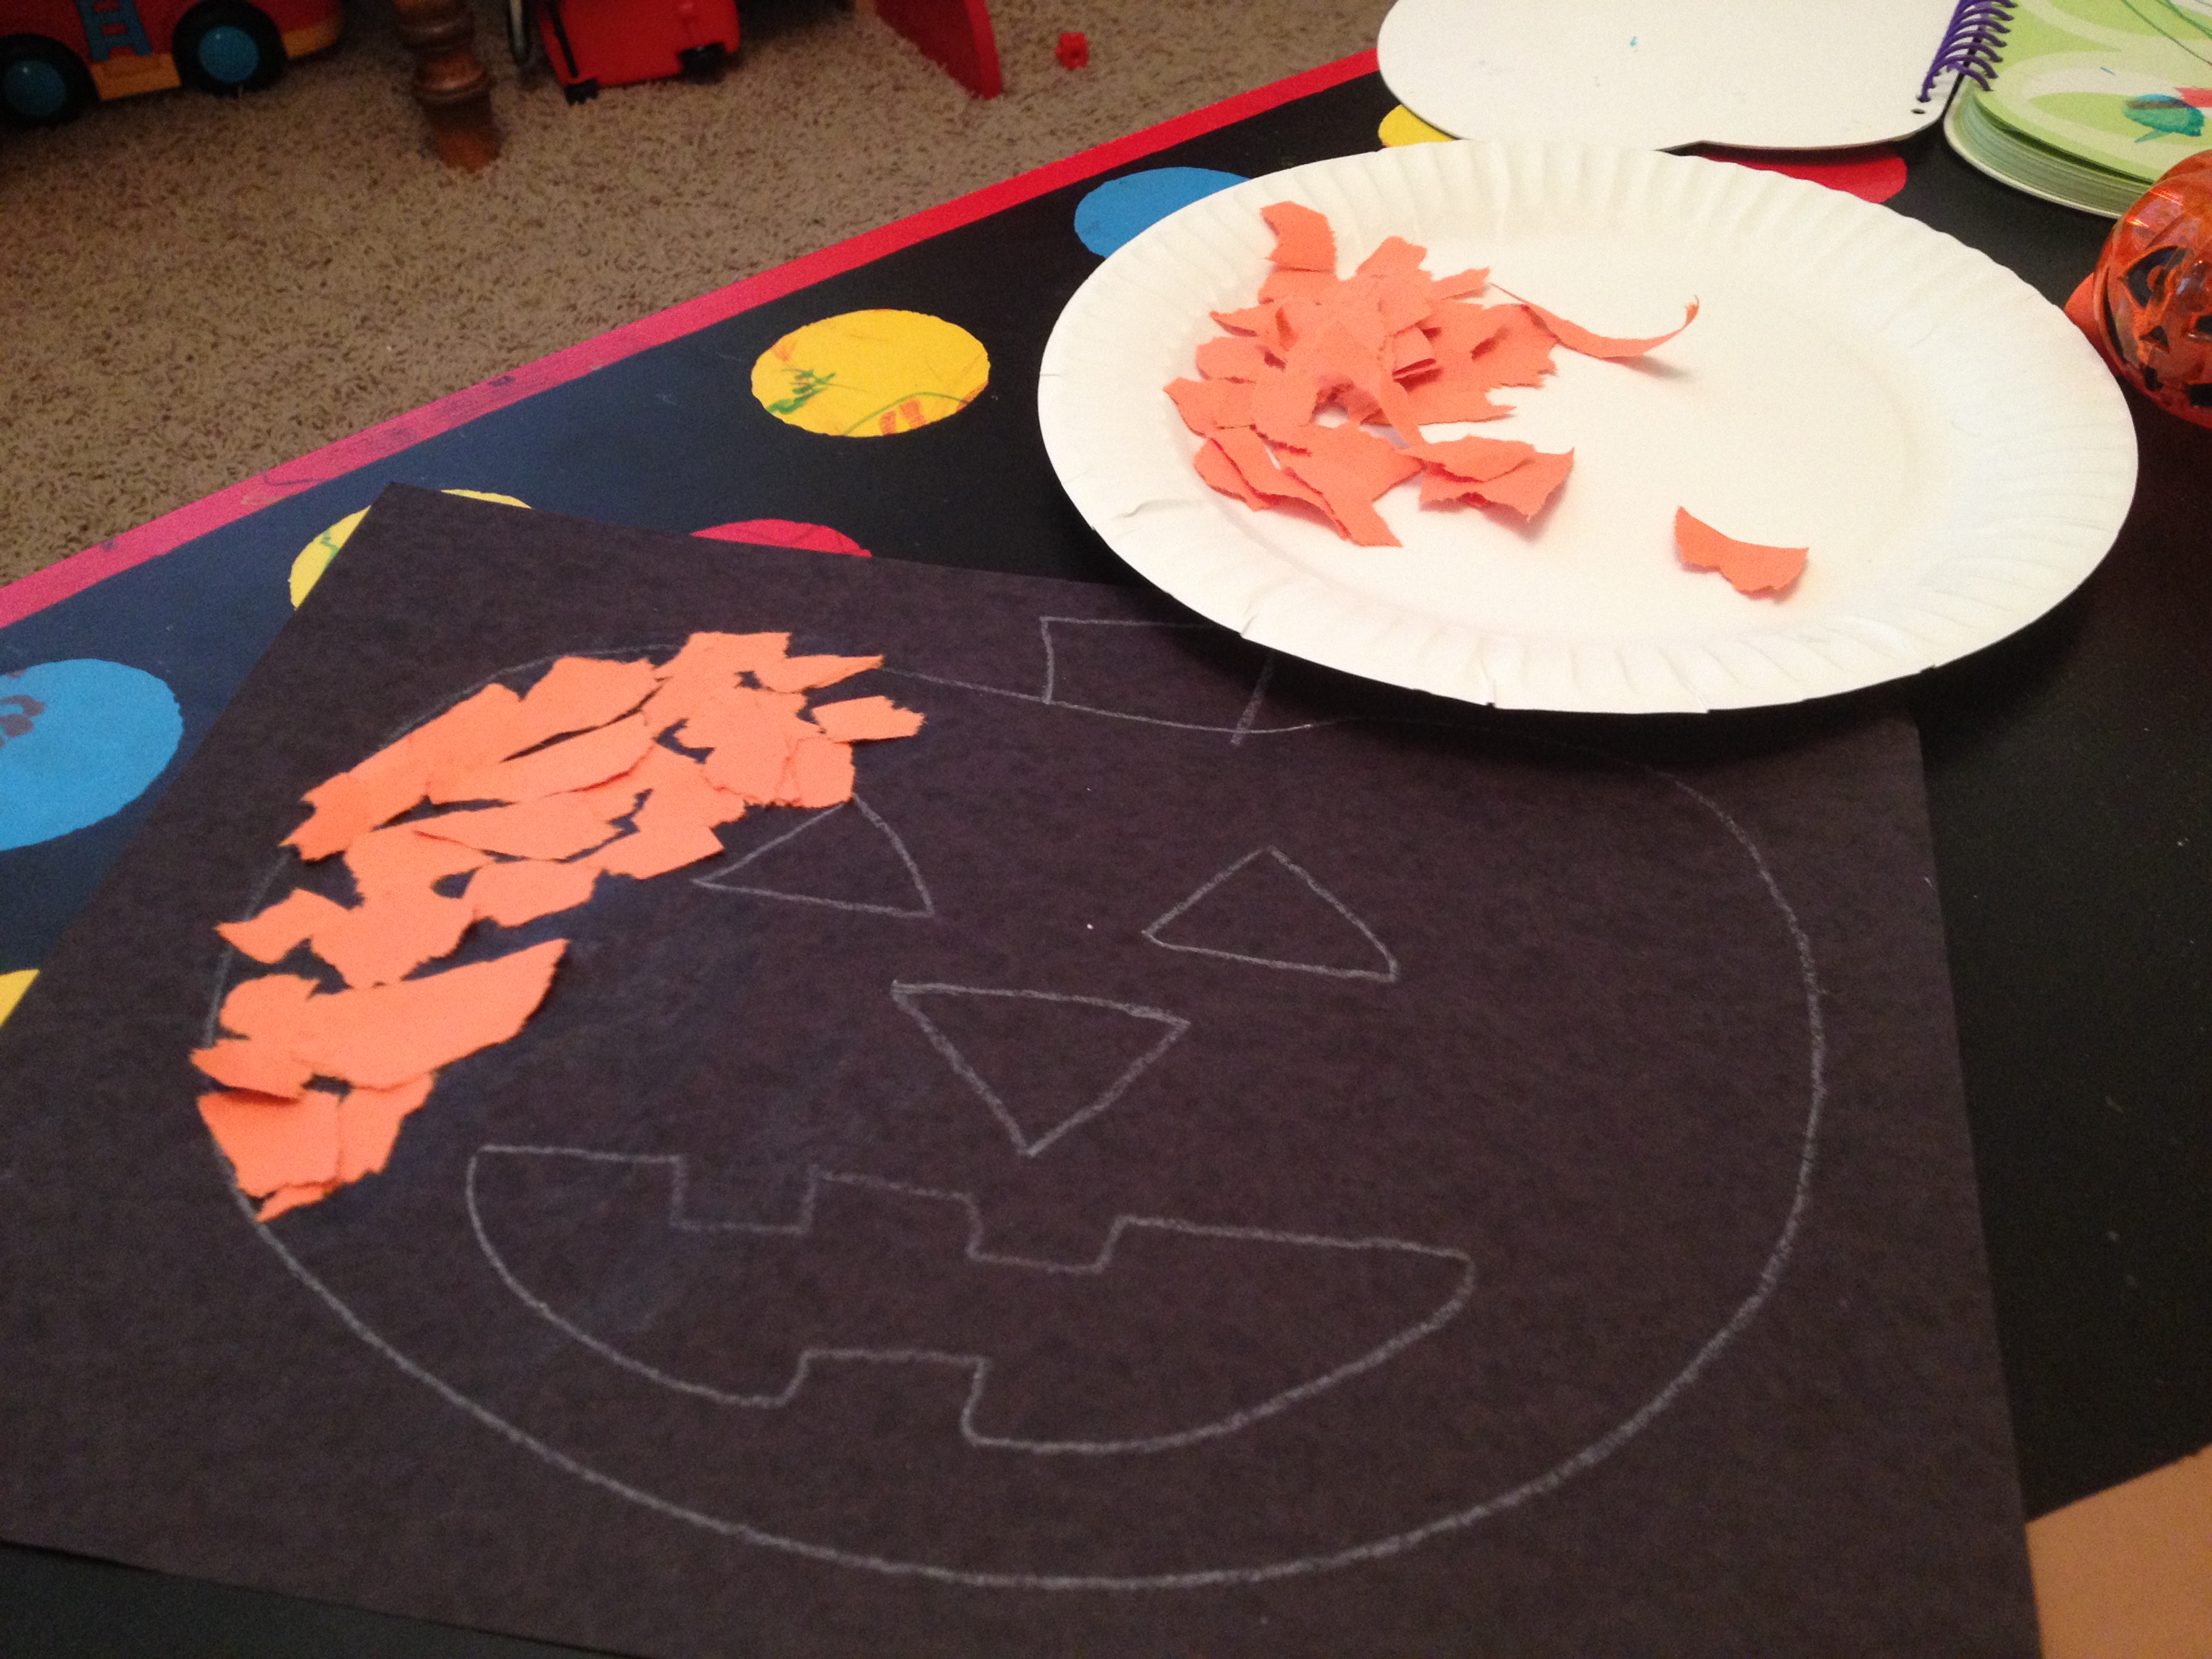
First, I pulled an orange sheet of construction paper, a brown sheet of construction paper, a black sheet of construction paper, a yellow sheet of construction paper, a white crayon, and a glue stick…. these materials can vary (if you don’t have one of those colors then COLOR a white sheet of computer paper (that is what I did for the stem of the pumpkin).
Yellow piece of construction paper not pictured.
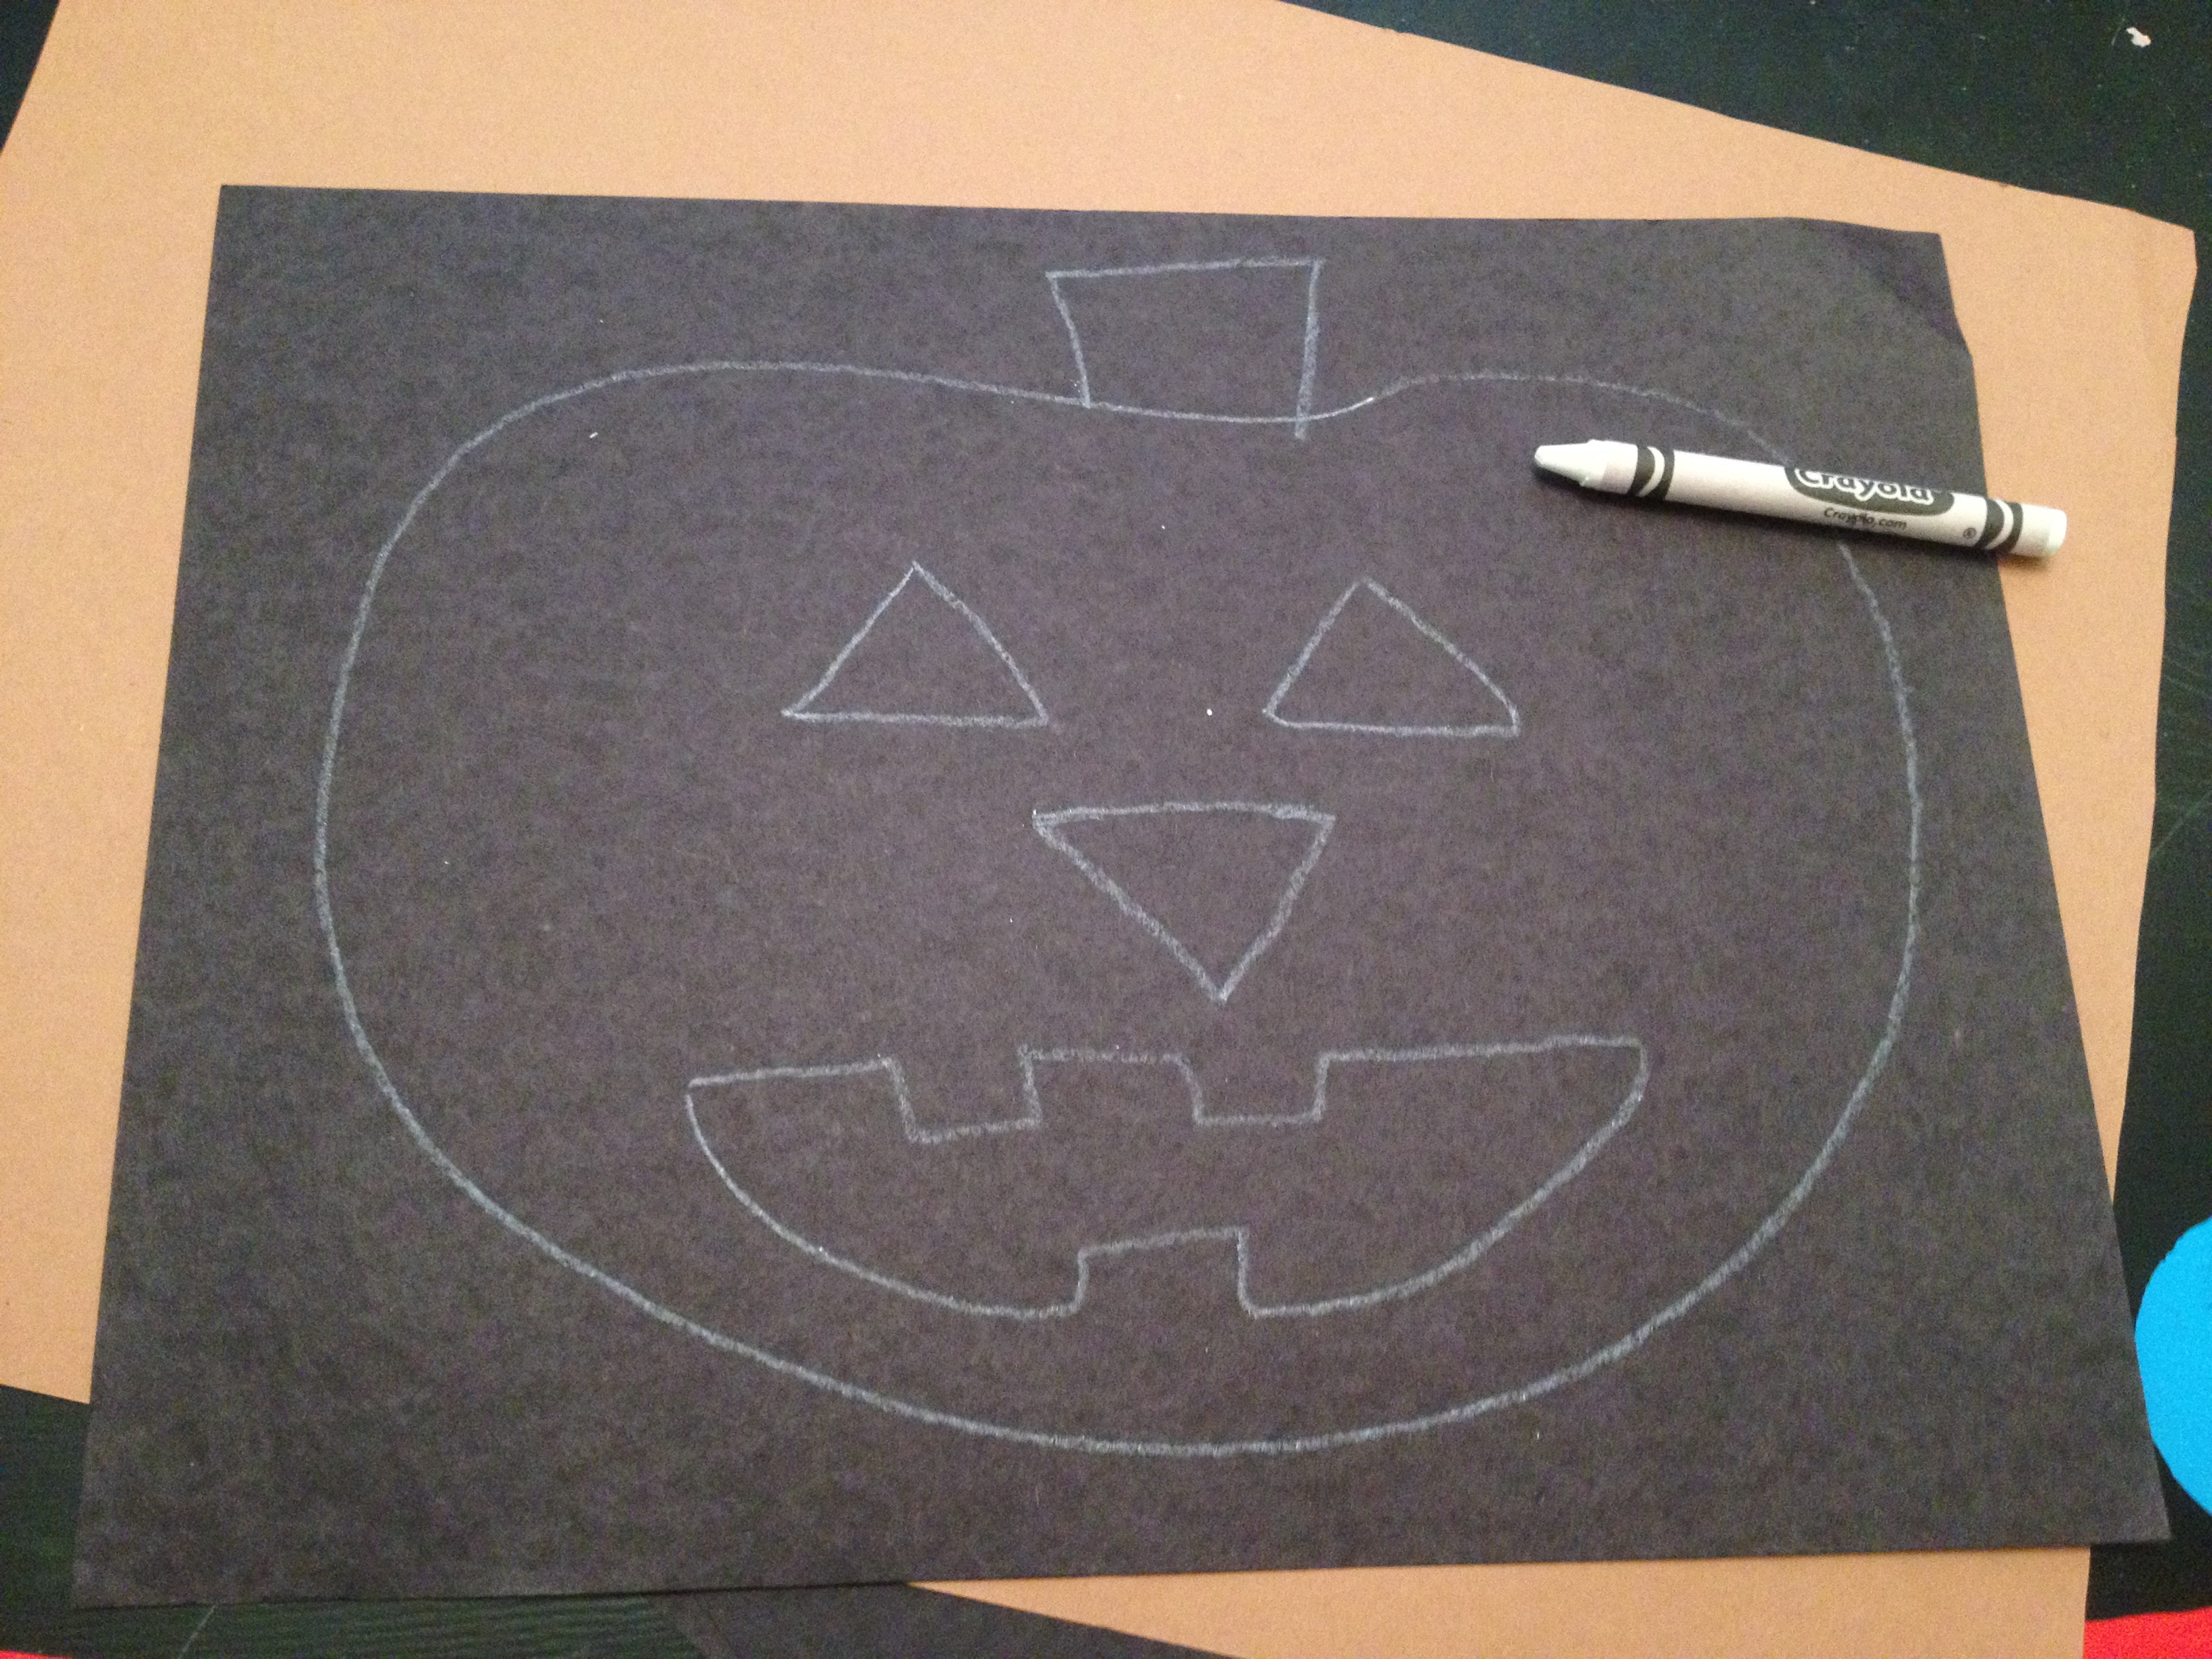
Next, I drew a pumpkin shape with my white crayon onto the black construction sheet of paper. I drew triangle eyes, a nose, and a mouth that you can fill in with yellow construction paper or leave blank. Great time to talk about shapes 🙂
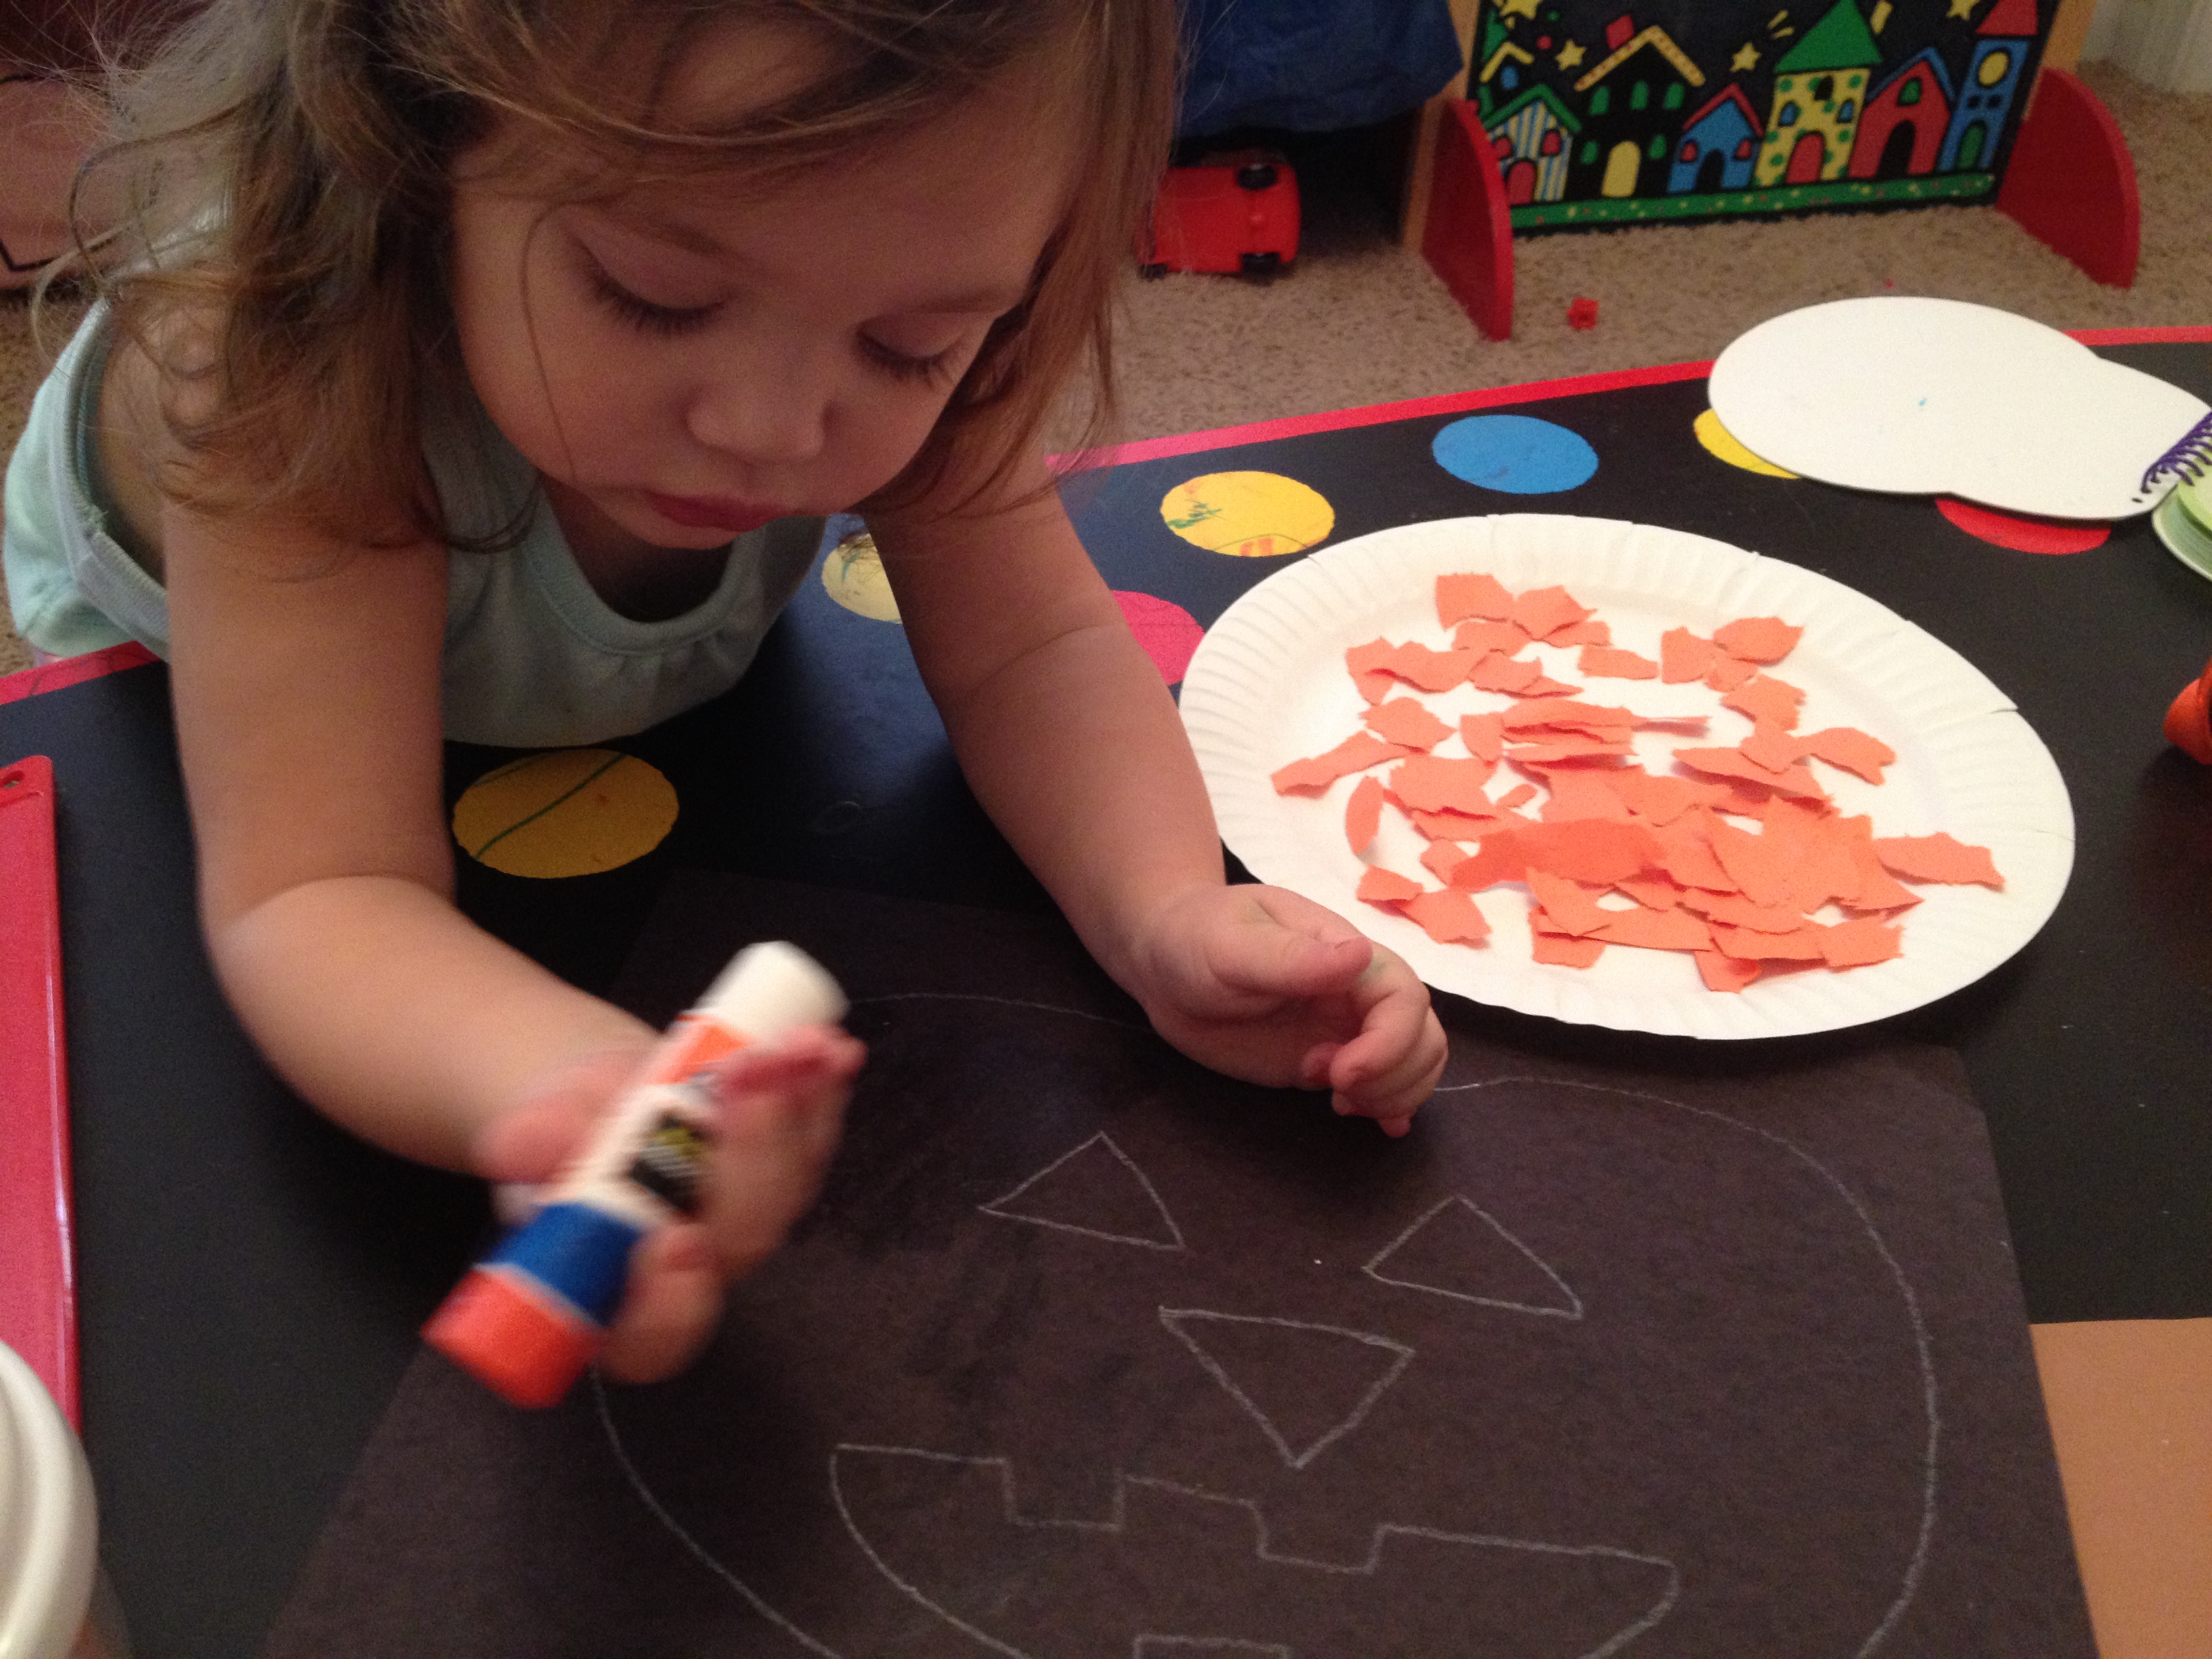
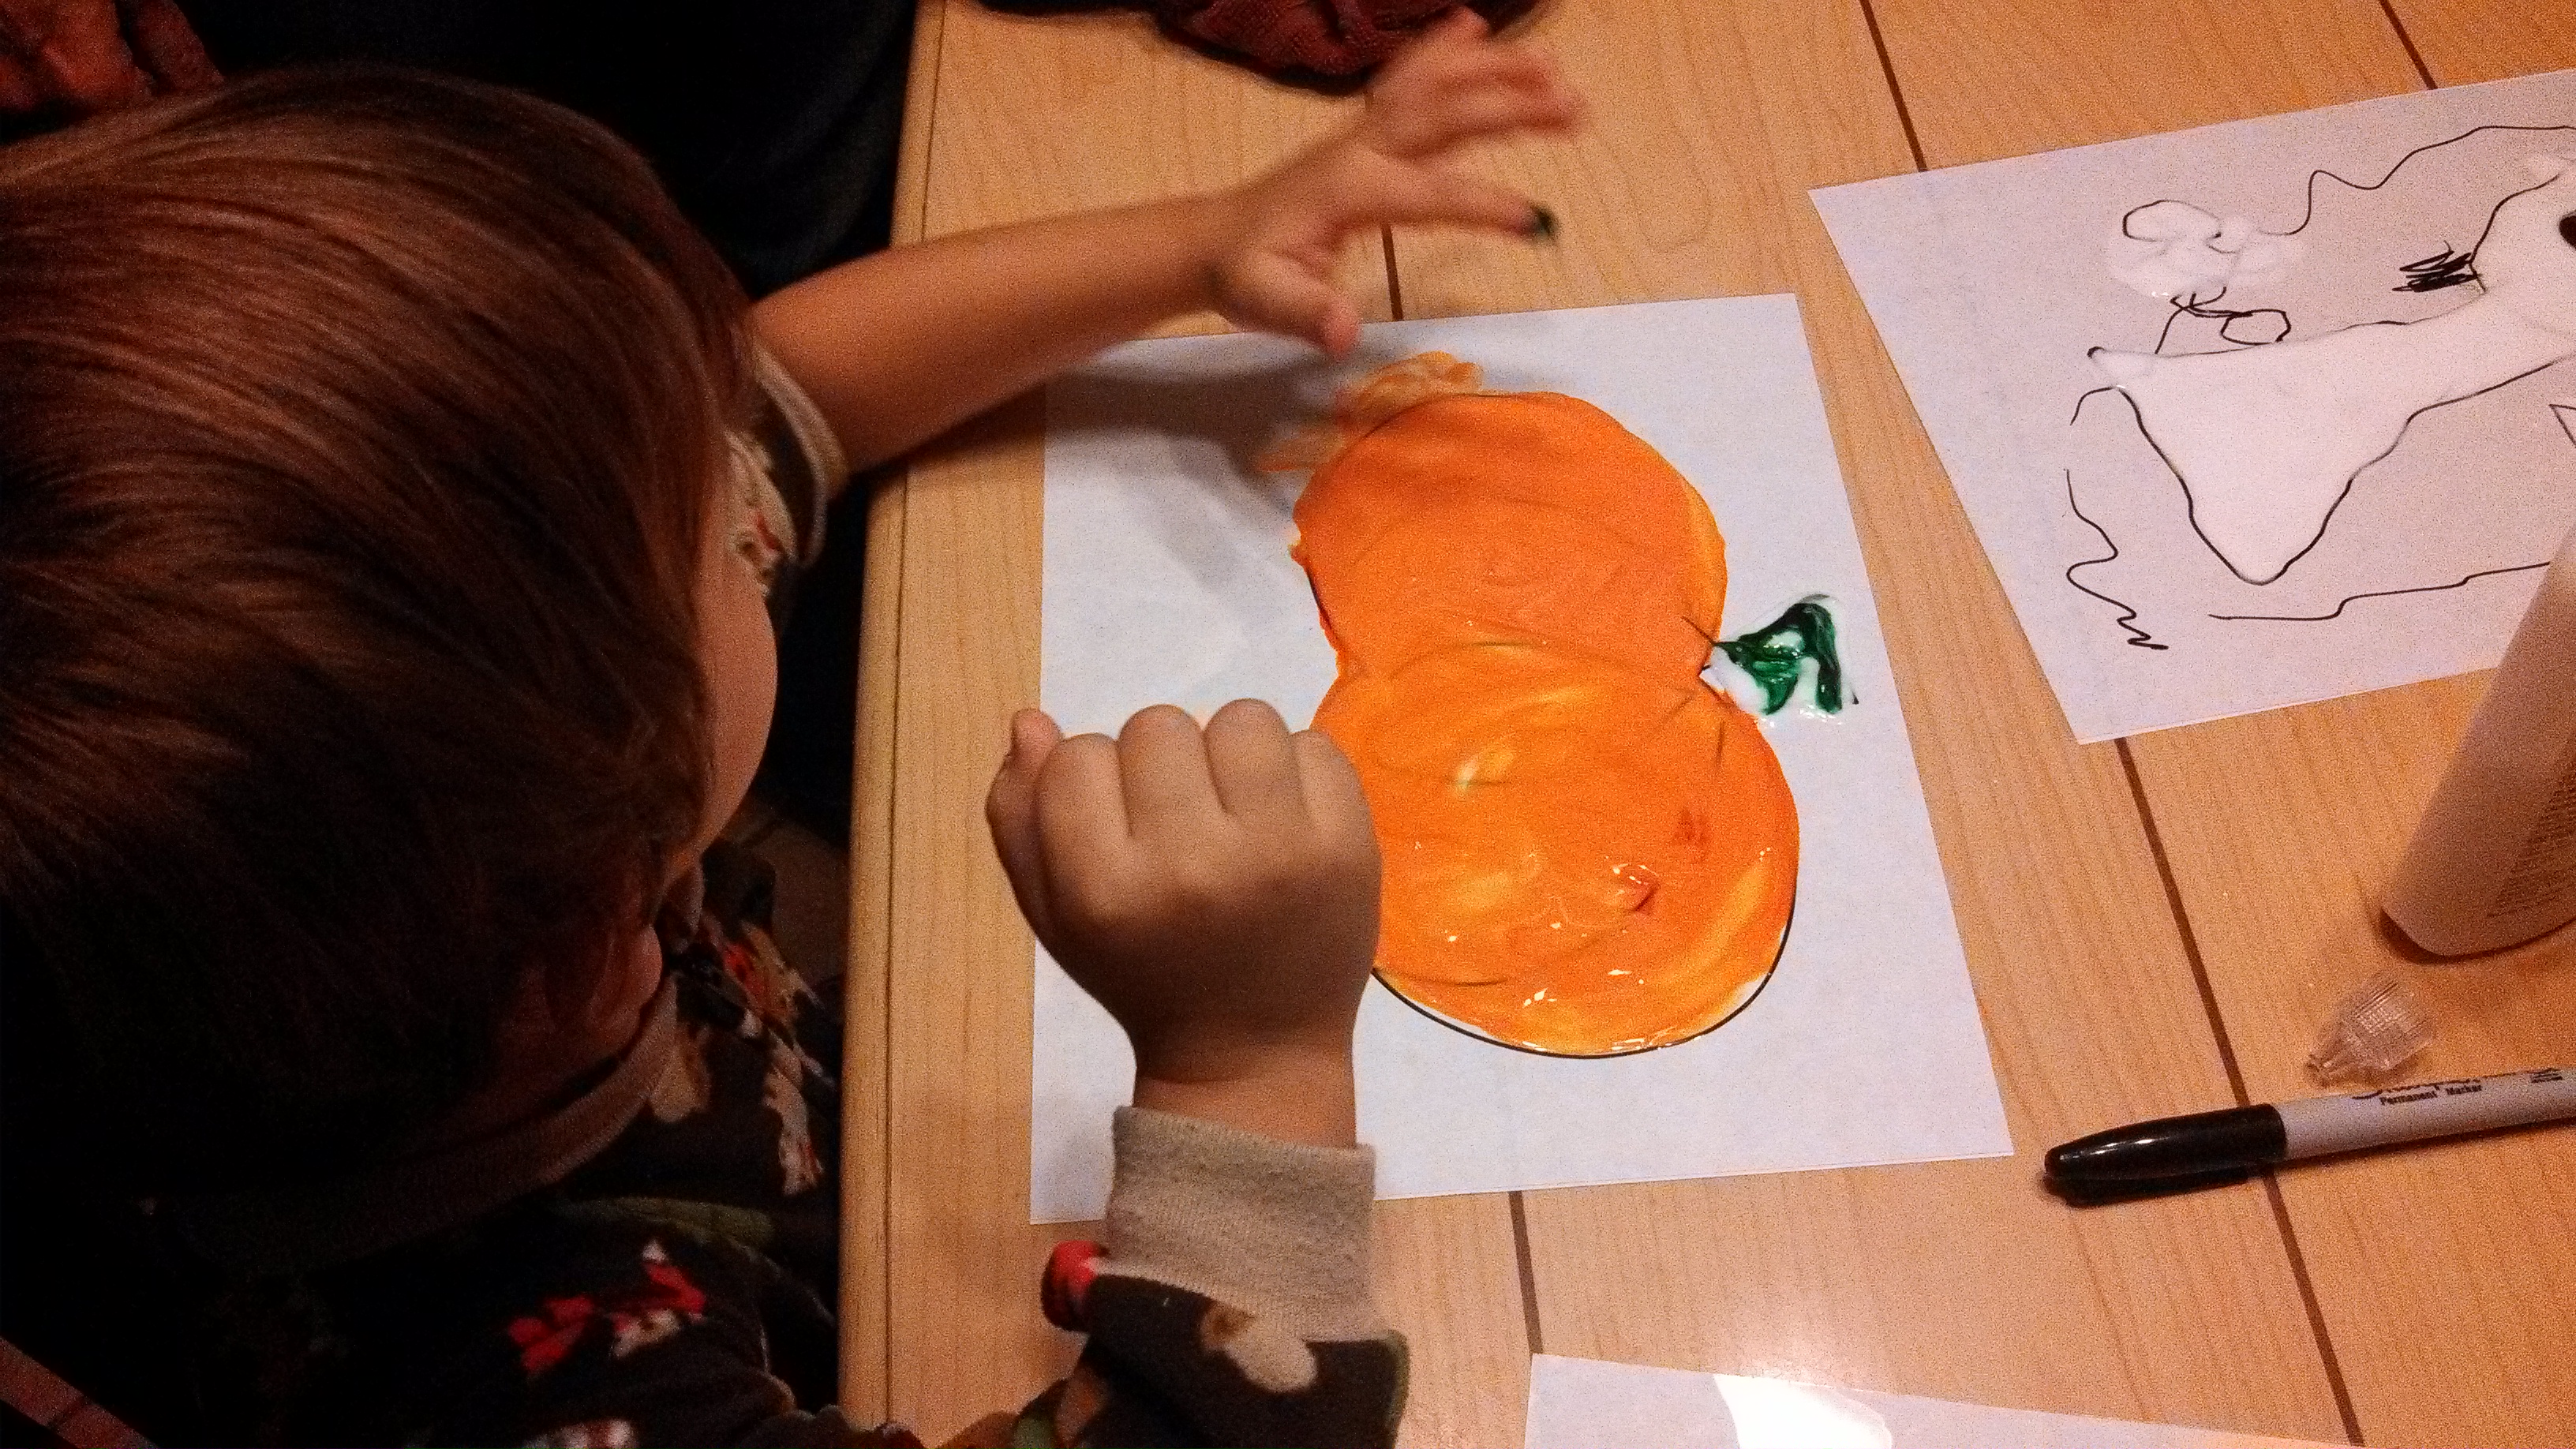
Then, together the kids and I tore the orange sheet into lots of pieces, and we used the glue stick to cover the inside of the shape on everything that we wanted to be orange.
And, we covered the pumpkin (or jack-o-lantern when you glue around the facial features).
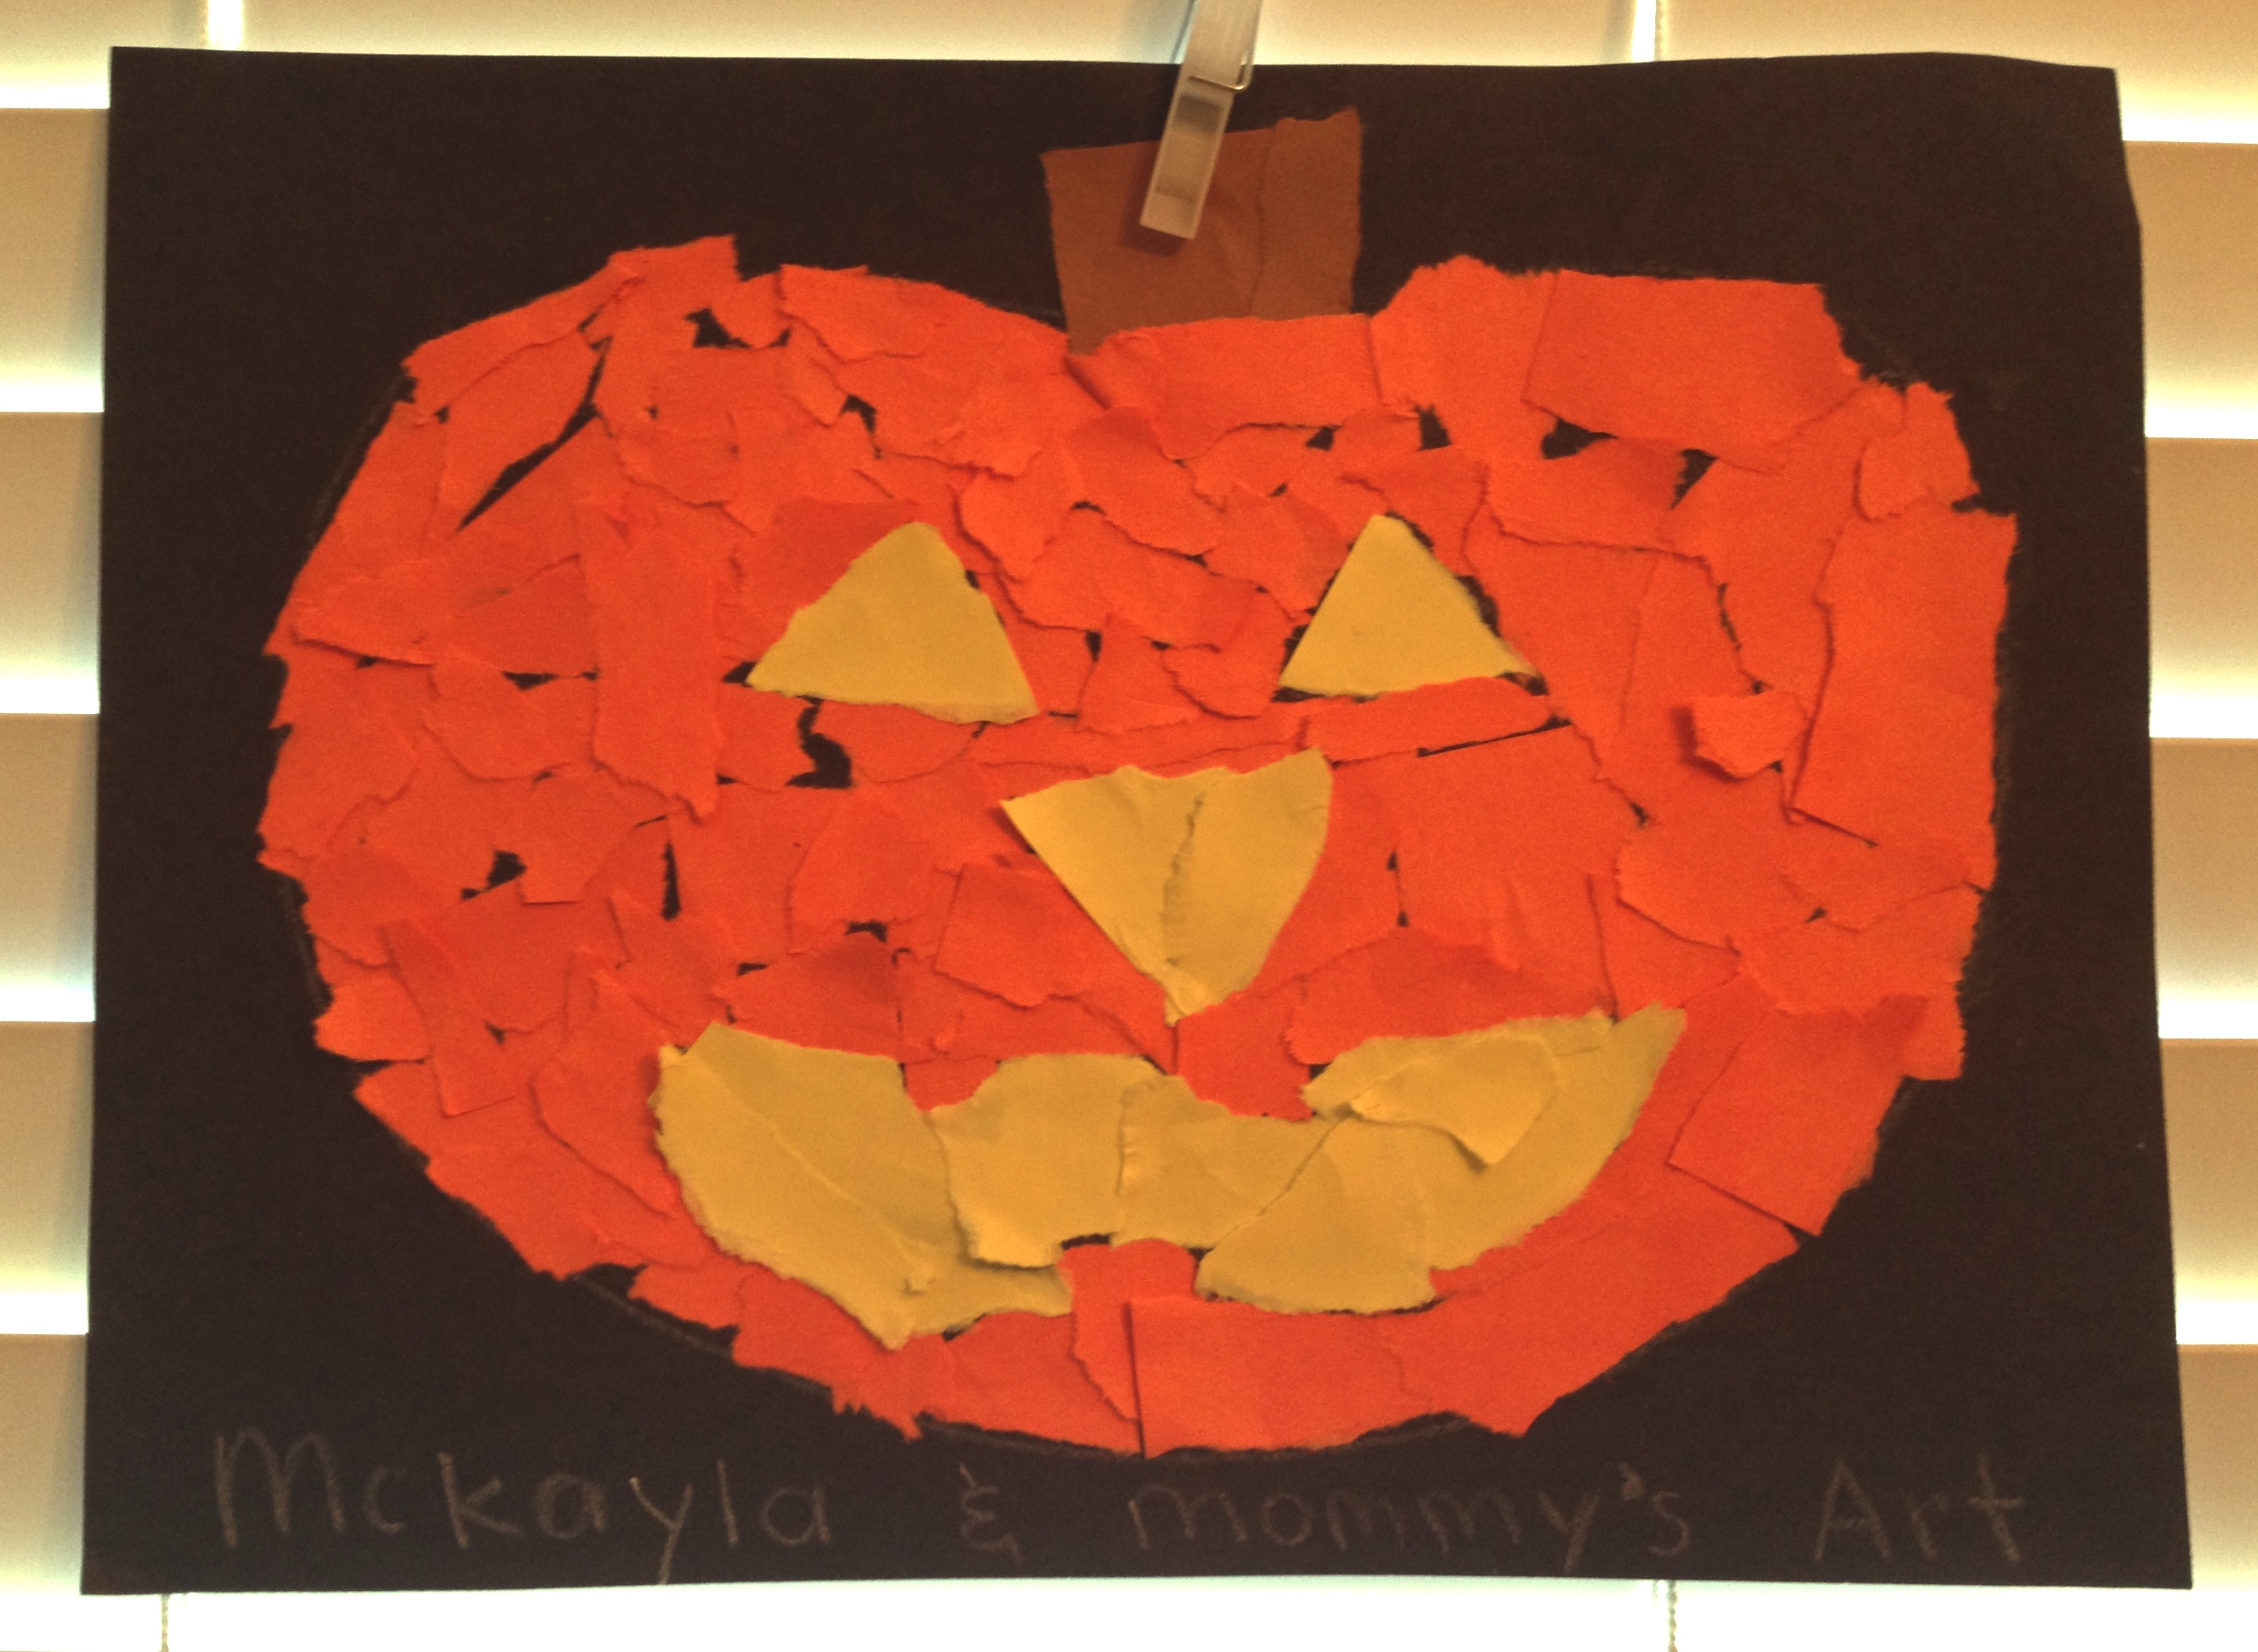
Finally, we filled in the stem with brown, the facial features with yellow, and hung it up on our playroom blinds with a clothespin to take pride in our Jack-o-lantern! (If I did it again I would start with the yellow facial features then do the orange).
We had fun, we accomplished something together, and they “worked out” their little fingers which is always a great way to prime them for writing.
This craftivity would be best for a four and up child in my personal opinion, but we didn’t finish this in one sitting and mommy helped A LOT!
After sharing one of these pics on my Instagram, a mommy teacher friend of mine took this approach….
And I LOVE LOVE LOVE that she used what she had, she made an activity geared toward her girl’s interests, and she inspired me to do this spin on the activity too! Thanks Allie!
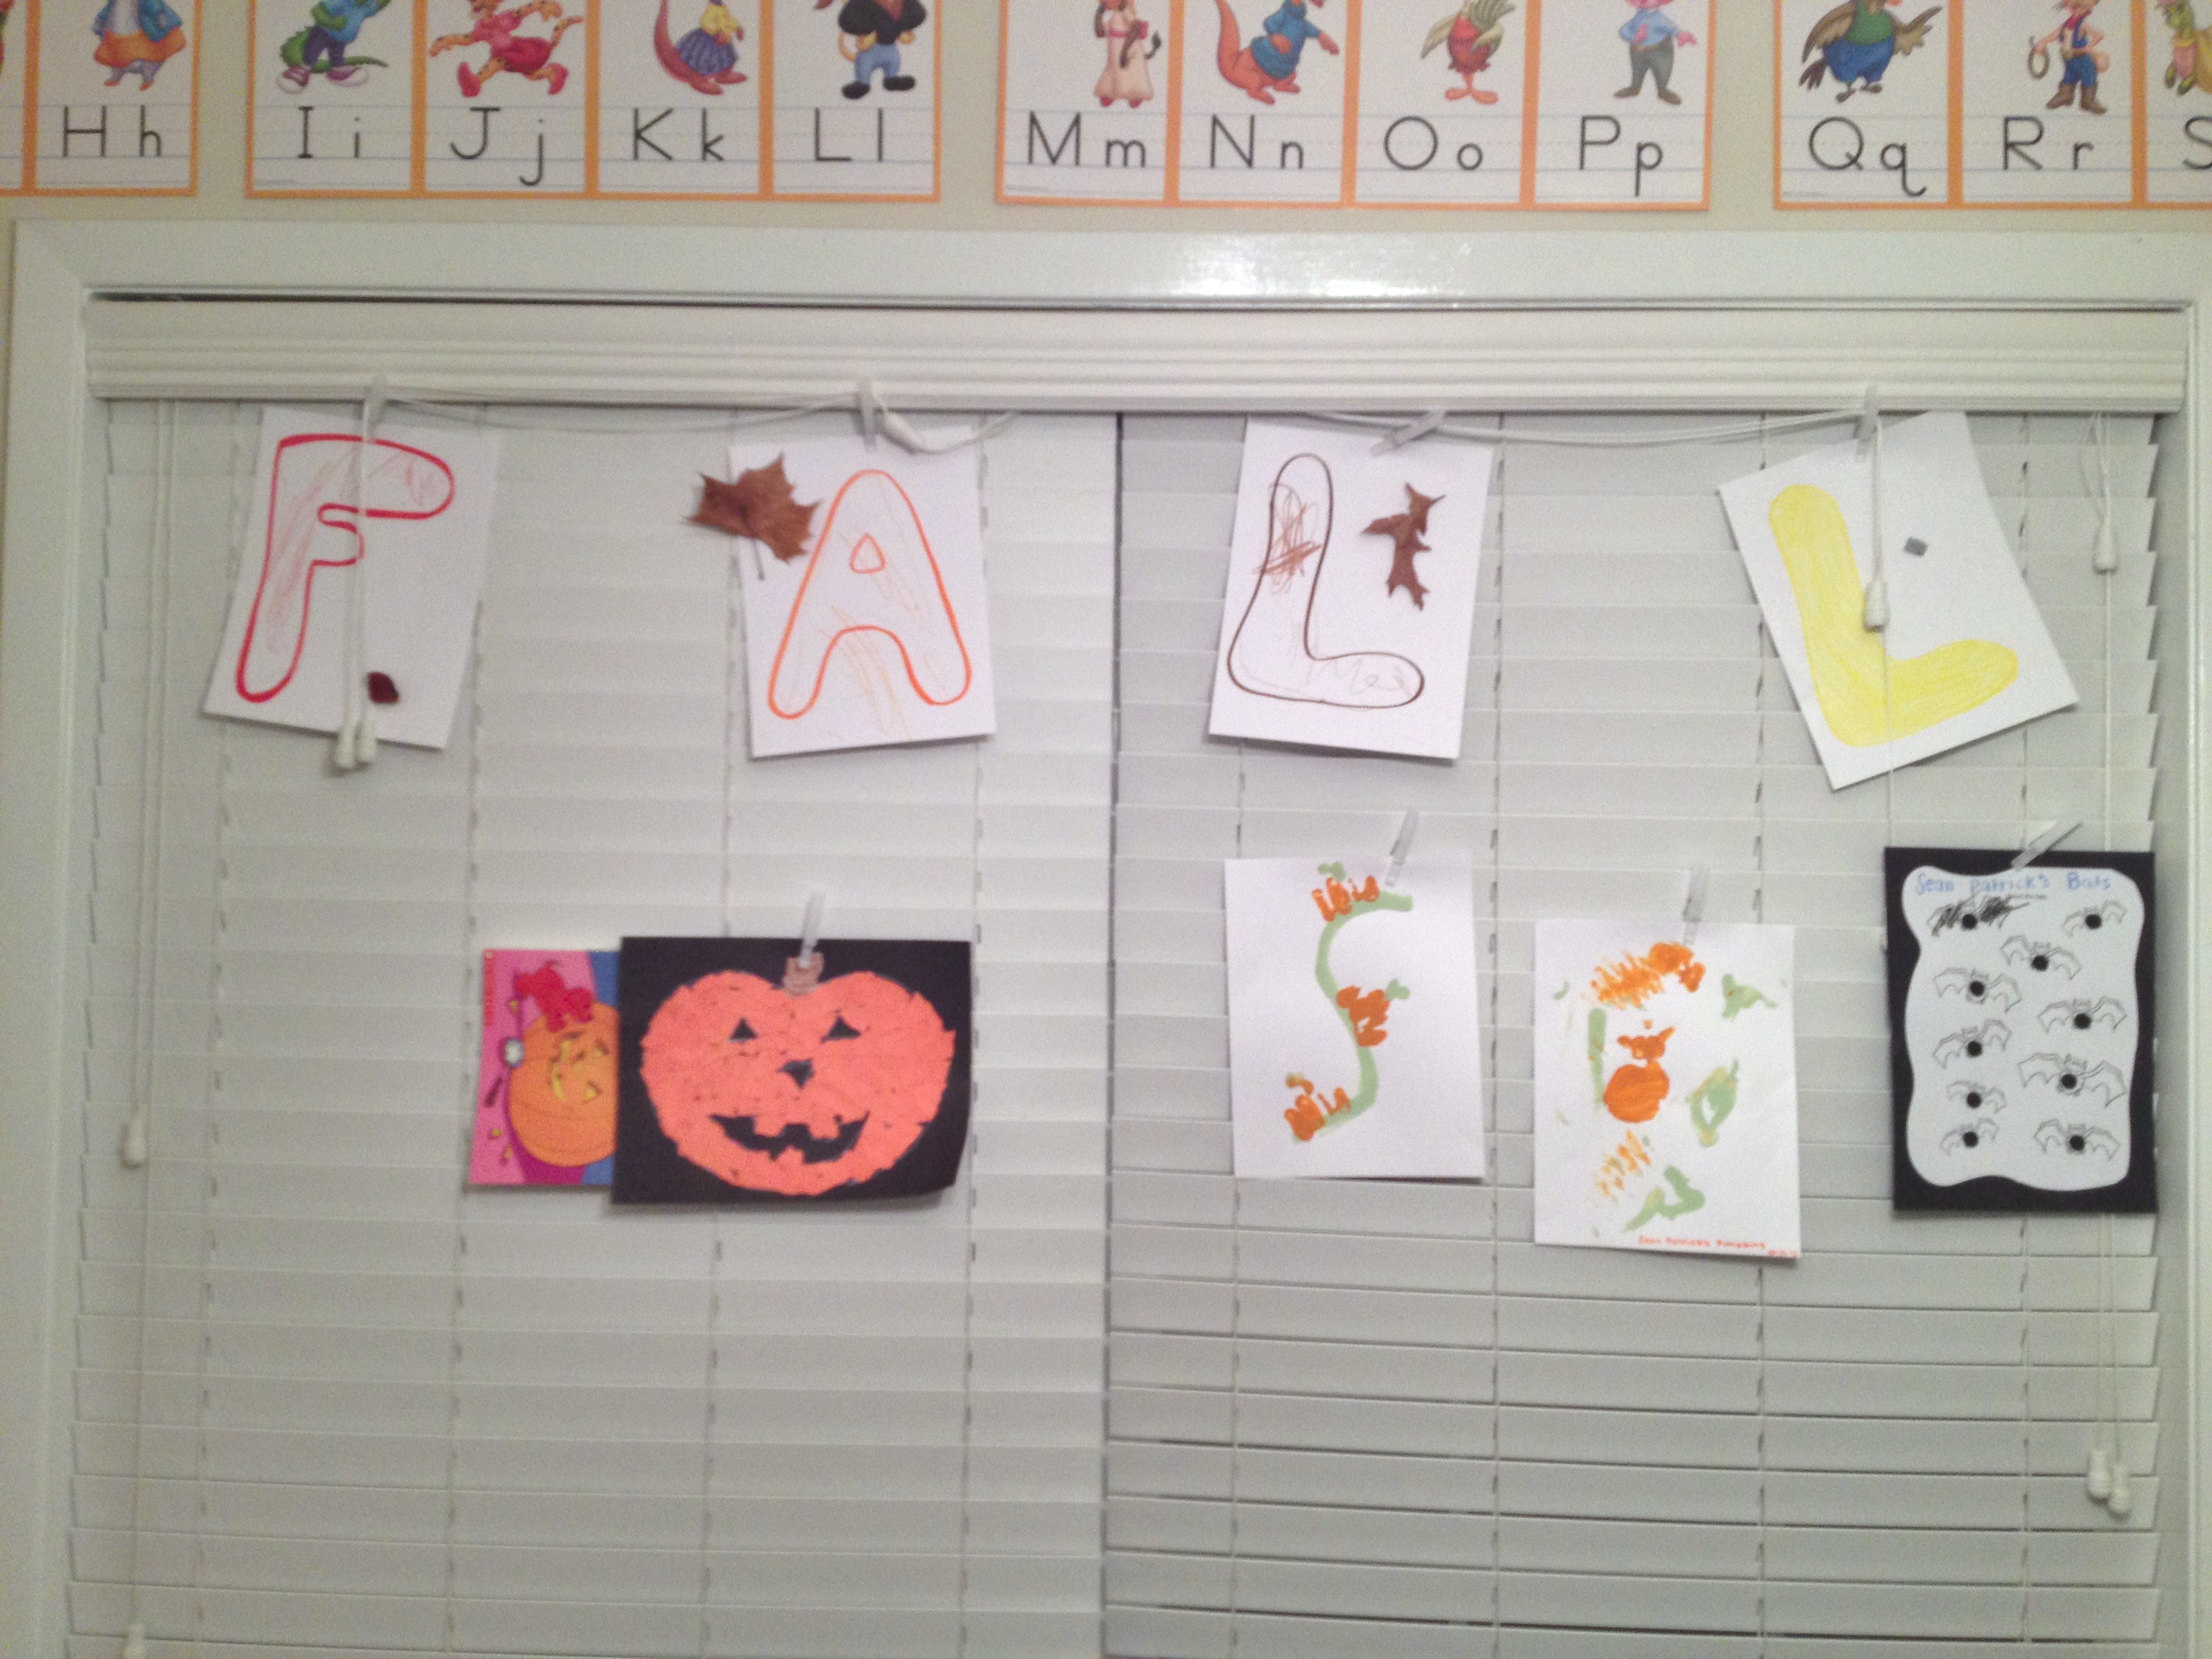
I was inspired by another mommy teacher and finally got my act together and started hanging our Fall activities on the blinds of the playroom and it got me SO motivated to purpose even more seasonal teaching moments.
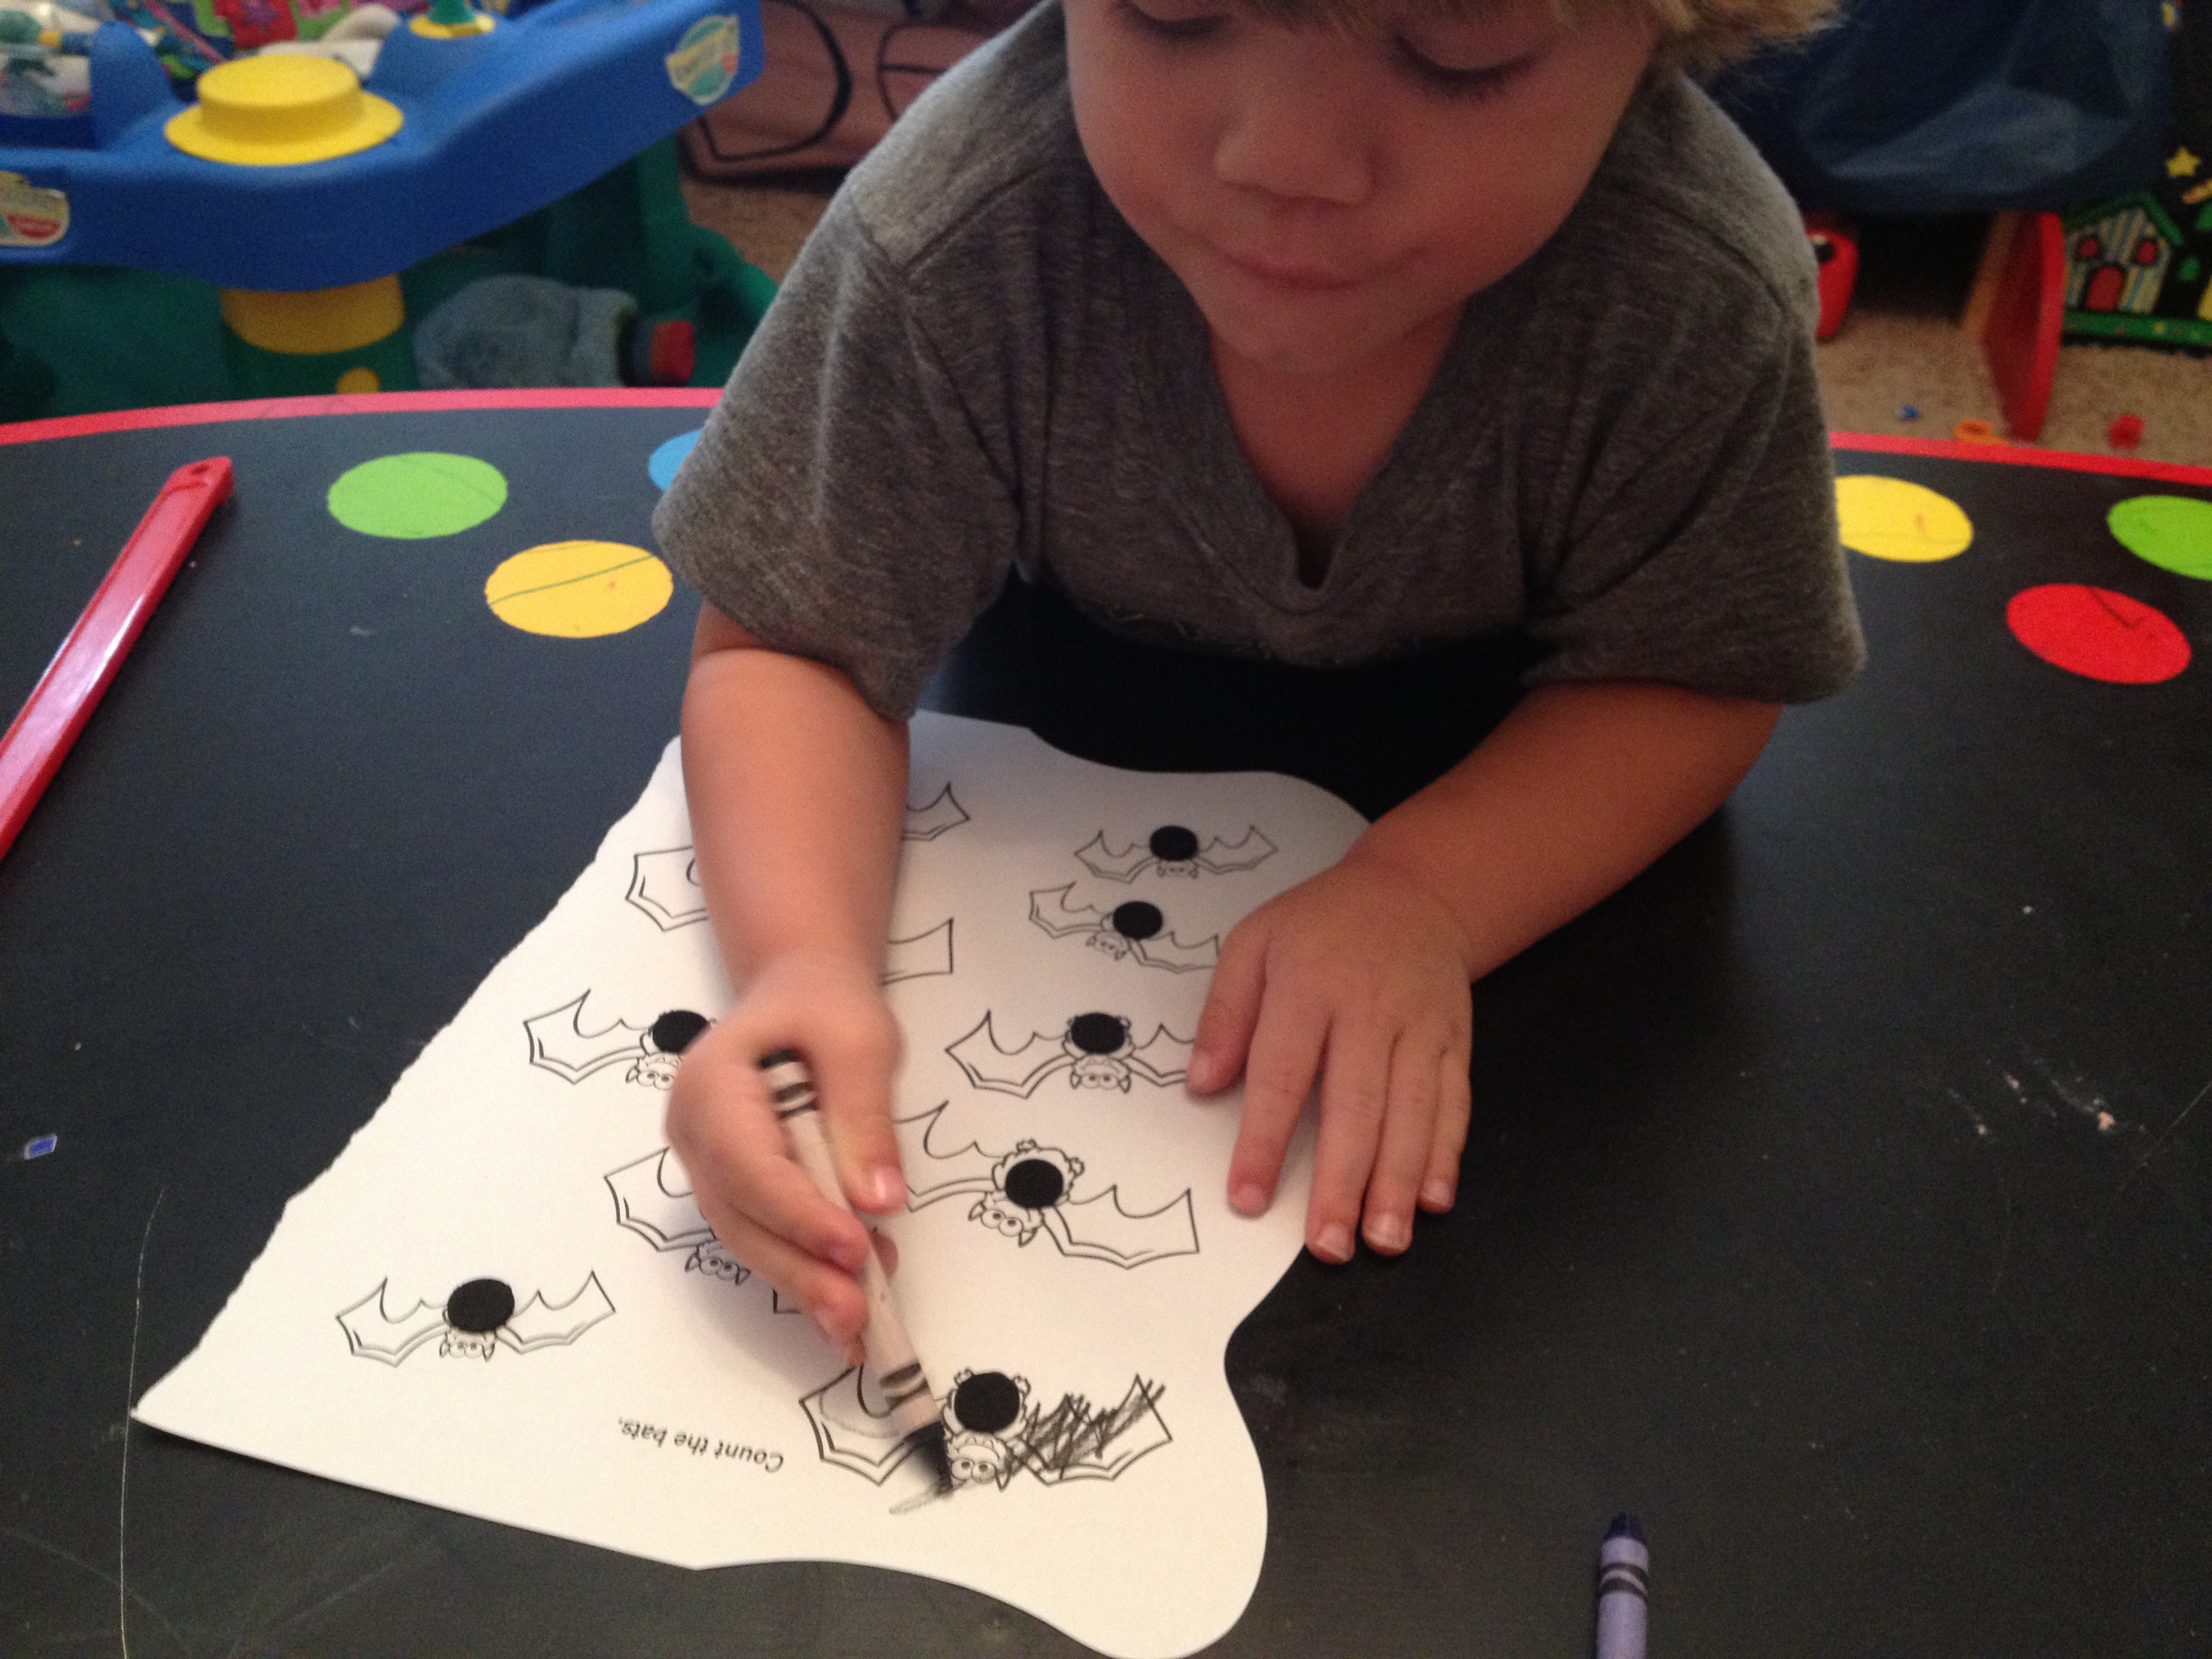
I am not over-zealous… I purpose one activity a day… and today’s activity was “Bat- Math.” I wanted to give y’all the step-by-step breakdown in case you wanted to print this FREE Bat-Math Printable and have some duh nuh nuh nuh nuh nuh nuh nuh da nuh nuh nuh nuh nuh BAT – MATH. Sorry, had to set the tone for this.
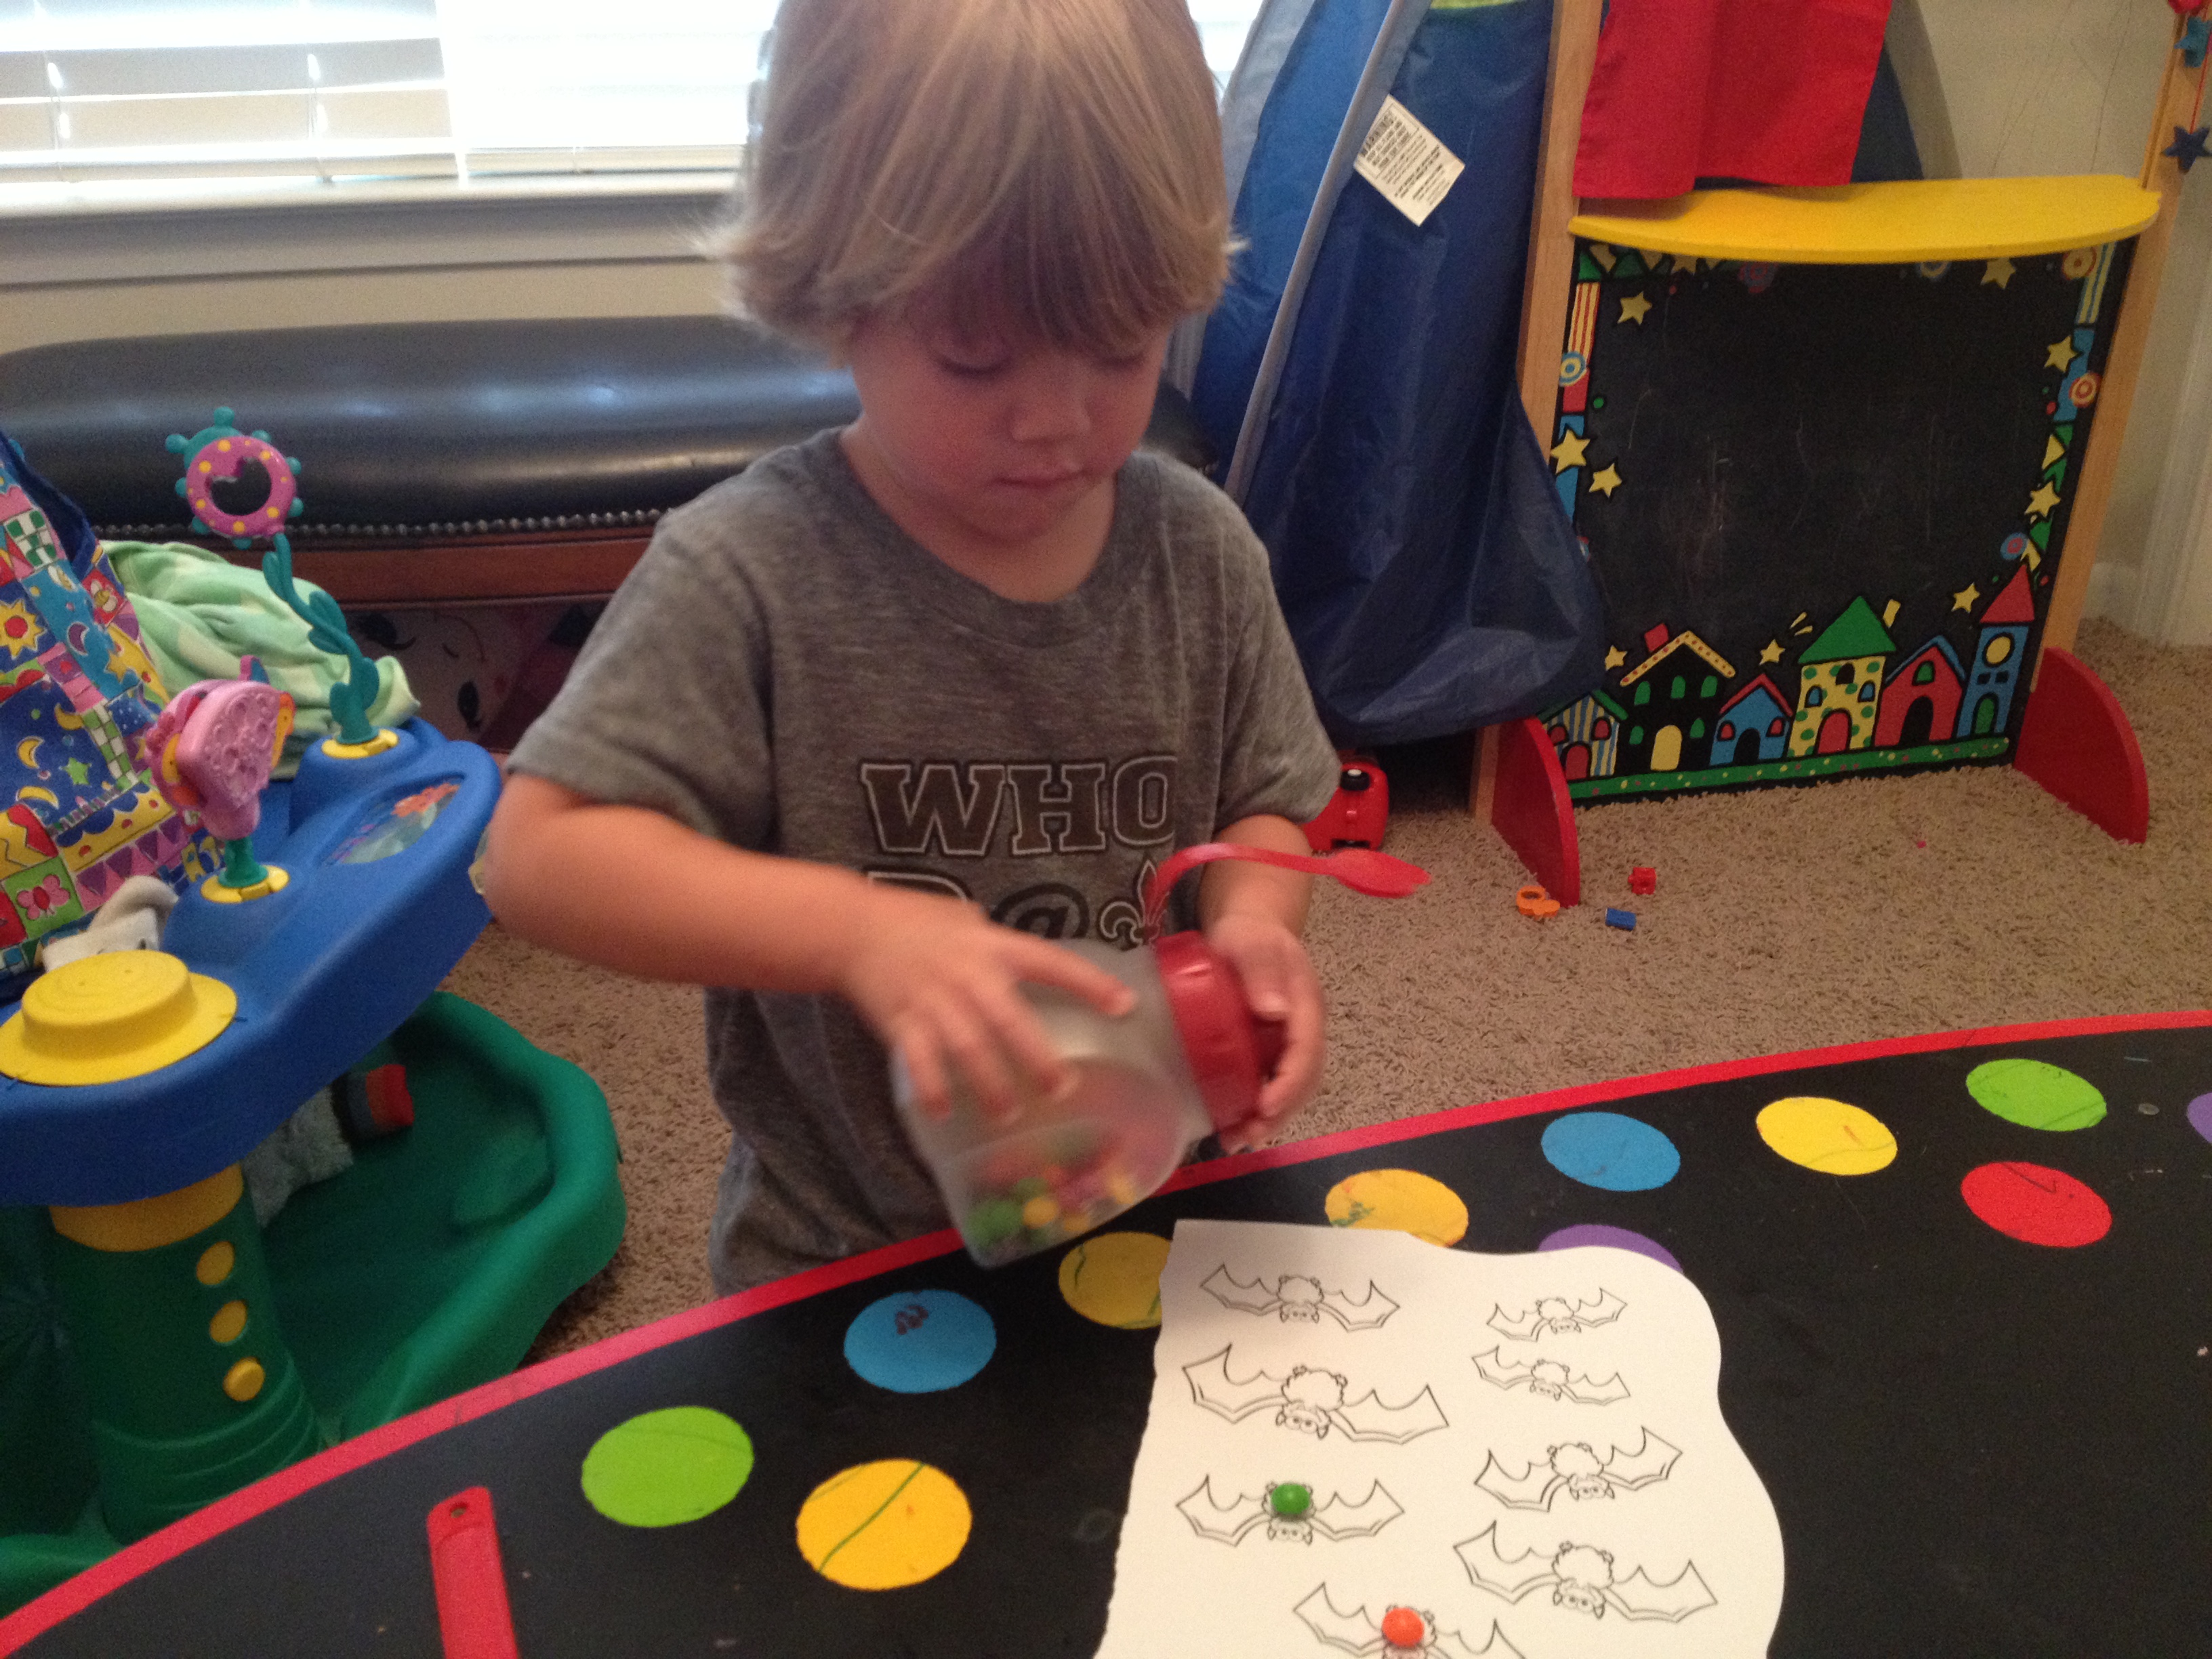
The way that my mini bat-math lesson started is funny… I found a VERY simple page with the outline of 10 bats in an Elmo activity book (by the Count) and I thought…
Today, Sean Patrick is going to learn that The LAST NUMBER he says when counting is the AMOUNT of bats that there are on this page. (I know that that is an abnormal thought). That is a common core math standard – that children can simply recognize that the last number they say represents the amount in the group they are counting. (Example: If there are 5 bats on the page then when I count 1-2-3-4-5, I know that there are FIVE bats because it was the last number that I said when I counted the last bat).
I started with too many – I will be honest. The page had 10 bats. He can count to 10 but I wish I would’ve started with 5…. which is why I made this free printable with 5 and with 10 because you know your kiddo and can choose.
First I said “Alright Sean Patrick… today lets cover up each one of these bats with skittles. Each bat gets ONE skittle so that we can count how many bats there are. When we figure out the right number of bats then we can eat that many skittles!” (once again… he normally only gets to eat THREE skittles so I wish I would’ve started with my own printable haha).
He covered up each bat (one skittle on each bat) and then started to count. He counted slow – one number for each skittle which is GREAT, but he miscounted because he didn’t count strategically (he started at the bottom and jumped up and around) so I said “Okay baby, try counting from the top then over, and go to the next line so we can count the right number. “
He tried again and he said “ten” but kept counting.
So I said “That was great counting…. lets try it one more time and when I say STOP, try to remember the number that you said!”
He counted it again and then I said “What was the last number you just counted to?”…. he said “five” haha okay this is great….this is the moment I realized 10 was too high to count a group number, and it was the moment that I realized we could work on this one skill all week.
Then we counted it again and I said “Did you hear yourself count to ten…. watch mommy and listen…. I shouted “10!” when I counted to that number and then said “How many?” and he finally said “Ten!”
I said “YEAH! lets celebrate great counting… eat your treats and then we will give all TEN bats a sticker, then we can color them. Let’s put the stickers on in the same “smart way” to count…. from the top to the bottom.
He was content with coloring just one bat so we glued the “finished” product onto a black sheet of construction paper and hung it up on our “fall art” wall…. (which I will share the play-by-plays of those activities next week).
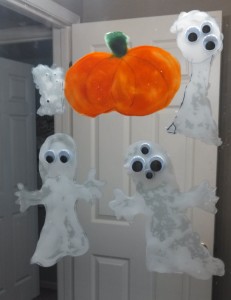
My mother-in-law just did a super fun and easy Halloween craft with the kids (and me…she brought extra supplies because she knew I’d want to do one too!).
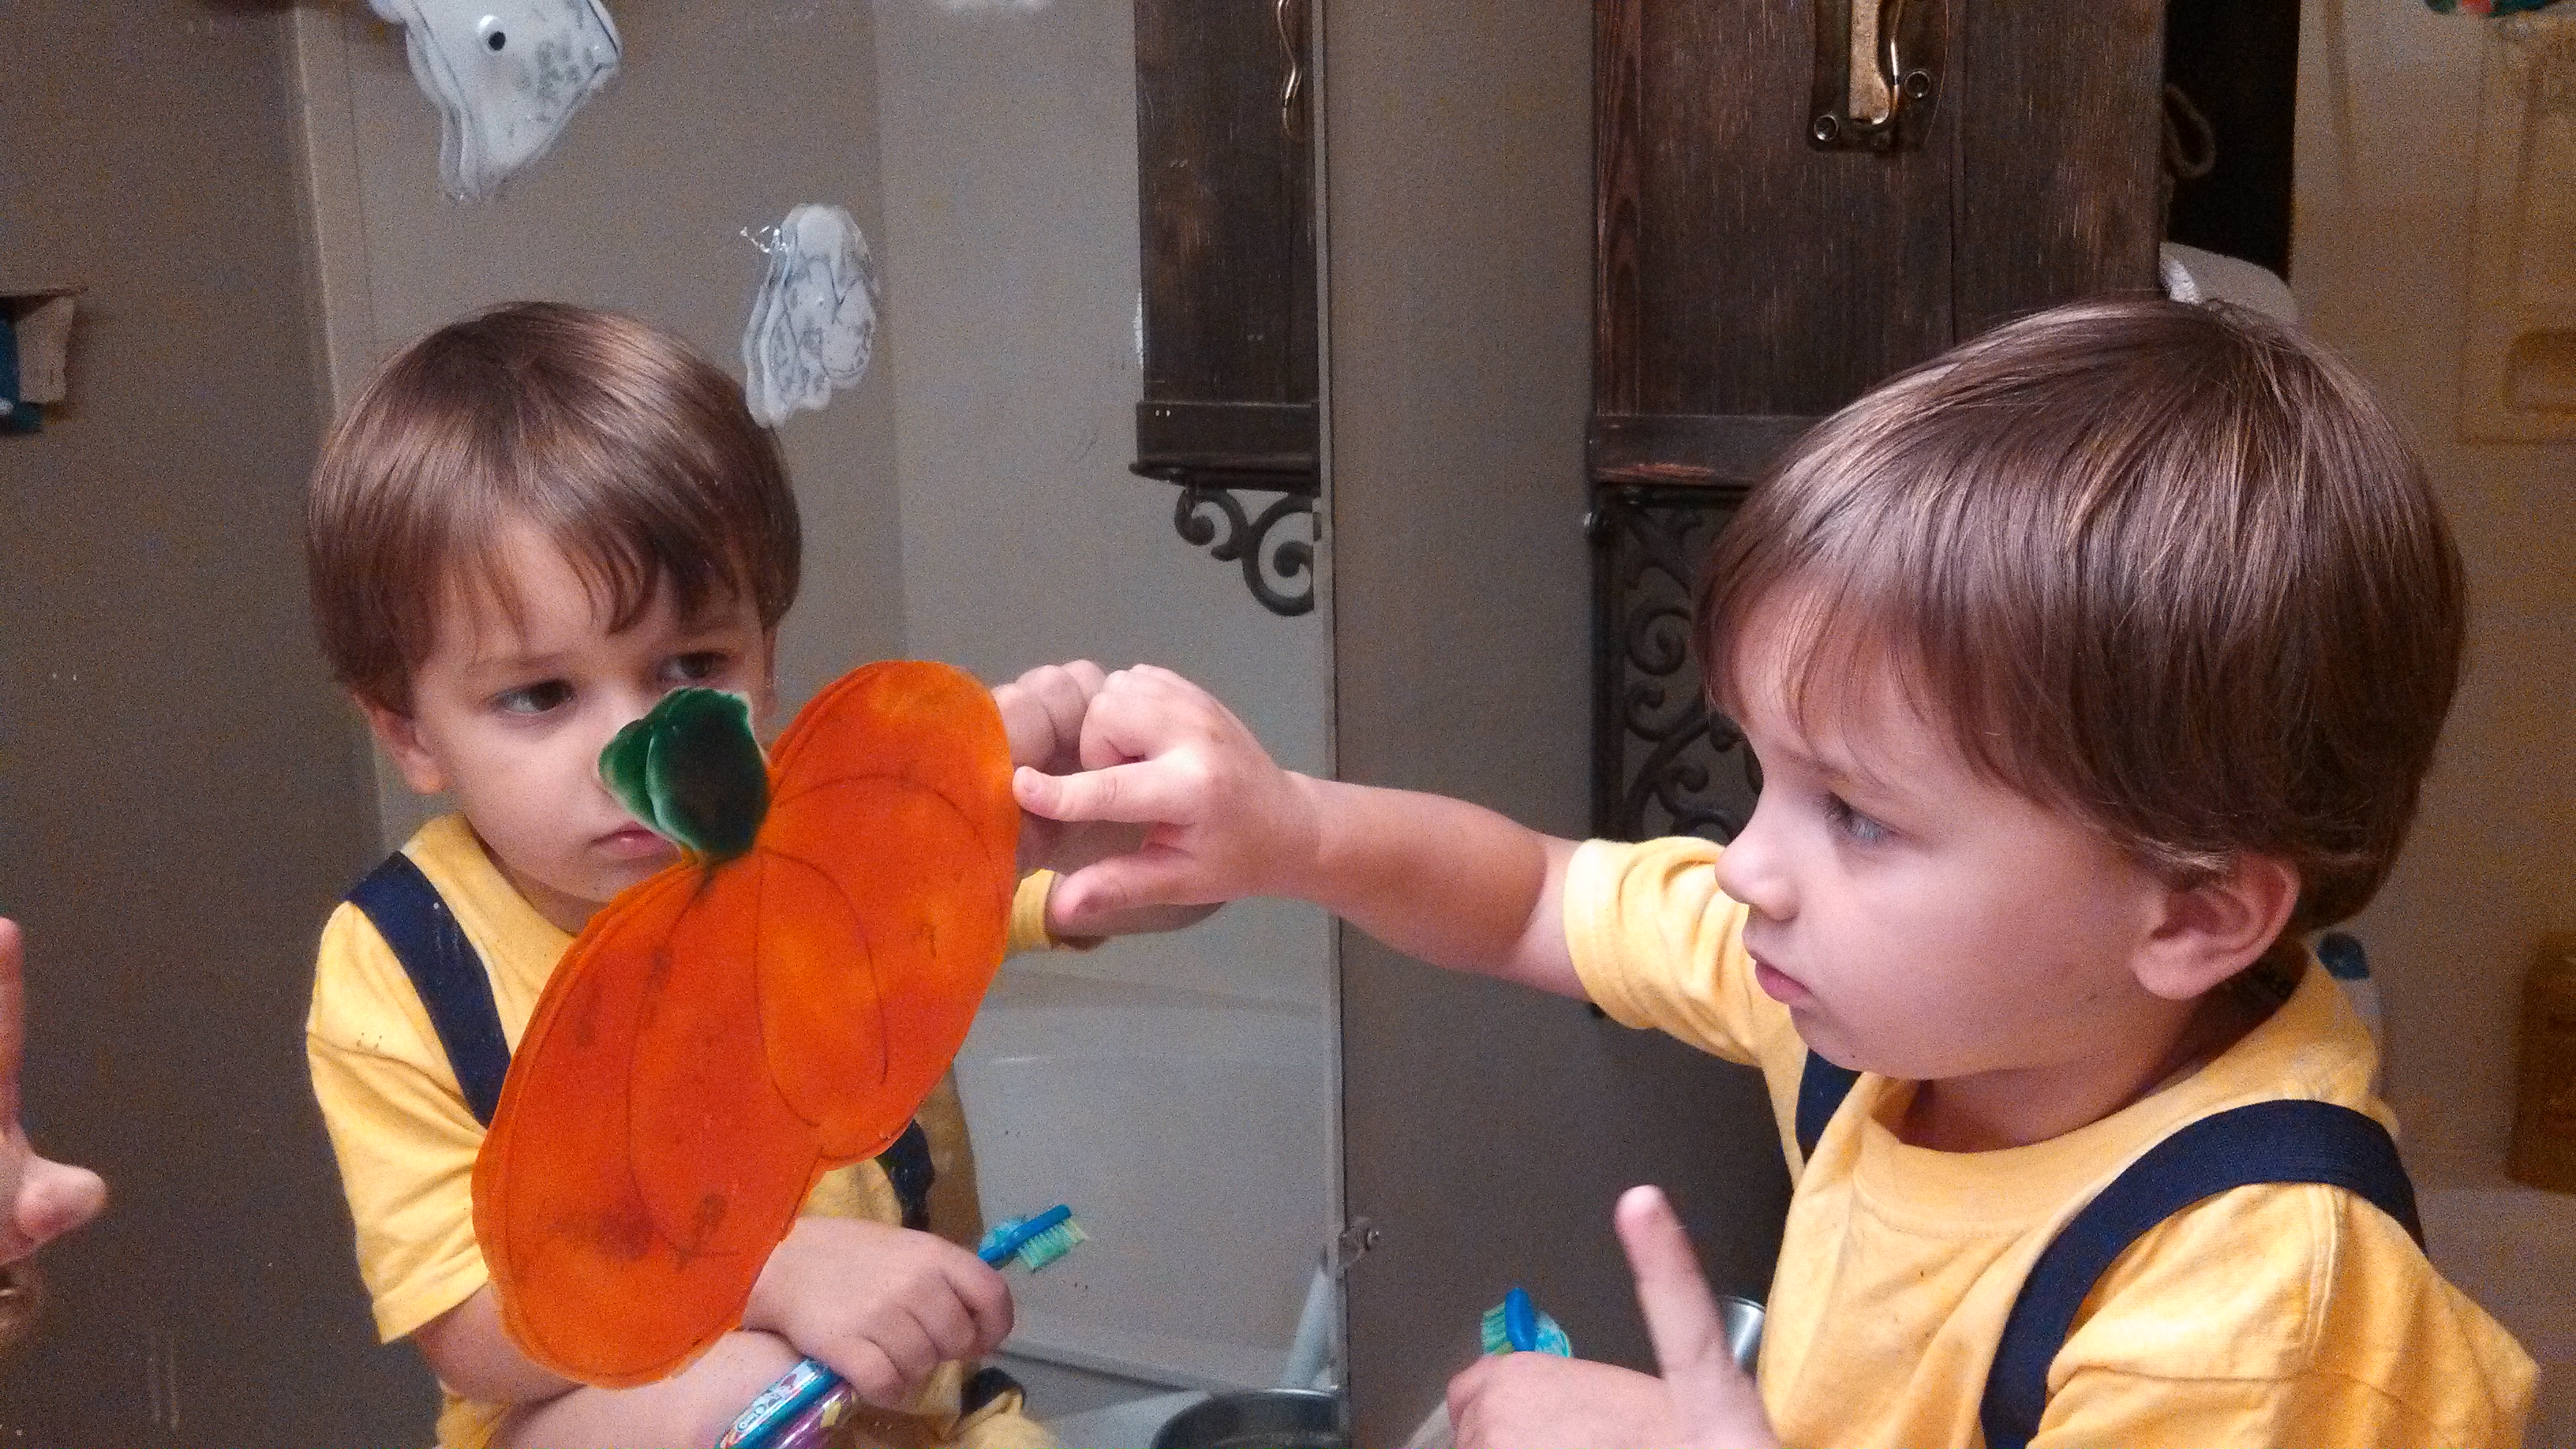
We made ghost and pumpkin window peels/decals and decorated the kid’s bathroom for Halloween. We had so much fun doing this super easy craft that I think we might just have to make our own window decals for every holiday!
Materials for Ghost Window Decals:
transparency sheets
white paper
school glue
permanent marker
googly eyes (optional)
nail polish remover
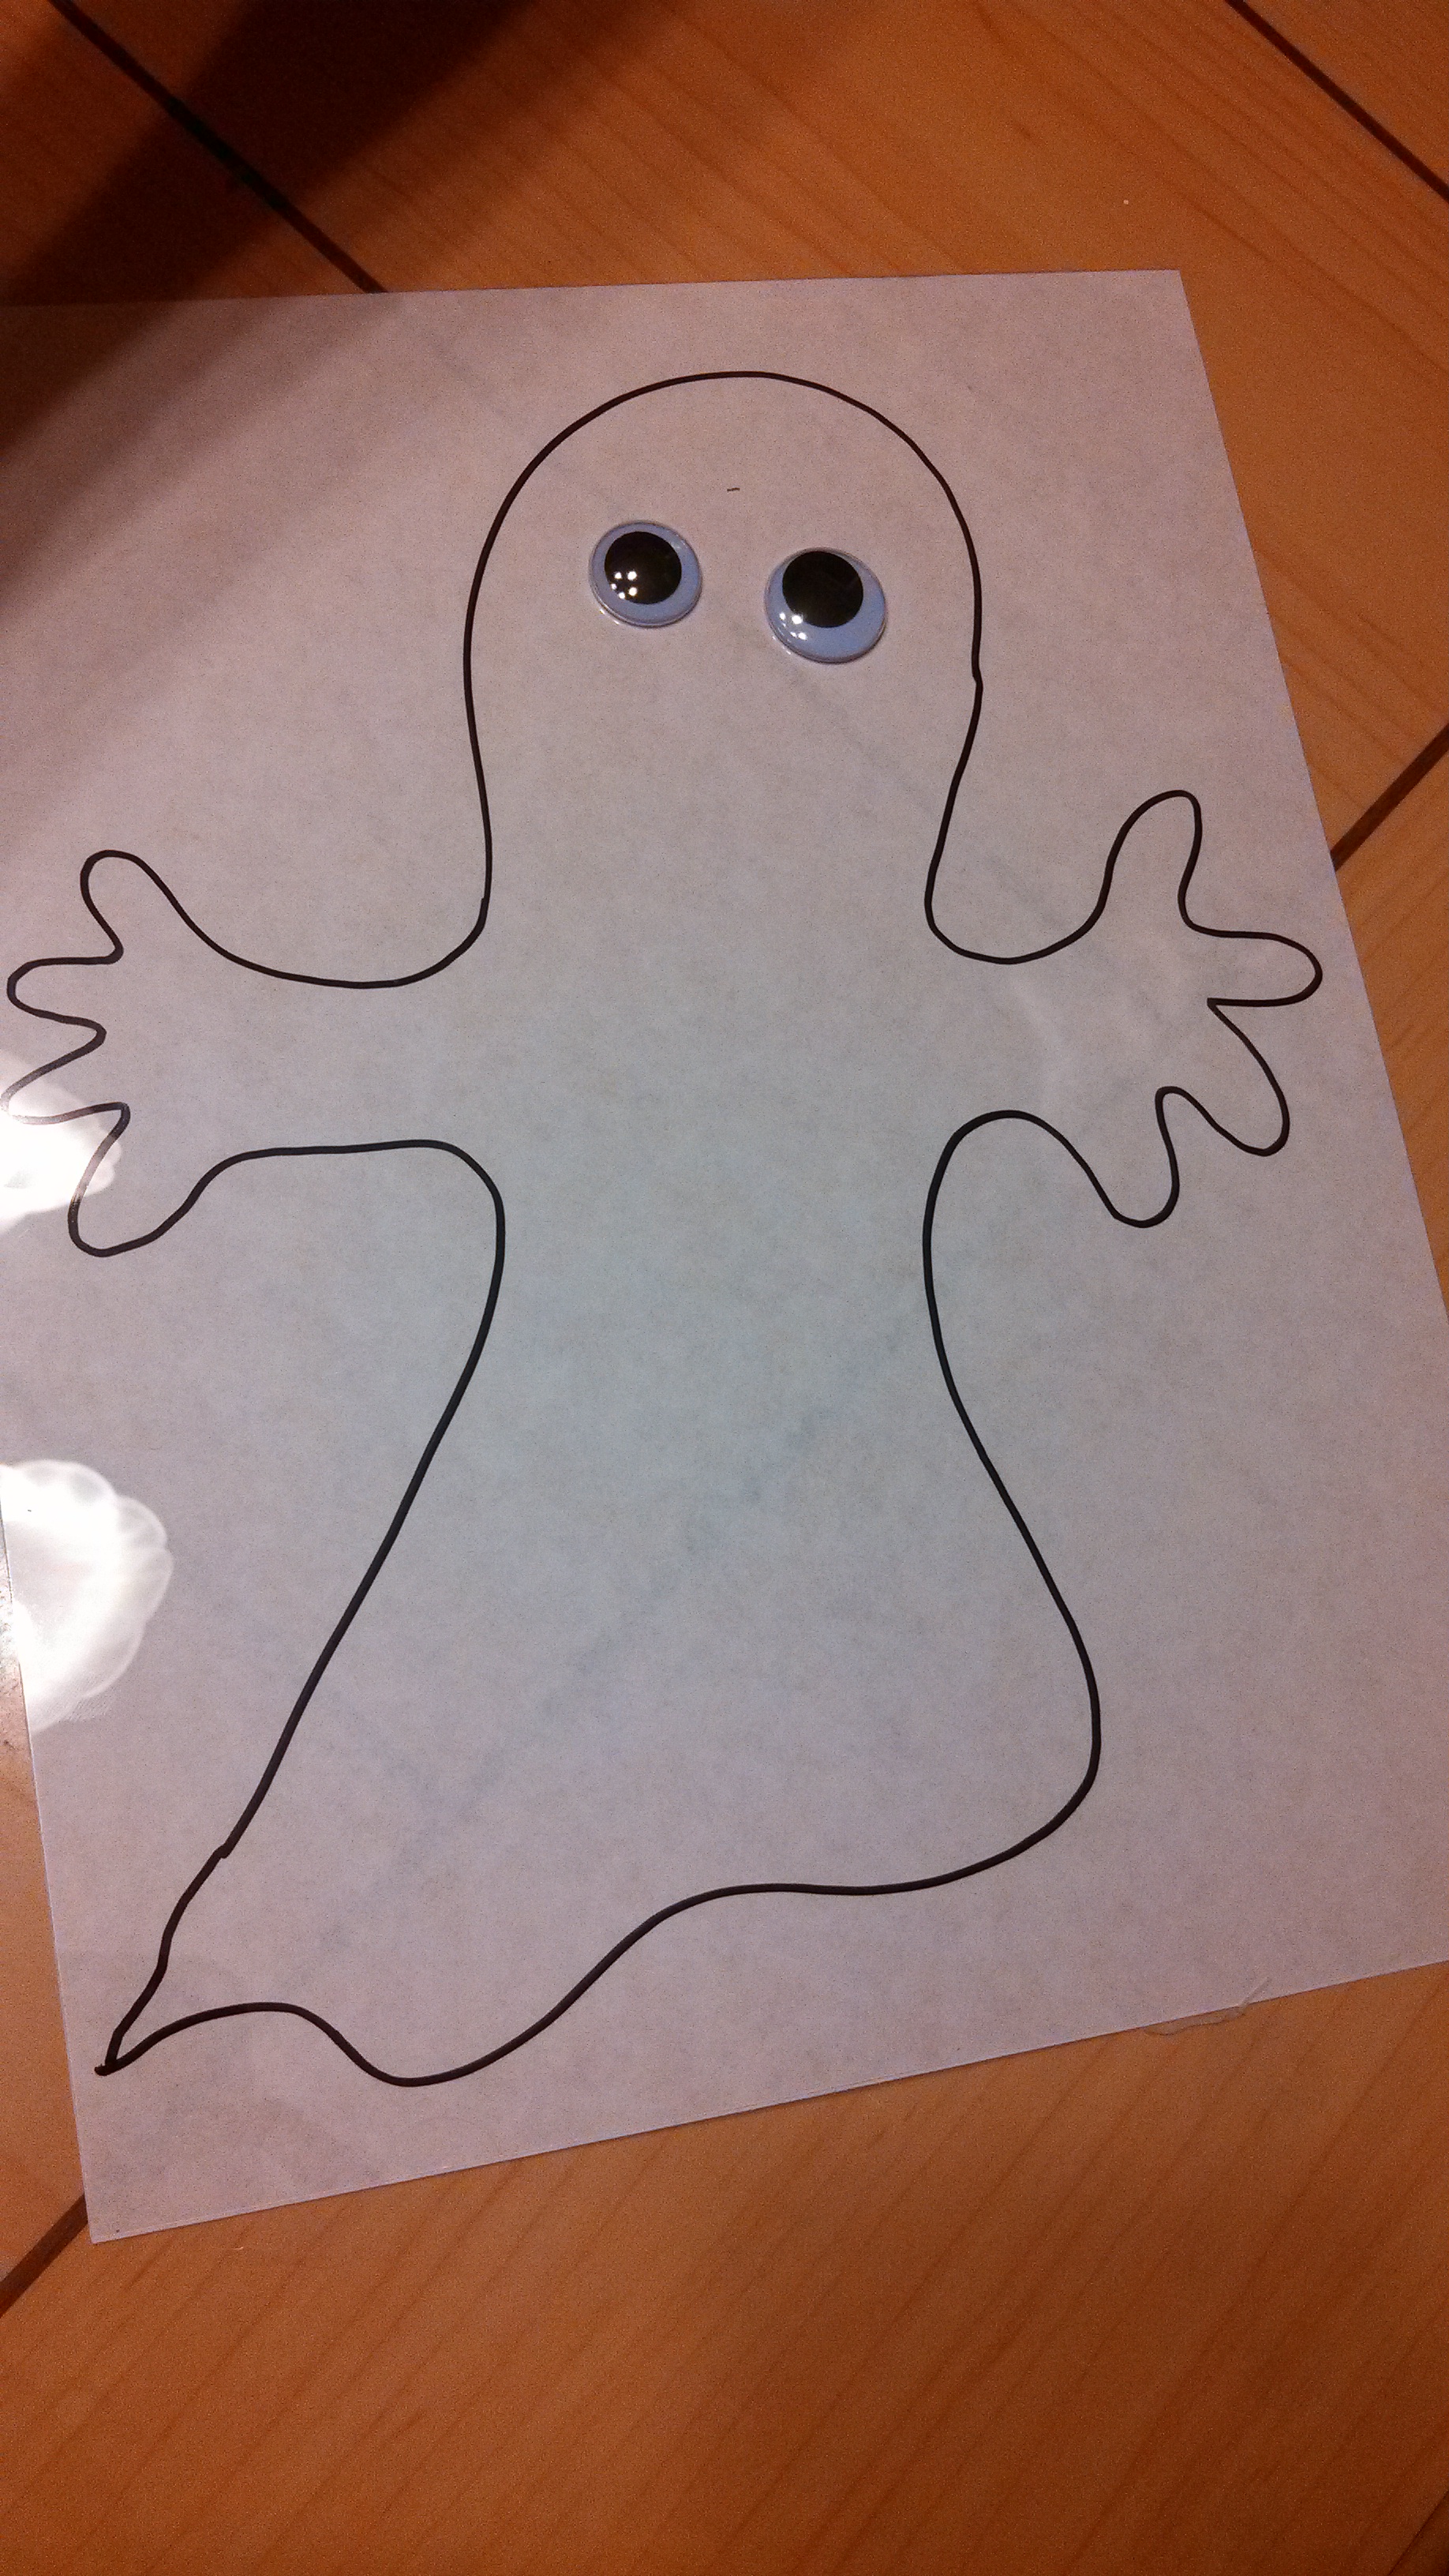
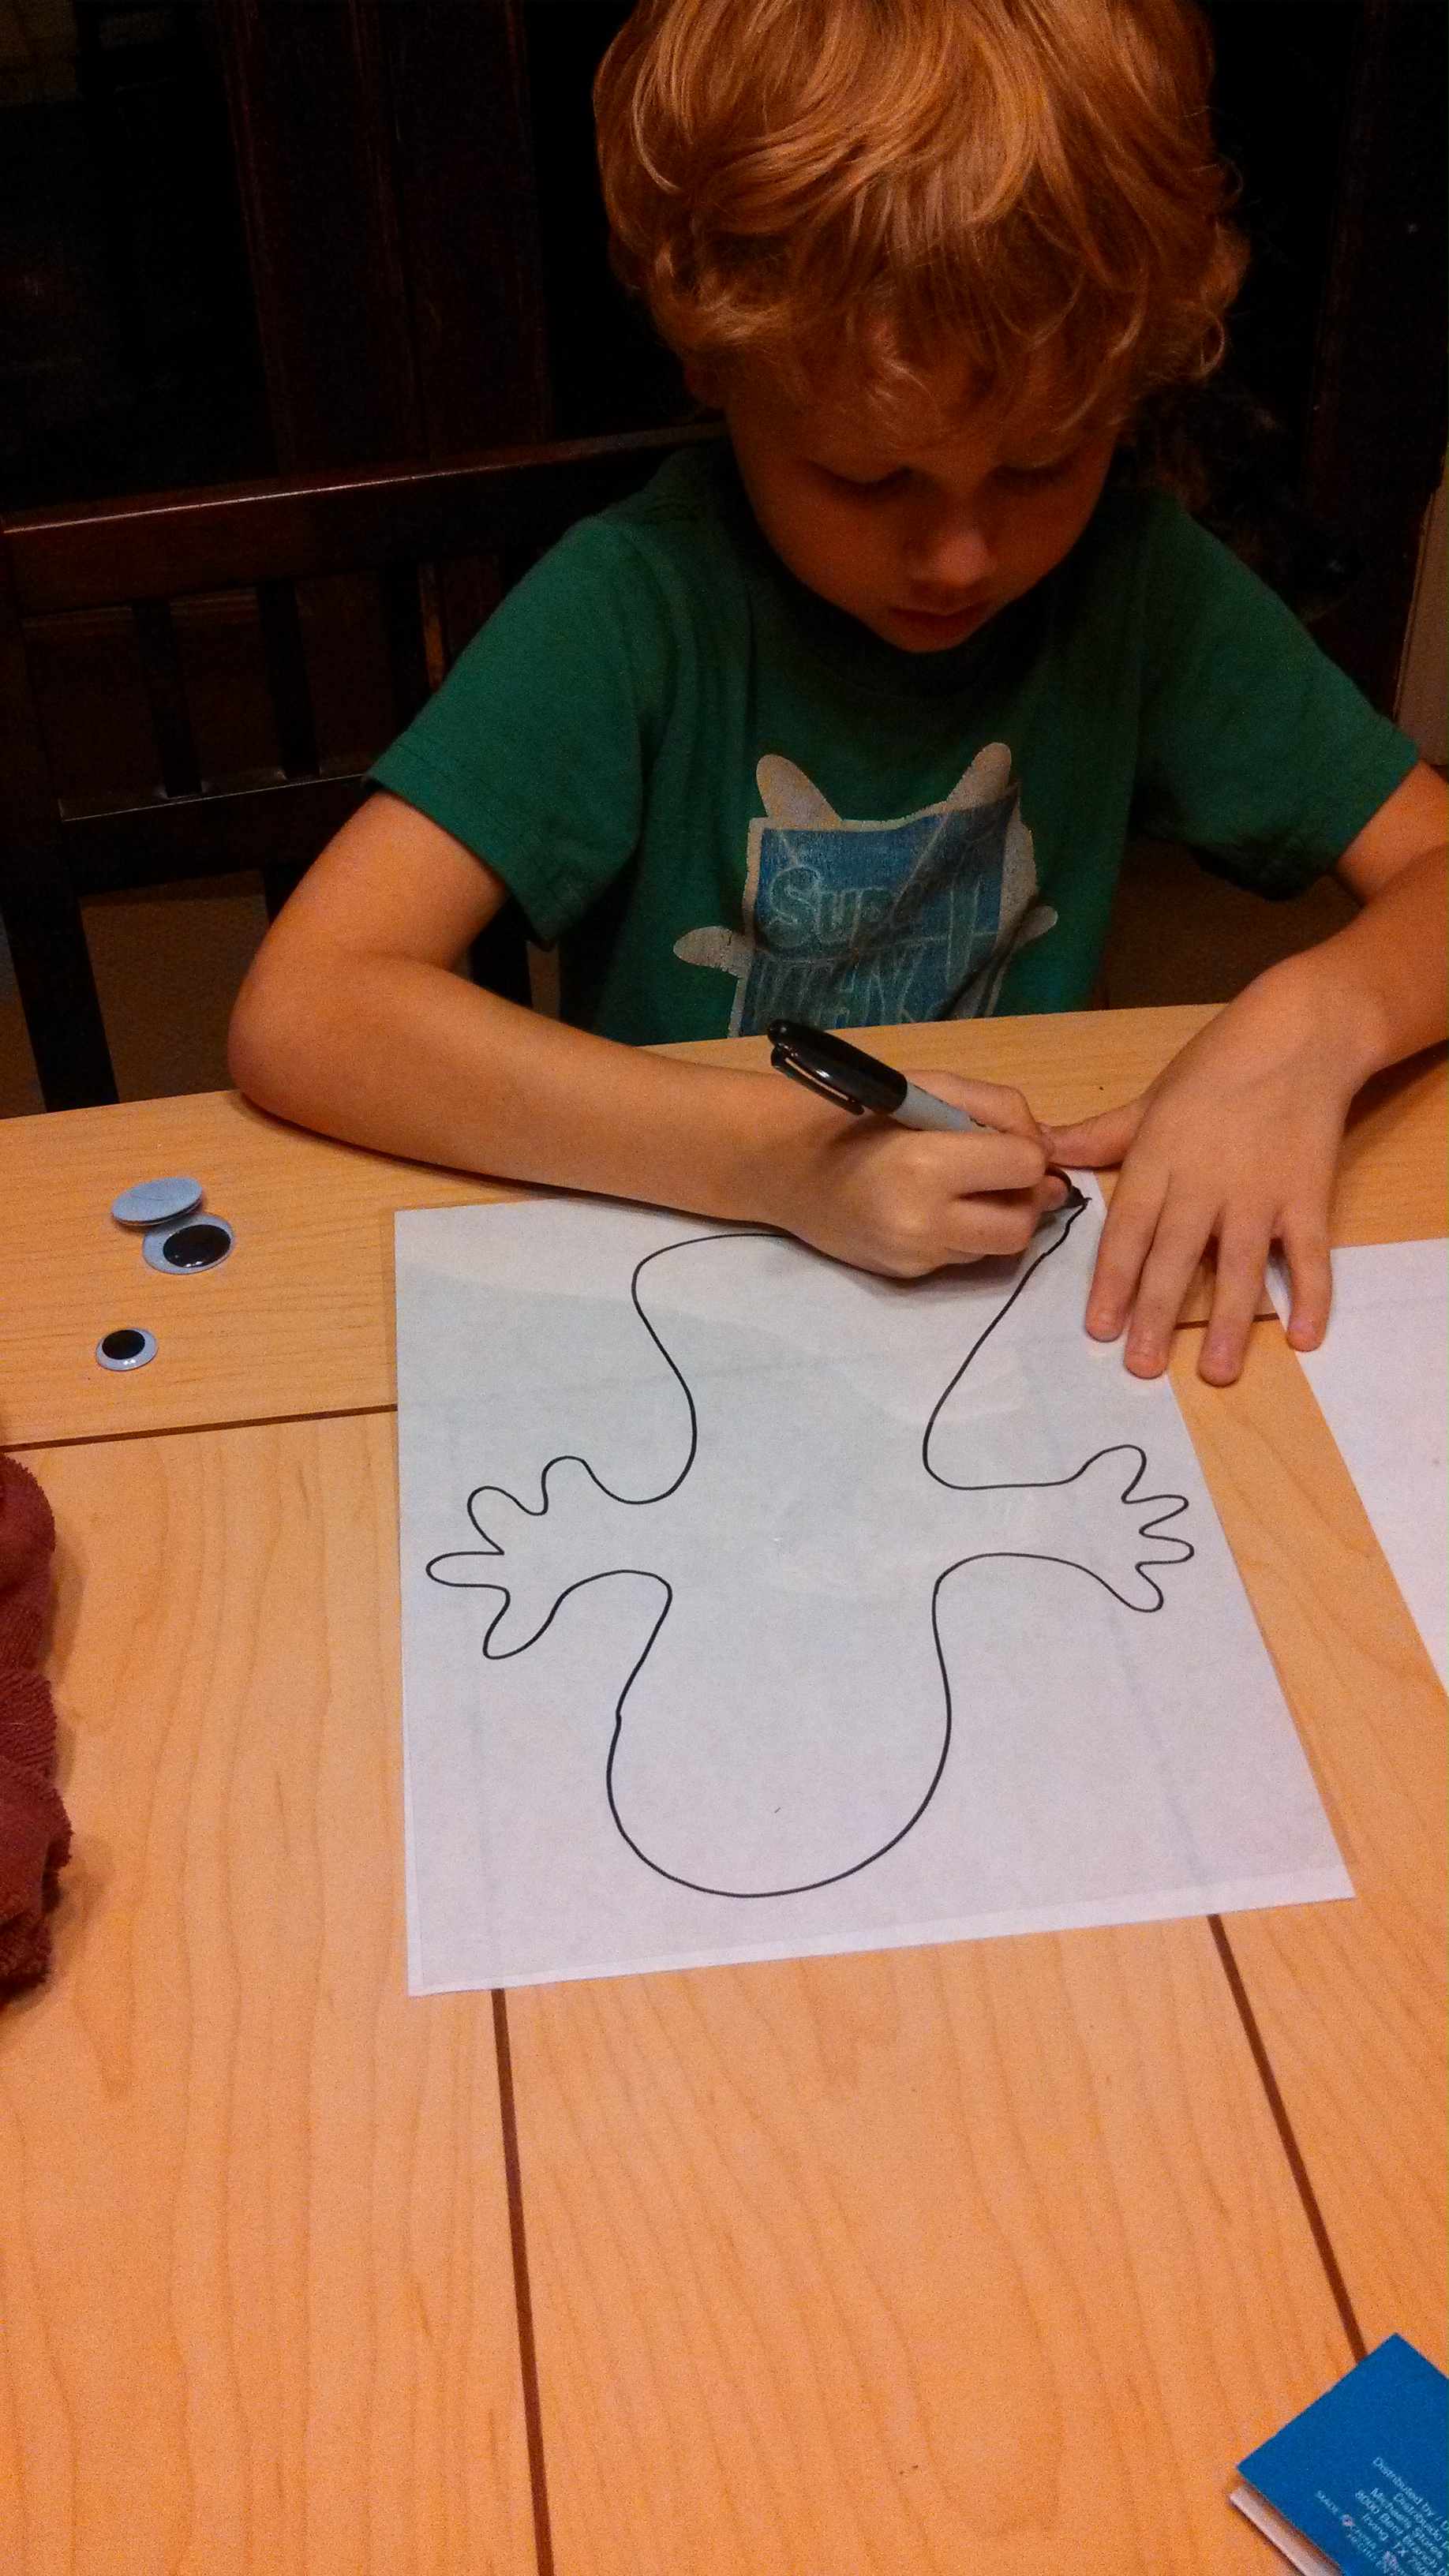
Step 1: Place a blank paper underneath your transparency (easier to see that you are not writing on your table with a permanent marker).
Step 2: Draw your picture onto your transparency using your permanent marker.
Tip: My 6-year-old had the genius idea to TRACE a picture. Look through a few coloring books or print a picture off the computer of a simple shape to trace.
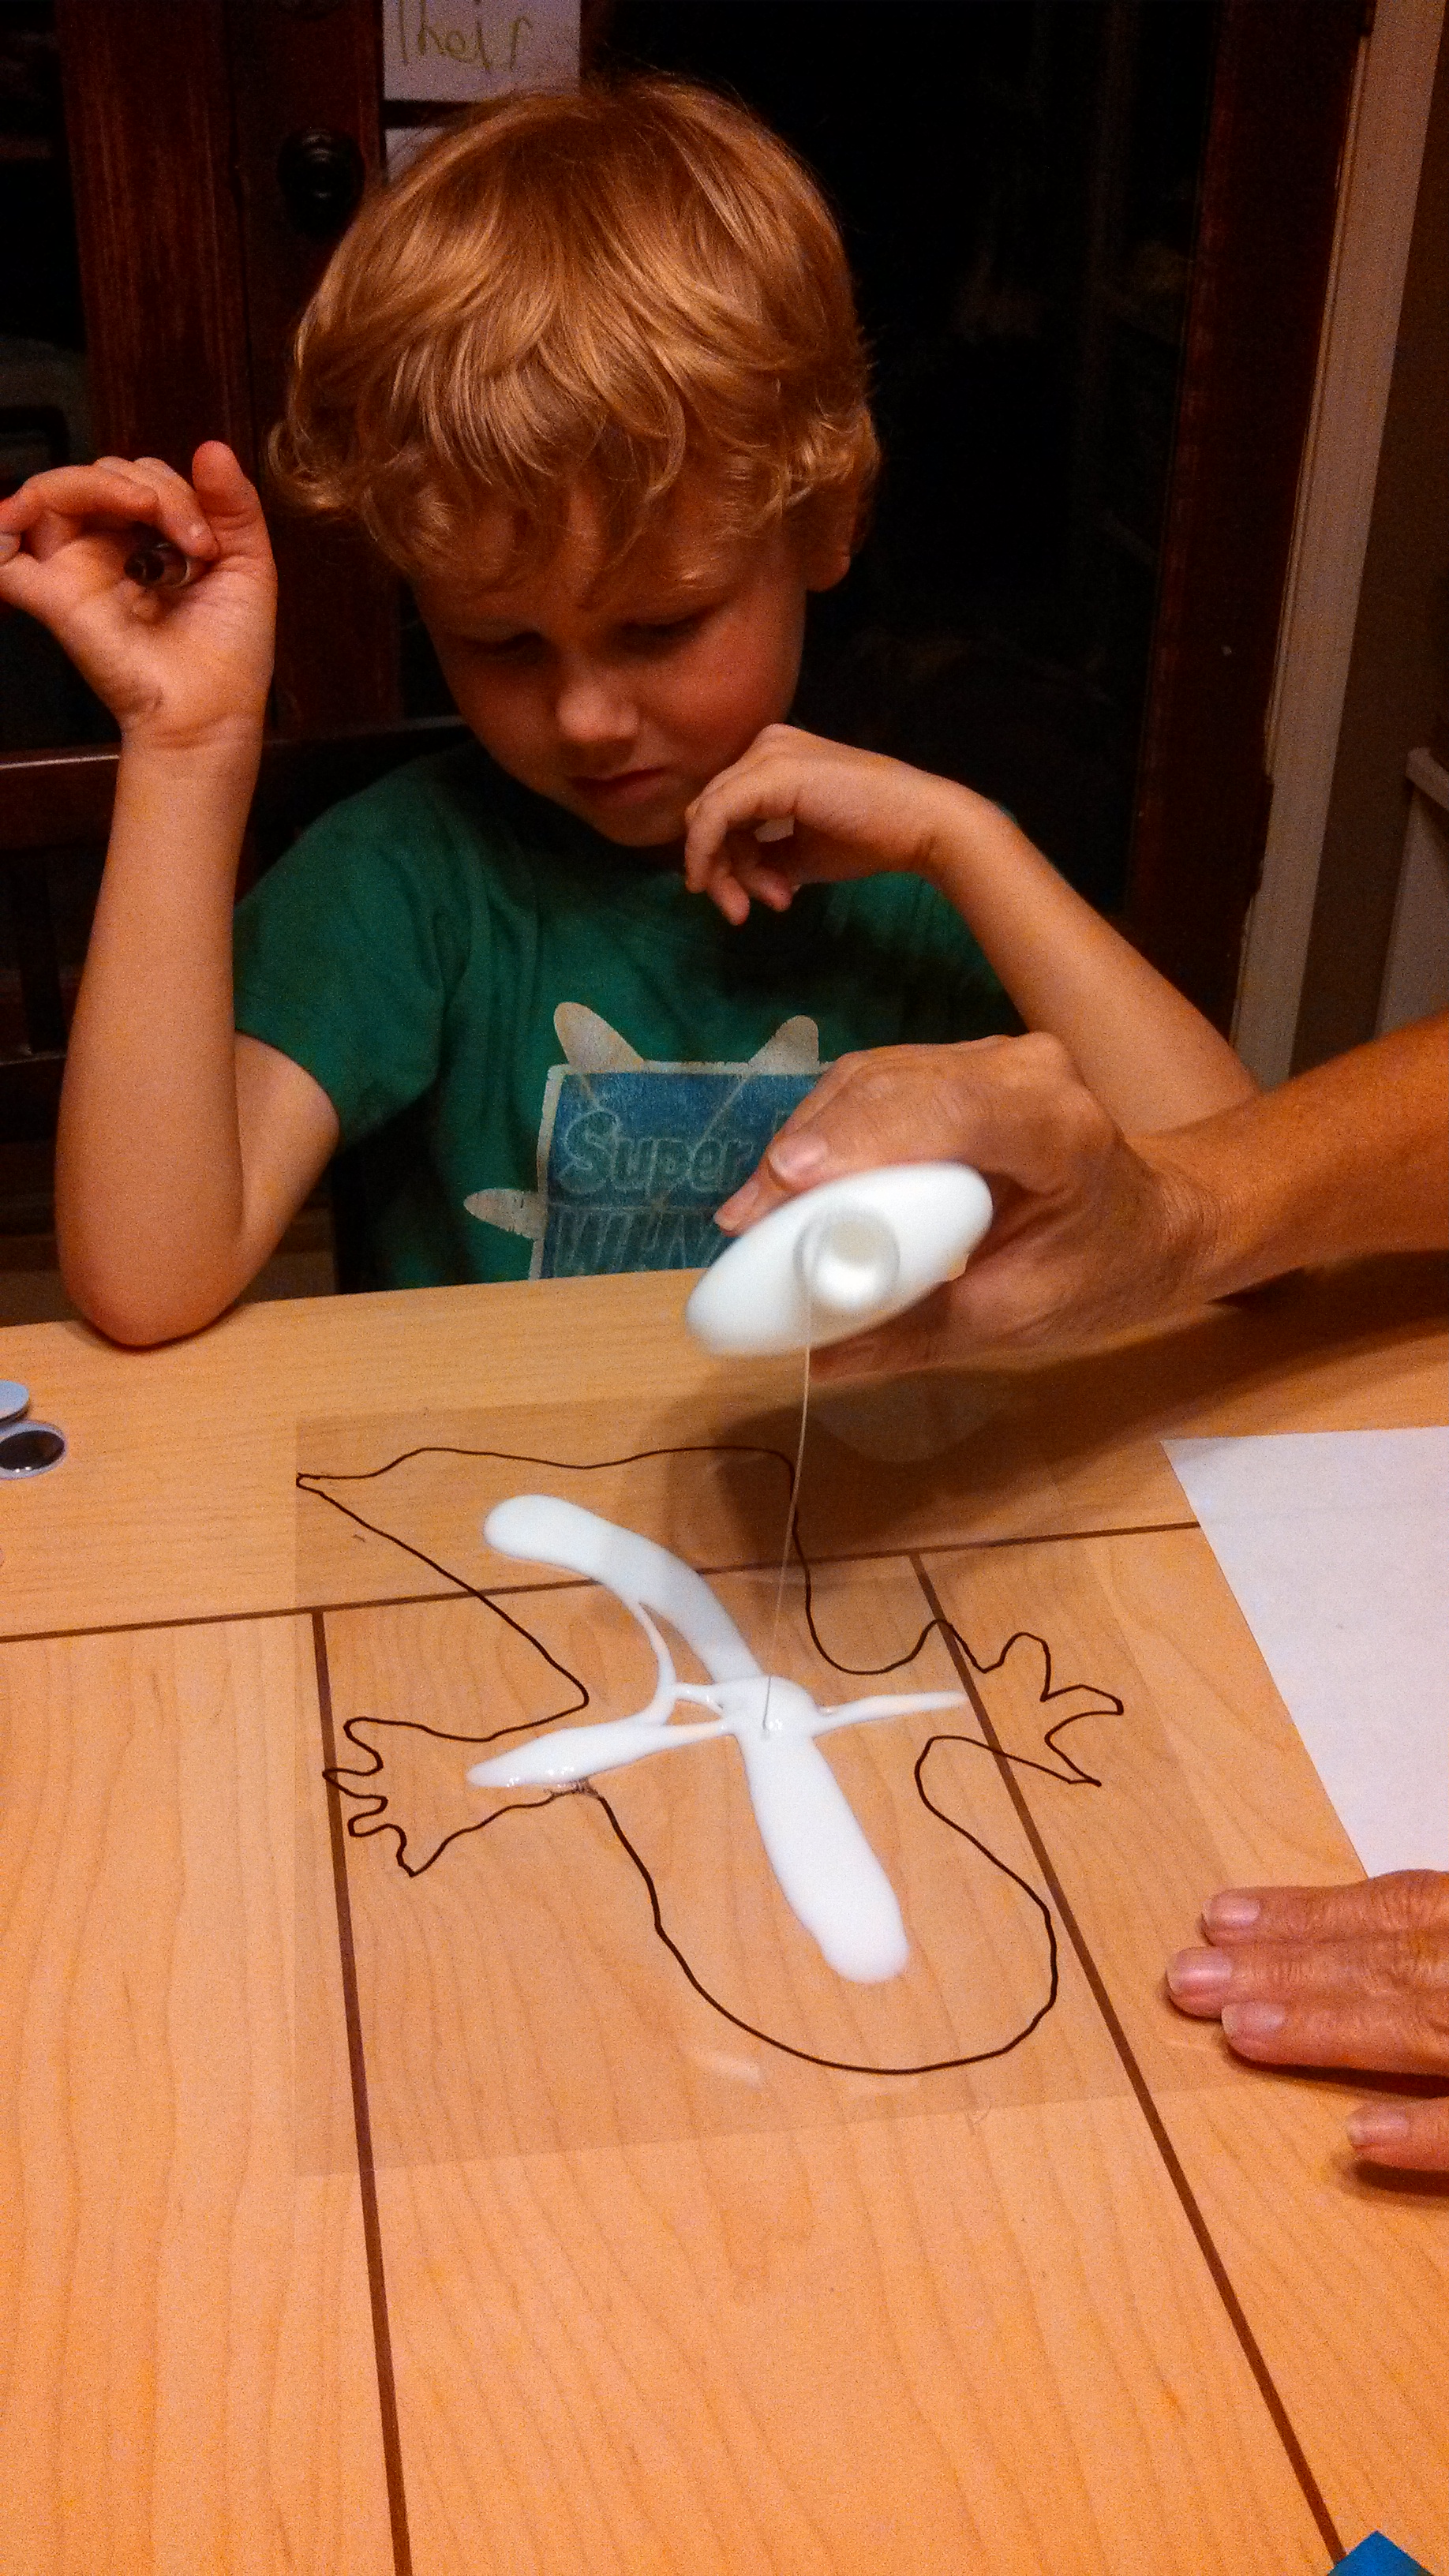
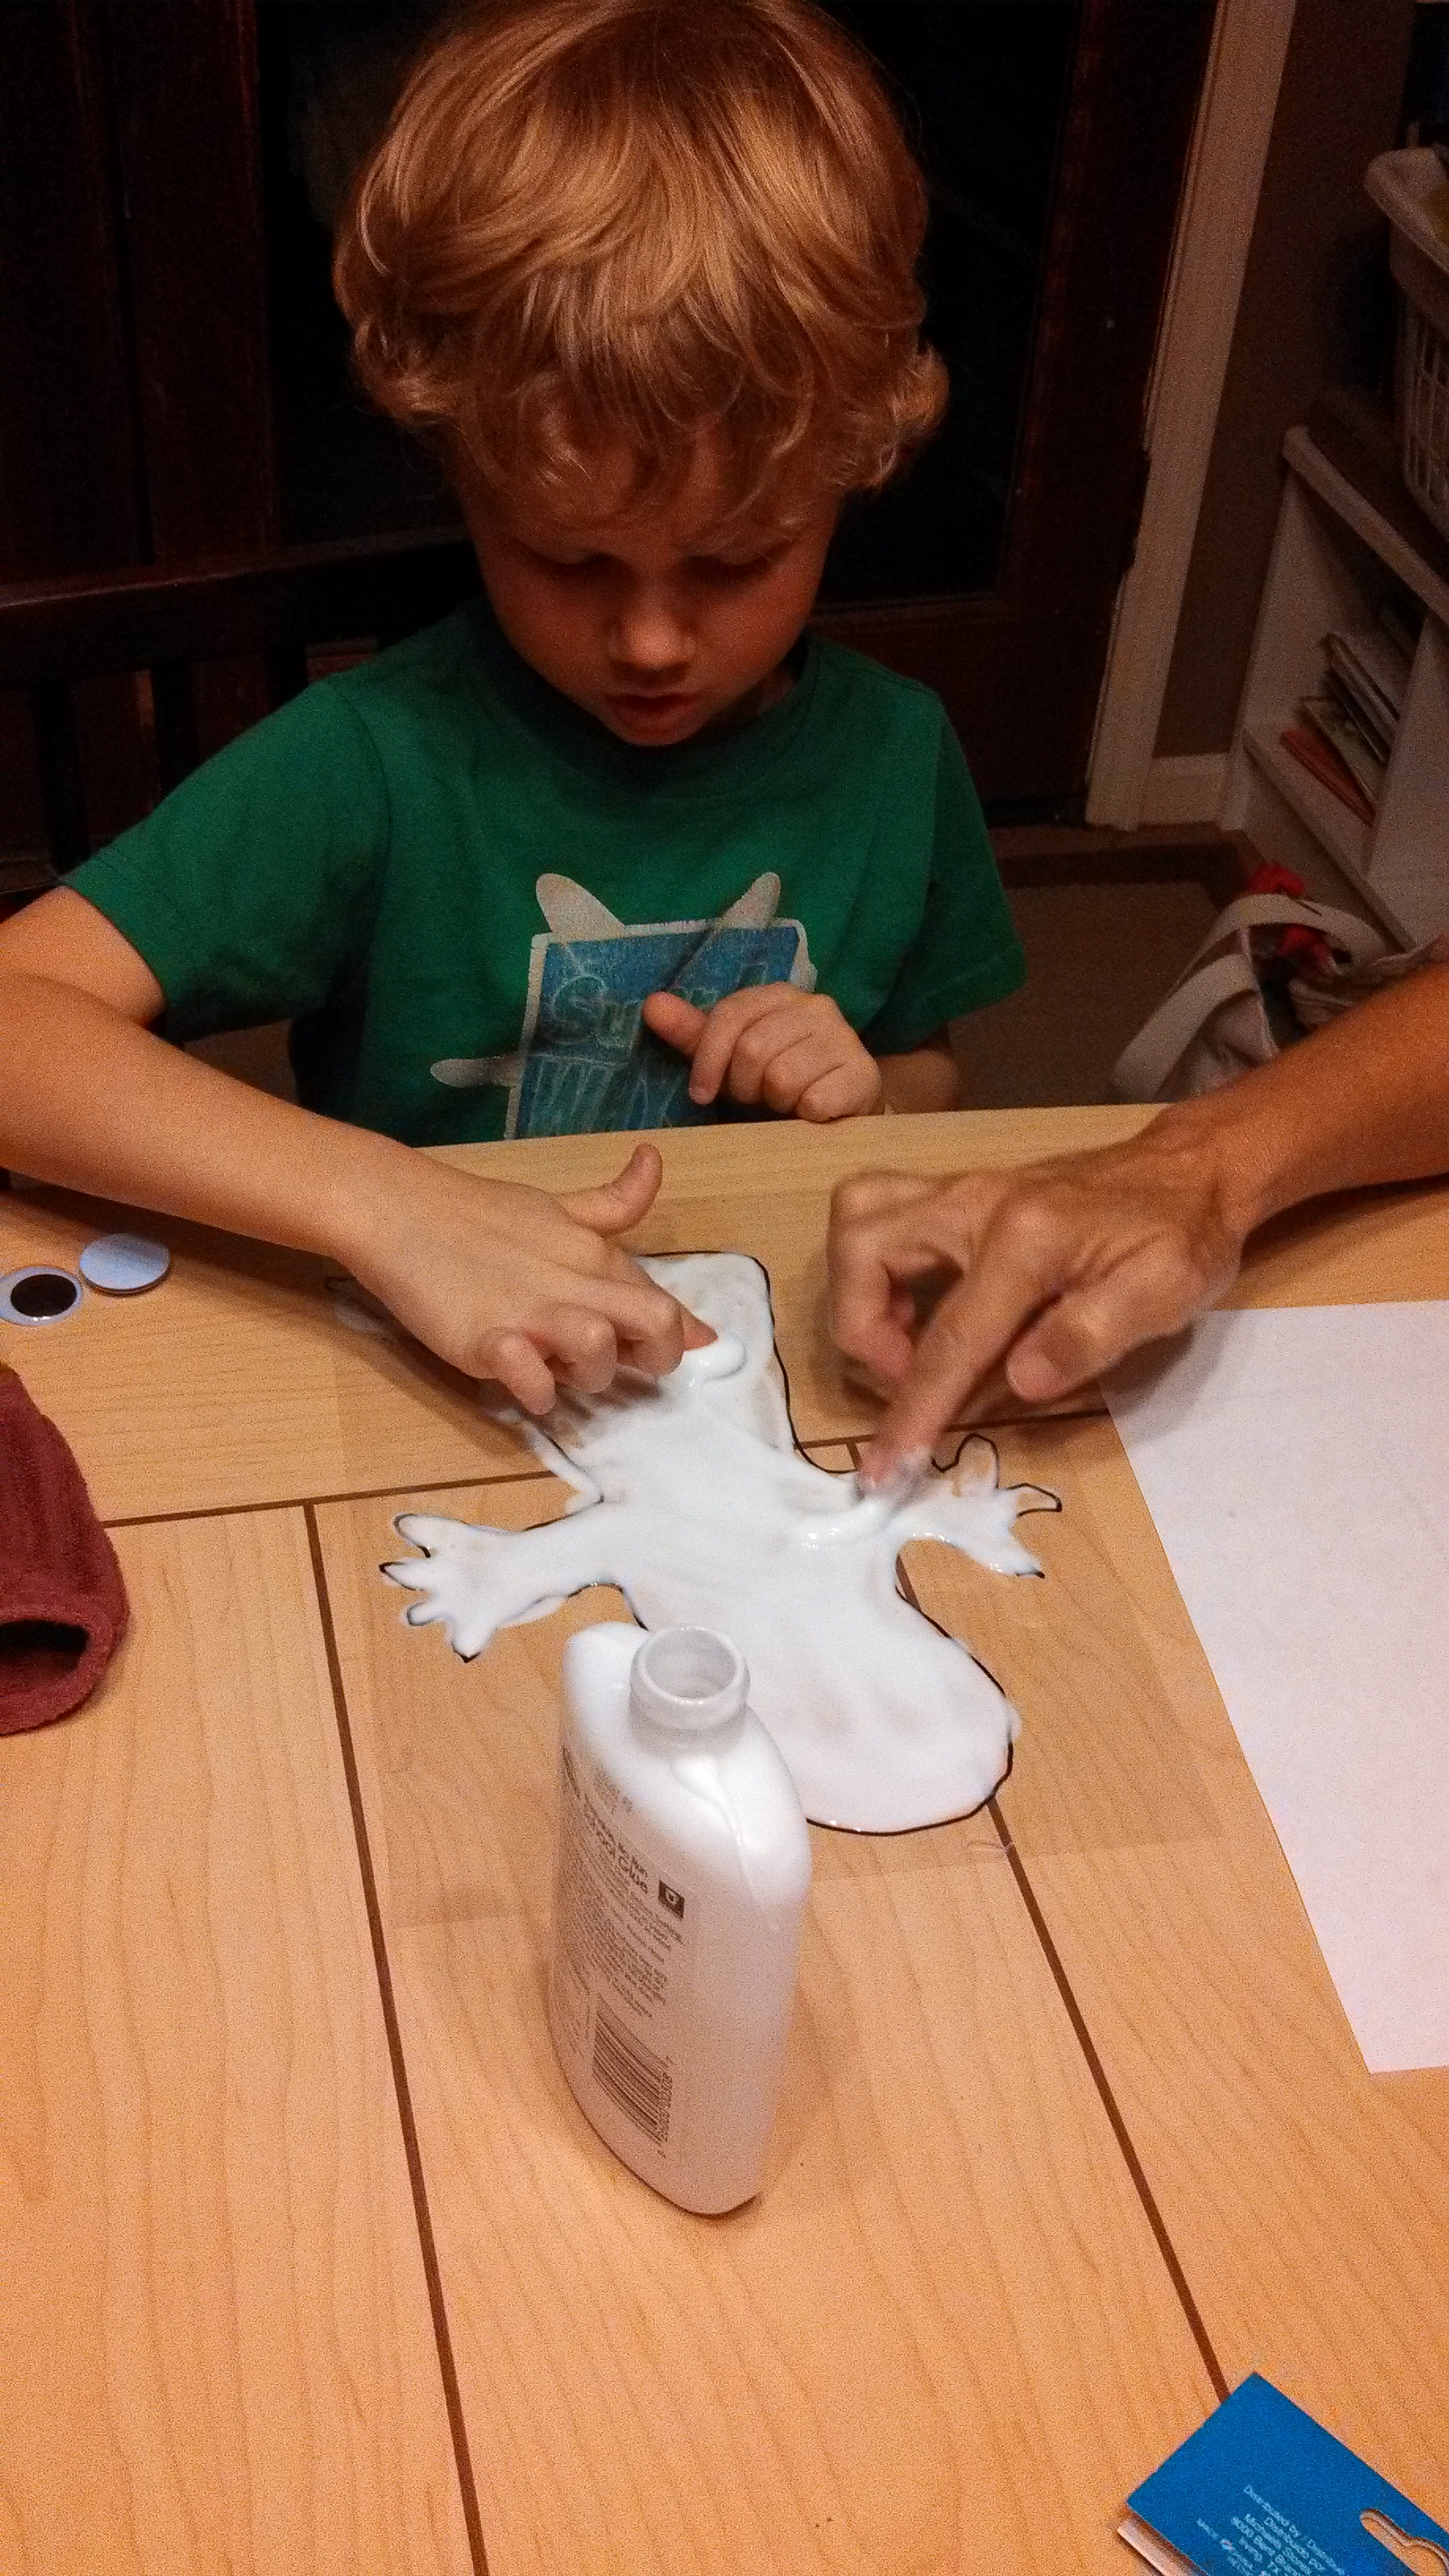
Step 3: Pour a whole lot of glue inside the outline of your picture and use your finger to “paint” the picture.* Make sure the glue is thick and even across your entire picture. It’s ok if the glue goes out of the lines, you can trim that off later.
Step 4: Place your transparencies on a flat surface to dry. You will be finishing your craft tomorrow. When all of your glue has turned from white to transparent, it is dry. (We let ours sit for about 24 hours).
Step 5: Using a small amount of glue, place googly eyes on your ghost. Wait for the glue to dry.
Step 6: Peel off and stick to your window or mirror! (Getting it started to peel off is the tricky part. Try bending the transparency while using your finger nail to lift it from the sheet. Then gently peel it off.)
Step 7: Use nail polish remover to erase the permanent marker from the transparencies and begin the craft all over again!
*To make COLOR decals, when doing Step 3, add a few drops of food coloring to your glue and mix together while you are spreading it. For our pumpkins, we added 4 drops of yellow to 1 drop of red in the glue and mixed it together to make orange.
Another option is to use fabric paints instead of glue, but 1. I love finger painting with glue, and 2. using glue is a cheaper alternative to fabric paint.
I would classify myself as a “clean as you go” mom. I am NOT a clean freak but I do like a tidy house.
I play with my kids and I pick up after my kids (admittedly) a lot.
With three under three, tidying up after my little tornadoes is an ongoing discipline. But as I approach the ages of chore-chart readiness I wanted to give my little ones a bit of familiarity with the responsibilities they can handle, and those that are age-appropriate.
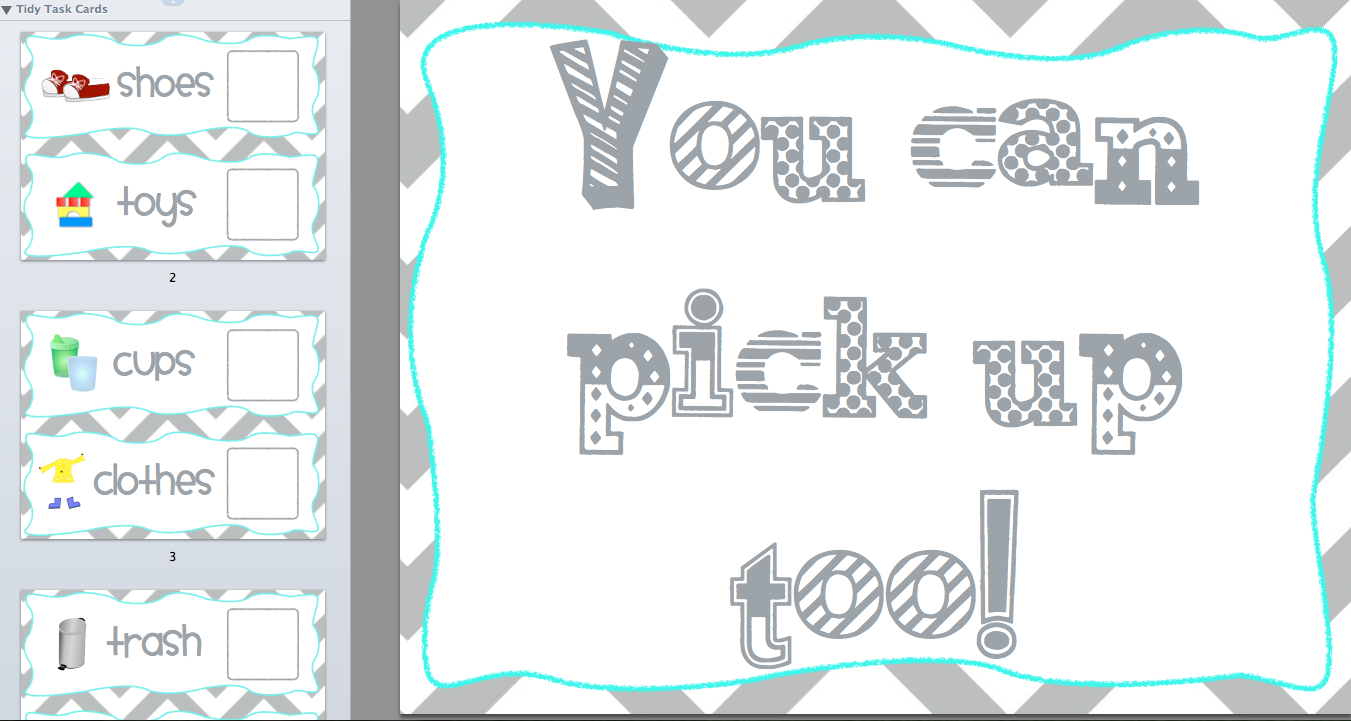
So, I made a simple checklist of the things that I would like them to be responsible for…. to pick up:
Shoes (We have a shoe basket)
Toys (Toy Chest)
Cups (Sink)
Clothes (Hamper)
Trash (Can)
Books (Book Bin)
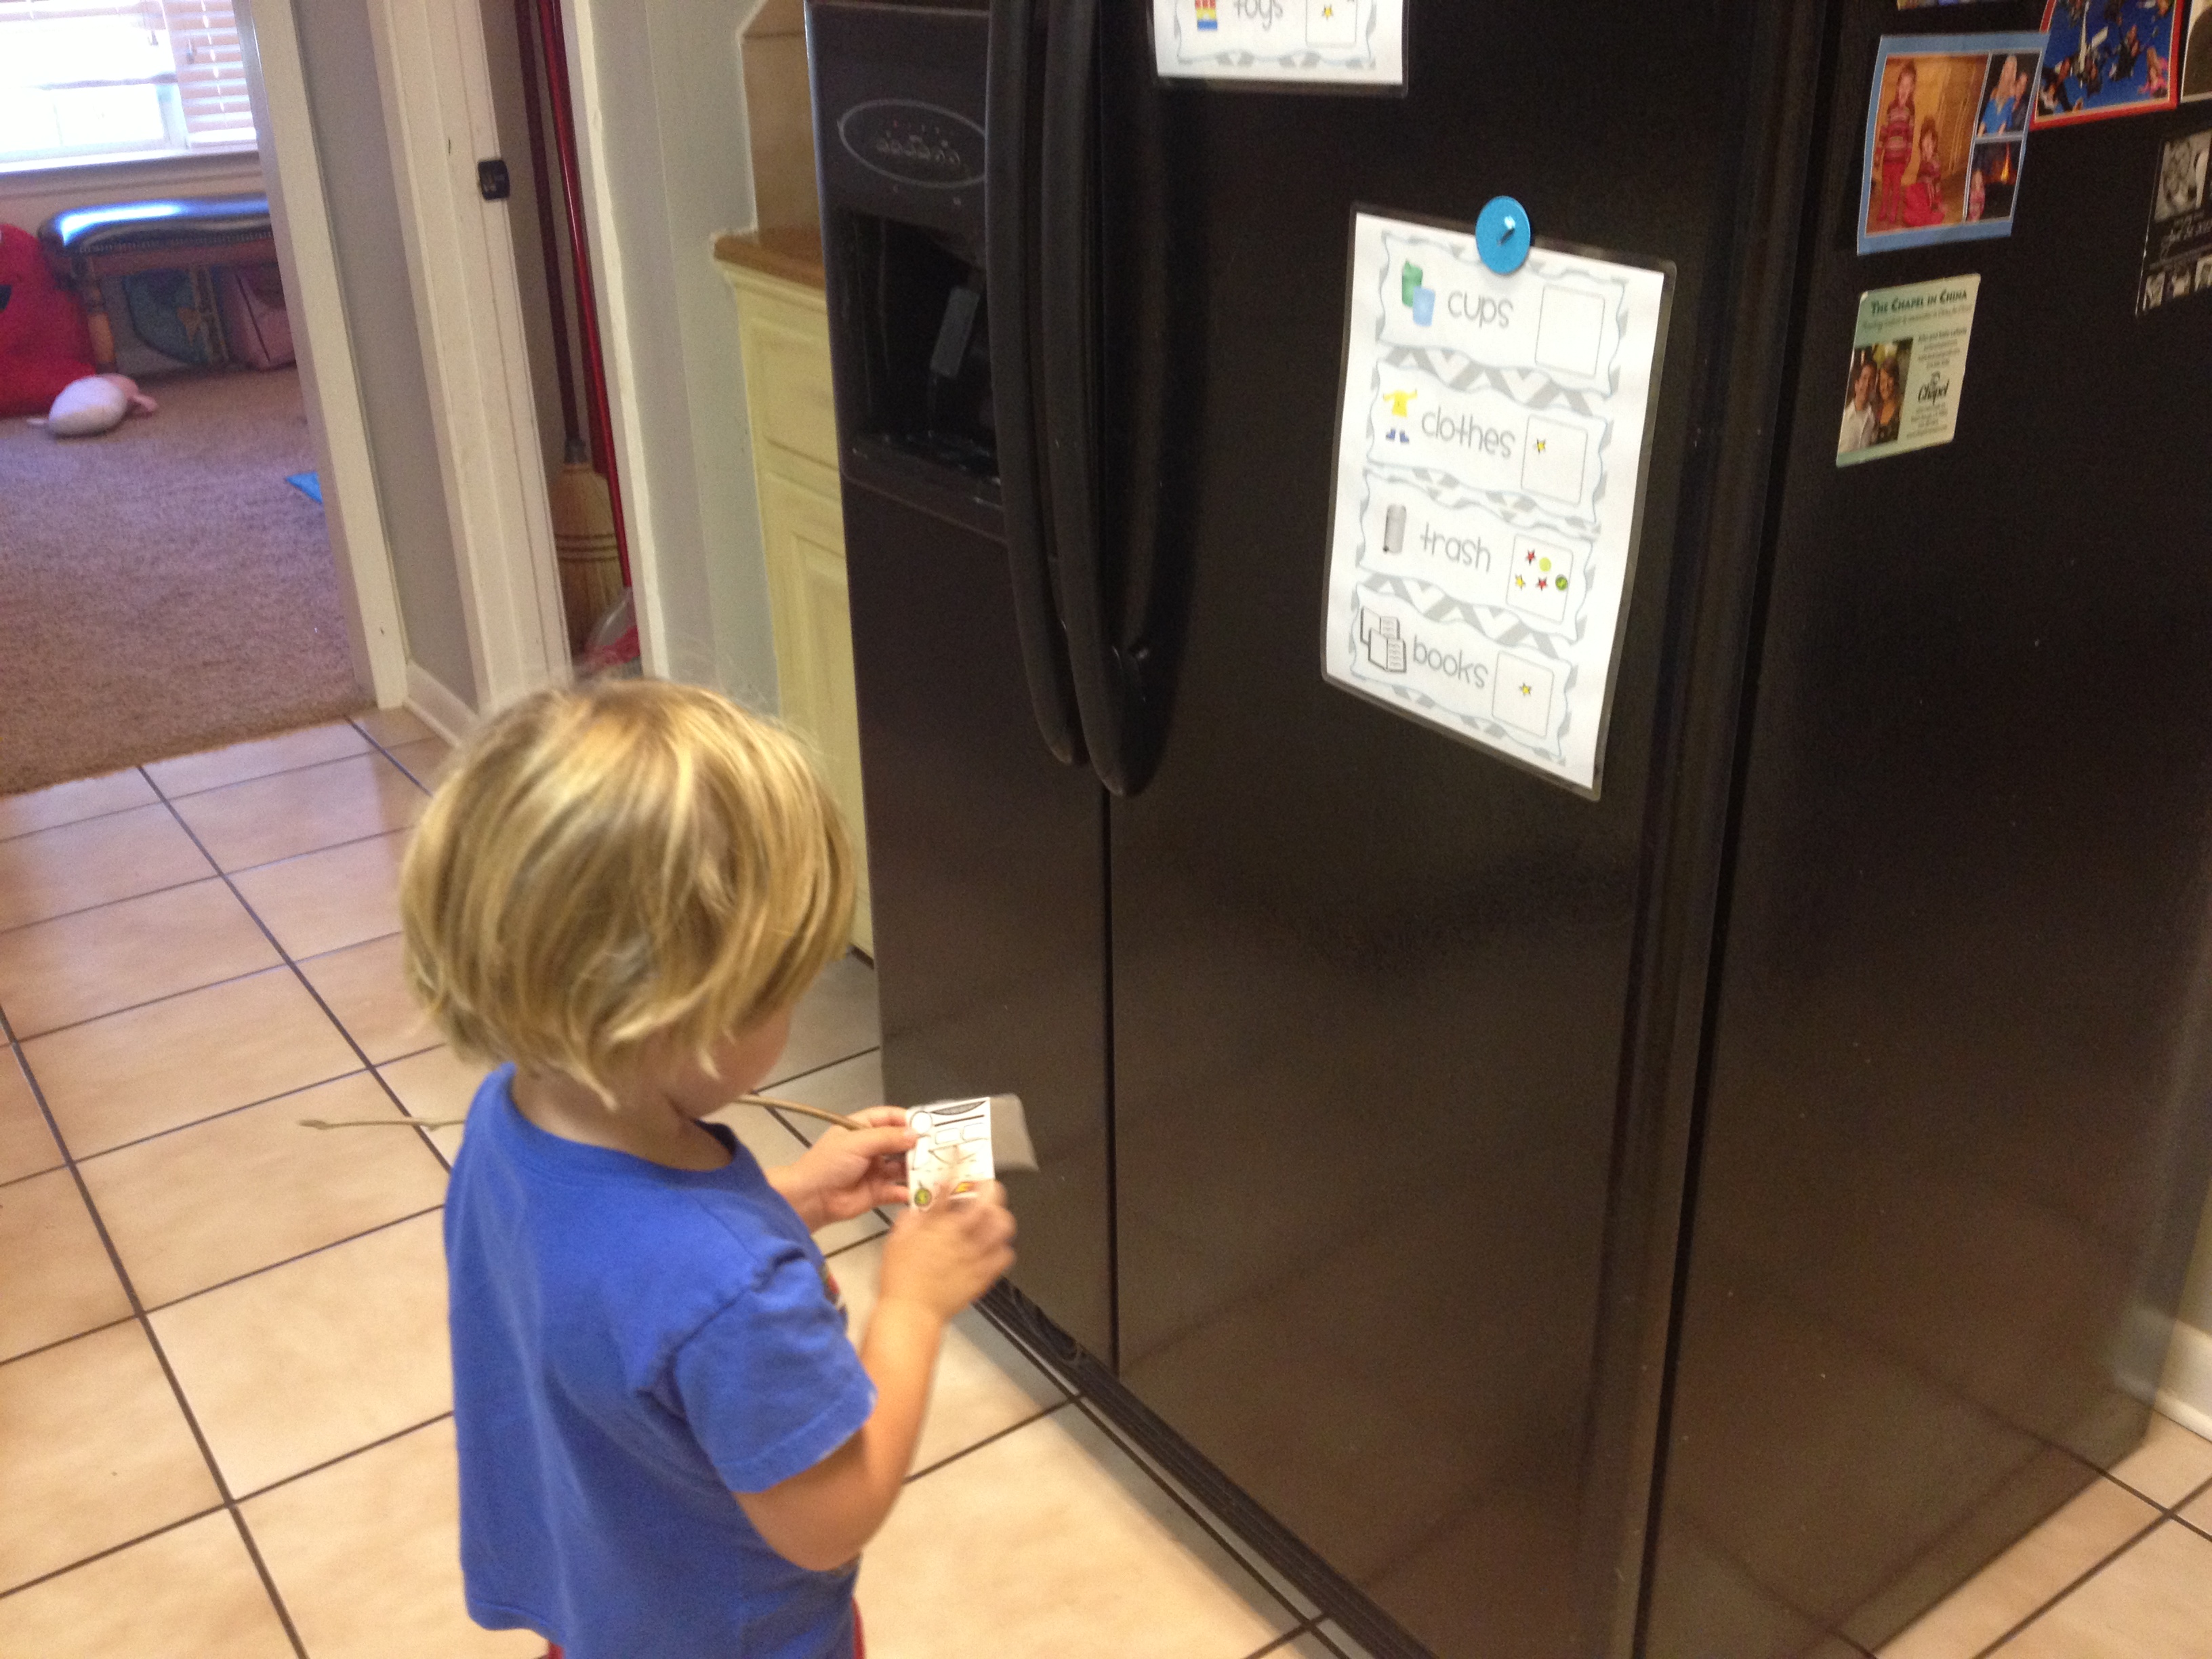
I printed my checklist two per page and then laminated it (I have an affordable self-laminator from Walmart) and put this on our fridge with a square of small stickers held by a magnet nearby.
I introduced this checklist by saying that from now on when we are responsible and pick up after ourselves we get a sticker for each thing we pick up. Then we picked up one of each item and put it where it goes, getting a sticker for each one.
Letting him take the sticker off helps develop his fine motor skills!
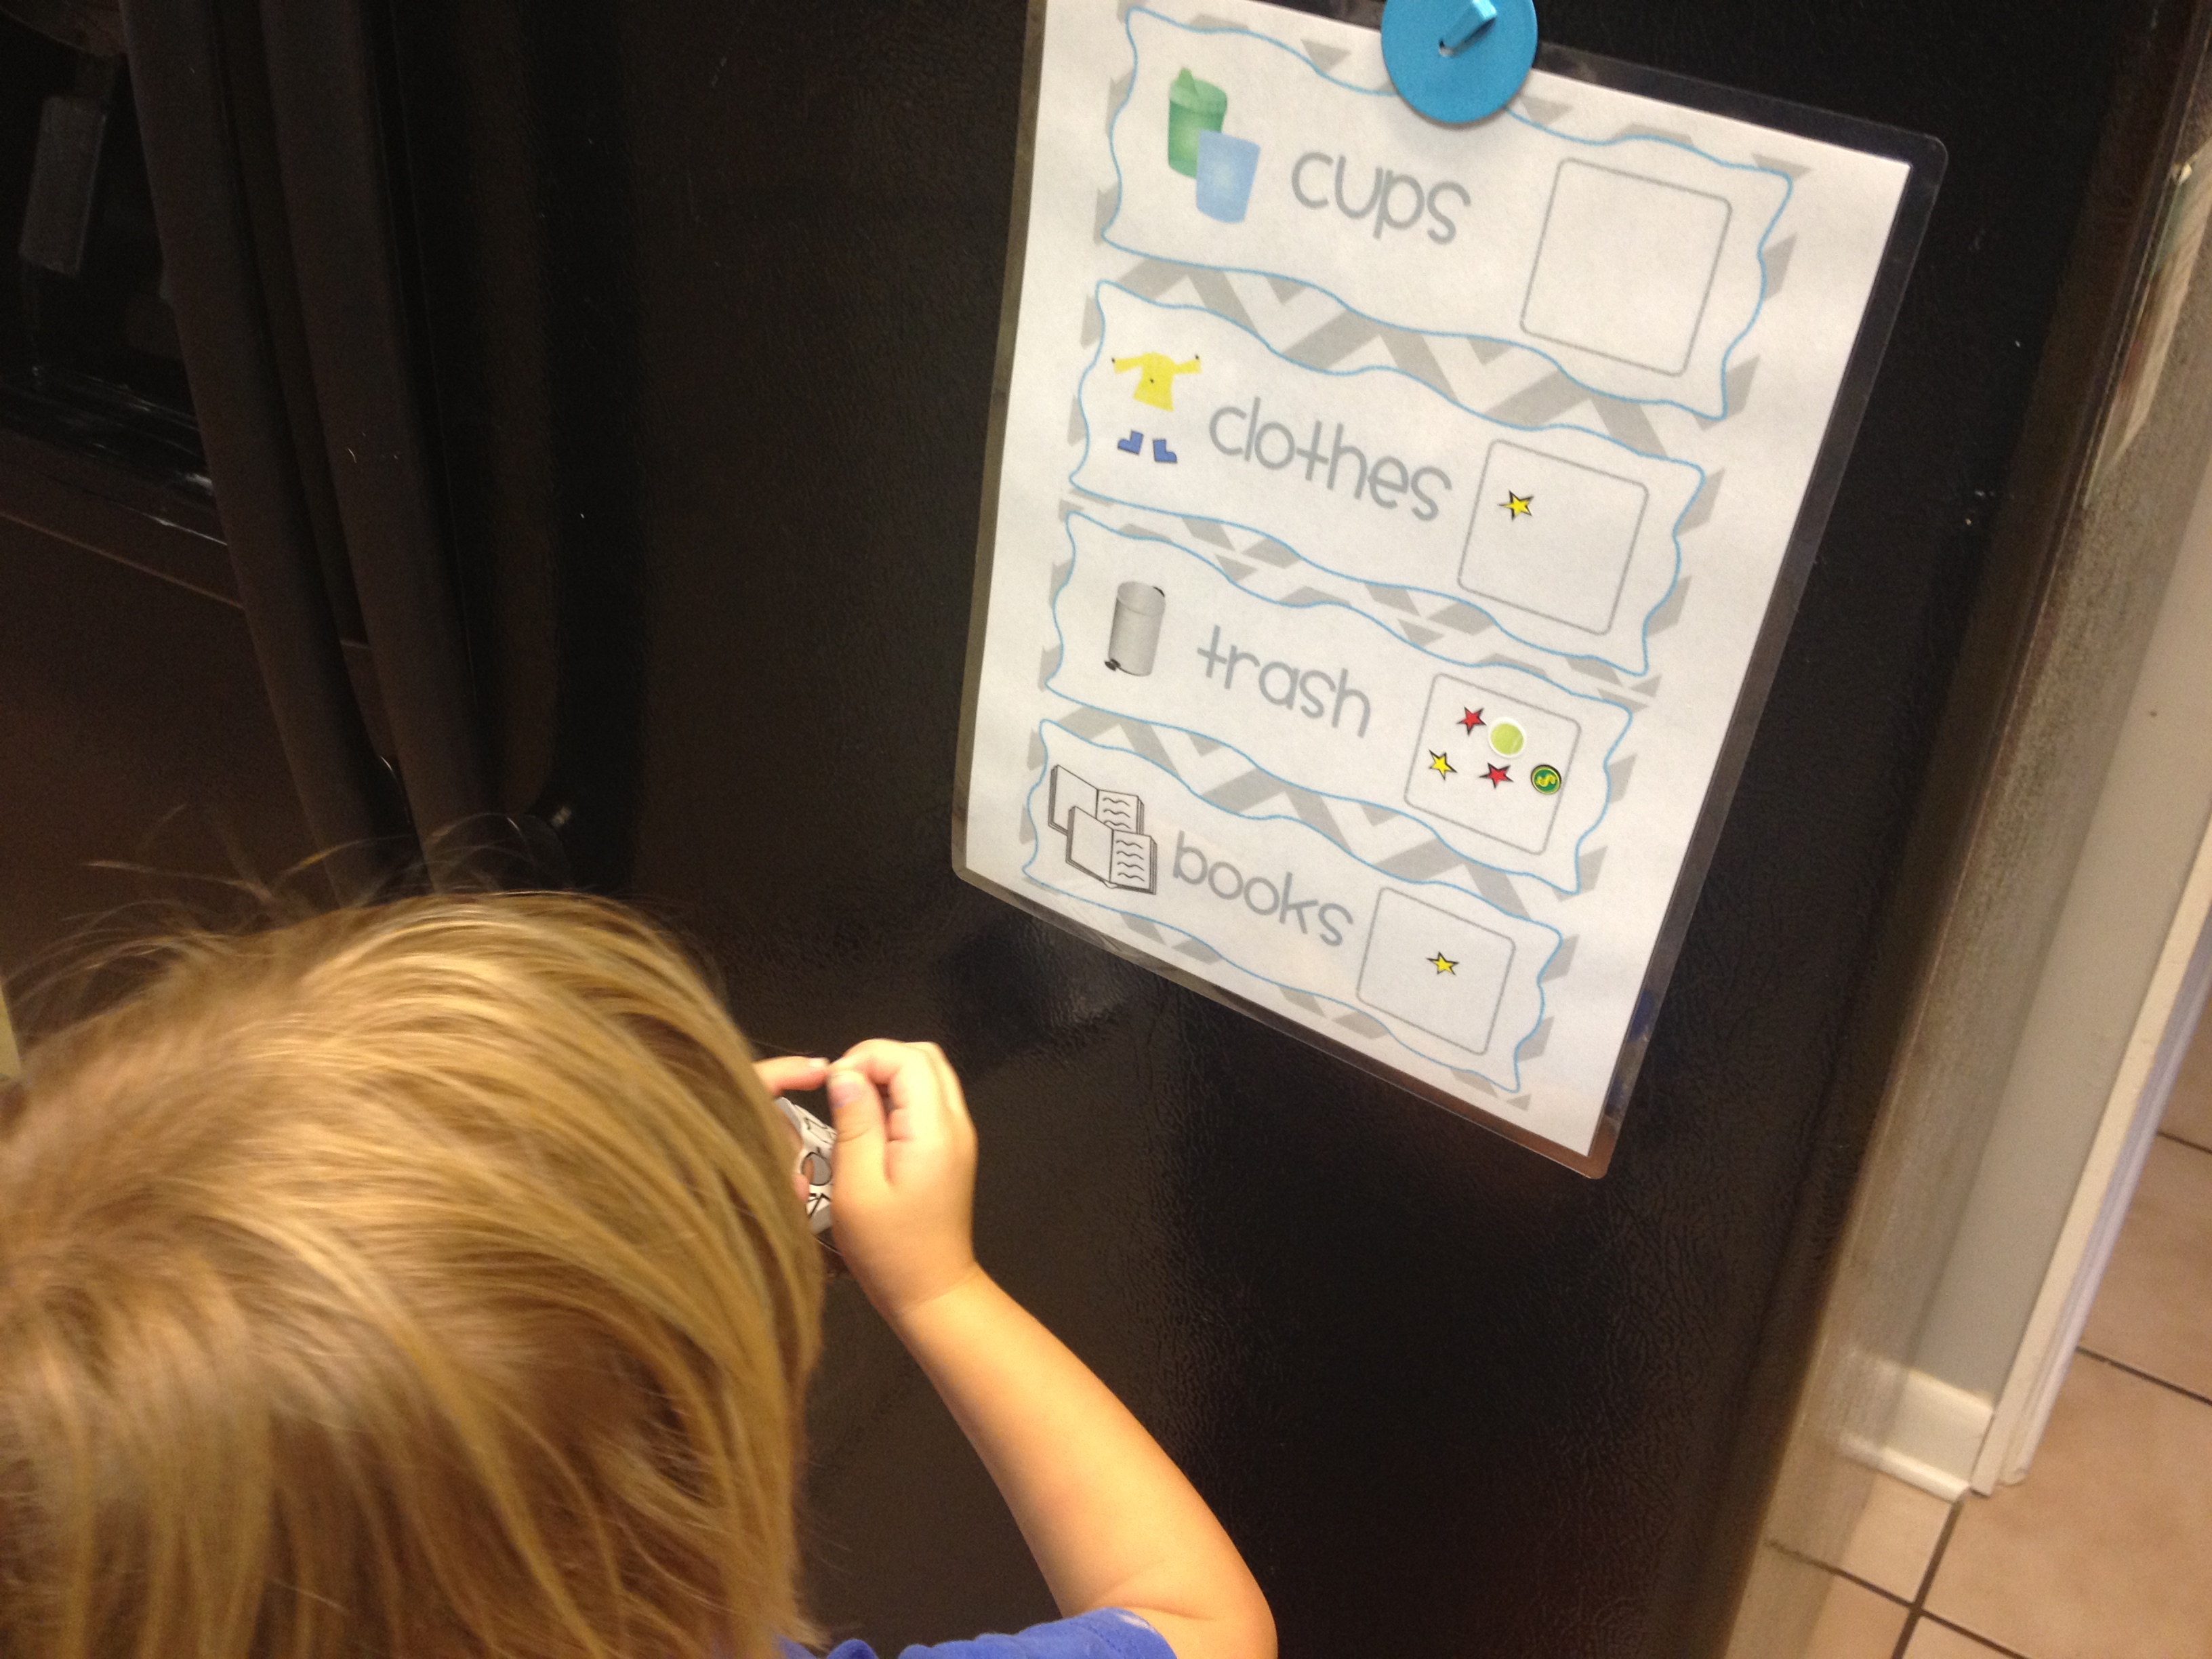
Now every time my kids pick up and put away something I give them a sticker to put in the box beside the chore. I give my kids stickers now even if I encourage them to clean by singing or ringing a bell… not just if I “catch” them cleaning, but if they do it without me asking I give them two.
Every time my kids put a sticker up, I say “Oooh we are going to fill up all the boxes and we will be able to see how hard we work.” This week our “trash” box is getting full so I asked Sean Patrick what he thinks we pick up the MOST of and what we needed to pick up MORE of so that I can keep him familiar with important math terms.
I am not giving him some big reward for filling up the boxes at this time because I want to get him accustomed to working hard because it pleases God not just to get the incentive. 🙂
Enter your e-mail in the sidebar to get this printable FOR FREE!
[Click HERE to become a member for just $5.00 and get unlimited access to ALL The Mommy Teacher Printables including this one!
OR CLICK HERE to see it in my TeachersPayTeachers Store.
This is a Mommy Teacher Spotlight from a friend that works out at the same gym as me… that will be no surprise to you after you see what she is all about.
The following post is from Niki (whose information to link up to her site is at the bottom of this post… so check it out!):
Niki writes “It was a 4:30AM kind of morning. I was pulling out of my driveway to see an early client. My crazy neighbor was at it again. Running up and down the street. Back and forth. The monotony of it practically put me back to bed. I wondered why on earth she ran back and forth. We lived a quarter mile from the cities running hot-spot. A beautiful 3 mile loop around the university lake. It made no sense and the absurdity of her routine drove me bonkers. Years past and every morning I gave her a we’re-up-too-early wave of camaraderie, followed by a you’re-more-nuts-than-me look.
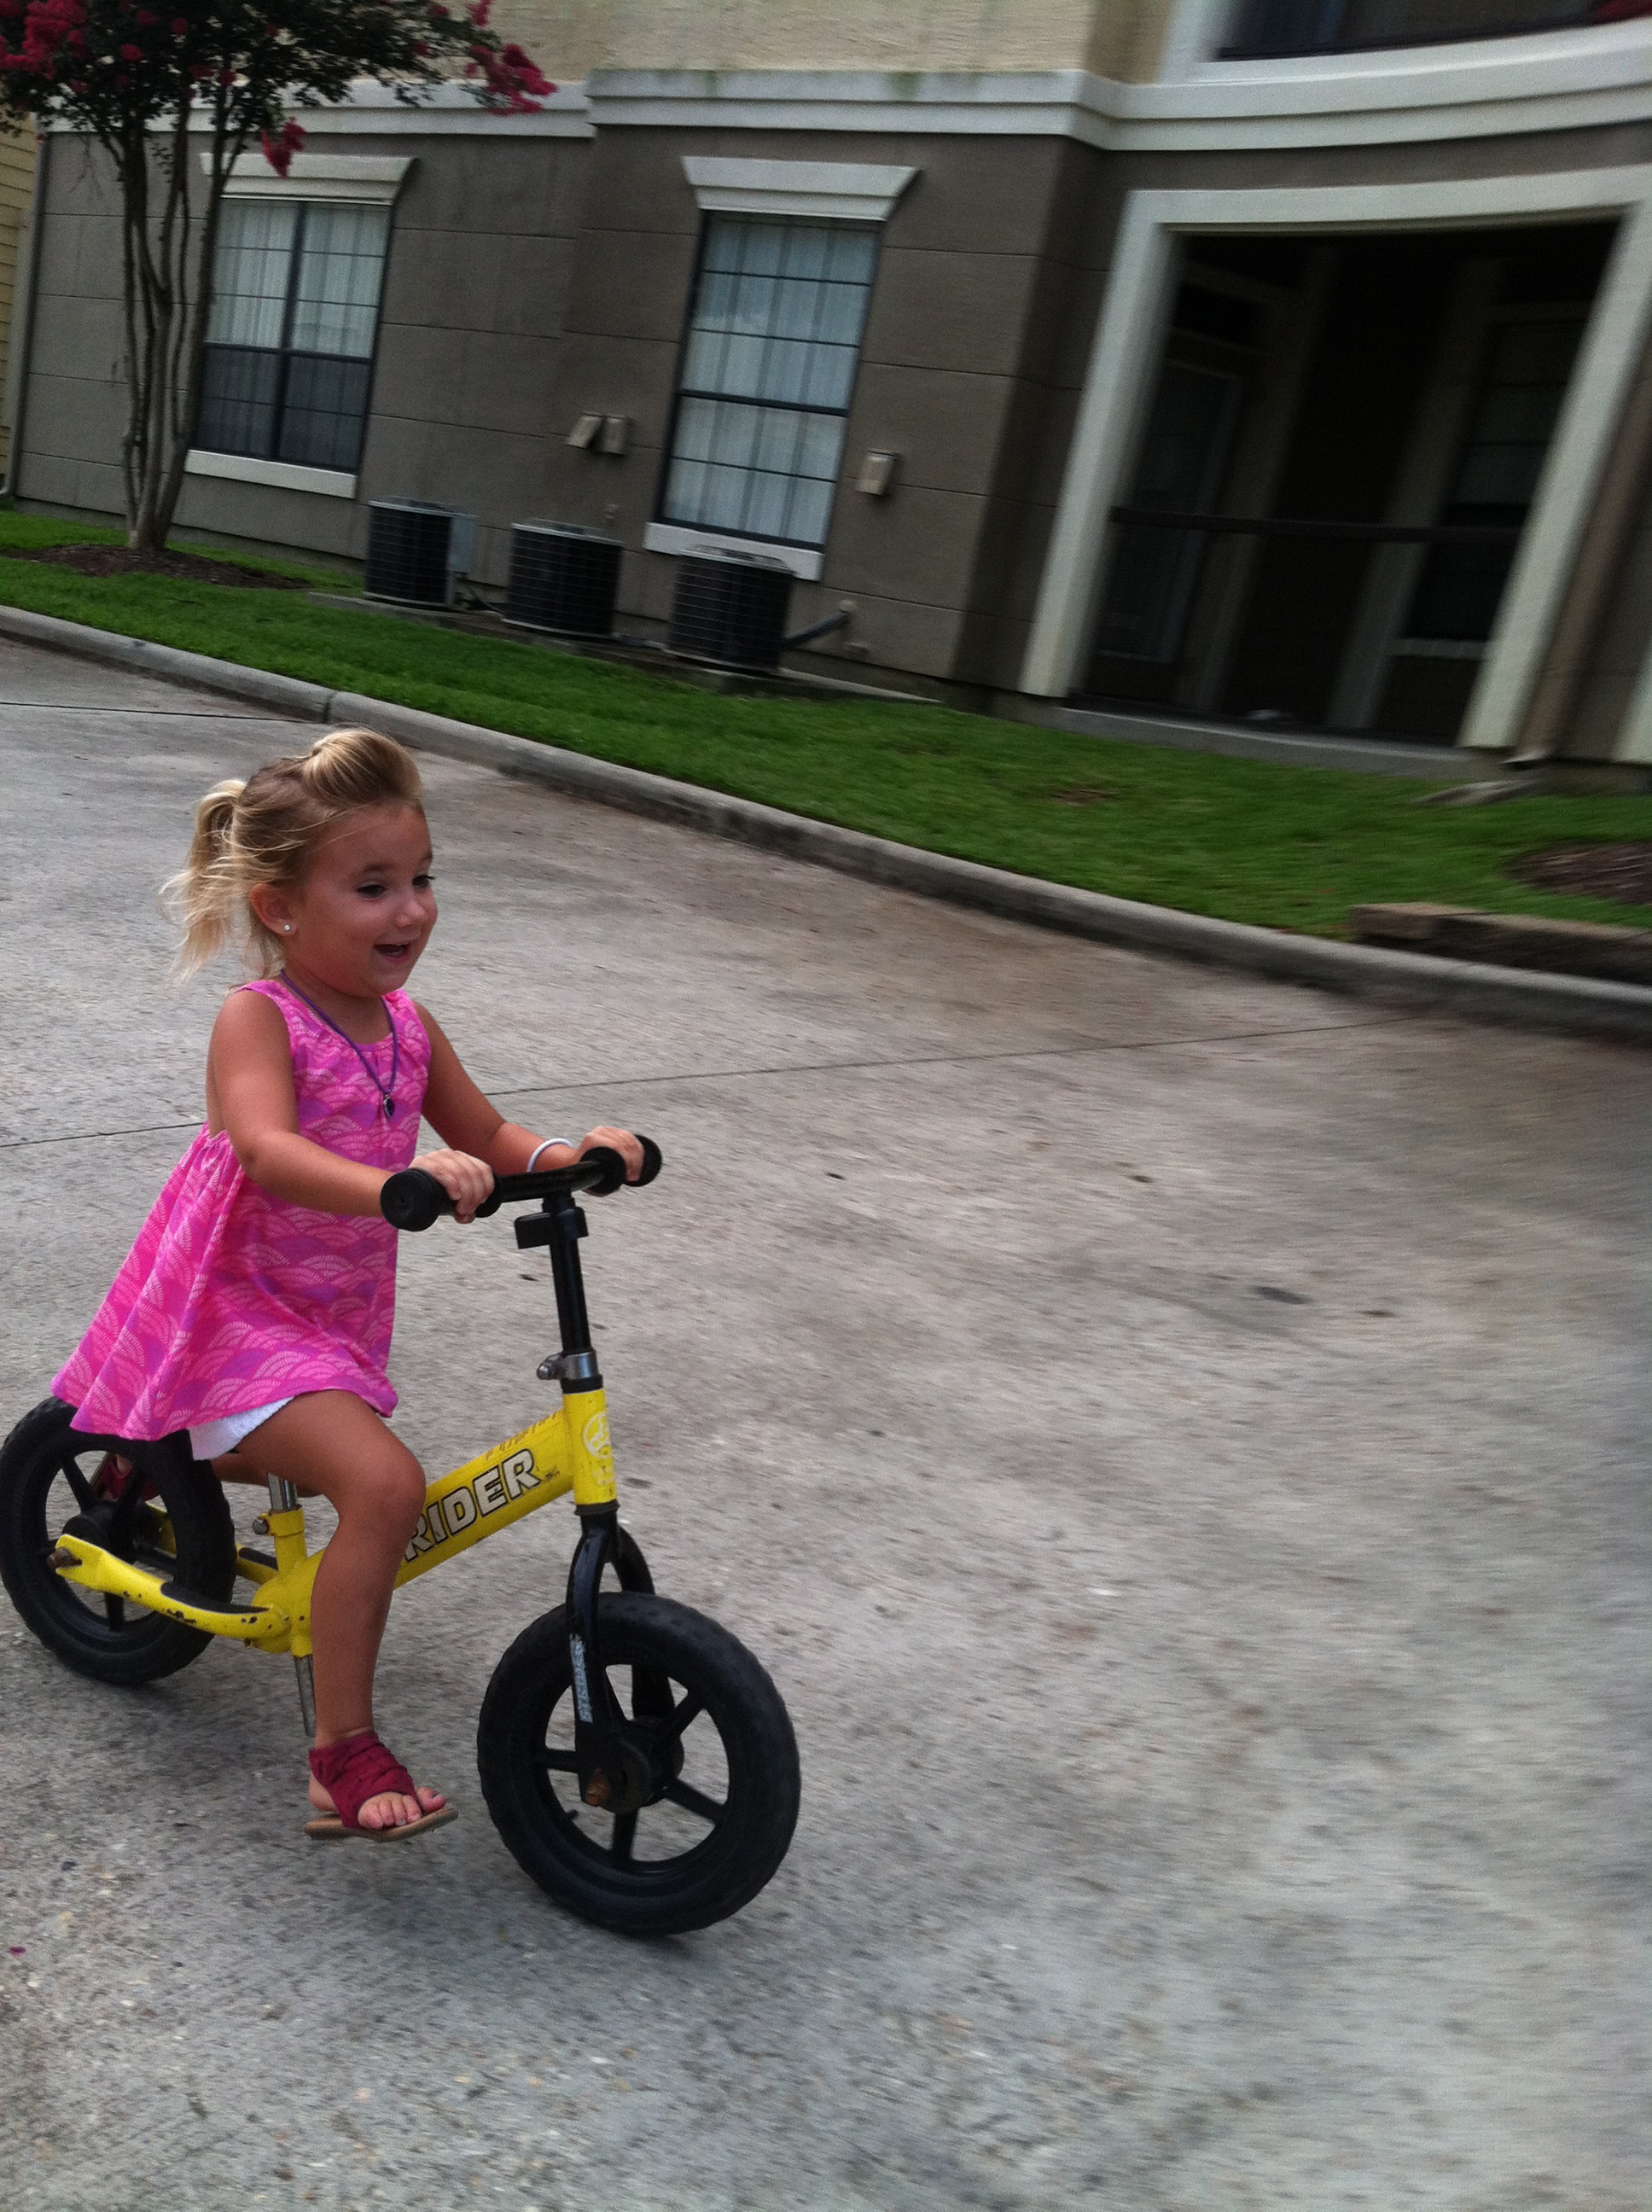
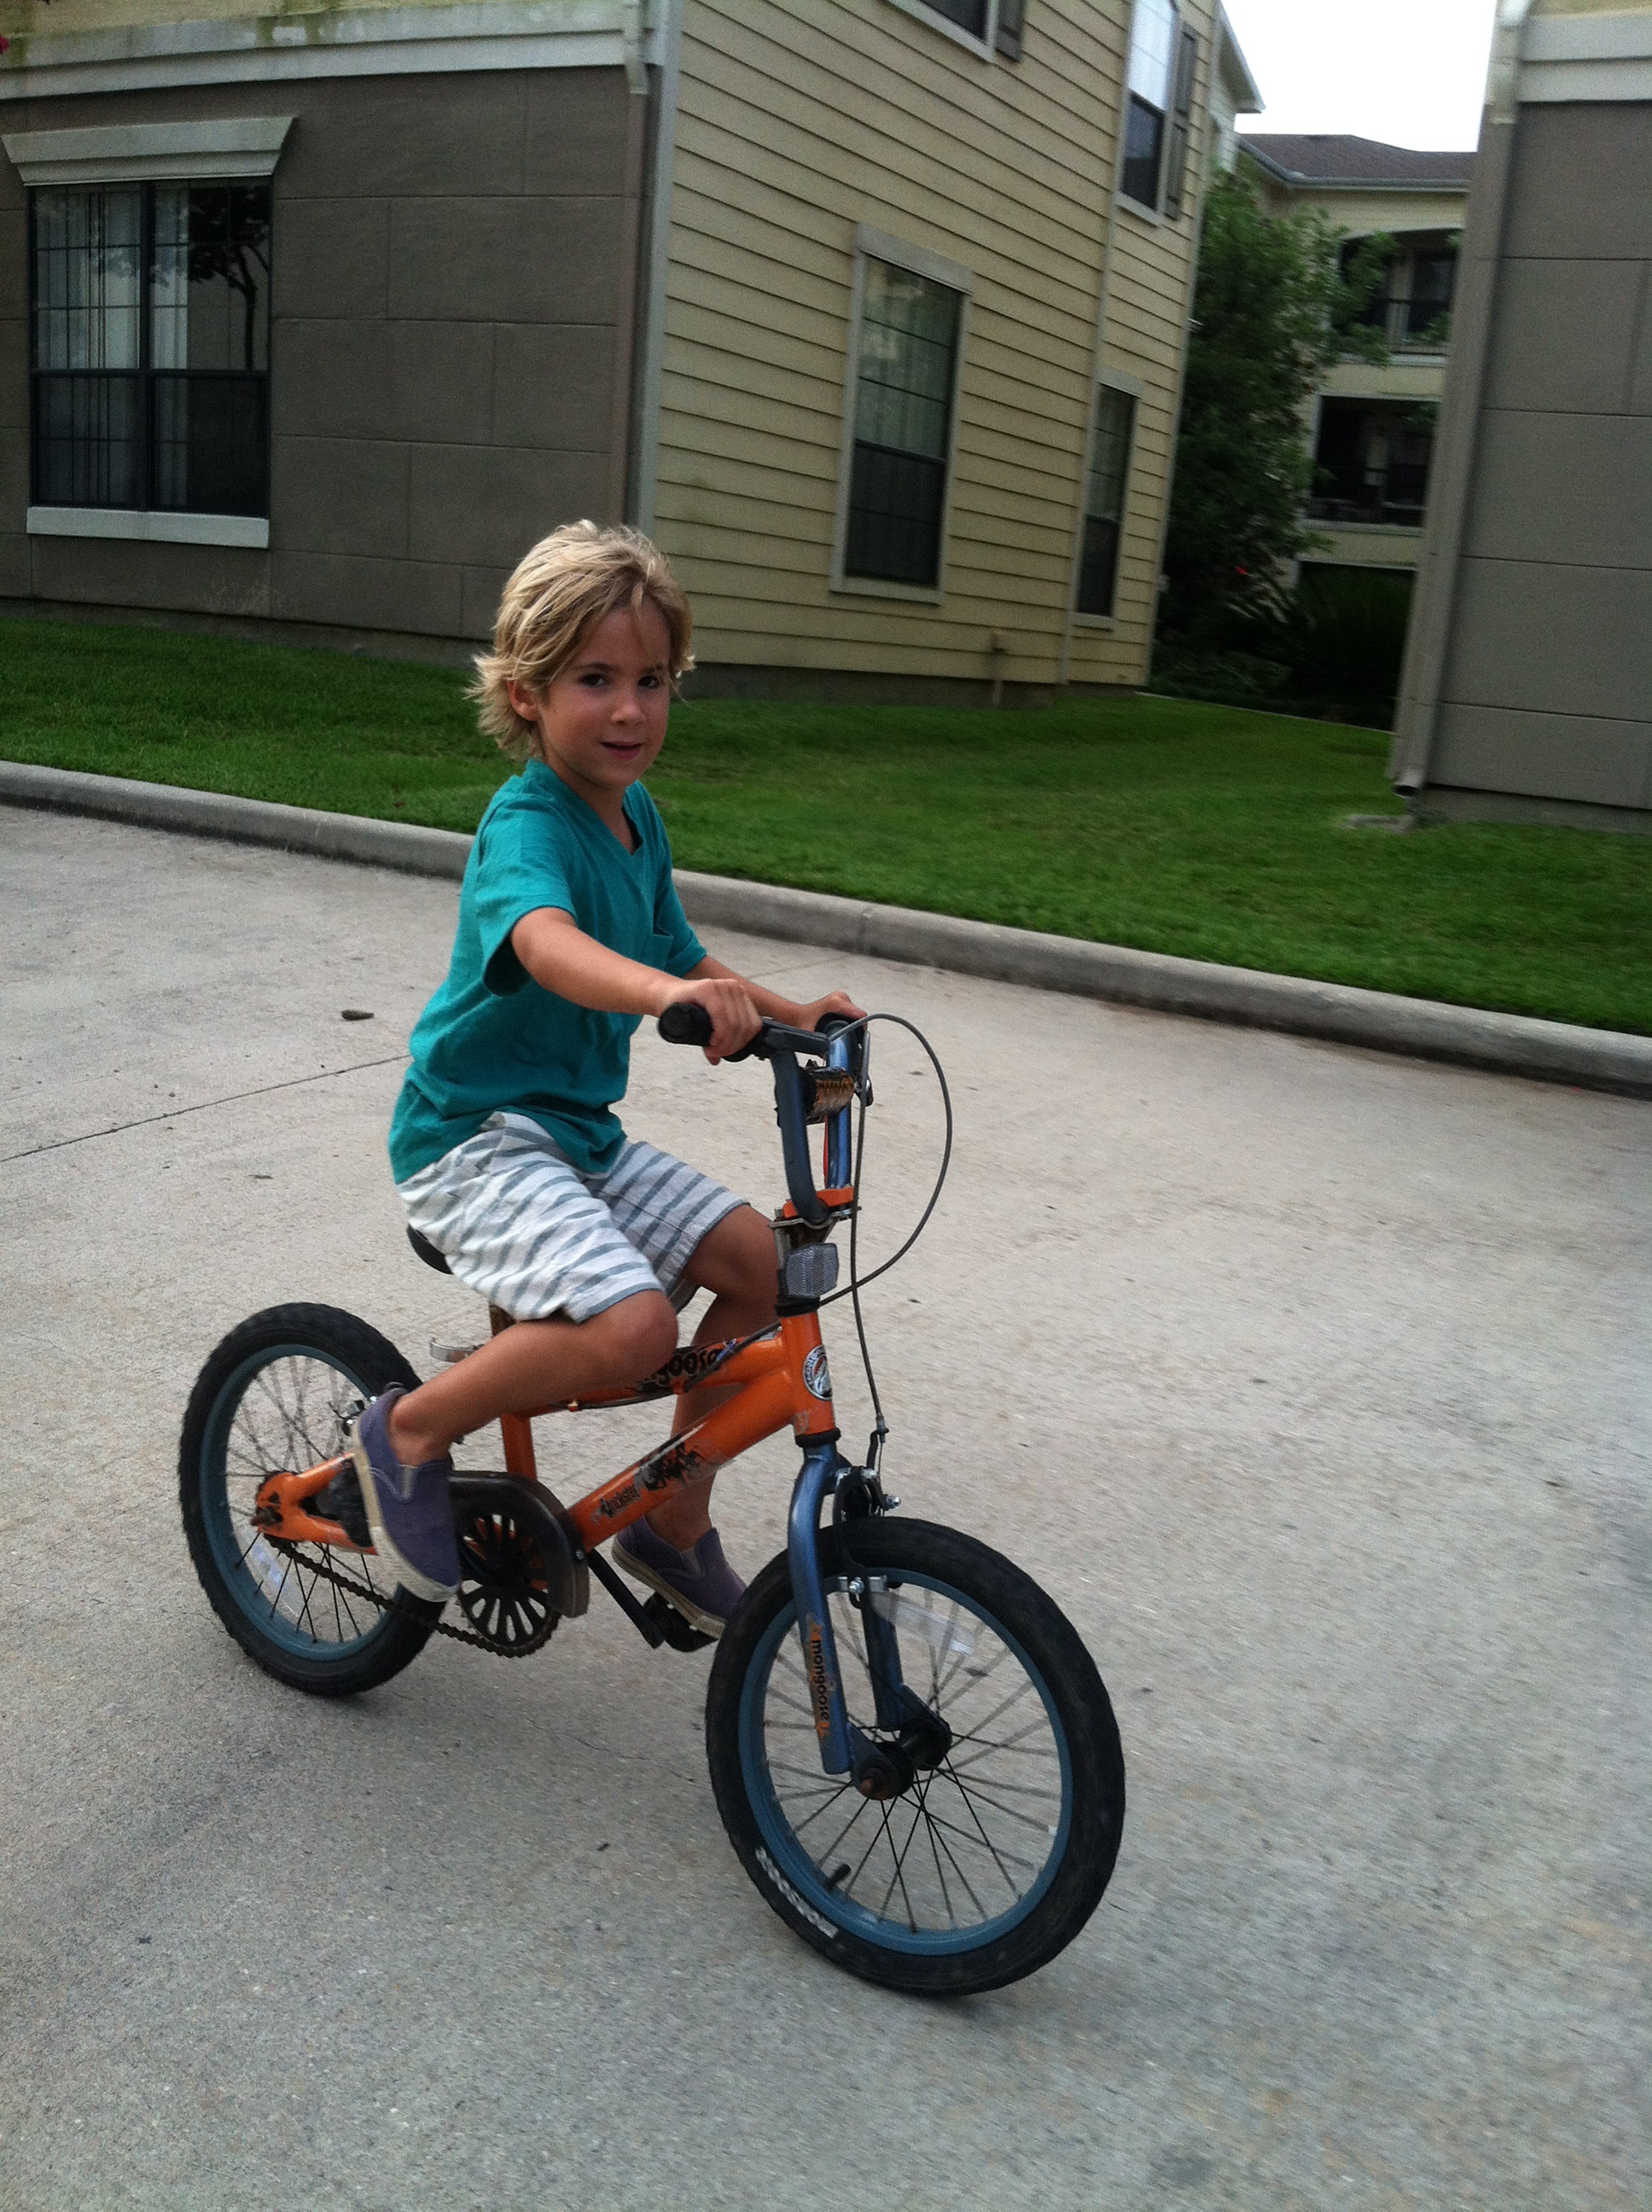
One morning as I was headed off I noticed she had 2 mini-me companions on her morning route of back-and-forth. Two young children on bikes pedaled at her heels. It turns out she was a single mom and the only way she could fit exercise into her day was to wake up earlier than her kids and never stray farther than a backward glance. I immediately fell in love with her no-excuses, make-it-happen mentality. She wasn’t a nut. She was a warrior.
What I didn’t know is that she would become the inspiration for my own back and forthing.
Fast forward 3 years. I’m now a single mom to two wildly fun kiddos, ages 4 and 6. I could never have dreamed up the life I have today. It’s very screen-play-ish. Life throws you curve-balls sometimes. What I’ve learned is that as pressure increases you have two choices: you can either rise or explode. Rising sounds like more fun to me.
I know that I am my child’s greatest teacher. I will pass on my best and my worst qualities to my children.
So I had to ask myself, “what kind of adult do I want my children to become?” “Am I a model for that kind of adult?”
I want my children to be healthy, happy, confident and love themselves. Not self-love in a narcissistic way. Self love in an I-am-worthy-of-greatness way. I want my children to become outside-the-box thinkers, people who laugh at limitations, go after what they want in life and follow their heart’s desire. I want to raise individuals who understand that wholeness comes from within.
Then I asked myself “am I a living example of all I want my children to become?”
Because I value being a mother more than anything in my life, I choose to rise each morning in self-love. Loving yourself by taking care of your personal needs is not selfish. So many mothers feel guilty for taking the time to exercise, prepare meals or relax! We need to embrace self care as a teach-by-example lesson to our children. If we want our children to love themselves, we must teach them to respect their entire being, body-mind-spirit. That includes exercise, feeding the body healthy foods, and seeking solutions to eliminate cravings, poor body image and low energy. The mind can literally become captive inside an unhealthy body. I know, because I struggled with cravings, emotional eating and poor body image for over 15 years. Negative self talk occupied my mind and prevented me from contributing my unique gifts to the world. I knew that I never wanted my children to experience the pain of not loving themselves or the fear of not being enough. Pretty enough. Smart enough. Popular enough. I want my children to experience a love of their bodies as a gift that allows them to do things that bring them joy and allow them to contribute more love to the world.
I choose self love inspired exercise and nutrition daily to fulfill my own physical needs and personal growth desires. When you fill yourself up with good food and exercise, you have more energy to give your children. You show them what it looks like to be healthy and happy. That is a life skill that cannot be taught in a classroom, it must be consistently modeled.
So, I rise each morning long before the sun comes up. I move forward in my self-love inspired life by sprinting back and forth past my children’s bedroom window. I send out a prayer of gratitude for the strong, no-excuses woman who pioneered the path of back and forthing. The mornings I find myself moaning and groaning with a I-don’t-feel-like-it attitude, I envision my future healthy happy adult children. My children are my greatest motivation and my biggest fans!
3 Ways To Model Health & Happiness For Your Kids
1. Identify what makes you happy in life.
What are your deepest desires for your own personal development? Do you have the desire to live in a strong, healthy, energy-abundant body? Do you have the desire to learn a craft or hobby? Do you deeply yearn to volunteer and make a positive impact on the world? What can you do to become the best version of yourself? Inspire your children to reach their highest potential by reaching for yours.
2. Get organized.
Write your self-development goals for the next 6 months. Break down your goals by month and put it in your calendar. If it’s not on your schedule, it’s not happening! Prior to bed, each night make a (doable) to-do list for the next day. Setting goals seems obvious but it doesn’t work unless you actually do it and stick to it!
3. Set it and forget it!
Set your goal and then enjoy each step of your journey towards achieving your goal. Focusing on the end-result will lead to overwhelm. Overwhelm is the inability to make a decision and take action. Take one moment at a time and knock out the 1,2,3’s on your daily to-do list. The most successful people don’t hyper-focus on achievement, they are present with the experience. Remember, your children will learn patience, persistence and follow through if you model a positive attitude on your own self development journey. ”
Niki Driscoll is a Mind-Body Connection Expert, Holistic Health Practitioner and Personal Trainer.Niki created Candy to Kale, a sassy-fun online video program to help women kick cravings and end emotional eating without discipline. Her sassy-edgy style motivates even the most committed self help cynics.Learn how to love yourself healthy and hot at [http://nikidriscoll.com] and visit [http://facebook.com/thenikidriscoll for the designed-by-niki poster series ‘Exercise Meditations.’