After being introduced to Second Story Window’s Busy Bag Exchange concept, there is so much to share that I am going to try my best to compartmentalize my efforts. So, here is “take one” of the busy bag adventure.
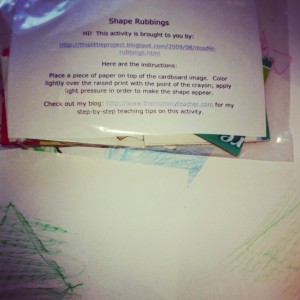
Seventeen mommy teachers (myself included) signed up to participate in a toddler busy bag exchange with several activity ideas linked in a google doc. I chose one of them called “Doodle Rubbings” from the blog This Little Project with an emphasis on Shapes.
Though I read a low-rating review from a blogger who has a toddler blog (a blog that I like a lot though), I chose the activity intentionally because it is a GREAT activity to teach and to experiment with fine motor and sensory development. This activity is not going to reap the same outcome as it would for a five year old, however, it is still a busy bag that I want at my toddler’s fingertips. AND it can be adapted for preschool, pre-k, and even kindergarten use!
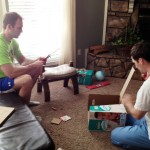
 In order to make the materials, my awesome husband and brother-in-law helped me cut up pampers boxes using a razor and scissors (and by helped me I mean that they did this part for me :). Then I drew shapes onto the cardboard squares and traced over the self-made stencil with hot glue. This was NOT difficult at all….but, it was time-consuming because I was making SO many of them for the exchange.
But I don’t want to neglect the how-to! A lot of sites give you “instructions” for activity ideas but this can incidentally shotgun mommies into lessons without much guidance. So, Here is one means of carrying out this activity with a little more umph! (varying depending on the prior understandings of each child):
1) Start with one shape, unless your little one already knows all their shapes….in that case, review the shapes.
2) Talk about the shape (round, lines, what it looks like, where we see the faces of shapes like a square on a box, etc)
3) Place a piece of paper over a flat surface and color, explaining that because we are coloring on a flat surface the picture comes out a lot like I imagined it would in my mind.
4) Place the shape under the paper (emphasize over, under, and on top), and as you are making strokes back and forth with your crayon talk about the amount of pressure you are placing on the crayon (“I’m not pushing hard with my crayon, I am coloring soft”).

5) Take your little one’s hand and demonstrate using the same shape but a new piece of paper.
6) Have your little one try it by himself/herself.
7) Talk about why it might have come out different than the first two or why the shape appears because the image underneath is raised.
And a few more thoughts:
This activity allows little ones to explorewith sensory development: texture, touch, etc. and use the little muscles in their hands to develop fine motor skills as well as the scientific observation of cause and effect due to changing the materials to produce a different outcome.
For children who need more of a challenge: This activity can be used to make tangrams (pictures made out of combining shapes). Tangrams are great for developing spatial skills!

I love this! I actually just hosted another exchange (with only a few people this time) and I’m still completely sold on the idea. Such a great way to build up educational activities for your little one. I think the shape rubbings are really fun!