Activity ideas

Sticker Activity Ideas

When I was little, my friends and I all had a sticker collection.  Lisa Frank was a hot commodity!  We would pretty much show and tell this collection, and sometimes trade.  But there are so many ways to make use of stickers – more than just maintaining a shelf life.

If you read “Join The Club” then you may remember that I was inspired to write up some sticker activity ideas for you to use what you already have to create fun and meaningful teaching opportunities.  Below are the ideas that came to mind, but feel free to share pictures on my facebook page of any sticker creations your little ones have designed 🙂

Use stickers:

1)      To check off chores accomplished using a chore chart. (This can teach responsibility & show data represented on a chart.)

2)      To mark important days on a calendar. (This can teach calendar skills & how to read information from a table.)

3)      To award positive behavior or to award children for each full serving of fruits & veggies your child eats at dinner. After a certain number maybe they can “rent a new movie” “bring a friend bowling” or some other fun incentive. (This  teaches number sense & goal setting.)
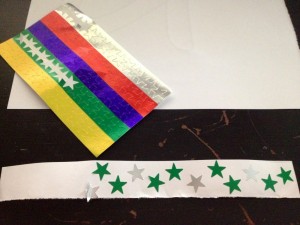
4)      To make patterns on paper strips that can be used to tape around your little one’s wrist or ankle to make a bracelet or anklet. [This can teach patterning and classifying (depending on how your little one chooses to make a pattern….by shape such as star-circle-star-circle, by color such as is pictured, by object such as horse-cat-horse-cat, etc.)]

5)      To make a sticker book of stories using the stickers in place of some of the words.  So for example if you have number stickers & animal stickers you might help your little one come up with something like this:  “(1) little (horse sticker) was galloping down the road, to meet (2) little (cat stickers) that were chasing a toad.” (This can teach math, reading, and creative writing skills.)

6)      To organize a sticker collection (place the stickers in sheet protectors and place in a binder by groups with divider tabs such as letters, shapes, animals, colors, scratch and sniff, etc.) (This can teach organization, classifying, sorting, and matching skills.)

7)      To represent characters in math stories (This can teach conservation of a number, number sense, counting, and adding.)

Hope this helps you to use what you have to create teaching opps…please share your stories!

YouTube Favorite Find

My friend shared the following video on Facebook and I had so much fun watching this couple rap about the life of a mom that I couldn’t help but share with all you mommies (and daddies) out there…

This family is too cute, too creative, and too talented!

Busy Bag (Take Three)

I started adding step-by-step teaching tips for some of my recent Busy Bag activities that Sean Patrick is experimenting with but this is taking me some time for a few reasons:

1) I like to introduce one activity every few days and really spend time maximizing the teaching opportunties from that “game” as Sean Patrick calls them.

2) I am a mommy teacher so I don’t spend much time on the computer – this blog is my hobby and I try to carve out more time in my day actually spending time working with and playing with my little ones 🙂

3) I like to spend time adding teaching tips for older children as well because I believe that EVERY activity can be and should be accommodated to each individual child.

So….at that….here is another activity….and one just in time to make use of all those Easter Eggs floating around your house 🙂

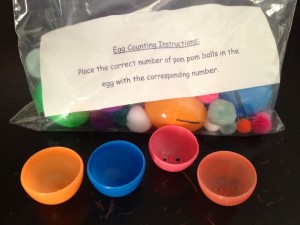
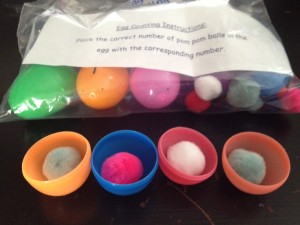
Egg Counting (The Link attached has other GREAT ideas, but try not to take them at face value….make a little step by step teaching plan for each activity because a “lesson plan” can structure the pace and aid the learning process)

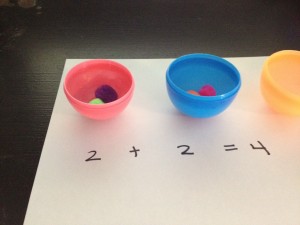
This activity has MULTIPLE uses… to teach counting one to one and to teach addition in the most organic way by teaching about all the ways to get to a number (1 + 1 + 1 + 1= 4 ; 2 + 2 = 4 ; 4 + 0 = 4)


I suggest that you work on counting to, or adding to, ONE number at a time.

1) Start with the smaller side of the eggs on their backs….if you are working on the number four then place four egg halves on their backs.

2) “Let’s use the Easter Eggs to see all the different ways we can count to four!” or for older kids “Let’s……ways  we can add to the sum of four”

3) Place one pom pom in each egg (I switched to the small pom poms after the first try because I wanted all of them to be able to fit in one egg half when attempted) One and one and one and one is four! (four younger kids you can use “and” in  place of “plus” and “is” in place of “equals” just for now while they are being introduced to adding.

3) Dump them out and say – let’s see if there is another way to fill the eggs to count to four …One, two and one and one is four so two and two more is four.

4) Continue this until you have exhausted every means of arriving at the sum of four.  For older children model and demonstrate how to write out each problem.

5) Pick a number close in proximity to the number you worked on (like 5) and do it again….together this time.

6) Pick a number easier than the original number (like 3) and allow your little one to try on their own as you watch and make encouraging comments.

Activity Swap Giveaway! (Winner Announced)

Rafflecopter randomly selected a Winner: Entry# 216 Jacqueline V whose favorite aisle is the “beads” aisle. Congrats!!!

My friend recently shared an AWESOME mommy teacher idea to start an “Activity Swap” for our little ones…..why didn’t I think of that?!?

We love our cookie exchanges, recipe exchanges, etc. And now, an exchange that is even more meaningful, the author of the blog Second Story Window came up with the perfect exchange that will benefit everyone involved.

Basically, every mommy buys supplies in bulk for one activity they choose or come up with.  Then, each mommy places the materials and instructions in gallon-sized ziploc bags…. providing enough for the amount of mommies involved.  Each mommy who provided an activity gets to take an activity from each mommy home too.  Essentially, a mom can show up with ONE activity and leave with several for her little one.  Click here for the blog that gives specific tips to organize the event!

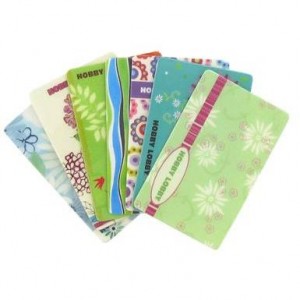
I LOVE this idea and it put me in the mood to go shopping at Hobby Lobby for some materials.  So, I thought I would supply a $25 Hobby Lobby Gift Card to one mommy (or daddy, grandma, teacher, whoever!) who is inspired today.

Enter below (giveaway starts today -march 5 and ends friday march 9)  – winners will be announced saturday the 10th!

And don’t be confused by the first several comments….Rafflecopter didn’t update when I changed the “Leave a Comment” entry from my last giveaway; so sorry if that confused anyone!  Don’t worry about changing your comment….just wanted to let you know it was my oversight! :

a Rafflecopter giveaway

Snowman Picture

When I was teaching in the classroom, I had literacy, math, and open-ended stations that would each accomplish different objectives.  My literacy stations were: 1) reading comprehension, 2) listening comprehension, 3) fluency, 4) phonics, 5) phonemic awareness, and 6) computer skills.

I am going to start planning weekly learning station activities that I hope to post as often as I accomplish this.  I really want to bring back the structure of having activities planned and provided for; that way my little one can start working on skills in an even more fun and meaningful way.

Just like you, I want to make time at home purposeful when my little one isn’t purposefully playing outside, with toys inside, or going about our daily routine.

So, in the meantime, until I post lots of Christmas activities next week, I wanted to share my “winter wonderland” template with ya’ll.

It is SIMPLE.  It is a simple template that I handmade- which you can undoubtedly tell by looking at it.  But, it allows your little one to cut out the images (use fine motor skills), identify shapes (shape recognition), and assemble the images to make a picture (practice spatial skills).  You can help your little one come up with a sentence about it (oral vocabulary), and help them write it (to practice his/her writing skills).

First, he or she will assemble the template however they think it might make a picture, and before gluing it, help them brainstorm where the items might go or what other features they might add (nose, arms, etc.)

Here is my template…..click HERE – Snowman.

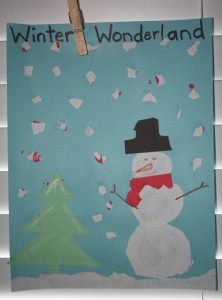
And here is one option of how the picture MIGHT look:


Related Posts Plugin for WordPress, Blogger...

1 11 12 13 14 15 20